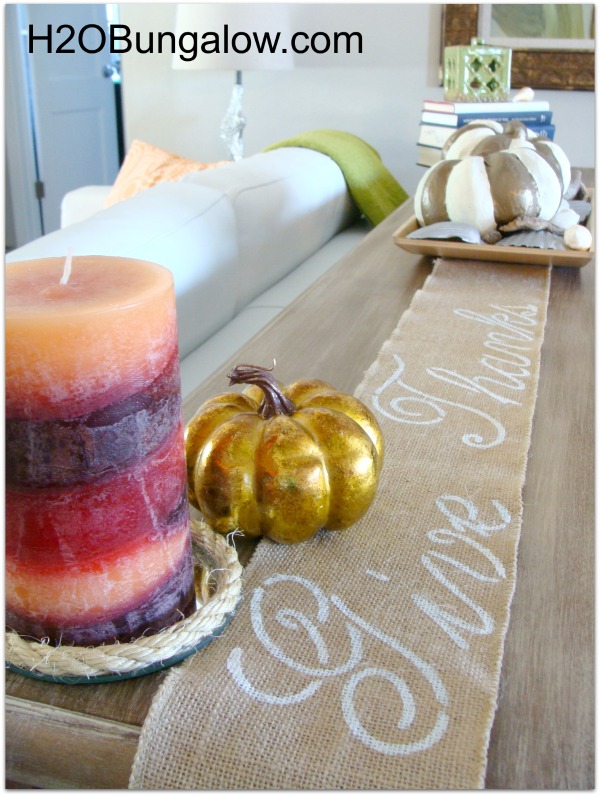
I made this no sew burlap table runner last weekend in about 20 minutes. I wanted to enjoy it for more than just one day so I made it to fit our Thanksgiving table and my sofa table.
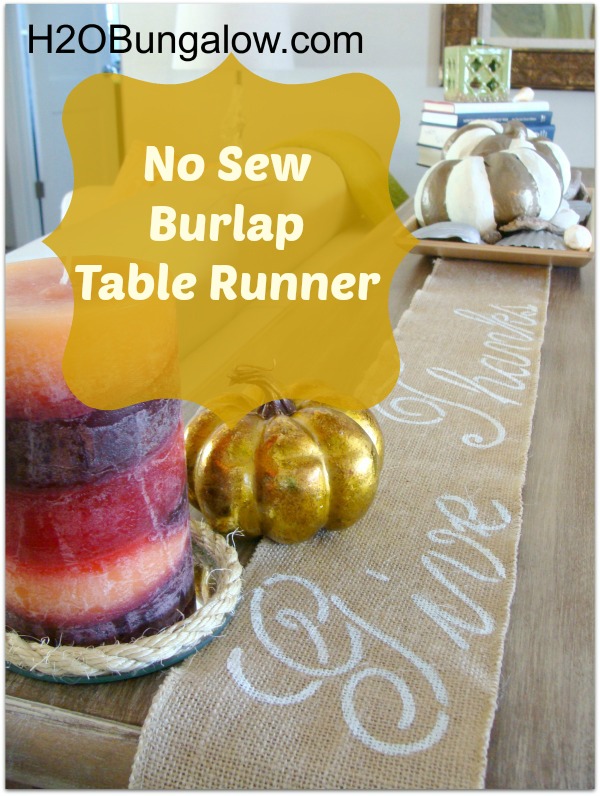
I think that was a smart idea, don’t you? Especially for those of us who live in a small house and have to conserve storage space!
I use affiliate links to help you find the products I used. If you make a purchase I get a small commission at no cost to you. The affiliate money I earn helps cover the overhead costs of H2OBungalow. Thank you for your support!
Supply list for no sew burlap table runner project:
Tools:
- Ruler
- Tape measure
- Good quality flat top stencil brush
If you’re planning to use your table runner for more than one place like I did, measure both table tops to be sure your words line up well on the top of both. Choose the words you want to use and do the math on how much space you’ll need. I needed approx 2″ per letter and my words “Give Thanks” were about 24″ in legnth together. I measured my dining table and fit my words on each end so I could place a centerpiece in the middle and the words wouldn’t be covered by anything. I like that my saying can be read from each end of the table too.
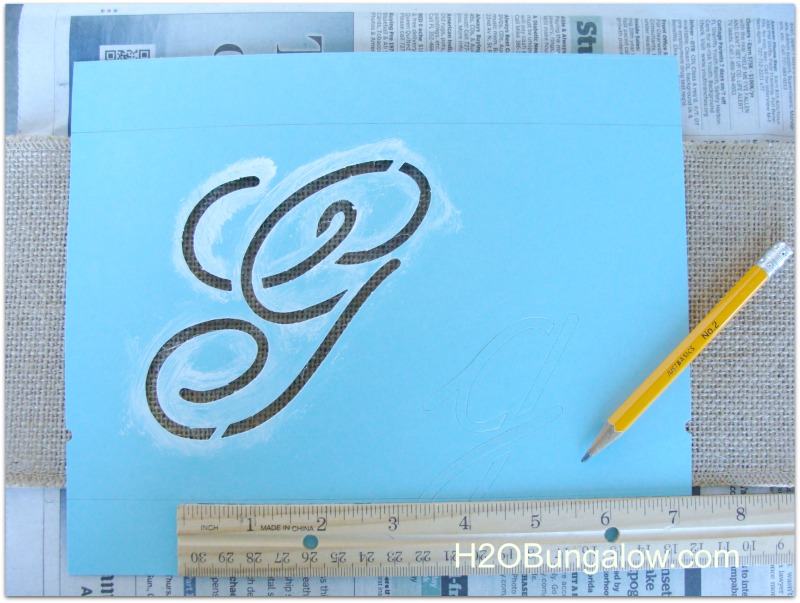
I used a tight knit burlap and simply cut the ends, they haven’t frayed at all. I centered the first capital letter on the burlap and to make an easy guide so all of my capitals would be lined up the same, I drew a 1″ line at the top and bottom of the capital stencils I was going to use. It was easy to line up the pencil marks with the burlap edges after that.
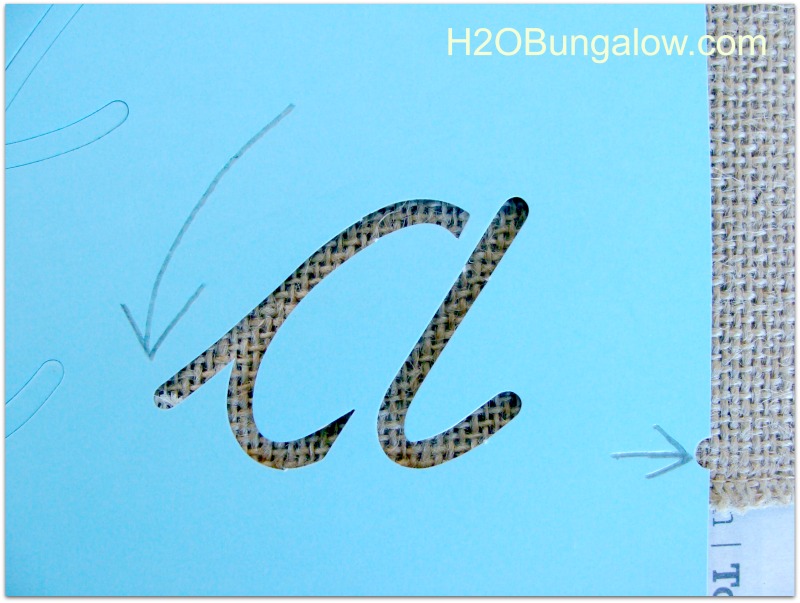
I held each stencil in place and dabbed and lightly pushed the paint onto the burlap so there was an even coverage. On the lower case letters I lined them up to the burlap bottom edge by the notch in the stencil.
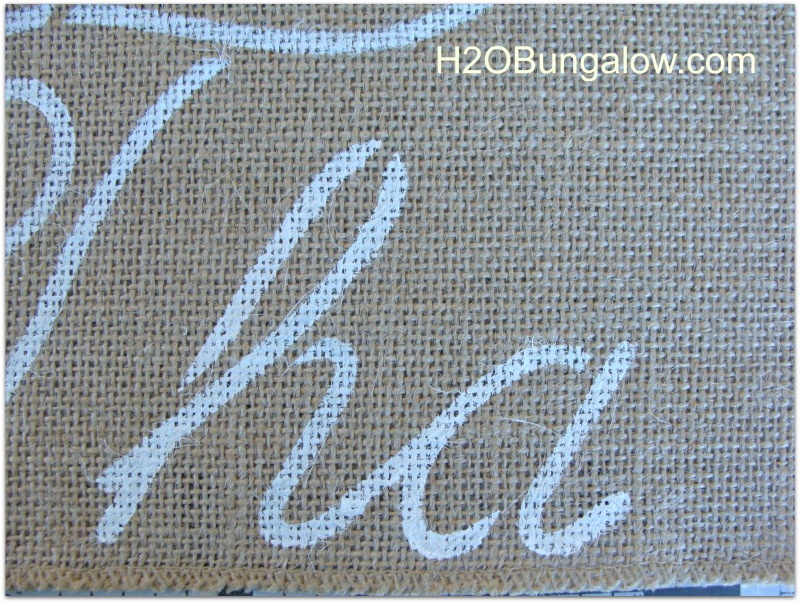
I haven’t stenciled with script letters before and wasn’t sure how difficult it would be. Connecting the letters in my no sew burlap table runner was easier than I expected. Simply line up the notch and overlap the leading edge of the stencil with the trailing edge of the letter already painted. I marked the stencil with arrows below so you could see what I’m talking about.
It will look like this! I promise 🙂
It’s that simple to make a personalized no sew burlap table runner with your choice of meaningful words. I know mine will be beautiful on the dining table but I’m especially excited about using it everyday and enjoying it for several weeks during the Thanksgiving season.
I loved it as soon as I placed it on the sofa table. I’ve added some accents,… which I’m still moving around 🙂
Notice where my DIY Metallic Pumpkins ended up? Yup, the cats had a field day with them on the coffee table and I kept picking them up from the floor every time I walked by:(
I gave up… they won.
That’s it my friends…my 20 minute project.
I think the coolest feature about this table runner is that we get to enjoy it so much more than a traditional table runner that only fits a dining table for one holiday meal out of the year!
What special words would you use to make your own no sew burlap table runner?
Guess what? This project was featured on



Rusty Sinn says
Thanks for sharing this project. I just ordered the stencil, and plan on making a Christmas runner (will be too late for Thanksgiving),
Wendi says
Hi Rusty! I’m so glad you liked this project. A Christmas runner would be beautiful. I’m thinking of all the pretty choices of words you have with Christmas. How fun! I love when other people are inspired to create something for their homes from a project of mine, it makes my day. Enjoy your project and thank you so very much for your note!
Daily Dish Magazine says
Love this project! Thank you for sharing with Foodie Friends Friday this week.
Wendi says
Thank you so much! It was an easy project to make and I love being able to use it in more than one place:) Thanks for hosting such a good party!
Denise says
I love that this is no-sew! Thanks for linking up to Home Matters Party. #HomeMattersParty
Wendi says
Thank so much Denise:) I’m a huge fan of the no sew projects:) Thanks for hosting such a great party, I know how much work it is!
Nellie says
Wendi,
What a cute idea……….very pretty and you did a great job on your stenciling.
Looks very nice on your sofa table.
Blessings,
Nellie
Wendi says
Thanks so much Nellie. This is an easy project over morning coffee, which if I remember right, is when I made it:) Thanks so much for stopping by!
grace says
Love it. Where did you get the stencils?
Wendi says
Thanks Grace. They are Martha Stewart paper stencils and I found them at Michaels. They were really easy to use. Best of luck to you on a project!
Cindy Eikenberg says
Wendi, what a perfect table runner for the holiday! Thank you so much for joining us and sharing at Best of the Weekend – pinning! Hope you are having a wonderful week!
Wendi says
Thanks Cindy! I think so too. It’s really simple but adds a nice touch on the sofa table. I’m looking forward to being creative with it at Thanksgiving too. Thanks for stopping over:)
Marie@InteriorFrugalista says
Hi Wendi – thanks for this stencil tutorial! I have such a tough time knowing how to line up stenciled letters properly and your tips really helped.
Wendi says
Ok, I’m honored you’d say that LOL… I hope there was something useful in the post for you. I had fun and started on the stencil kick from your pretty nesting tables. Now I have to find the perfect words for my tray project! Thanks for stopping by 🙂
amanda @ mommy is coocoo says
So happy you joined the google+ party but you linked up your blog instead of your google+ url silly girl. You are coocoo today.
Wendi says
LOL… I just fixed it! Am tidying up last minute details and off I go. I thought I’d be smart & pop in and share a few posts while I’m wrapping up last minute details..I see I’m not doing a good job at multi-tasking today. Thank you for the heads up & see you next week at the #mommyiscoocoo party!
JO says
Idea instantly popped into mind—–JOY JOY JOY—- along the length of runner……with each alternate ‘joy’ upside down so it can be read from both sides of dining room table. Also ends will not be extending over edge of table due to toddlers in the house this year, thus, will use a simple decorative finish so ends won’t look ‘abandoned’. Great tutorial!
Wendi says
Your idea is brilliant! Thanks for sharing…now I may have to make another one for Christmas! I’m so glad you liked my tutorial and thanks for taking the time to leave me a comment. They really do make my day 🙂
Janell K. says
That runner came out beautifully! Great little tutorial!
http://www.mamagetsitdone.blogspot.com
Wendi says
Thank you! I really like it too and especially like that we get to enjoy it for the season instead of just one day. Thank you for visiting my corner of the blogosphere!
Abby says
This is so great! It’s classy and simple, I love it! great job!
Wendi says
Thank you Abby! I’m enjoying it everytime I walk by the table. Now I need to come up with a tablescape for the Thanksgiving table around it!
Sarah says
I am a big fan of burlap, and quick and easy projects. This is so cute and versatile, thanks for sharing.
Wendi says
Thanks Sarah~ I’m beginning to appreciate the simple projects so much lately! I’m really happy with the double duty of fitting on two tables too. Thank you for stopping by & have a great week!
Rebecca @ Love at First Book says
That is so cute and looks sooooo easy, too!!!
Wendi says
Thank you Rebecca. I am on an “easy” kick lately. I love that it doesn’t look it though. Appreciate you stopping by & you’ll see this one in your next linky parrrtaay! Ok, I might be a dufus on the spelling.. but you get the meaning!