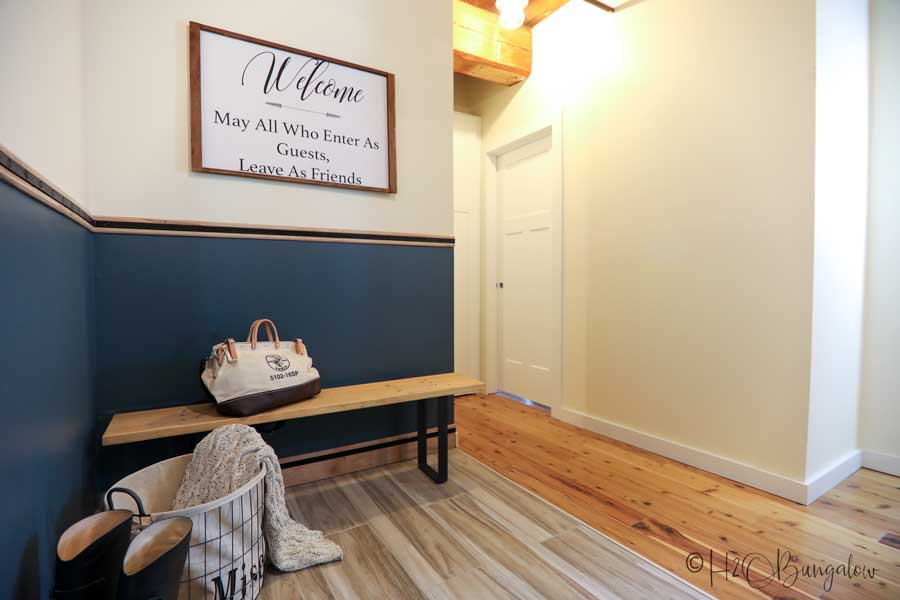
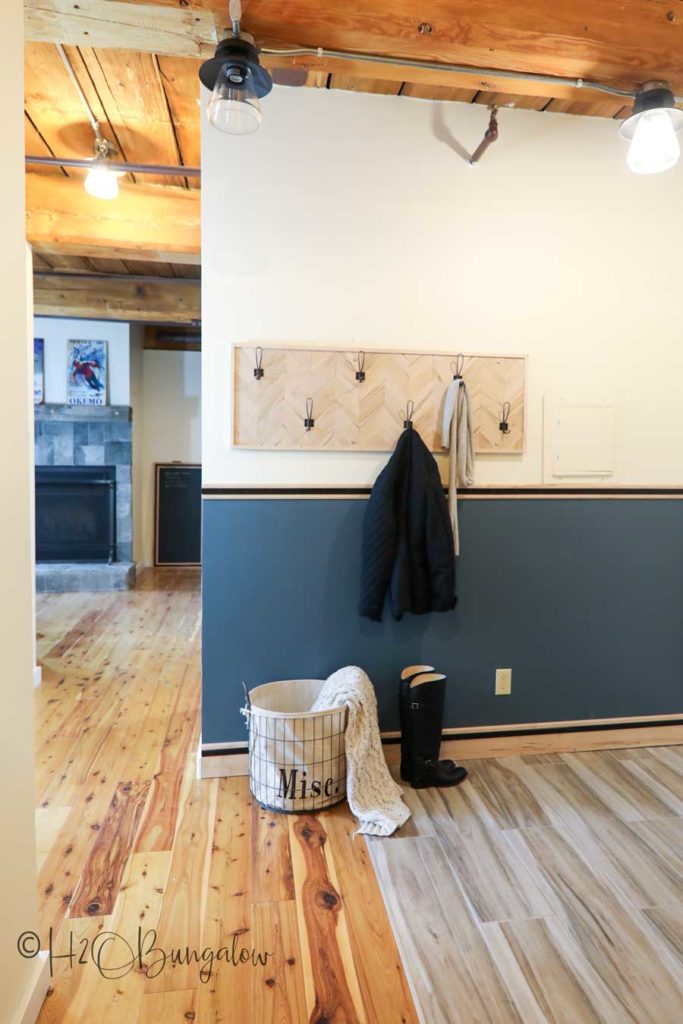
Today, I’m sharing my first completed room in the new Mill Place, my modern rustic DIY mudroom entry! Since this mudroom isn’t really a separate room, I defined my space with color and the most gorgeous and unique rustic wood trim with a wrought iron look insert. Adding functional items like seating, a place to hang coats, take off boots and little storage for hats and gloves makes this mudroom functional and space saving.
To save on the budget, I’ve made most of what you see in my new mudroom entryway. The Chevron DIY Coat Rack is a knock-out in this space! I’ll share the entry bench soon!
Be sure to see my awesome giveaway of $500 worth of Rustic Ornamental Moulding products below! You can choose from several show stopping moldings or decorative stair risers.
The Mill Place is a fabulous condo conversion from a woolen mill that was built in 1857 and our newest addition to the North House Lodge, our boutique vacation rentals in Ludlow Vermont. It features nine foot exposed beam ceilings, large windows and a ton of character. I wanted my new mudroom to do the space justice without taking away any of the charm and unique character the place already had.
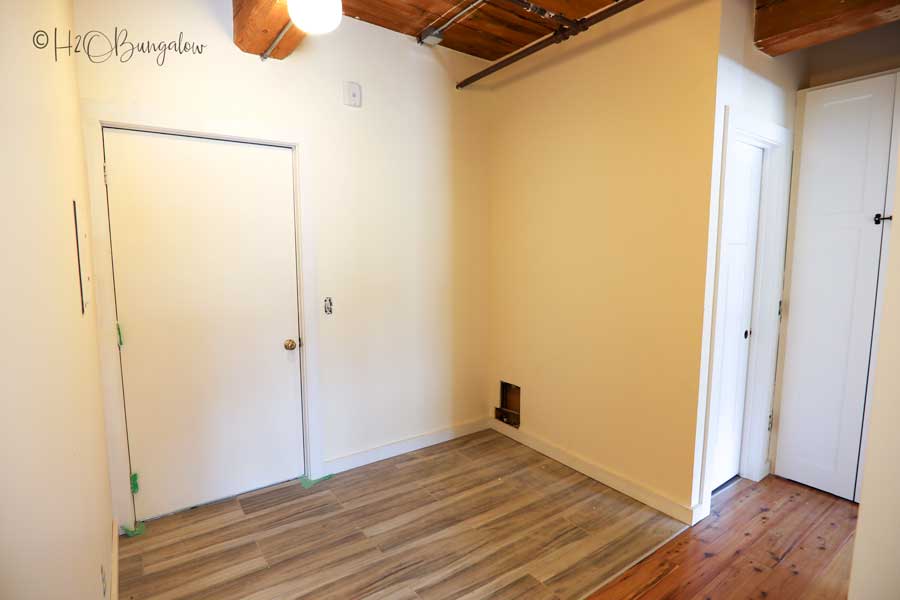
This is what the space looked like after removing the hall closet to open up the entry and gain a little more space for the new DIY mudroom. My Old House Tour is a video walk through that will share what this place looked like before I started the renovations.
The original floors were literally falling apart, so we replaced them. I used a wood look tile at the entry to stand up to wet coats, skis and boots.
Sending out a big thank you to Ornamental Mouldings, Inc for sponsoring this post. This post also contains affiliate links, as an Amazon affiliate I earn a fee from qualifying purchases. Thank you for supporting the brands that keep H2OBungalow going!
How to Make a DIY Mudroom Entry
My entryway and mudroom dimensions are 68″ x 68″ x 80″. My challenge was to figure out how to make a small entry into a mudroom on a budget.
This is how I turned an ordinary small entryway into a pretty and functional mudroom by using color, wood trim and furnishings.
Supplies used to build my mudroom.
- Ornamental Mouldings Rustic Baseboard 5 1/2″ ambrosia maple with metal look insert
- Ornamental Mouldings Rustic Chair Rail 2 1/2″ ambrosia maple with metal look insert
- Paint
- Construction adhesive
- Nail gun
- 2 inch brad nails
- Miter saw
- Brad nailer
The lights weren’t installed until the condo was almost done. Getting good photos was tough, so pardon the low light photos.
Step 1. Remove the existing baseboards.
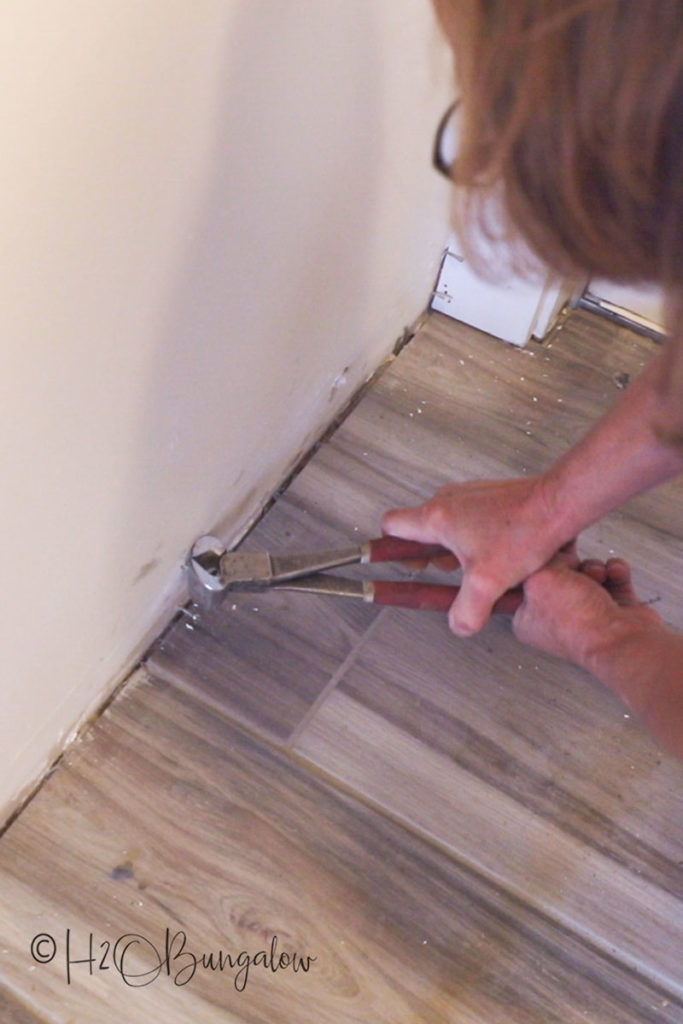
Removing the existing baseboards isn’t hard if you use a painters 6 in 1 painters tool to first wedge it between the wall and the baseboard and then wedge a short pry bar in the open gap to pull it the rest of the way off. Nippers are a girls best friend when it comes to pulling out leftover nails that were left behind from the baseboards.
Step 2. Mark the chair rail height.
Mark how high the paint will go on the wall and the height of the chair rail. Mine is set at 48″ high. Check to be sure that your rail height won’t interfere with things like light switches. Using a measuring tape and level to mark your line or snap a line with a carpenters chalk and string for a perfectly straight line.
Tip: Since the rustic baseboards are 5 1/2″ tall, I used a 2 x 4 along the bottom of the wall and mark the line as a guide of how far down on the wall to paint. The paint line will be hidden behind the floor molding.
Step 3. Paint the wall accent color
Apply two coats of paint to the wall making sure to cover the edges where the the chair rail and the baseboards will be installed.
Step 4. Add baseboard and chair rail to define the DIY mudroom space.
Both the Ornamental Moulding chair rail and the baseboards are all wood. Made from gorgeous ambrosia maple, they look like they have metal straps bolted in as insets.
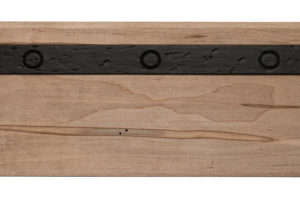
Rustic
They are super easy to cut with just a miter saw or even by hand with a hand saw and miter box. Check out my DIY Baseboard Tutorial to see how to install molding. The chair rail installs the same.
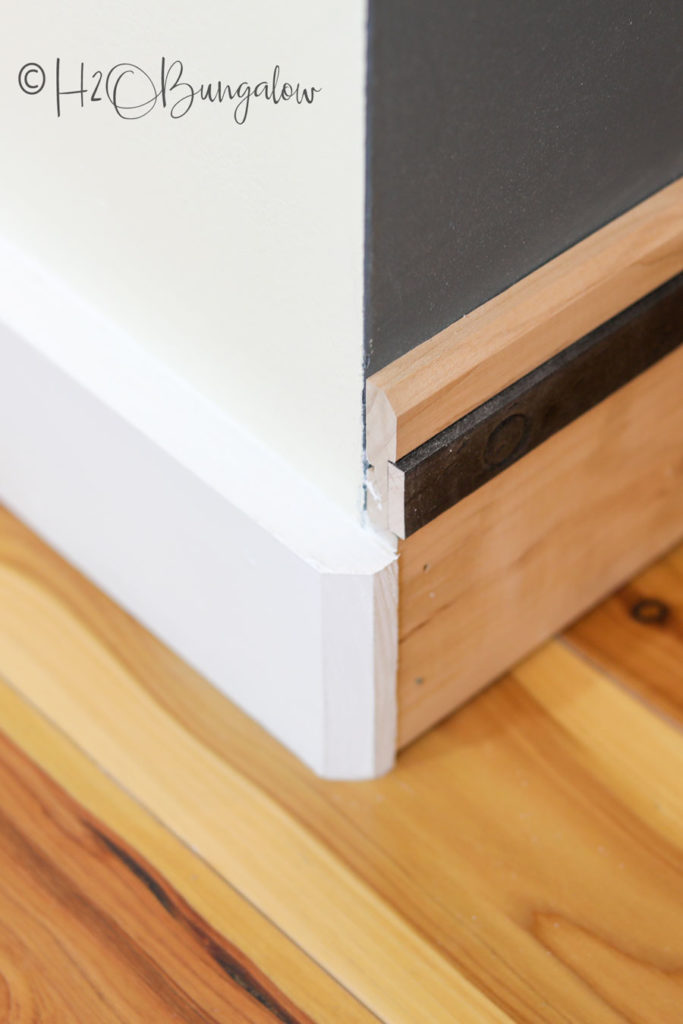
- I had two different moldings meet at the corners. We used 1 x 4″ casing as baseboards in most of the house and the 5 1/2″ decorative mudroom molding. I decided to chamfer the end of one and use a straight cut on the mudroom molding.
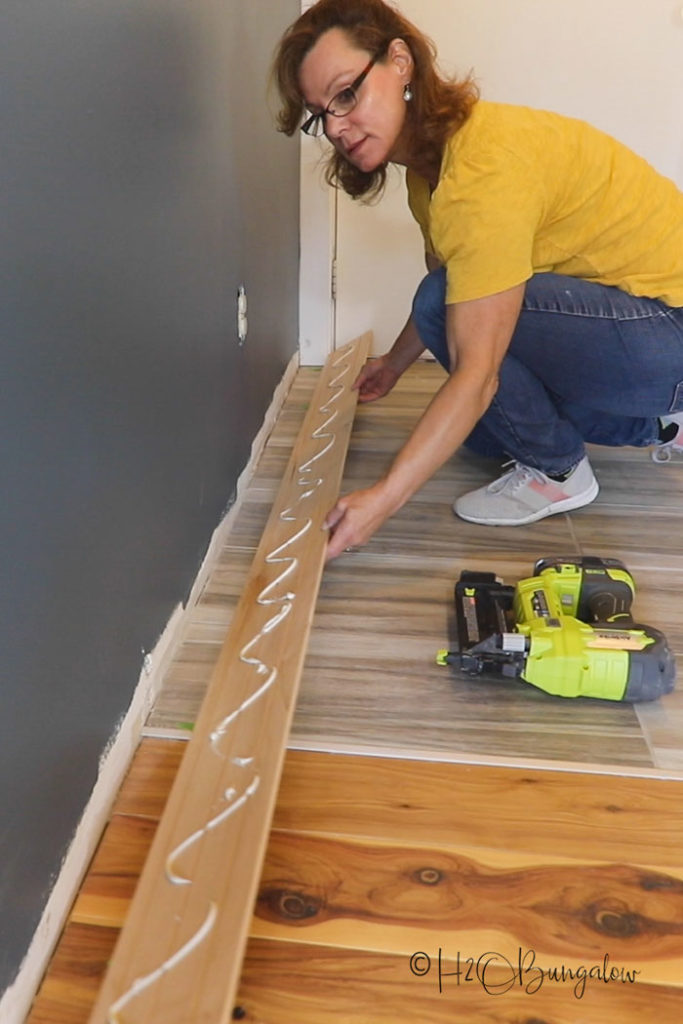
- Mark the location of the studs with painter’s tape on the floor so it’s easy to nail into the studs.
- Use construction adhesive and two inch nails to attach the molding to the walls on the studs.
Step 5. Add mudroom furnishings.
Since my DIY mudroom had to be budget friendly, I made the rest of the furnishings. Tutorials for everything will follow! I built this modern wood and metal DIY mudroom bench with space underneath for boot trays to hold wet boots and keep them out of the way.
I brought over my DIY Engineer Print Large Welcome Sign for the wall from the Pleasant St location. I like it there, it may stay!
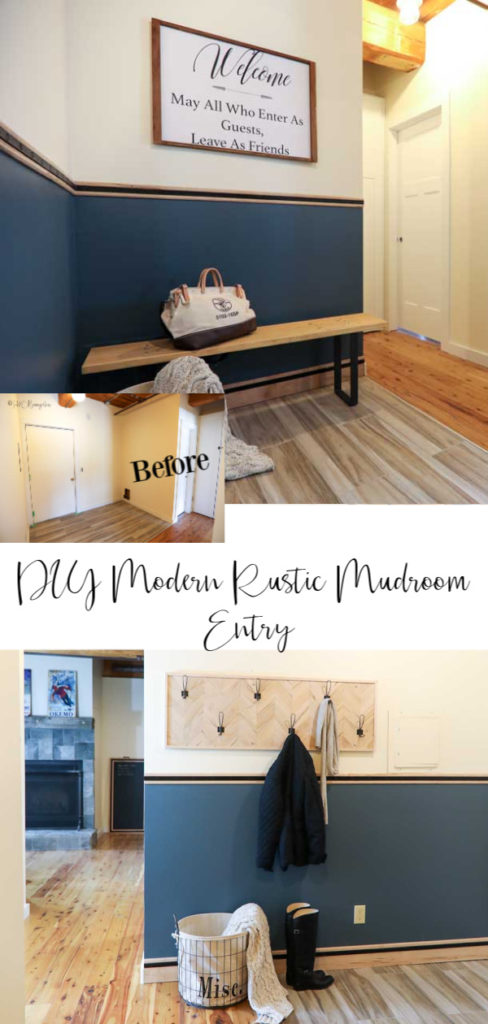
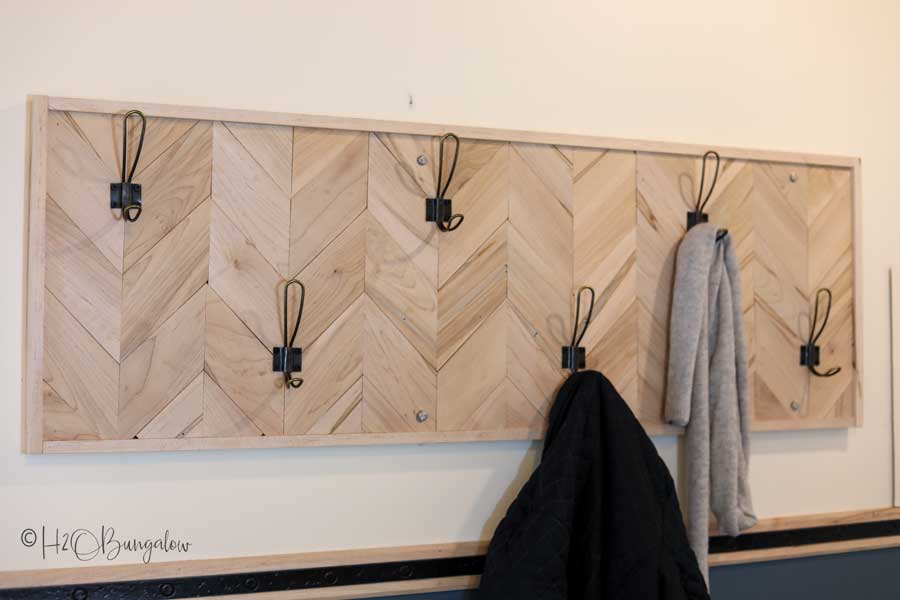
A mudroom wouldn’t be complete without a heavy duty coatrack. I used 1″x 4″ maple rustic casing from the same line to build my chevron coat holder. It’s made from the same gorgeous ambrosia maple as the chair rail and baseboards.
Can I mention how gorgeous it is? The wood has so much character with hues of gray and what looks like spalting running through it.
Someday, I’ll build storage cubbies or lockers in the mudroom, but for now we have a large metal basket to collect hats, gloves and the other items that always collect by the door. I’m not sure where I’m placing the basket yet. It may end up by the coat rack or the bench.
Since the Mill Place is in a ski town, part of the year our guests will have ski’s and snowboards to store as they enter. I’m working on a ski rack design where guests can hang their skis to the left of the door as they enter.
If you look closely at the ceiling, you can see where we removed the existing closet to fit the mudroom into the entryway. The exposed brown pipes are the building’s sprinkler system.
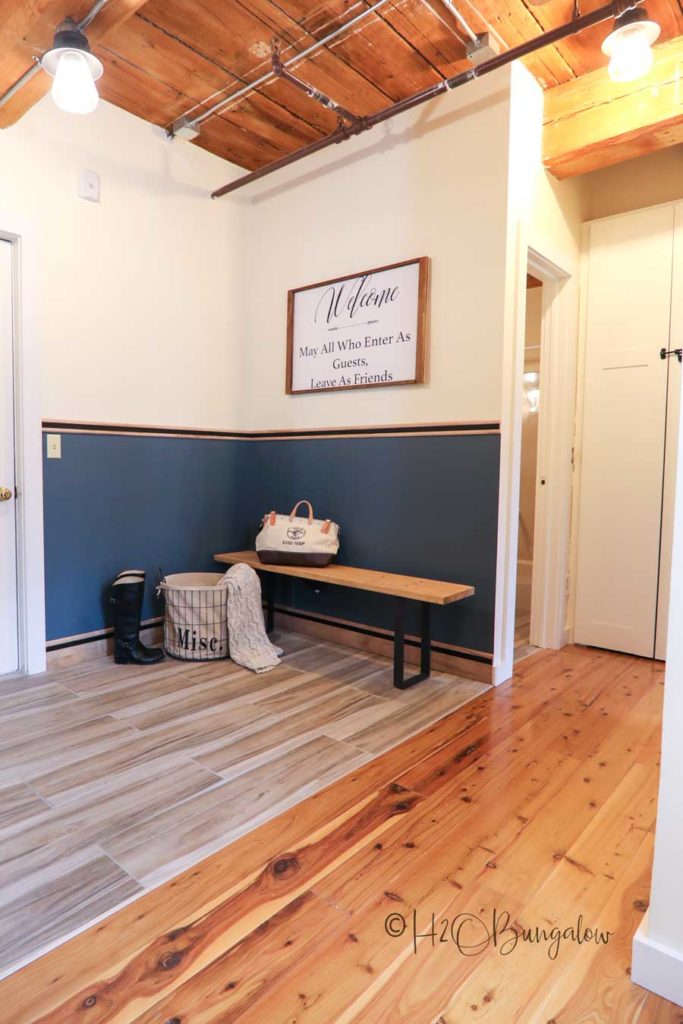
Do you love my simple but functional mudroom design…or, even the gorgeous moldings and trim for a later project? Leave me a comment to win $500 worth of molding! Read below.
Pin my project and share with your friends on Facebook!
Ok, so let’s talk about how you can get free trim for your home too! Ornamental Moulding Inc. has generously agreed to give away $500 worth of the Rustic Moulding products to one lucky winner!
How do you win?
Leave a comment on this post, my Facebook post or the Instagram Post announcing my project and this giveaway. The winner will be picked randomly from all comments on 11/12.
Yes, you can leave a comment on all three to increase your chance of winning!
Winner can select up to a $500 value from the below styles. Each style offers a variety of moulding types, from baseboards to casing to crown molding. See the full line of Ornamental Moulding products on their website. Winner must be 18 or older and live in the continental US.
You can purchase Ornamental Millwork products at Lowes and on Wayfair.
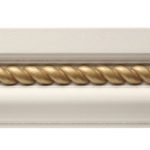
Rustic Mouldings, ambrosia maple with a metal look trim. what I used in my DIY mudroom!
Haute-2-in-one Mouldings, with gold or silver look inserts in the trim
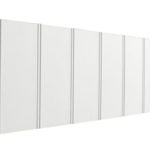
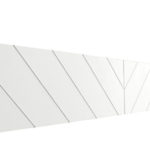
Decorative Stair Risers, they’re reversible!
- Rustic
- Haute Silver
- Haute Gold
- Reversible Stair Riser
- Reversible Stair Riser
Use decorative wood trim to define a style and space like I did. Or, use it to trim out a furniture makeover, a DIY project, frame a mirror or picture.
I love how the new modern rustic DIY mudroom entry welcomes guests at the front door, gives them a place to hang coats and leave wet boots to dry. The best part is all it took to create this mudroom area was defining it with color and adding wood trim!
So, which molding or decorative trim would you use?

Stacy Risenmay says
I love everything! That blue, the hooks, the TRIM! Fabulous!
Wendi Wachtel says
Hi Stacy!
Thank you so much! The entryway looks like a completely different place. It’s amazing what a little color and adding trim will do! Thanks so much for your note and comment!
Becky Iscaro says
I love the transformation. The mud room entry way is so inviting and your guests will certainly enjoy it. I love the wall color and trim. Great job!
Wendi Wachtel says
Hi Becky!
Thank you so very much! I can’t get over what a huge difference adding color and wood trim made in here. I love it so much, I’m thinking about where else I can do this! Thanks so much for your note! Hope you guys are all doing well!
TraceyA says
The colors and style are amazing. The moldings are so pretty and add a lovely touch.
Wendi Wachtel says
Hi Tracey!
Thank you so much! The blue really sets off the details of the molding. Adding the color was a last minute decision and absolutely the right one. Thanks for your visit and note and good luck on the giveaway!
Karen Welty says
Wow! Looks amazing and really transformed that space for better functionality!
Wendi Wachtel says
Hi Karen!
Thank you so very much! It’s fun to see how a few changes can completely make a space different. It is so much more useful now. Thanks so much for your visit and good luck on the giveaway!
Ali Celestino says
I love it! The entry way is stunning! And the sign is super cute! I’d choose the Rustic!
Wendi Wachtel says
Hi Ali!
Thank you so much! I love that sign too. I may have to make another so I can put this one back in it’s original place. Good choice on the Rustic Molding! It’s even prettier in person! I have some extra and will make a few projects…can’t wait to share them. Thanks so much for your visit and good luck on the giveaway!
Sherry B says
So simple and minimal, but so pretty! I love the molding and blue accent color!
Wendi Wachtel says
Hi Sherry!
Thank you so much! I love the projects that are simple to do and hav e such a huge impact. Thanks so much fore your visit!
carol clark says
i just redid my bathroom and this would be nice for the entry way going to the bathroom
Wendi Wachtel says
Hi Carol!
Ohhh, what a pretty use for the molding! I can’t get over what a difference adding a little paint and these gorgeous molding made in the blank room. Thanks so much for your note and good luck on the giveaway!
Sandy Heath says
Pretty cool! My favorite thing is the coat rack, but the bench is a close second. Thanks for the inspiration!
Wendi Wachtel says
Hi Sandy!
Thank you so much! I’m glad you like the new entry and projects! I’ll have a tutorial for the coat rack this qweek. It’s easier than yopu’d think to make! Thanks for your visit and note!
Jane Bixby says
Wendi
I love seeing your creative ideas and work. It was a great idea to remove the closet! More open and inviting. Can’t wait to see the unit completed. Great job!
Wendi Wachtel says
Hi Jane!
So good to hear from you 🙂 . Thank you so much for your note. This unit has been so much fun to work on and rehab. You probably know this floor plan. Yes, taking out the closet to add a usable mudroom for the guests was the best use of space. I opened the wall at the end of the hall and made a storage closet using some space from the bedroom closet. You’ll see that in the reveal. Thank you so much for your note & staying in touch!
Sharon says
Such a wonderful transformation! Moldings can really make a room.
Wendi Wachtel says
Hi Sharon!
Thank you so much! Yes, molding in a room completely changes the way it looks. This was an easy project that most people could tackle in their own entry. Thanks for your note and visit!
Kirstin Troyer says
It’s really coming together. I’d probably choose something from the hobby moulding collection. That coat rack is gorgeous!
Wendi Wachtel says
Hi Kirstin!
Yes, it is coming together! Whew, it’s been a long year of projects. Thanks for your note and I’m SO glad you like the molding line! It’s the best way to add character to a room!
Thanks for your note & visit!!
Michelle James says
Wendi, what an incredible makeover! The moulding is gorgeous! I look forward to seeing the ski rack too. You’ve done such a great job with this home!
Wendi Wachtel says
Hi Michelle!
Thank you so much! I love all of the moulding choices bit this one spoke to me. It was a perfect fit for our rustic place. Thanks so much for your visit and very sweet comment!