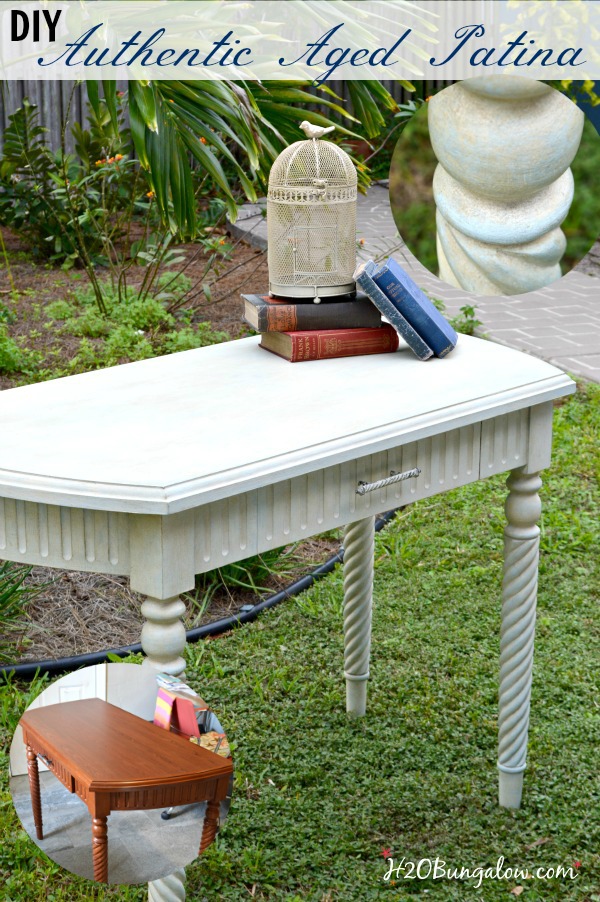
Is it an entry table or a desk? I’m still not sure. Today we’ll call it a desk while I’m sharing my latest project and painted furniture passion. A desk makeover with Amy Howard Paint line where I recreated her famous luscious New Toscana Finish. You guys, this is probably my most favorite furniture makeover…ever!
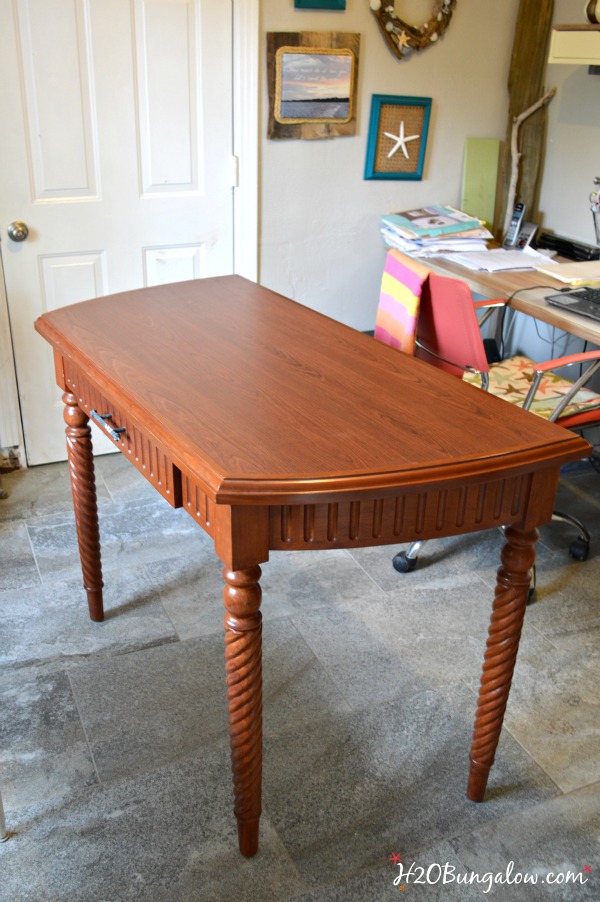
This is what I started with.
I found this desk that had character written all over it, in good condition, but with a fake wood top. Yuck! But…I fell in love with the lines, the detail and those legs!
I had to have it anyway.
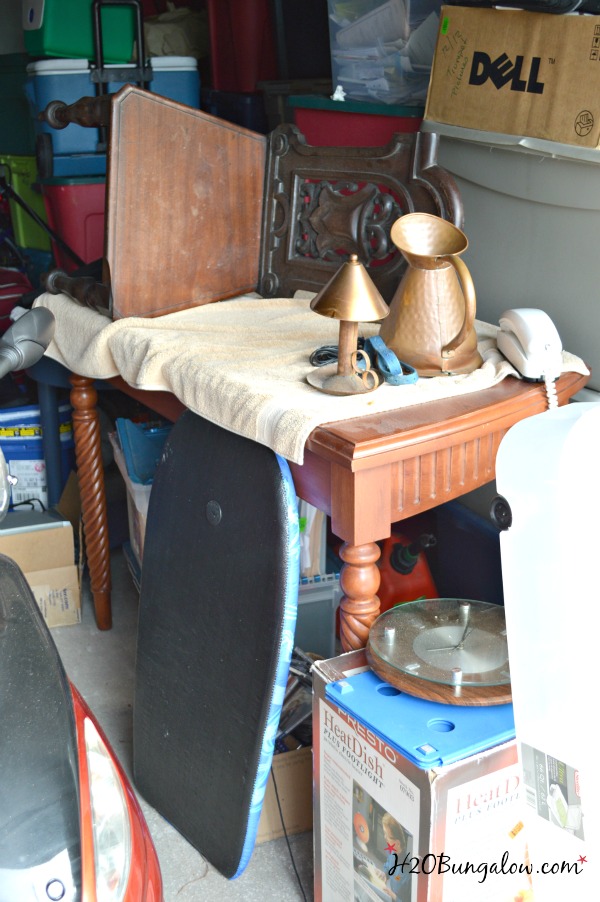
So I brought it home. There it sat for the better part of last year. Unloved and unre-imagined with stuff piled on top of it in the garage.
Until I attended a painting workshop taught by Amy Howard herself in Memphis last fall. Ohh-la-la can I tell you this desk was made for her New Toscana paint finish! I’m in love with the products in the Amy Howard At Home Paint line for the rich patina you can craft on anything. Even raw wood can look authentically hundreds of years old. With just a little practice pretty much anyone can achieve a look that’s rich and sophisticated, fitting the priciest look of a high end boutique furniture store.
…OK, I’ll stop gushing and get on with the tutorial!
Desk Makeover with Amy Howard Paint Line
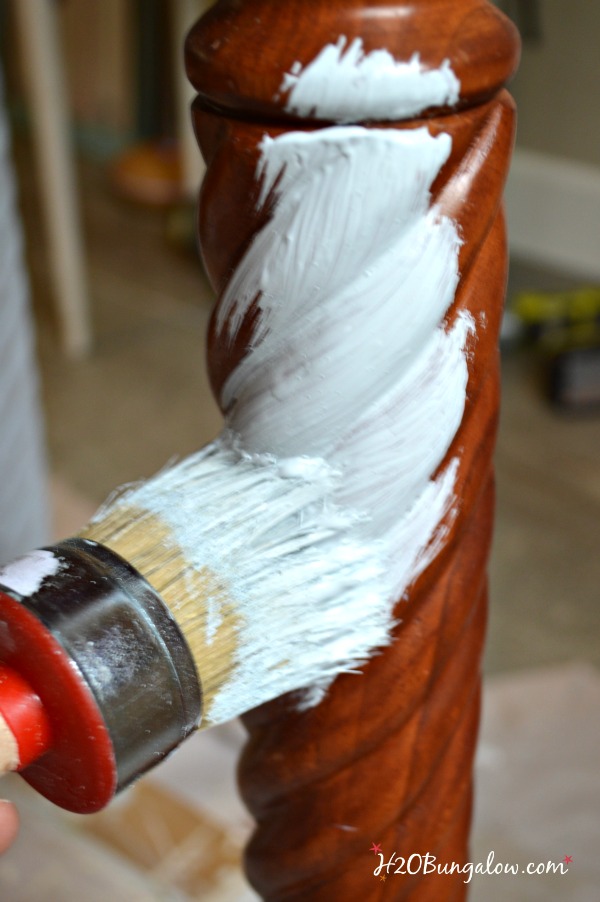
My desk makeover with Amy Howard Paint has several steps, but they aren’t hard. The steps are the key to the authentic finish:) Start with a clean and prepped piece of furniture. Brush on a single coat of Amy Howard One Step Paint. I used her round bristle brush and loved how it worked with the paint. This is French Blue. The paint cleans up well with soap and water. No prepping, sanding or sealing is needed with this paint.
After the base coat dries, mix up a batch of Amy Howard Toscana Milk Paint. I used Remis Grey for this project. Use about a 50/50 mix of water and paint powder. It will work best if you put it in an old blender – don’t tell DH, I used my immersion blender to mix mine, shhhh it’s our little secret 😉 Your mixture will be a little gritty. You can call that part of the character since the paint is replicating paint made from hundreds of years ago…or it can be strained using a cheesecloth. I left mine with the little grits and knocked them down very gently with a 320 grit sandpaper when it was dry. Using the same (but clean) soft round paintbrush apply a single layer of the Milk Paint over the dry One Step Paint, and allow to dry.
This next step is in lieu of sandpaper aging and is how Amy creates her authentic aged look of wearing the paint down in areas that would be naturally rubbed and worn.
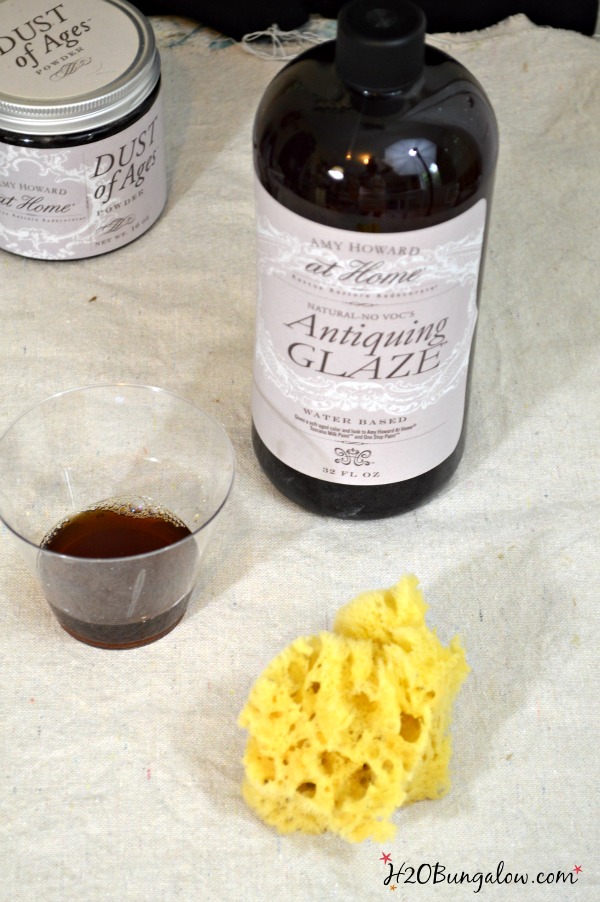
The first thing I did was take a china bristle or chip brush, dip it into the Antiquing Glaze and run my fingers through it to “flick” some of the glaze onto the desk top. Next, with a water damp sea sponge, dip it into the Antiquing glaze and begin working off the paint in areas that would naturally wear. You should use a tamping and pressing action with the sponge onto the areas where you want to lift the paint.
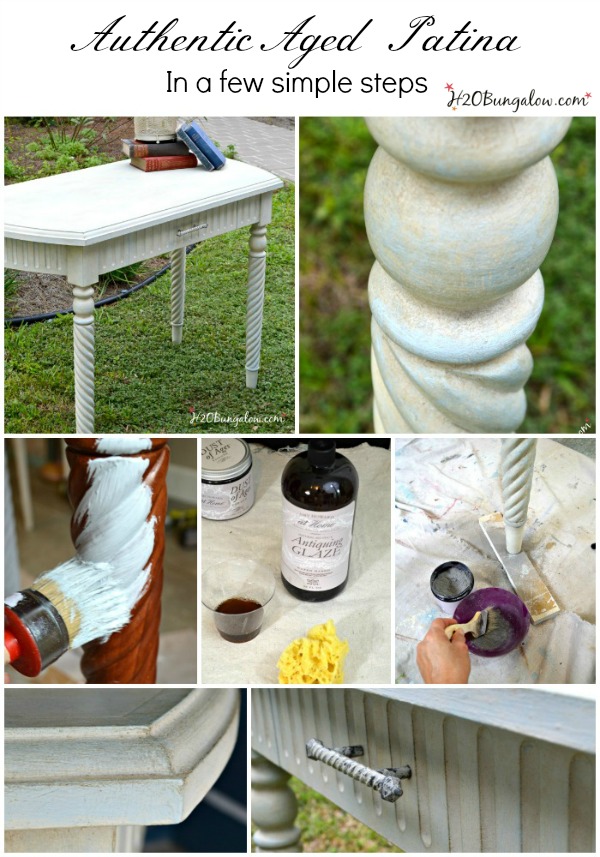
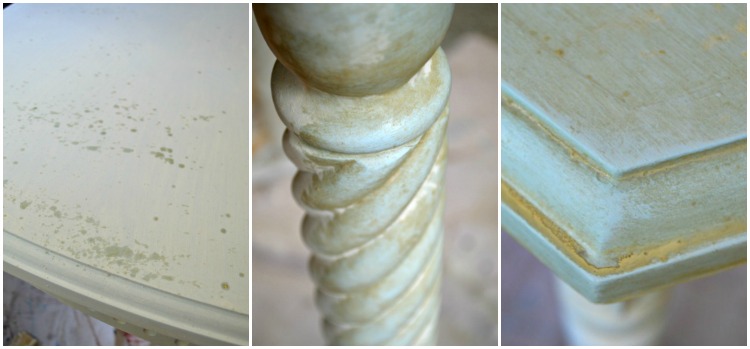
When the glaze dries, it will look like this, and show realistic subtle wear and tear.
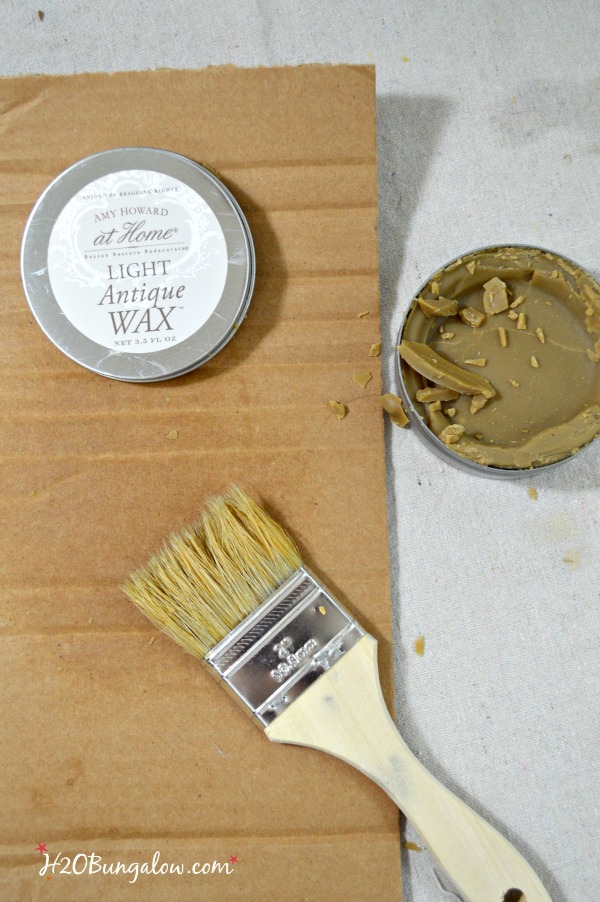
Next comes the Amy Howard Light Antique Wax. The chip brush is great for smaller projects but I found on a large surface a round wax brush worked better to get a good even coat. Wipe your brush on a cardboard piece to remove extra wax before applying. It’s harder than other wax brands I’ve used so you have to work it a little to cover the brush. This stuff smells so good!
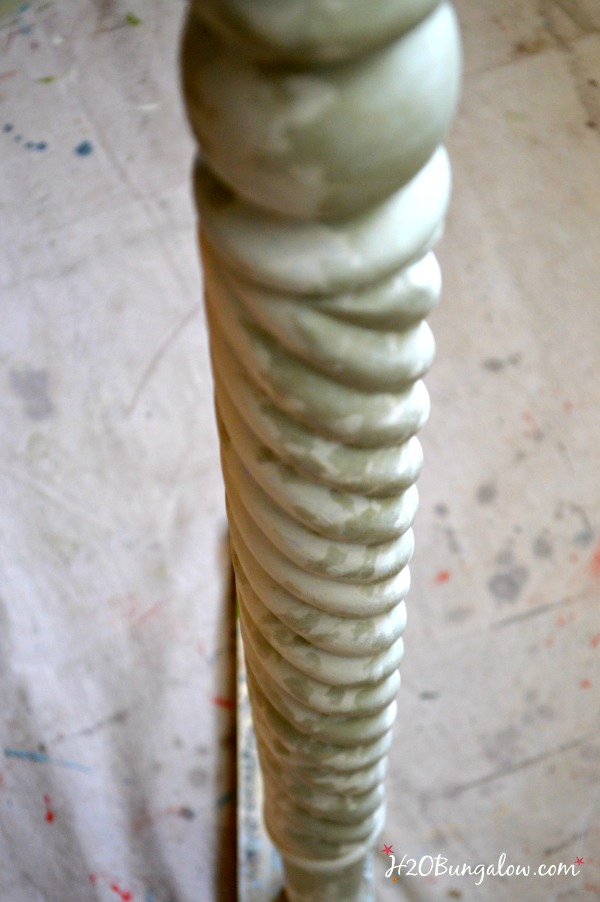
Be generous with the antique waxing and work quickly in small sections. I worked on a leg at a time. When you press your ring finger onto the wax and it feels sticky it’s ready…ready for what you ask?
Magic dust is what I call it!
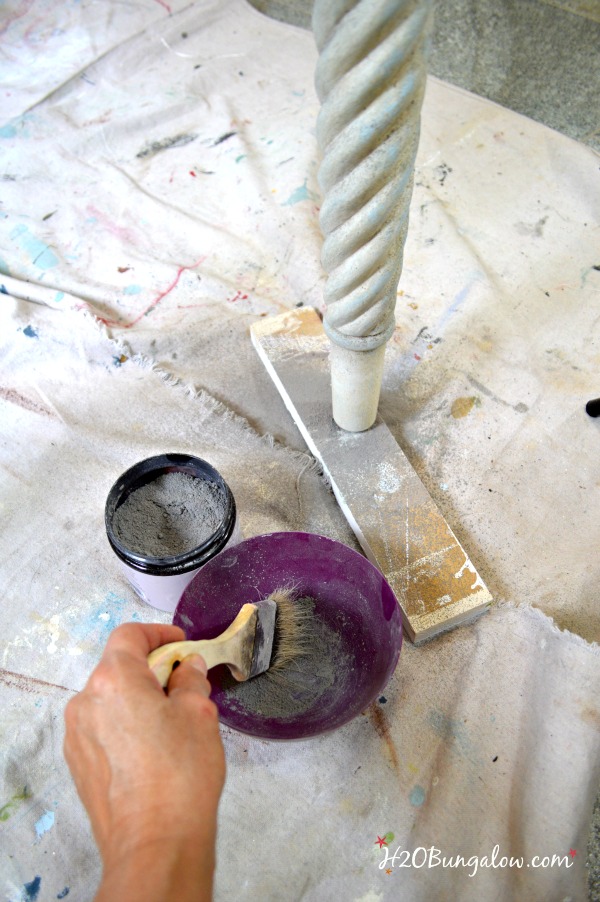
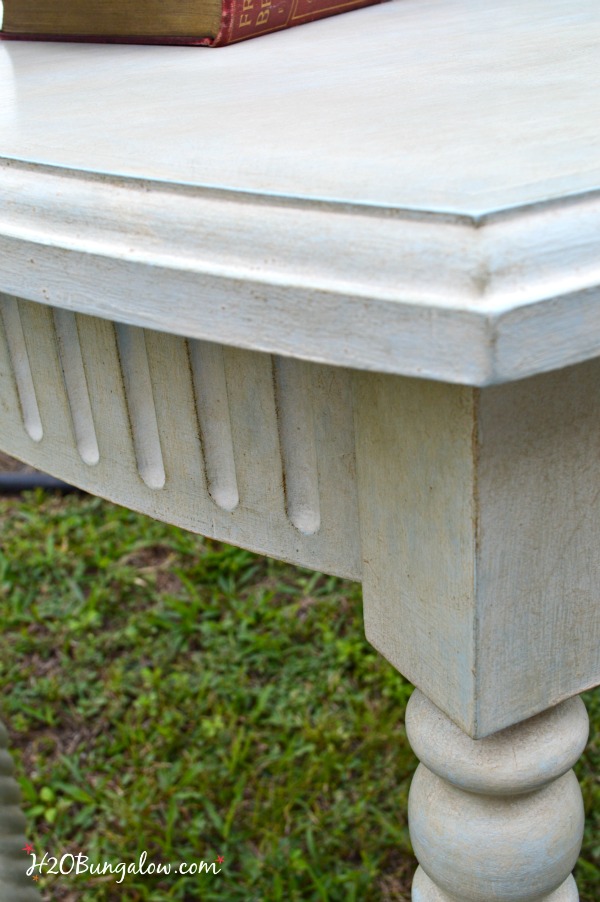
Dust Of The Ages is generously brushed onto the waxed areas, especially in the crevices. Place a piece of plastic or something to catch the extra dust that falls off so you can put it back into the container for another project. Let it sit and resist the urge to touch it for about an hour. Then very gently wipe of the dust from the high spots and buff lightly. This gives your piece rich buildup and detail in the natural cracks and crevices that would have accumulated paint, dust and wear over time. The grey powder takes on a different appearance when it’s been buffed.
The last step is applying the Amy Howard Dark Antiquing Wax. Load a China Bristle or chip brush with the dark wax, offload any extra onto a cardboard piece and apply only to areas that would naturally get dark with normal wear over time. Use the lightest of touches…like butterfly kisses.
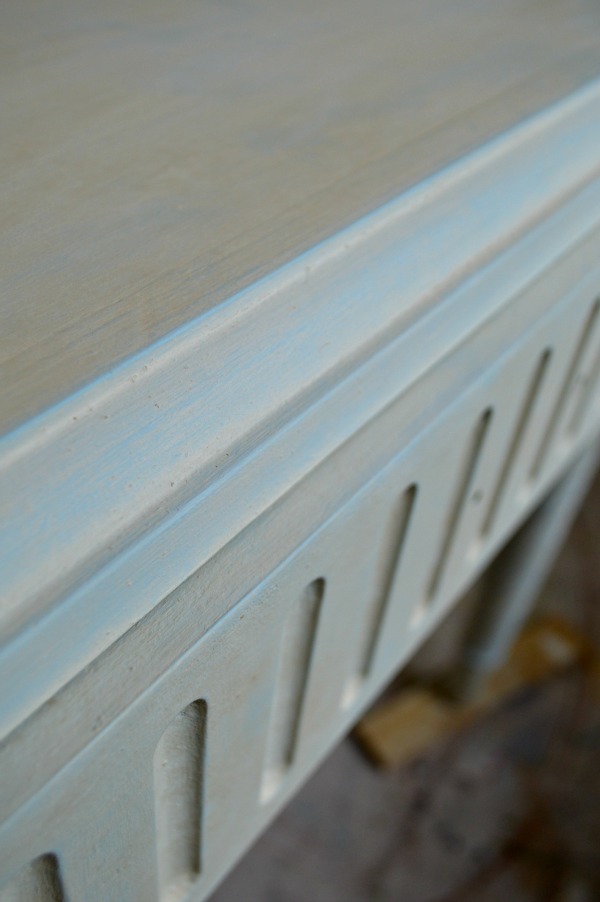
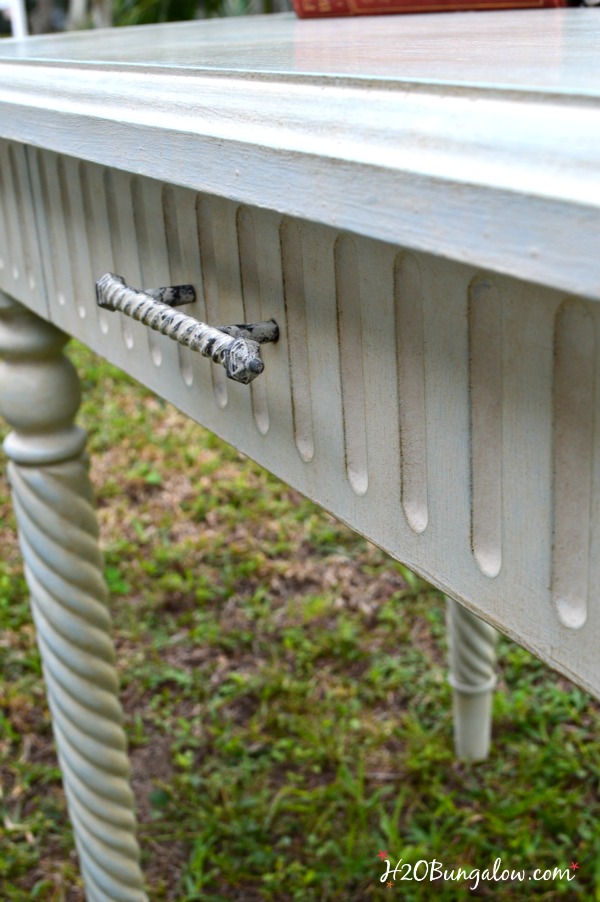
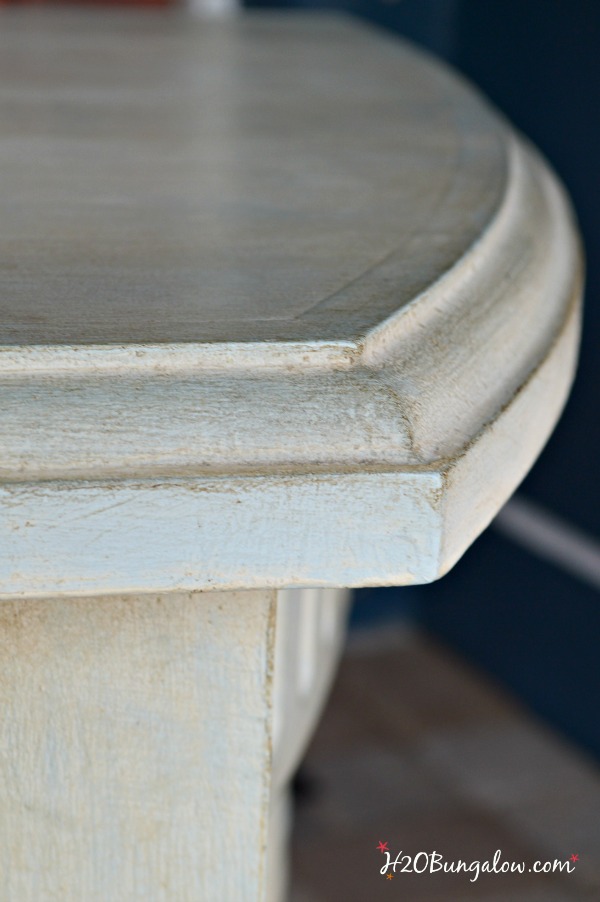
The dark wax is only an accent used sparingly! You can see here where I added just a touch on edges and areas where I wanted a tad more patina.
In furniture paint terms… I call this love.
I look at it and it makes me want to run my hands over the finish and touch the variations. I love when I see a makeover that makes me feel something, it stirs a feeling deep inside…an emotion.
This type of finish does it for me.
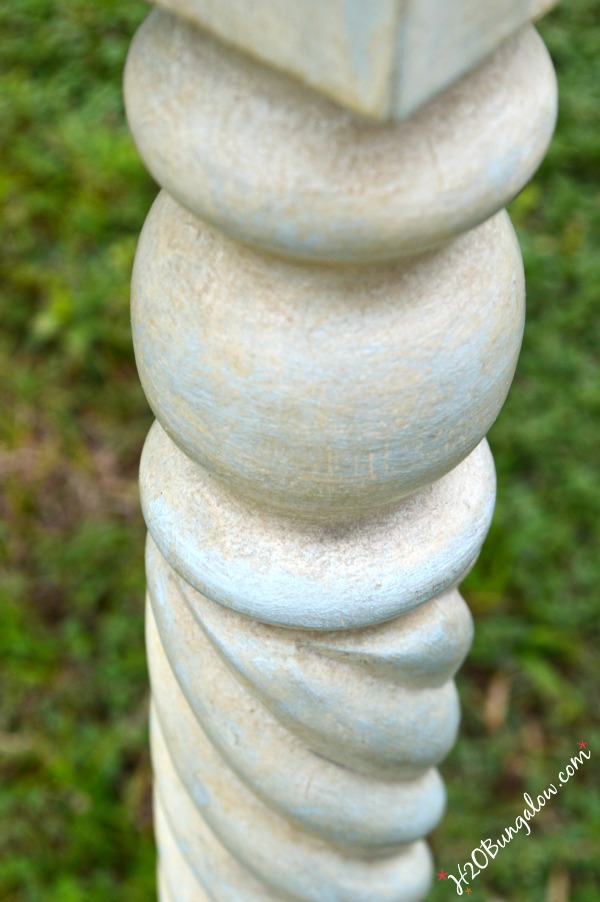
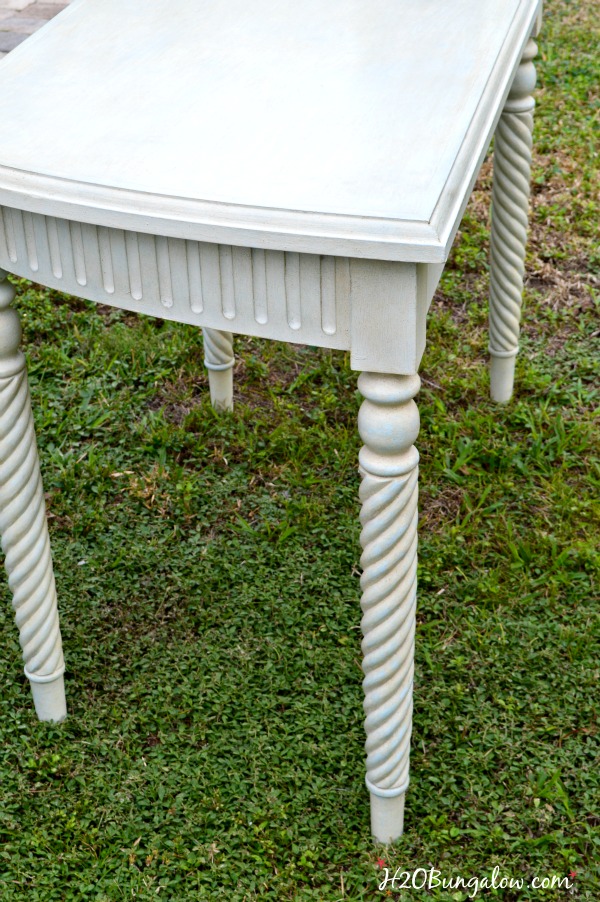
It makes me want to keep looking at it from different angles.
I could make up stories about the rich past it had, and the generations of family that passed it down…
But we all know it was thrift store cast off not too long ago.
Cast off or not , it turned out awesome.
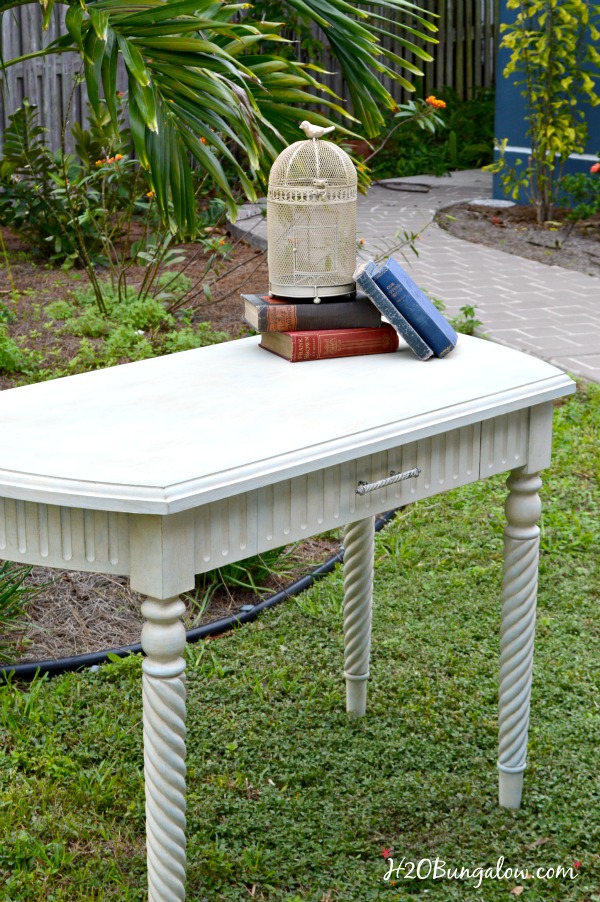
Here’s the whole piece.
I still don’t know if it’s a desk or a table. It really doesn’t matter. When it’s sold the new owner can decide what it is. In the meantime it will be available for sale in my shop at the beach. Send me an email if you’d like to see it:)
If you love furniture makeovers like this desk makeover with Amy Howard paint, be sure to sign up for my emails so you don’t miss a single one. I have several more fabulous Amy Howard Paint furniture makeovers planned for the near future! You can find the Amy Howard At Home Paint line in Ace Hardware stores or find a local dealer by searching on the Amy Howard At Home website.
A big thank you to Amy Howard who graciously opened her home and studio to a handful of paint loving bloggers last fall and generously shared her trade secrets, time and talents to open up a whole new world of patina possibilities:)
Love a good dose of DIY home decor, home improvement, the challenge of woodworking and creative ways to make your home look fabulous?
Me too!
I’d love to share mine with you. Click here to sign up for my post emails and I’ll send a quick note when I have a new project to share.
Social media fan? Don’t be shy say hello! I love when you guys do that! I’m interactive on Facebook and I share lots of other projects and, useful inspiration for the home and content I don’t share anywhere else. Follow H2OBungalow on Facebook here
Oh heck, just follow me on all social medias. We’ll have some fun…promise:) Follow H2OBungalow on Instagram , Follow H2OBungalow on Twitter , Follow H2OBungalow on Pinterest, I’m on Periscope! @H2OBungalow
I use affiliate links in my posts. If you should make a purchase I will receive an itty bitty commission at no cost to you. Thank you in advance for supporting my blog and two furball cats who believe they are privileged.

Susie@TheChelseaProject says
Wendi,
Love this makeover and your excellence tutorial. I have simply got to find some Amy Howard paint retailers. Her products and your skill = perfection. Thanks for linking to Friday’s Furniture Fix….Susie
Wendi says
Thank you Susie! I’m crazy about this finish and how much the layers add to the final project. I’m starting a new one today and can’t wait to share it!
Margarita Kreider says
Love the table/desk. It sounds like many steps to paint a desk!
With the chalk paint from Ann sloain is it that many steps as well ???
Thanks. Mk.
Wendi says
Hi Margarita, You can just paint the chair with Amy Howards One Step paint which was my first step in the white color and be done. It doesn’t need to be sealed. Annie Sloan paint will need to be sealed. I used the extra steps to give my piece the impresseion it was aged. That’s the beautiful thing about paints, you can creat any look you like. Thanks so much for your question, it was a good one:)
Robin from RPK Interiors says
Stopping by from The Painted Drawer’s Fab Friday Link Party. What a gorgeous transformation! You’ve peaked my interest in Amy Howard’s products. Thanks for taking the time to write up such a great post about your process!
Wendi says
Hi Robin, You’ll LOVE the Amy Howard At Home paint line! They are fabulous to work with and create unique finishes. Stop by again as I have several more of her processes to share that create other finish styles. Thanks so much for your visit!
Suzanne says
Gorgeous! Sharing tonight on the Fab Friday Link Party and thanks for linking up!
Wendi says
Thanks so much Suzanne! I absolutely love the pieces you create, so it’s an honor to be featured at your place. Have a great weekend!
simple nature decor says
Love the paint that you choose, will try that paint on a table i have been wanting to redo, thansk for sharing this at Dream Create and Inspire Party
MAria
Wendi says
I hope you do try this paint… it’s absolutely wonderful to work with and makes a durable surface as well!
Jenny @ Refresh Living says
Wow – you really turned that table around and made it look fabulous! You made me want to try out this paint line. Thanks for all the tips you gave for each of the steps.
Wendi says
Hi Jenny…you should try out this paint, it’s so versatile. The desk looks even better in person than it does in the photos too!
Bre @ Average But Inspired says
This is absolutely gorgeous! Is the Dust of the Ages product also from the Amy Howard line? It sounds incredible! That desk is just stunning. Thank you SO much for sharing it at The DIY Collective!
Wendi says
Hi Bre…and yes the Dust Of Ages is from her line. It’s the best stuff! Thanks for the sweet note on my makeover too:) Have a great week!
Terry says
This is lovely! I love the legs on this piece! You really nailed the look! I have not heard of this line of paint yet so I’m going to have to check it out for sure! Thank you for sharing it!
Smiles!
Terry
Wendi says
Thank you so much Terry:) I’m loving how versatile this paint line is and that it’s not priced too high. I’m also loving that it’s easy to find, Ace Hardware stores are everywhere:)
Pat says
My question is how well does this hold up to wear and tear. I have a dining table I would like to do this to, but it really takes a bunch of abuse.
Wendi says
Hi Pat. What I would do on a piece like that is use a clear matt sealer on the top of the table after you’ve applied the waxes as detail only. Sometimes I add a clear wax right ontop of the sealer too. Next. you’ll let the finish cure before you use it. I’d let it sit at least a few weeks to cure. The longer the wax & paints sit, the harder they become. I have waxed pieces that are crazy durable after curing. I’ll also check the Amy Howard line and get back to you if they have a sealer product. Please let me know if you have any more questions:)
Thelma says
Magnificent piece in the Toscana Milk Paint. Love Amy Howard Sealant. Comes in Matte or Gloss.
Have only used it over her chalk paint.
Wendi says
Hi Thelma and thank you! Amy Howard has lots of new products I haven’t used yet and her sealers are one of them. She really is tops when it comes to her products. So glad you liked my project and tutorial! Thanks so much for your visit ad sweet note!
Marie,The Interior Frugalista says
Wowee, you’ve got me intrigued BIG TIME! I bet this pretty table/desk doesn’t last long in your booth Wendi.
Wendi says
Hi Marie… You’d be hooked on this paint in a minute! I can’t wait to share my next few projects I have lined up!
amy @ one artsy mama says
That turned out so gorgeous, Wendi! Well done!
Wendi says
Thanks so much Amy! It was a bit different working on a big item over a small sample board. Once you get the feel of working the products it’s easy. I can’t wait to try other color combinations! Thanks so much for your visit!
Patty says
Wendi, that is just fabulous. I really want to learn how to do this. Where can I buy the paint, glaze, powder waxes, etc? I bet it is expensive, but oh so worth it. That desk is gorgeous.
Do you know if there are any videos, with step by step instructions.
I have an antique kitchen cabinet that is 21 inches wide and 691/2 inches high with a door on top with glass then a drawer then a solid door on bottom, I use it in my mud room off the kitchen to keep my pottery in, I keep putting off painting it because I wasn’t sure what I wanted to use and of course there is the confidence thingy, but after seeing that desk I know that is just what I want to use on it.
Maybe that paint technique is to elegant for that old cabinet, what do you think Wendi? Any advice would be much appreciated. You did such a wonderful job on that desk, you have inspired me.
Wendi says
Hi Patty…Thank you! First, you CAN do this finish and I’m sure it would be gorgeous, absolutely gorgeous on it! It’s not too hard. Search Amy Howard At Home for her videos on the New Toscana finish. The paints and supplies can be purchased at Ace Hardware or you can search for local suppliers on her website. I’m planning on sharing other projects with the same technique soon. I’ll probably add a video as well with simple steps broken down. Start thinking about your color combinations and how stunning your vintage cabinet wll look!
Patty says
Wendi, I’m so excited, we just had an Ace Hardware open up her about a month ago.
I will be looking for the video’s and learning as much as I can before I attempt it.
Thanks so much for your encouragement.
Wendi says
Your’e welcome Patty!
Mary-the boondocks blog says
Wendi this is fabulous. I can see about 4 or 5 different colors on the legs and I’m sure the pictures don’t do it justice. When I come over the pond I’ll l ook into these fantastic paints. It certainly does look like it was passed down generations!
Wendi says
Hi Mary… you do need to see this paint and I know you’ll love it! Thanks so much for the thumbs up on my desk makeover!