We just finished installing my new DIY interior wood shutters in my studio/office and I’m in love with how they’ve completely changed the room. I couldn’t wait to share this project, it’s simple but made a huge impact. This is one of those projects I’ve always wanted to do and had no place for them. A few months ago we decided to move the sofa bed out of my office to make my office just my office. That changed everything.
In about 5 minutes I started doing a makeover in my head and one of the first projects on my list was vintage style wood shutters.
I grew up in the northeast where there are lots of old buildings. I’ve always appreciated old style windows, doors and hardware, pretty much anything that had character. Building my own set of old world interior wood shutters for my studio gave me a little bit of the vintage and old world charm that I love.
DIY interior wood shutter like mine are easily a weekend project. Since window sizes are different, I’ve decided to show you how I made my wood shutters rather than share plans for one size.
The length of my DIY interior wood shutters is 4 ” longer than the window, 2″ at each end. We used 1 x 6 pine boards for this project. Be sure to pick through the wood and select straight boards for this project.
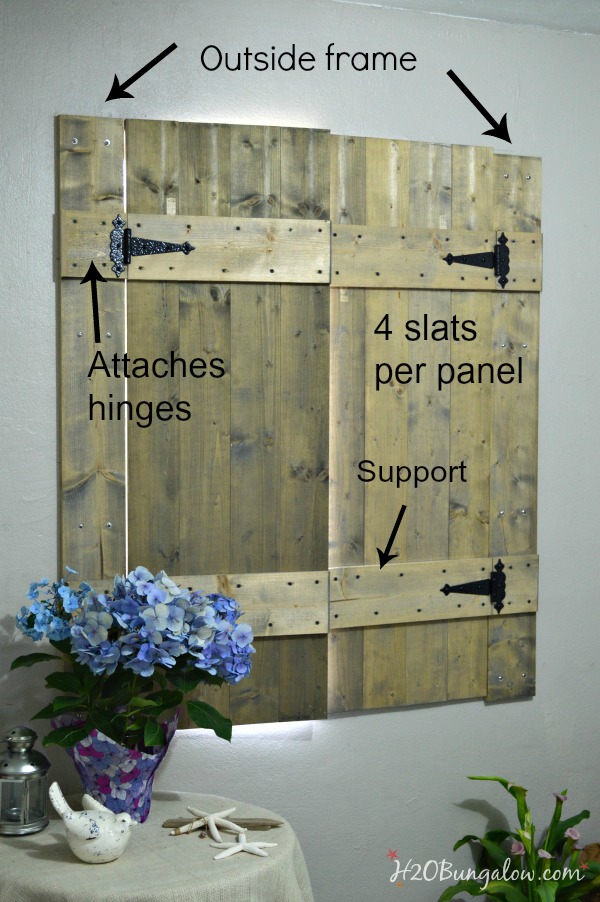
1. Outside frame – Install a 1 x 6 board on each side of the window the same length as the window panels to make the outside frame. We used 8 anchors on each panel. I have cement block walls 🙁 which required a masonry bit to drill the anchor holes. Most people will have drywall and wood studs. Be sure to choose the proper anchors for your wall and drill pilot holes on your frame boards.
2. Each panel was made with 4 boards. After doing the math for a 36″ window width, we ripped each 1×6 panel board down to 4 1/2″ wide. Next we squared one end by trimming a small amount off and then measured and cut the board to the length we needed.
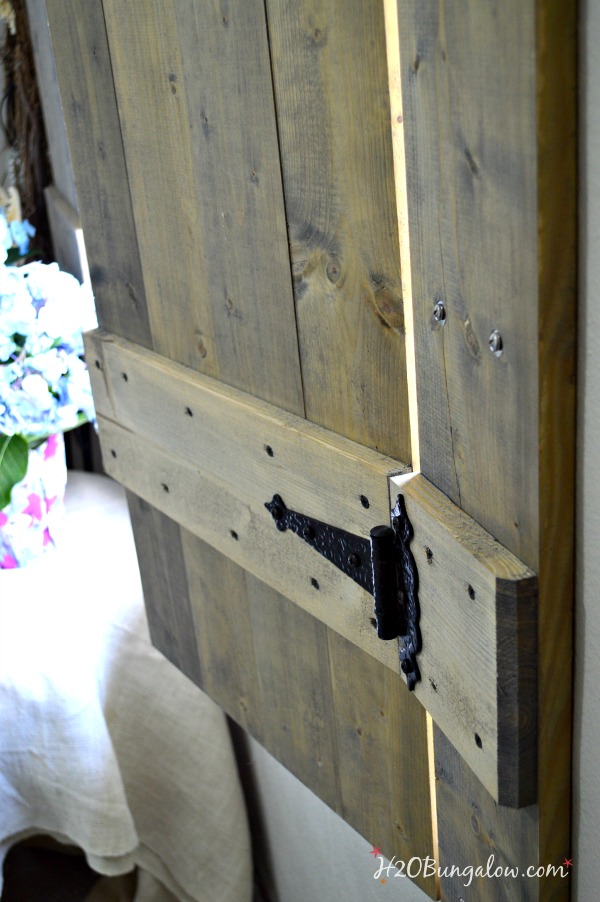
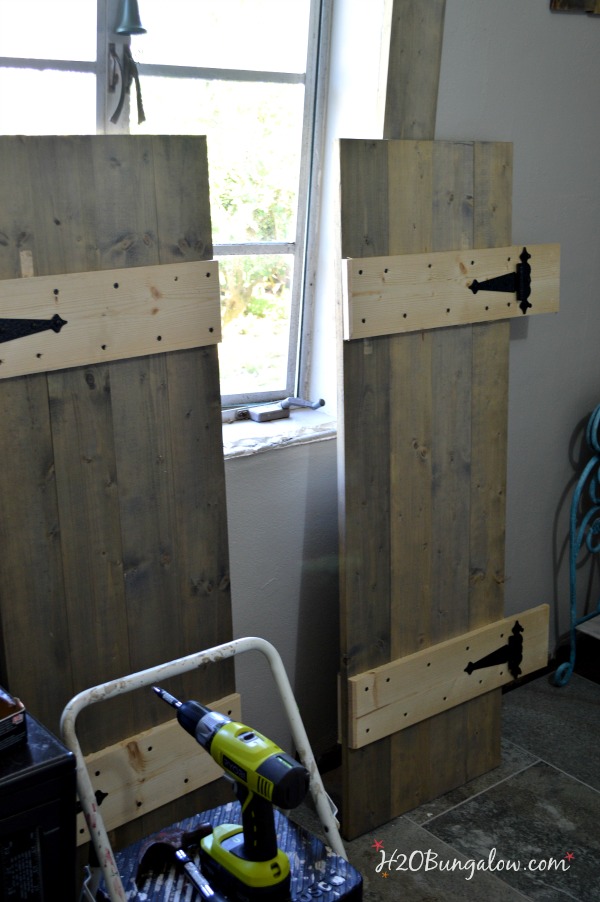
3. Horizontal slat supports were made from 1 x 6 boards across the top and bottom of each panel. The boards were cut to length and mounted on the outside frame. Note the screw pattern we followed to attach the support to the boards on each panel. This was to prevent twisting and warping. You’ll notice in the pictures that these edges are angled. This is optional.
4. The hinges attach the side frame to the window panel.
Here’s a few tips that I think are worth mentioning to make building the wood shutters easier.
Stain the wood before assembling the shutters. I used DRIFTWOOD WEATHERED WOOD FINISH – Creates a natural Driftwood Weathered Wood Finish in minutes (affiliate link) because it was water based, cleaned up easy and gave me the weathered look I wanted. It comes in a powder, and you mix it with water. It’s that easy. 🙂
Since I didn’t own any clamps big enough for the width of the 4 boards, we built a jig to hold the wood slats of each panel together while we screwed the supports onto them. We wedged wood shims into one side at each end to press the panel slats tightly together. 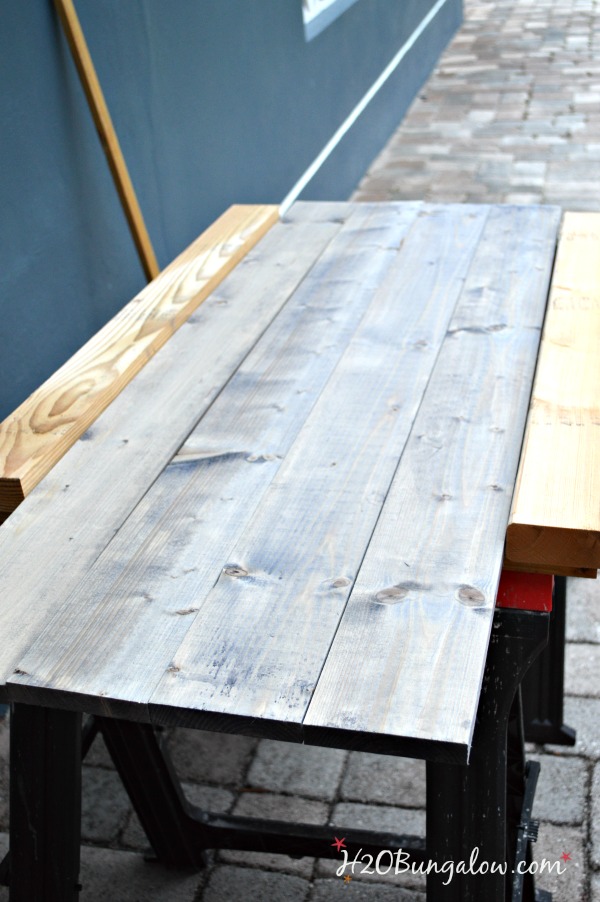
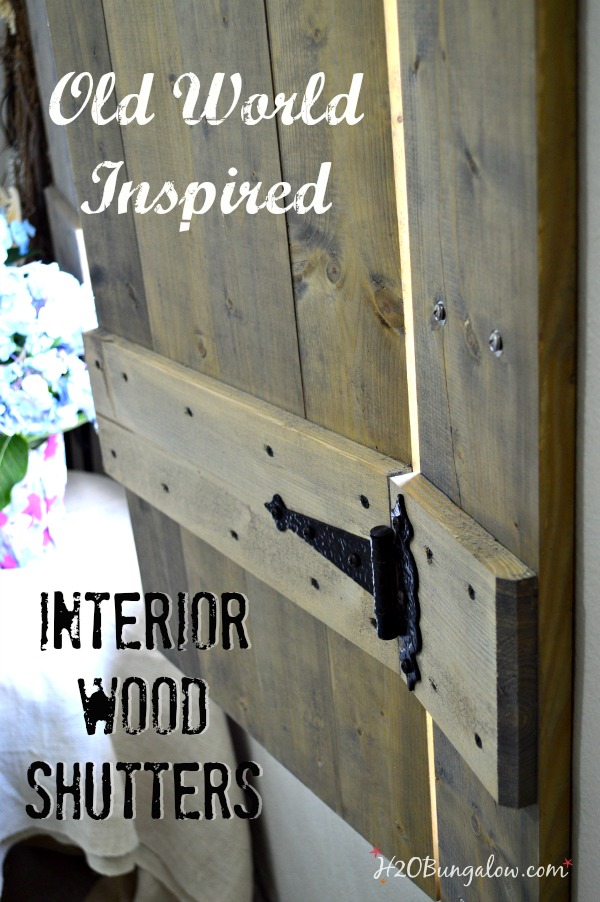
My dad was visiting and I talked him into making these shutters with me. He used to renovate old homes and is a stickler for details. He said “real” vintage wood shutters have the edges cut like this picture below. I said..”ehh, I don’t need those cuts” … He said “yes, you do”. OK, Dad you were right, they look good 🙂
A word of advice, measure both the upper and lower part of your window width. Do one last check to be sure the wood panels fit and will close before installing them. My windows were built unevenly and the top is narrower than the bottom. We had an extra 1/4′ on the top of the panels and the shutters didn’t close well. I’ll have to trim a little off of the inside edge. It so much easier to do this before installing the panels!
At the last minute I decided I really liked the decorative detail of the horizontal support slats across the top and bottom of each panel. We quickly made an extra set to mount on the inside of each shutter panel. I stained them after my DIY interior wood shutters were installed.
I love them!
They are perfect for letting lots of natural light in when I need it to work, and shutting for privacy or blocking the hot summer sun out.
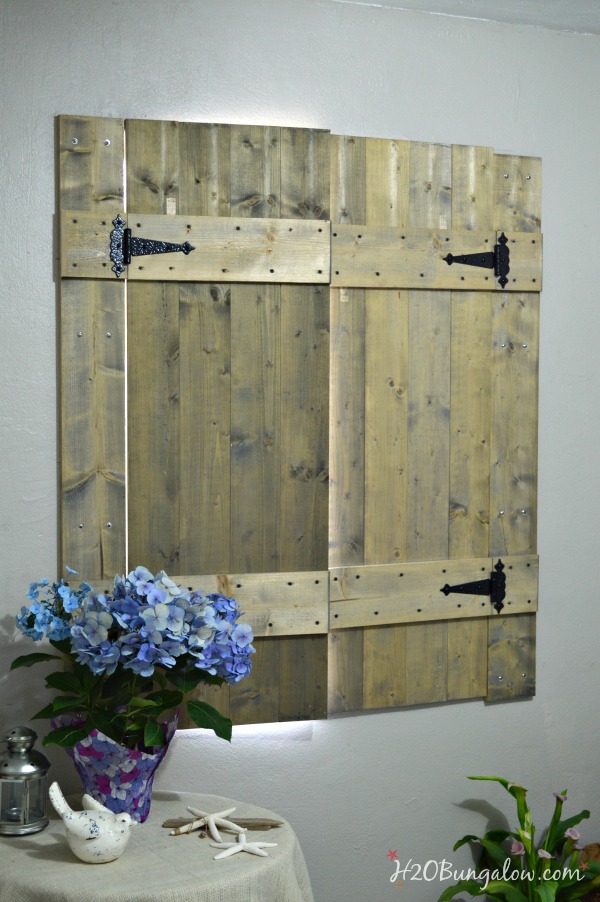 My new old world inspired vintage wood shutters add lots of character to my studio. I love the hinges and may find a decorative set to install on the inside of the shutter or some other hardware to jazz up the inside of the shutters since they will be open most of the time.
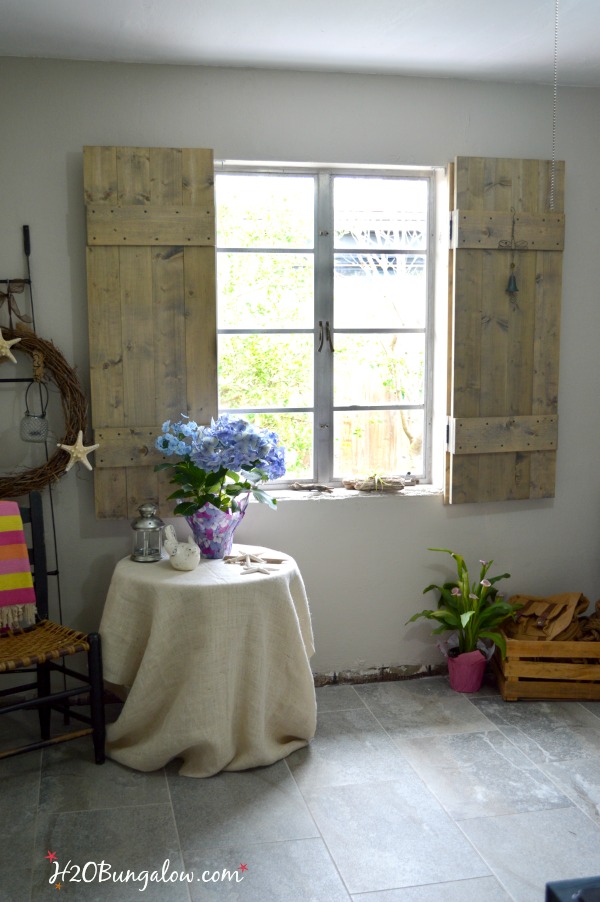 … yes, I know I don’t have any baseboards… yet. It’s on the project house list:)
I’m over the moon excited to have a place that I could fit my DIY interior wood shutters in my home. They’ll work beautifully with my new plan for transforming my workspace into something special. I started out my office makeover with my upcycled metal bakers rack project last month. I have a few more to projects to finish before the big reveal.
I’ve always been awful at keeping secrets and growing up hasn’t changed a thing! I can’t wait to share the rest of my office/studio makeover!
Do you have a special decorative touch you’ve always wanted to add like my shutter project?
Love a good dose of DIY home decor, home improvement, the challenge of woodworking and creative ways to make your home look fabulous?
Me too! I’ll share mine with you!
Click here to have my posts sent to your mailbox fresh off the press.
Social media fan? Don’t be shy say hello! I love when you guys do that!
I’m very interactive with my readers on Facebook and I share lots of extra projects and, useful inspiration for the home and content I don’t share anywhere else.
Follow H2OBungalow on Facebook
Oh heck, just follow me on all social medias. We’ll have some fun…promise:)
Follow H2OBungalow on Instagram
Follow H2OBungalow on Pinterest
I’m on Periscope! @H2OBungalow
I use affiliate links in my posts. If you should make a purchase I will receive an itty bitty commission at no coast to you. Thank you in advance for supporting my blog…my two cats and our boxer dog 🙂
Linking up to these fun parties here: Coastal Charm Show and Share No.253, Funky Junk Interiors, The Scoop , DIY Sunday Showcase , Sunday Features Link Party , Bouquet Of Talent Link Party , Inspiration Monday, Motivation Monday, That’s What She Said, Busy Monday, Melt in Your Mouth Recipe Blog Hop , Munching Mondays, Mix It Up Mondays, Raegun Ramblings, Something To Talk About, Inspire Me Monday , The Scoop, Two Cup Tuesday, Treasure Box Tuesday, Project Inspired Link Party, Snap Creativity Show, The Sits Girls , Brag About It Link Party , Two Cup Tuesday, Treasure Box Tuesday, Project Inspired Link Party, Snap Creativity Show, The Sits Girls , Brag About It Link Party , Share Crafts DIY Projects, Wonderful Wednesday Blog Hop, Whimsy Wednesdays, Dream Create Inspire, Wined Down Wednesday, Worthwhile Wednesdays, The Wednesday Round Up, Wake Up Wednesday, Living With Style, Maisondepax, Work It Wednesday , Share Your Style, Create It Thursday, Showcase Your Talent, Think and Make Thusday, Your Turn To Shine, Creative Exchange, Artsy Fartsy Link Party, Idea Box Thursday , Creativity Unleashed, Weekend Retreat Link Party, The Handmade Hangout, Craft Frenzy, Pretty Spaces, Freedom Fridays, Pinworthy Projects, Home Matters Linky Party , The Creative Collection Link Party, Super Saturday, Best DIY Projects and Recipe Party

Lory from The Robin's Nest Designs says
Love these!! Thanks so much for sharing at The Living With Style Linky Party! Have a great day.
Hugs, Lory
http://www.therobinsnestdesigns.com
Wendi says
You’re welcome Lory! It’s been fun sharing them and I hope I inspire others to make these as well.