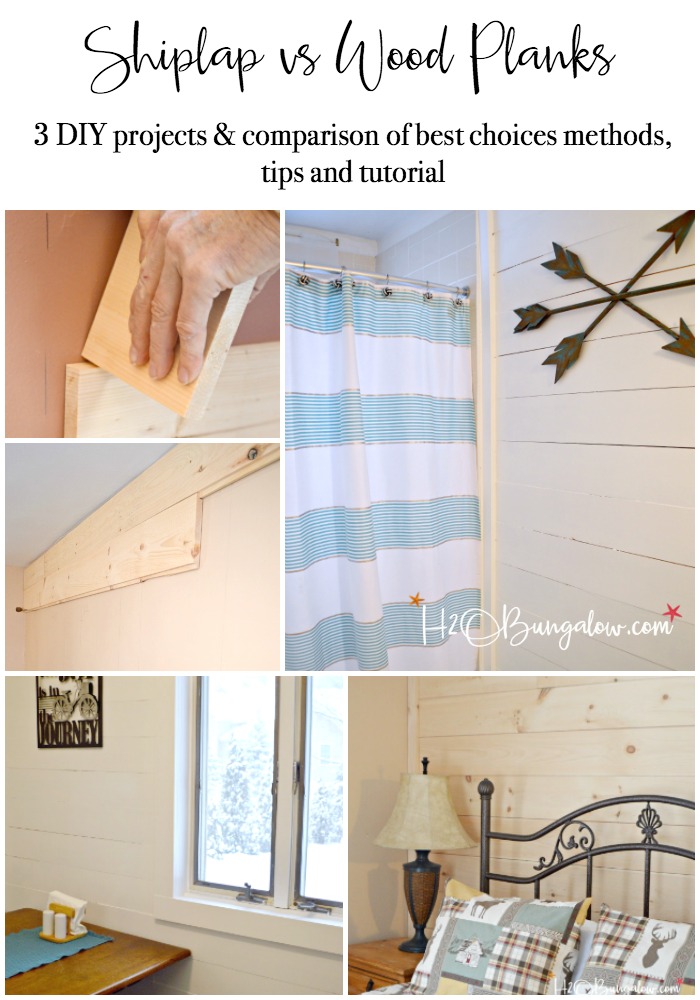
Learn all about the difference between DIY shiplap vs planked wood walls.
Let’s chat about how to install a farmhouse style wood plank wall, the difference between using shiplap vs planked wood walls and shiplap vs tongue and groove siding today. I’ve added not one, but three wood planked and shiplap accent walls in the North House recently.
I used a different method and materials on each of them. Adding interior wood plank walls is not hard to do. It’s even easier if someone shares a few tips to help installing your wood accent wall project…so let’s get started!
I’ve used both plain old wood planks and shiplap in different rooms for my interior wood plank wall projects. Initially, I was confused about the difference between shiplap vs wood plank walls because everyone calls a planked wall shiplap nowadays.
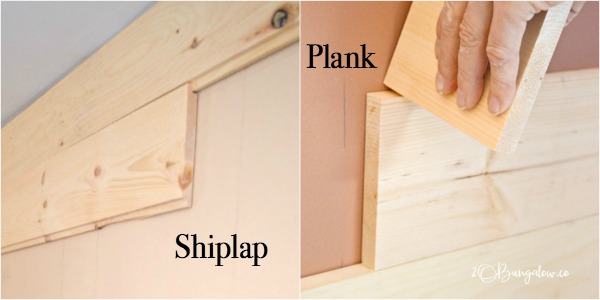
But there is a huge difference, a Shiplap wall is not a wood plank wall!
The Difference Between Shiplap vs Planked Wood Walls, Car-siding and Tongue and Groove Wood Walls
I’m updating this part to add third type of interior wood plank wall to this post, car-siding. A few helpful readers have shared information on car siding walls in the comments below and used the term car siding and tongue and groove.
Car siding, also known as tongue and groove is actually different than shiplap and it looks different when installed on a wall too.
What does a Tongue and groove or car siding wood accent wall look like?
I have another DIY wood accent wall project here in the North House, that was done in pine tongue and groove or car siding. I’ll share a picture below so you can see what it looks like installed. I’ll link to this post when I finally write the tutorial.
Car siding and tongue and groove has a u shaped channel on one side and a protruding piece (think of sticking out your tongue (thanks Allison!) on the other edge. The two fit together. It was called box-car siding because they used to make box cars with it.
The 2″ thick version of this is also used for horse stalls. If you look close you’ll see a “v” shape cut in where each of the boards meet. One big benefit of using tongue and groove for a wood accent wall is you’ll never see spaces in your wood due to shrinking.
What does a shiplap wood accent wall look like?
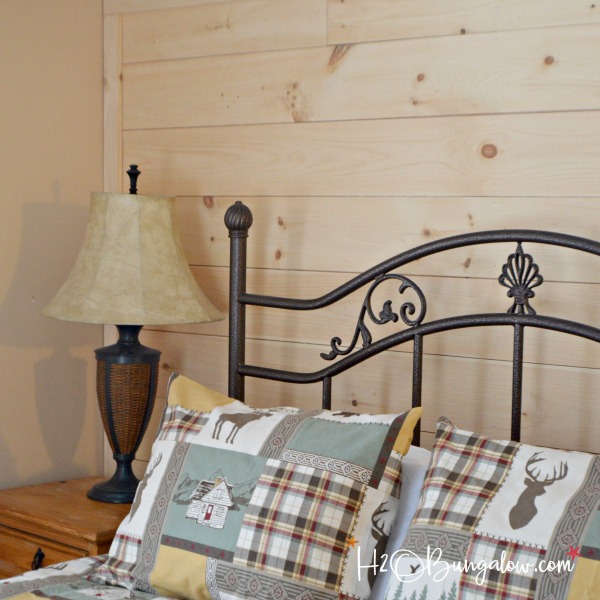
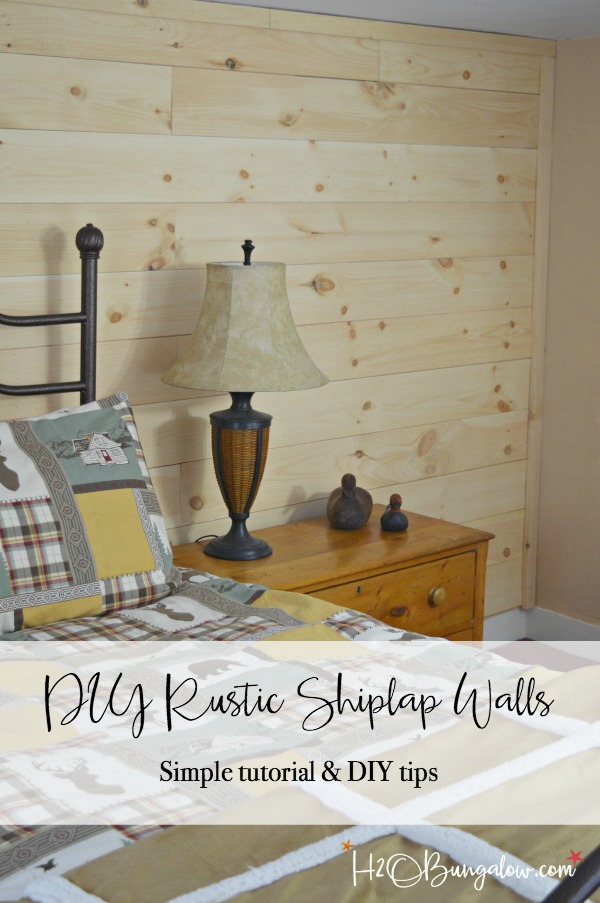
The picture below is a shiplap wood wall. A shiplap wood wall has each wood plank lay over the edge of other. In simple terms it has a cut out groove for the next board to rest under or over. In technical terms it has an overlapping joint, called a rabbet or an “L” shape cut out.
You won’t notice when shiplap wood planks shrink after they are installed because of the overlapping wood parts.
What does a wood plank accent wall look like?
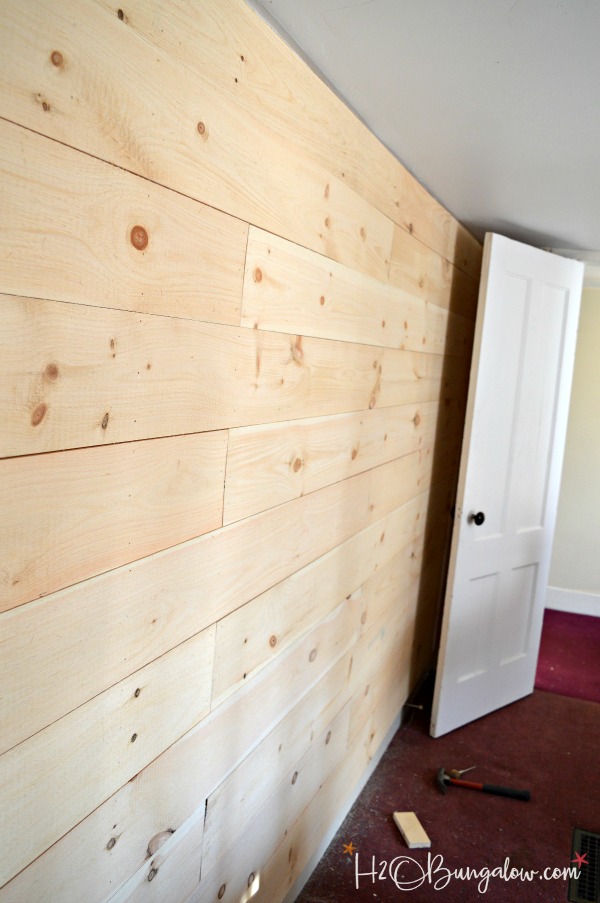
A wood plank wall is simply that, a wood accent wall using wood planks. Unlike the other wood plank types, there is no way to connect them or seal seams with a wood plank wall. You’ll basically nail them up tho the wall.
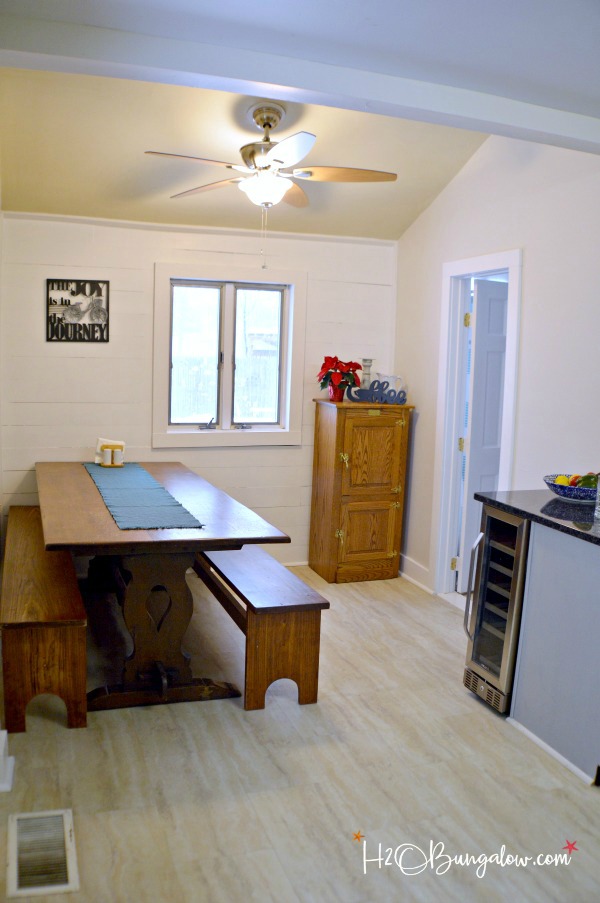
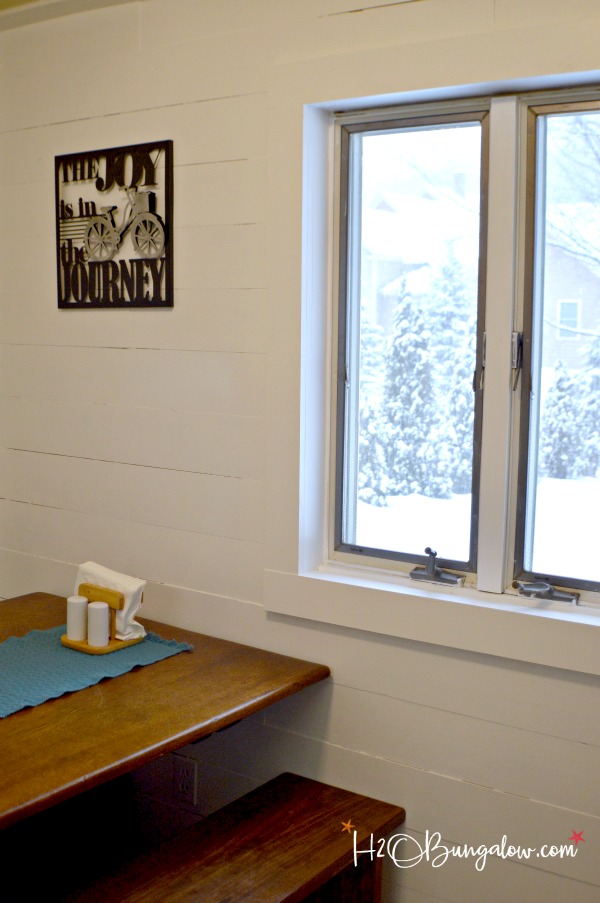
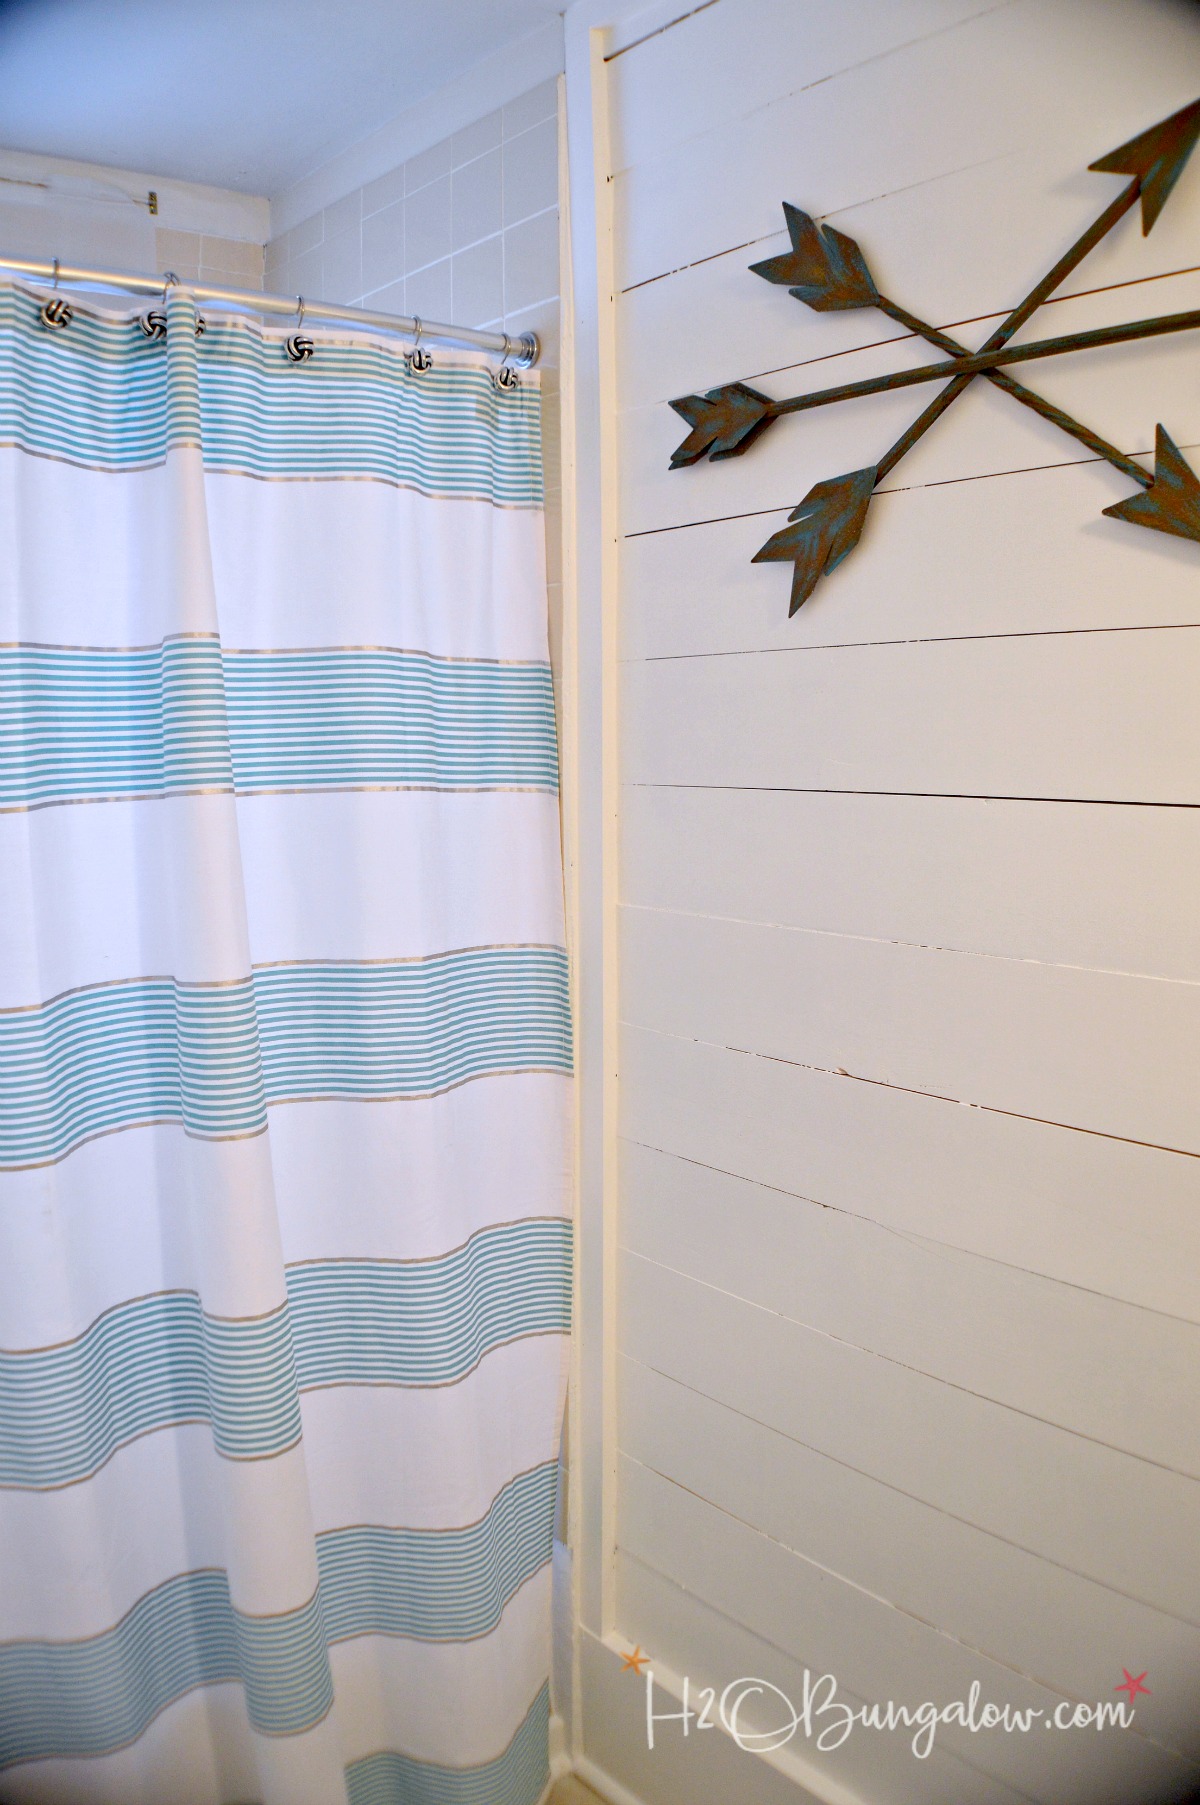
You’ve probably seen some pretty creative wood plank walls using pallet wood or other reclaimed wood. I used 1″ x 6″ common pine boards for my accent wall in the kitchen and the downstairs bathroom.
I’ve also used plain 3″ wood boards and cut them into 12″ wood pieces, stained them different colors and made a wood tiled wall. That is probably the best use of common pine boards for wood wall.
How Easy Is It To Find Shiplap or Tongue and Groove Wood?
Shiplap, tongue and groove and plain wood planks are most commonly found in pine and cedar.
Finding shiplap or tongue and groove wood for an accent wall or ceiling project is easier than you think, You may have to do some creative looking depending on where you live. Do a search on your local Home Depot or Lowes website and you’ll find lots of choices and many that ship for free right to your home.
One problem with not choosing your own boards is you’re likely to get warped, cracked and poor quality boards mixed in your shipment. Returning and exchanging a few bad boards can be a hassle and time consuming.
Don’t overlook the regional building supply places if you have them, I found our local building supply store, LaValleys in Vermont had fabulous prices and was located just down the street in from the North House Lodge.
Basically, finding shiplap in VT was easy, in FL not so much. After doing some serious browsing at my local Home Depot in FL, I found a small selection of shiplap by the tongue and grove boards. It wasn’t the same quality as what I found in VT which had a rough side and a finished side which I liked.
Supplies Needed To Install a DIY Wood Accent Wall out of Shiplap, Tongue and Groove or Wood Planks
The supplies needed to install a DIY wood accent wall from any of the three wood styles is the same.
- Wood plank accent wall material. Shiplap, tongue and groove or wood planks
- Ryobi Airstrike nail gun
- Ryobi 10″ Compound Miter Saw
- Ryobi Cordless Jigsaw
- 4 foot long level
- Brad nails I used 2″ brad nails because both the shiplap and the wood boards were 1″ thick
- Caulking gun
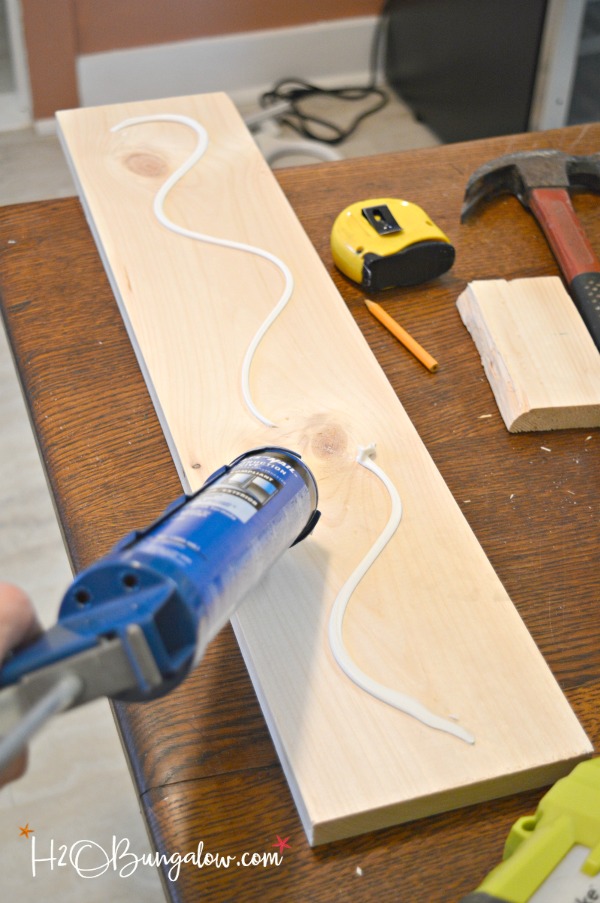
- Construction adhesive that fits in caulking gun. I used approx. 2 per 10 foot wall.
- Caulk
- Paint or stain
- Level
Useful Tips For Installing A Shiplap Wood Accent Wall
As I mentioned earlier, after installing 3 different accent walls of wood in the North House, I have a lot to share. Unless I mention otherwise these tips are for installing both a shiplap or a wood plank wall.
A second set of hands is helpful at times, especially if you’re planning on using long boards. I talked my dad into driving up and helping with the kitchen wall (thanks Dad!), as always I love the time we spend together besides the fact that I learn something new with each father-daughter project we tackle together.
I built the bathroom wall myself and hired local help to install the shiplap wall in the Lodge bedroom simply because I was running out of time on the oversized to do list before I had to head back to Fl.
Tips to install a wood plank wall
Common pine boards will shrink over time. Paint the wall underneath if you don’t want what’s under your wood accent wall to show through. Also, use spacers like nickels or pennies in between each board to get a uniform look if you do want spaces between each wood plank.
The bottom line is, now that I’ve installed a few wood accent walls, I wouldn’t use plain wood planks again unless I were installing a specialty wood accent wall. The others choices, tongue and groove and shiplap look better in my opinion.
Step One: Measure your walls and determine a pattern
Figure out your total wall surface in square feet by multiplying your length by the width of your wall. Decide how you want the boards placed and at what length. In my small bath I used planks as wide as the wall because it was a small space, I had no board seams.
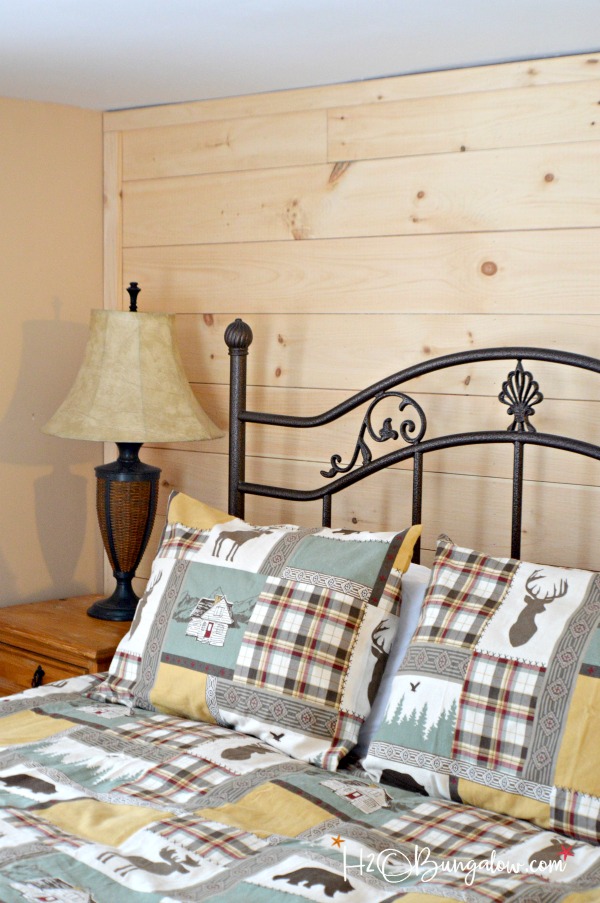
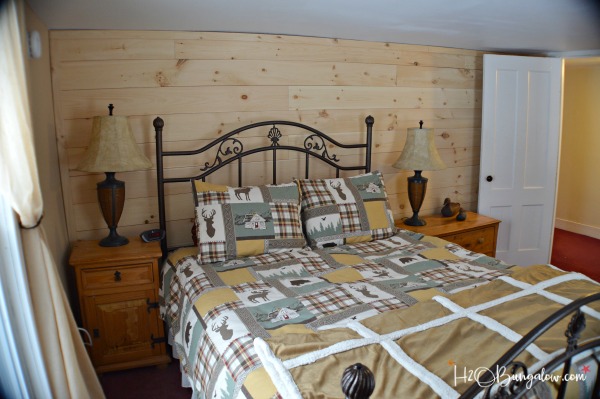
In the Lodge room (pictured below) we staggered the board seams and used long planks (I think 6′). Plan the seam location up front to be sure you’re ordering enough wood. Keeping the board length in mind, add up the number of boards you’ll need and add 10% for waste and mistakes.
Step Two: Locate and mark where the studs are on the wall
Use a stud finder and mark the location of the studs on the wall. Draw a line from the ceiling to the floor.
We were playing around with the board pattern in the picture below and held the boards up with a nail and awe.
Step three: Start at the center
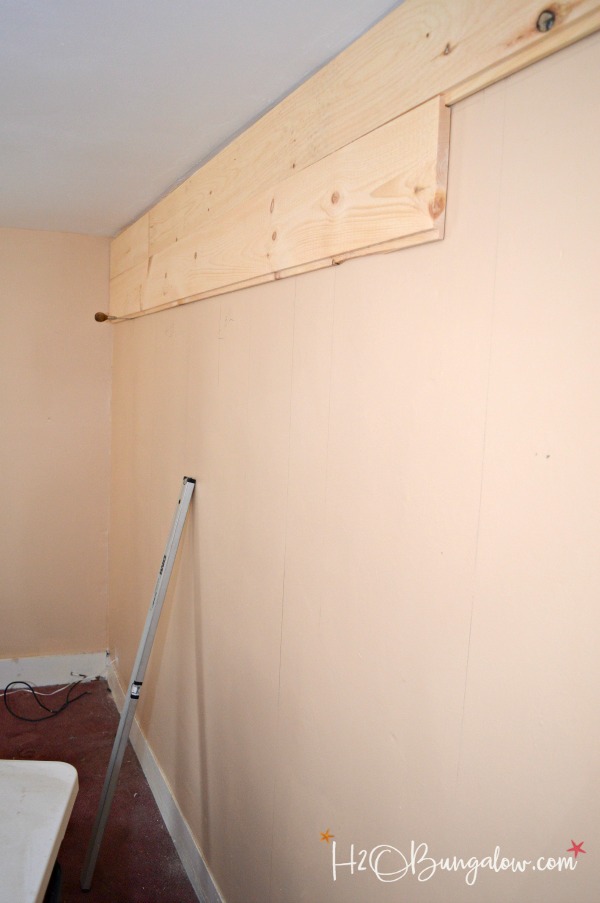
We started this wall at the ceiling. After installing several walls I think it’s easier to start at the bottom unless you are using small boards that are light. Center your first board in the middle. Apply adhesive to the back and attach the shiplap or plank to the wall with a nail gun.
Place 2 – 3 brad nails in a row along the studs with a nail gun. We started at both bottom and the top of the wall on different projects. I liked starting the top the best for looks. I think your eyes travel to the top of a wall, and it’s looks better when the top pieces are the same size as the rest of the boards on the wall.
I’d rather rip (trim on a table saw) the boards on the bottom row by the floor where it’s less visible.
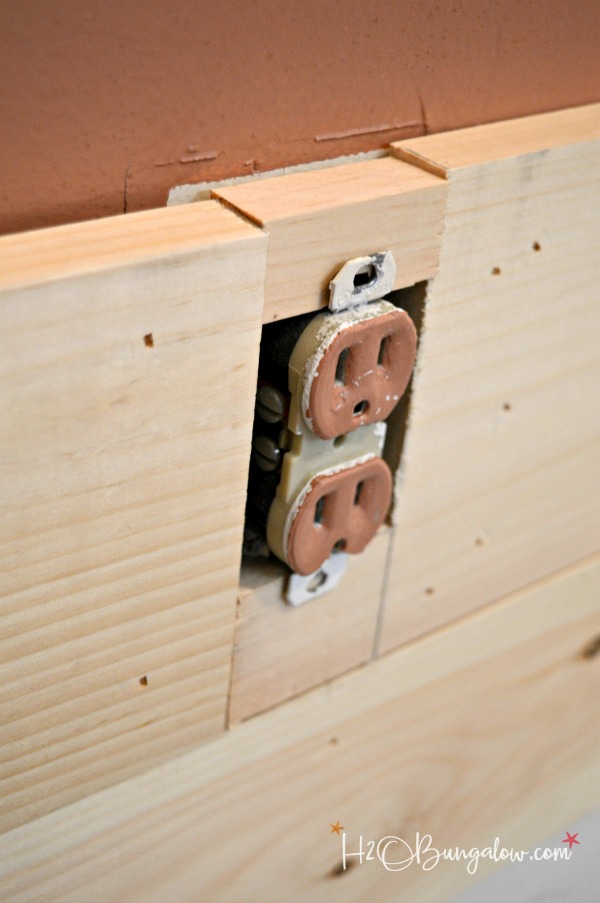
Step four: Work around windows, baseboards and electrical outlets
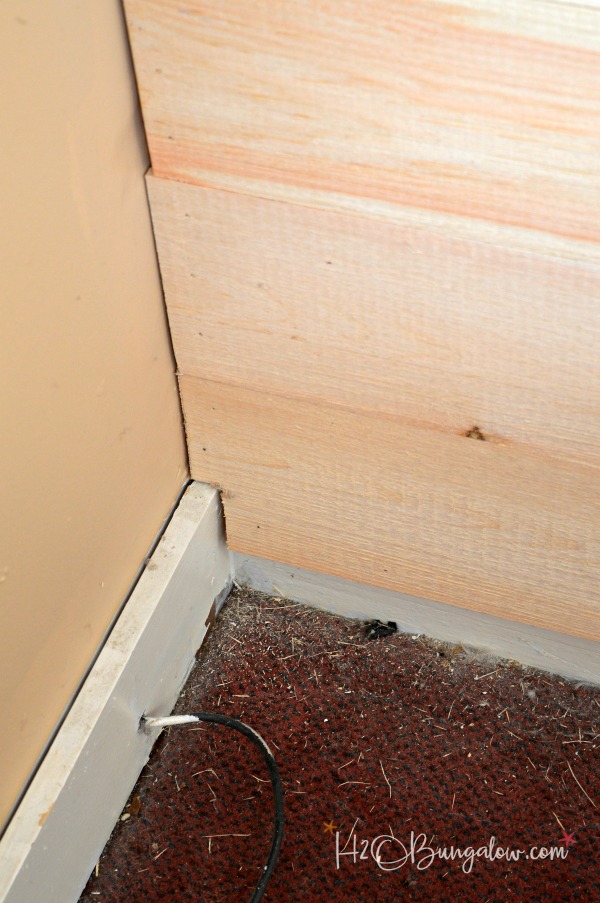
Plan in advance for the items you’ll work around. We decided to overlap the baseboards in the Lodge Room and butt up against them in the kitchen and bath.
We worked around the outlet on the plank wood wall in the kitchen.
Step five: Trim and finish the wall edges
The North House was built somewhere around 1900, the walls and ceilings are uneven which makes it nearly impossible to get a good tight fit to the top of the wall and ceiling. The solution to that was to trim the wall at the corners and ceiling which hid the uneven gaps.
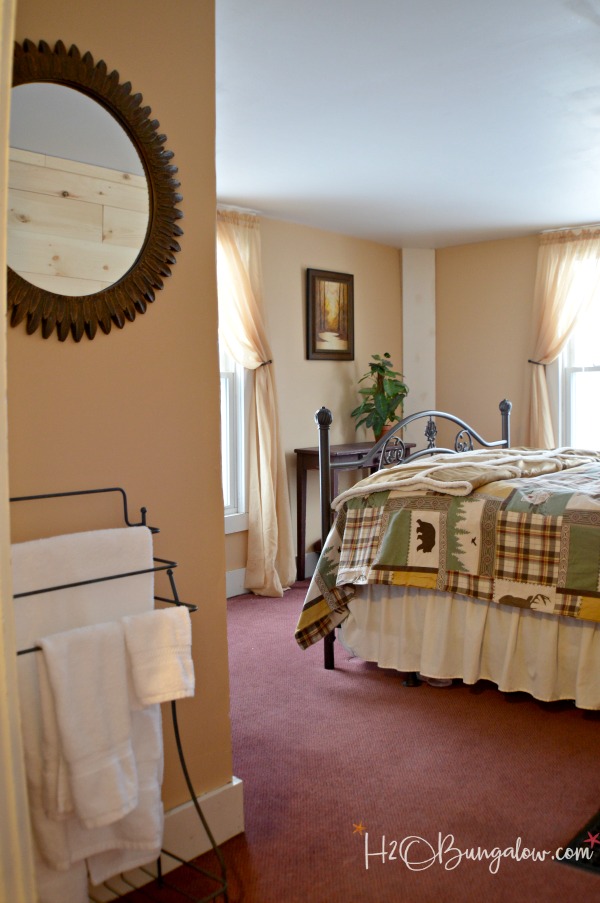
If you’re not planning on adding a trim around the edges be sure to get a snug fit at the ceiling. Yes, I’ve changed out the carpet since I took this picture!
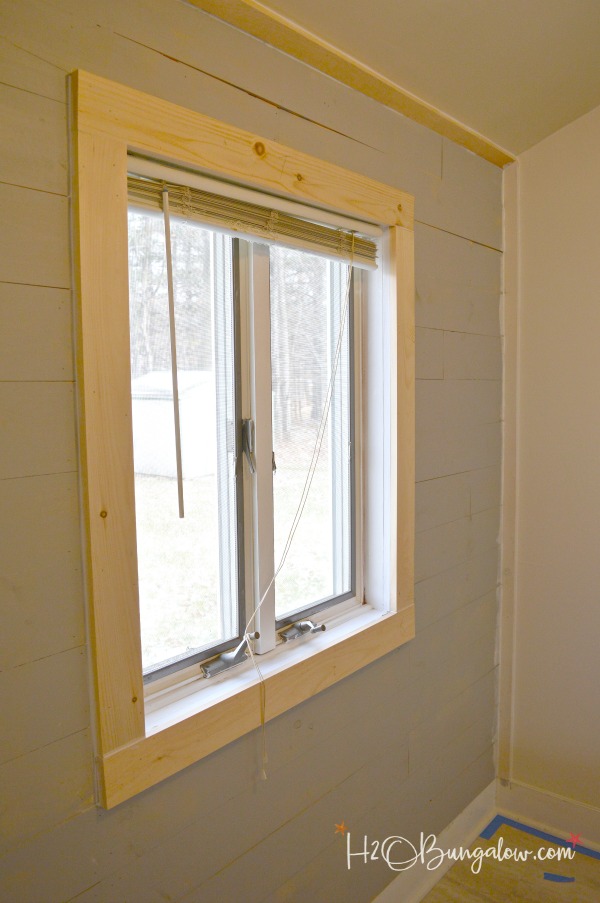
There is a window in the middle of the kitchen wall we were adding planking to. Our solution was to add new trim right over the top of the old trim. It fit perfectly. Since I was painting the planked walls downstairs I caulked the window and edges of the trim before painting.
Pros and cons of using shiplap vs planked wood walls?
To me, the benefit of using shiplap was the uniform appearance. Each board fit with the next like a puzzle piece. All of the spaces are even between the boards. The shiplap was by far easier to use and install too. The grooves keep the boards flush against the uneven walls.
Depending on where you shop, unlike wood planks, consistently finding a quality grade is easier in shiplap too. I loved the shiplap I used in the Lodge Room, it came with a rough side and a smooth sanded side in high quality pine.
We installed it with the rough cut side out. The texture of the rough side was exactly what I envisioned to fit the rustic decor in the Lodge Room.
I’m still not sure if I’ll stain it because I liked the natural color of the wood. I think it compliments the decor don’t you?
How much difference does adding a wood planked wall make?
Alot. Don’t you think so?
Keep in mind I haven’t added window treatments or much decor yet!
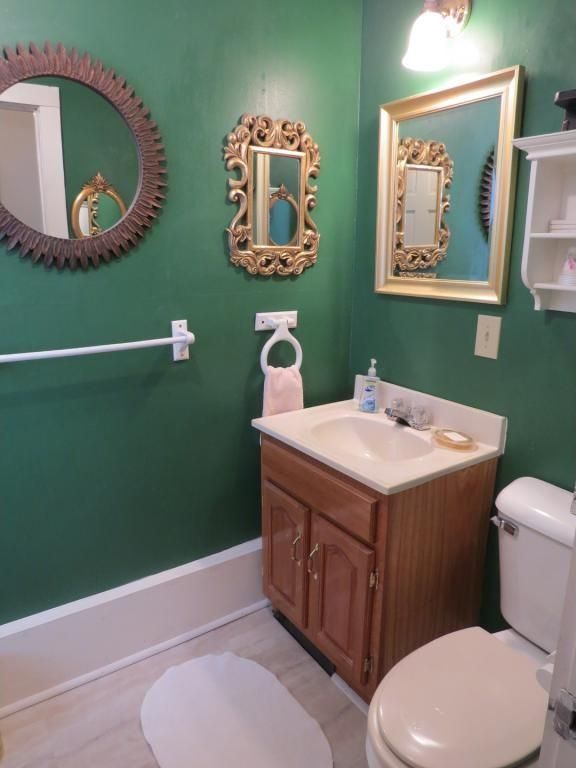
I know many of you have seen this half bath before picture, but for those of you who are new…
The makeover turned out fabulous!
When would I choose wood planks over shiplap for walls?
I probably won’t use common boards again for a wood planked wall. Shiplap is too easy to use with nice straight lines. I would choose wood planks for a wall if I were using the 1/4″ decorative premade wood planks or pallet wood. They would be perfect for a wall that couldn’t hold much weight or you wanted the cool look of the different color & textures that these come in.
I know this post is crazy long…so sorry! I simply felt that if I’d had all this information before I started the projects would have been easier. That’ my job, to share the good info with you guys… So now that you have it, be sure to pin it to keep it handy for when you too tackle a wood accent or DIY shiplap wall:)
Shiplap vs planked wood walls, which one would you choose and where would you put one in your home?
You may enjoy and find these other projects & posts helpful too!
I added DIY Interior Wood Shutters to my studio in Fl.
Genius Painters Tape Tips For A Perfect DIY Paint Job
The North House Lodge.. what’s a Fl girl doing in VT?
DIY Rustic Headboard out of Shiplap
How to Make a Pallet Wood Wall
Install a DIY Wood Accent Wall out of Shiplap, Tongue and Groove or Wood Planks
How to install a DIY wood accent wall out of shiplap, tongue and groove or wood planks
Materials
- Wood plank accent wall material. Shiplap, tongue and groove or wood planks
- Brad nails I used 2" brad nails because both the shiplap and the wood boards were 1" thick
- Construction that fits in caulking gun. I used approx. 2 per 10 foot wall.
- Caulk
- Paint or stain
Tools
Instructions
- Figure out your total wall surface in square feet by multiplying your length by the width of your wall. Decide how you want the boards placed and at what length. Plan the seam location up front to be sure you're ordering enough wood. Keeping the board length in mind, add up the number of boards you'll need and add 10% for waste and mistakes.
- Use a stud finder and mark the location of the studs on the wall. Draw a line from the ceiling to the floor.
- Center your first board in the middle. Apply adhesive to the back and attach the shiplap or plank to the wall with a nail gun. Place 2 - 3 brad nails in a row along the studs with a nail gun.
- Plan in advance for the items you'll work around like windows, baseboards, and electrical outlets.
- Add trim to the wall at the corners and ceiling which to hide any uneven gaps.
- Paint or stain as desired.

Ande says
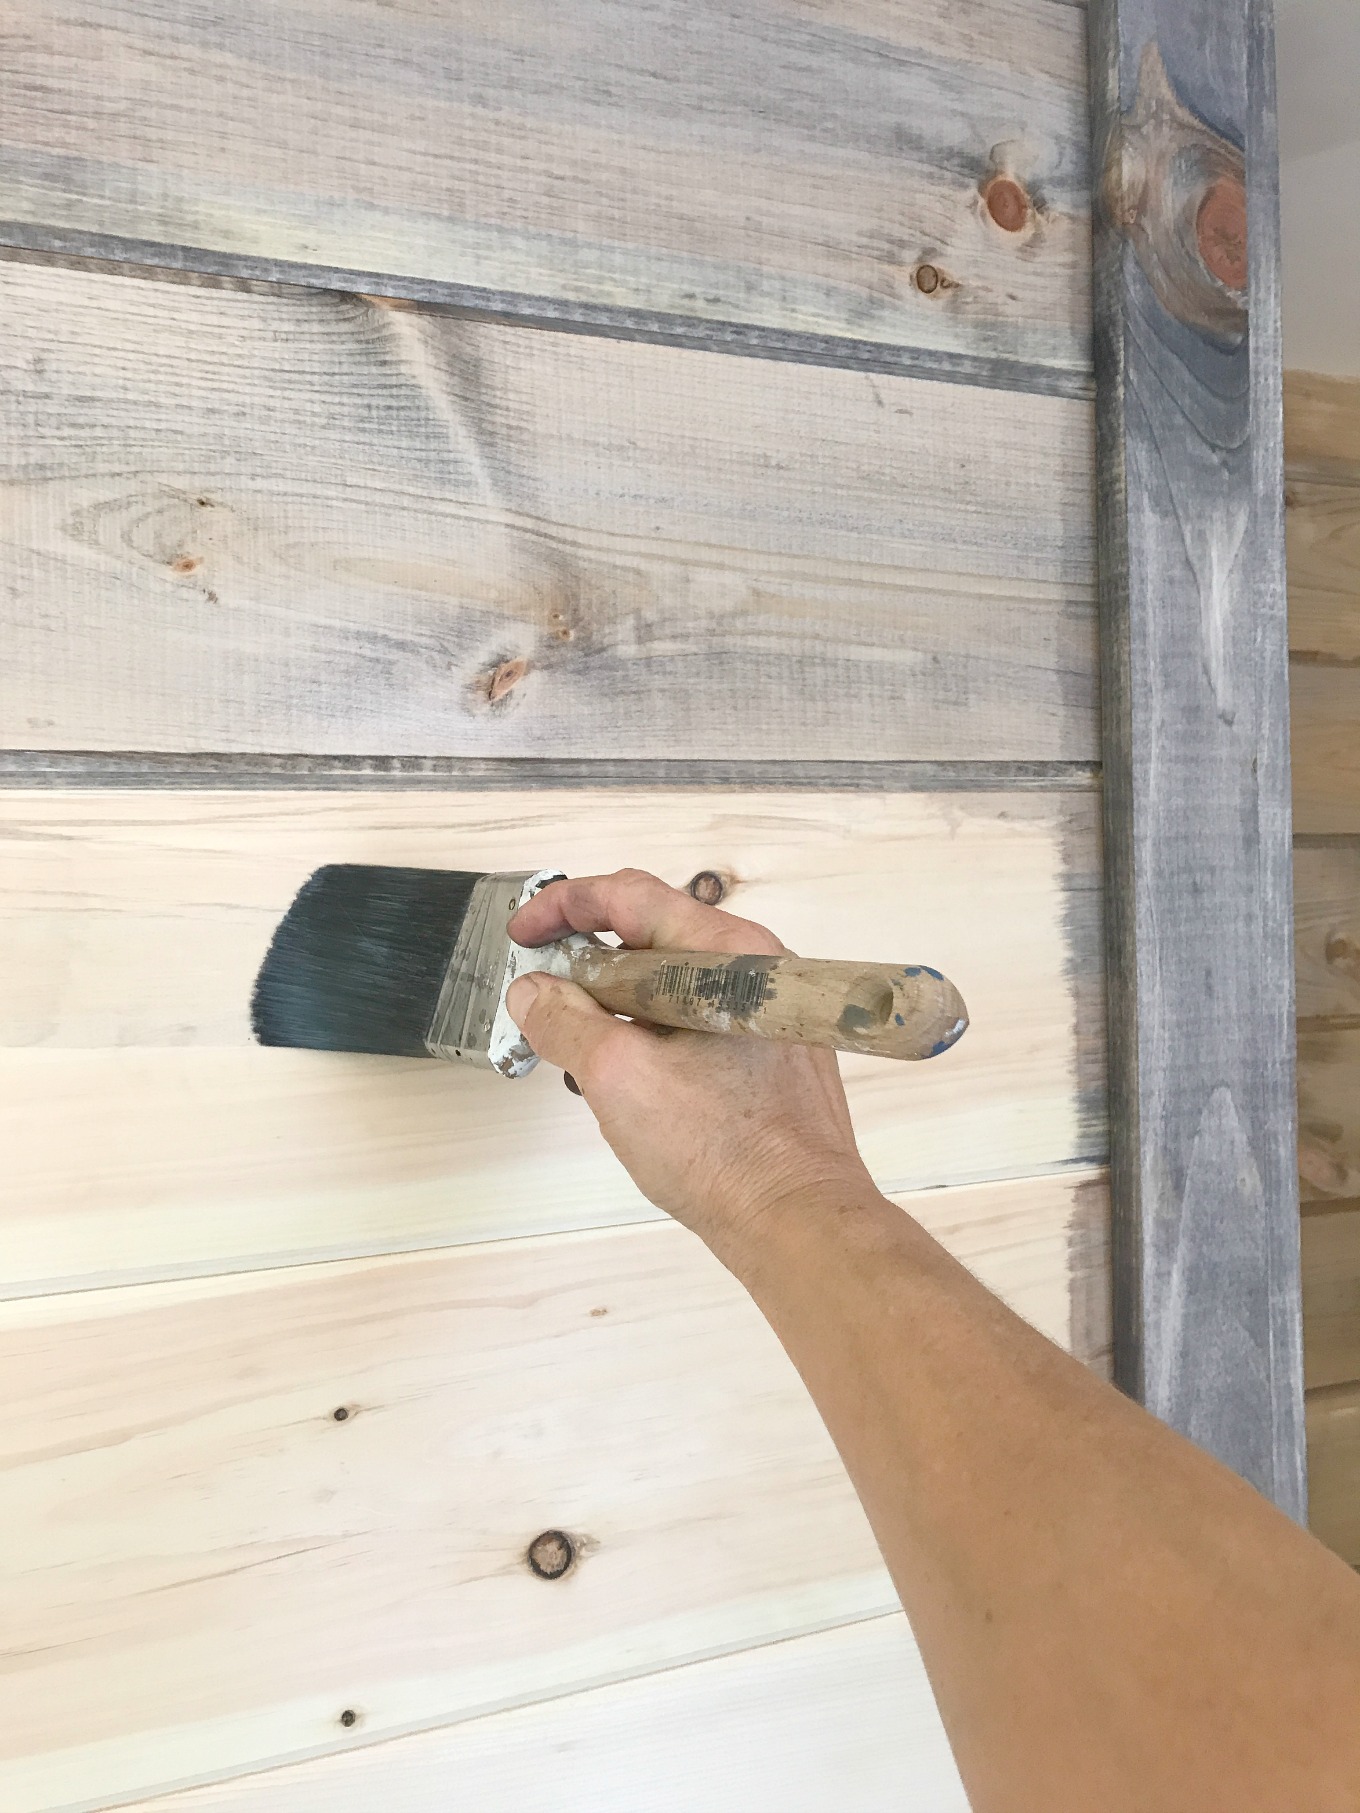
Hello! I know this project was done over a year ago, but I was hoping you could tell me what stain you used in the main photo? It looks gray? I love it. I’m also curious if there were any tricks you used to get that color, possibly another coat? Any help is much appreciated. Very nice article:)
Wendi Wachtel says
Hi Ande,
I’m glad you liked my article on shiplap and plank walls. Here’s the one that has the satin you were asking about. I do talk about layering in this one. I love to layer finishes although on that wall I didn’t. You’ll see I show a gorgeous example of two stains layered. https://h2obungalow.com/ways-to-age-weather-wood-comparison
Thanks for your visit!
Dianna says
I loved your post. I have been working on some bedroom walls in our house and left space at the bottom for some old wide baseboards that I found. They are both knotty pine but the baseboard has been stained dark. I have been wondering if I should just take the shiplap all the way to the floor and use a trim like I use for the sides and top. I would love to know what you think.
Wendi Wachtel says
Hi Dianna!
Thats a very good question! I think shiplap to the floor would look great too. That’s the super thing about wood walls, they are versatile when it comes to design! Thanks so much for your note and good luck with your project!
Vicky says
I am getting ready to start my project over the top of a hearth. The walls are 45 1/2”. I will be hanging 6” ship lap (tongue and groove). With a 3” border, one board will be less than 6”. Should that board be on the top or bottom? I could leave off the bottom border and just have the board on top of the brick.
Wendi says
Hi Vicky,
I’d probably put the trimmed board on the top next to the ceiling. You want the perfect boards to be down where your eyes are. Good luck and have fun with your project!
T Stoner says
Great work and wonderful results, congratulations. Please don’t take this next comment negatively, but there is a safety issue on the electrical outlet. From the picture it appears you simply pulled the receptacle out from the box and mounted it on the wood. If indeed that is accurate it would be out of code as it is a fire hazard. The recepticale must be contained inside an approved electrical box to prevent combustible materials from being in contact with electrical components. To solve this, pull the electrical box out from the wall to flush up with boards or add a box expander on top of the wall mounted box (inexpensive and easy to get from any big box store), then mount the recepticale to it. Either of these approaches prevent contact with combustible material.
Wendi says
Hi T Stoner!
Thanks so much for your note and I’m glad you liked my wall. We love it too. I actually disconnected the electrical outlet all together, capped off the wires and the wall switch. I thought of using an extender but I didn’t use the outlet on that wall and just did away with it. Your info is helpful for others though. I probably have readers with outlets they want to use on their own walls. Thanks for sharing. I should point that out in my post!
Tommy says
Wendi. I have a question. When you installed the shiplap. At the top of the ceiling. And the edge on bottom. My question is what part did you nail. After I saw your install. Did any boards roll over
Wendi Wachtel says
Hi Tommy!
That’s a good question. I’m not sure I understand what you mean by roll over so I’ll just explain how we did it. I shared several walls in this post. When we used actual shiplap we just attached the final board at the top like the rest were attached the the wall. We ripped the last board down in size to butt up against the ceiling and nailed the boards directly to the wall. Then, we trimmed out the ceiling and sides which covered the edges. I hope that answered your question! Please let me know if it didn’t. Thanks for your visit!
Gayleen Carpenter says
Found your blog and post on shiplap vs. planked walls as I’m wanting to tackle this project in my modern craftsman home in Colorado! Your post was SOOOO helpful! It’s really nice to read detailed information to get educated before you buy supplies and just wing it! Any your pictures are great too. Thanks for the great info!
Wendi says
Hi Gayleen and thank you so much! I’m so glad my post was helpful! It was all a mystery to me before I started using wood walls as decor. It’s nice to find out that it’s not so complicated once you have a bit of info. Enjoy, and thank you so much for leaving such a great note!
Monica says
Your tongue and groove wall…what size
Trim did you use around the edges?
Wendi says
Hi Monica,
i’ve worked on several plank walls in this post but, the one we used the most was 1″x 2″. I hope that helps! Good luck with your project!
Melinda says
I am a rookie home project tackler. Just had my shiplap boards delivered today – and I have a zillion questions. Your post has helped answer some of them – so thank you! Will I have any problems hanging this on a plaster wall? My house was built in the early 50’s – so all of my walls are plaster.
Wendi says
Hi Melinda! I am SO glad you asked that question before tacking your project! If your walls are plaster like ours are in FL, which is the old plaster walls in a stucco and block house, you may not have wood studs. You may have furring strips like we do. If you can locate studs in your walls, you’re fine. Mark the stud line and go for it using a brad nailer on the studs to attach your wood. If not, you may want to add 3/4″ studs onto your walls so you’ll have something to attach your nails to. That way you can also take it down if you ever get tired of it. You can also use a construction glue like liquid nails on the wall and shoot your nails directly into the plaster wall. Keep in mind if you take down the wood, you’ll wreck havoc on your walls and need to do drywall repair. I hope this helps and have fun!!
Melinda says
Thank you for responding so fast and thank you for all of your help!
Wendi says
You’re welcome! So happy I could help. I hope it all turned out beautifully!
Kpea says
What about cost wise? Is regular plank boards that much cheaper that it may benefit Going that route if you didn’t want to pay extra for the tongue and groove?
Wendi says
That’s a good question Kpea! I thought the same at first, but the tongue and grove was about the same cost as the planks. Tongue and groove looks better in the long run. And the seams are a lot more even. Both look great overall, depending on the look you’re trying to achieve. Thanks so much for your visit and good question!
Van W. Stewart says
Thanks for the informative tutorial and photos. The work is beautiful and no doubt is a great source of pride as well as enjoyment for you and your family.
You may have already discovered this but shiplap is also known as carsiding because it was commonly used in the construction of railroad boxcars.
Thanks also for highlighting the differences between planks and shiplap. Due to the recent popularity of shiplap it seems its becoming a generally used word for anything from beadboard to tongue and groove siding. The loss of distinction drives woodworkers crazy and I’m glad you’ve taken the time to understand the differences.
Thanks again!
Wendi says
Hi Van, and thank you so much for the nice compliment on my post. I did read that shiplap is also known as carsiding, but not the reason why, so thank you so much for sharing your knowledge! I tend to be a stickler on terms, and my Dad lectured me on those for a long time as I was talking about tackling these projects. Again, thanks for taking the time to leave such a nice note and your visit to my blog project!
paul says
Thanks for the great info!
I love that comforter you have! I was wondering if you could tell me where you got it from?
Thanks
paul
Wendi says
Hi Paul, I fell in love with it too. It was perfect for the lodge theme of this room. I think I found it at Kohls online and had it shipped. Shopping is scarce in Ludlow and the surrounding areas so internet shopping was my best bet for themed linens. I hope you find one!
BonBon says
Thanks for sharing this great information at Inspire Me Monday link party. I wanted to let you know that you are one of my featured picks this week
Wendi says
Hi BonBon… I just found your note in my spam folder! Wanted to drop you a quick note to say thank you so much for featuring my project! Thanks so much for hosting the party, I know how much work it is!
Sara @ finditfixitorbuildit.com says
Thanks for sharing this awesome tutorial with us at the Home Matters Link Party! With so many people wanting to do something like this to a wall in their home, this is very helpful. Hope to see you at the party again next week! Following you on Pinterest:)
Wendi says
Hi Sara, Thank you and following you back! I learned so much about planked walls on these projects! If I’d have had a few of the tips I shared before doing my projects I probably would have made a few different choices. I would have saved time if nothing else! LOL.. Thanks so much for your visit!
Angie ~ ambient wares says
Great information, Wendi! I had no idea there was a difference at all. Thank you for sharing this with us at Funtastic Friday! Pinning & sharing
Wendi says
Hi Angie and thank you! I knew there was a difference but wasn’t sure what it was until rolled up my sleeves and tackled a few of these projects. Thanks so much for hosting your fun party!
Angie @ Knick of Time says
Great info. Wendi. We’ve done both in our home, but I tended to use the terms interchangeably, not really knowing the difference between them.
Angie @knickoftime.net
Wendi says
Thank you Angie! I wasn’t sure about the difference..then again the most important item is whether or not you love your walls! Thank you so much for your visit!
Nancy says
I love the shiplap and planking (however it is called)….
Nancy
wildoakdesigns.blogspot.com
Wendi says
Hi Nancy and thank you! I love it too and exactly…no matter what the name! Iy was easier to install than I thought it would be too. Thanks so much for your visit!
Marie from The Interior Frugalista says
I didn’t find this post too long at all because it was chalked full of valuable information. I’d love to add ship lap over our popcorn ceilings. After reading this, my focus will probably be on shiplap because like your VT house, ours is an older home with uneven walls. Girlfriend, I cannot believe how much you accomplished in such a short time. The walls look amazing and add so much character to each room. Perfect choice for a rustic ski lodge home. I hope you’ve been doing some relaxing in the sun since your return to Florida, it’s certainly well deserved.
Wendi says
Hi Marie! I love the idea of shiplap on a ceiling! Especially to cover popcorn. Trimming the edges made perfect sense for these projects and it made the jobs go much faster since we didn’t need to measure down to the 16th of an inch in exactness. Yes, I did get a lot done and am getting ready to do more:) Heading back next week for another burst of makeovers! Thanks so much for sharing that my post wasn’t too long!
Patty says
It doesn’t matter to me shiplap or plank, I love them both and they just add so much to a home. You have done a wonderful job Wendi, everything looks beautiful.
Wendi says
Hi Patty :)! Your comments always make my day! The wall projects were fun and I’d wanted to try shiplap/plank walls for the loooongest time. Now I have to do a wall at home so I can enjoy the new skill! I’m back to VT next week to work on the upstairs bath & a few little things. We’ll see how many projects I can squeeze into 8 days. #whoneedssleep
Clarke Schneider says
I believe that shiplap and carsiding are two names for the same cut. They can also be run vertically.
Wendi says
I’ve read that too Clarke, that shiplap is also called carsiding. What a funny name too. Good point on installing planks vertical as well. I’ll add that to my post 🙂 Thanks so much for your visit & comment:)
Allison says
Technically speaking, shiplap and car-siding are two different laps. Shiplap has a rabbet joint – in simplest terms, that’s an L-shaped cut along one long side /length of a board “lapped” over or under an adjacent L-shaped cut on the next board – one board “laps” over the next.
Car-siding is true Tongue-and-groove. One board has a U-shape cut out – a “groove” – that the “tongue” (3-sided joint – think of your own tongue when you stick it out flat) of the adjoining board fits into. Each board has a “tongue” along one edge and a grove” on the other. In true car-siding the tongue and groove are more of a deep-b or a teardrop.
The product was originally used as, and called, boxcar siding..
So, there you have it. 🙂
Wendi says
Hi Allison…and thank you SO much for your note! It’s difficult to get good information at times because so many resources have and share incorrect information. That includes people at stores. I’m editing my post to update the descriptions. I have a few more plank wall posts from the North House that I haven’t shared yet that are done in car-siding. I love how they look. The 2″ planks are what is used to build horse stalls too. Anyhoo, thanks so much for your note & the time you took to write it. Please visit again!
Bliss says
Years ago before the dawn of time, we had smooth cedar on a ceiling. Back then in our neck of the woods the tongue and groove style was called car siding or box car siding, or as my husband still says, “just tongue and groove”. Now a days if we go to the lumber yard and ask for tongue and groove we get asked what kind of tongue and groove.
Wendi says
So true on the tongue and groove! That’s still how Home Depot classifies it too in our area. You’re the second person to mention car siding as a name ad I’d read that as well. I hope it stays in style, I’ve always been a sucker for a wood wall! So glad you stopped by & thanks for leaving a comment 🙂
Julia says
Great post Wendy! I prefer the look of the shiplap. I think it looks rustic but cleaner. Can’t wait to try it.
Wendi says
Hi Julia! Thank you. I didn’t intend for the post to be novel, but there was so much information to share and I had so many pictures of what I was talking about. I guess that’s what happens when you combine 3 DIY projects into one post! Now that I’ve done both types of plank walls, I prefer the shiplap too 🙂 I hope the info I shared will be useful for you when you do a wall too! Thanks so much for your visit and note!
Ivory says
Wow, I love what you did, and your tips are very helpful, because I wanted to do this to my son bathroom, but fearful to give it a try. Thanks to you now I think I will be able to do this.
Wendi says
Ivory…You can totally do this project! Seriously, it wasn’t hard. I’m so glad my tips helped you out and gave you some confidence to tackle your wall. Let me know if you have any questions I can help with and have fun! Thanks for your visit & comment!