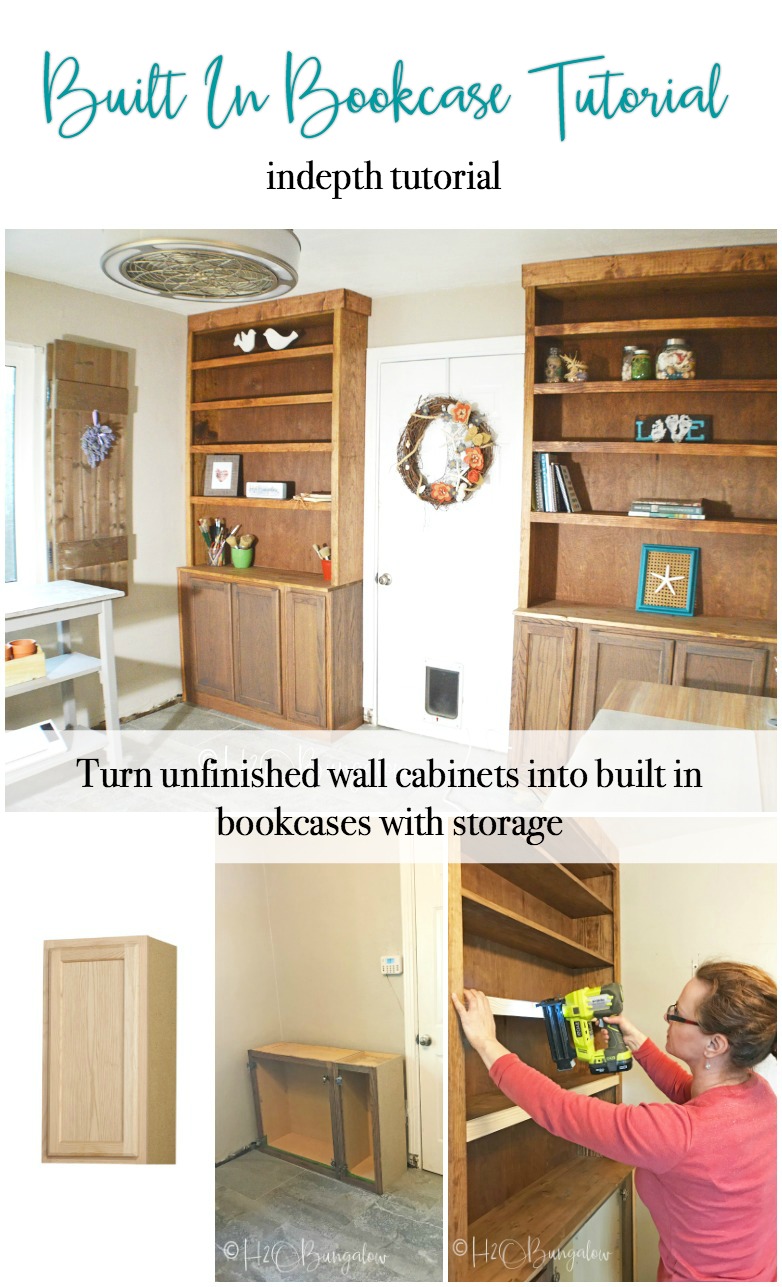
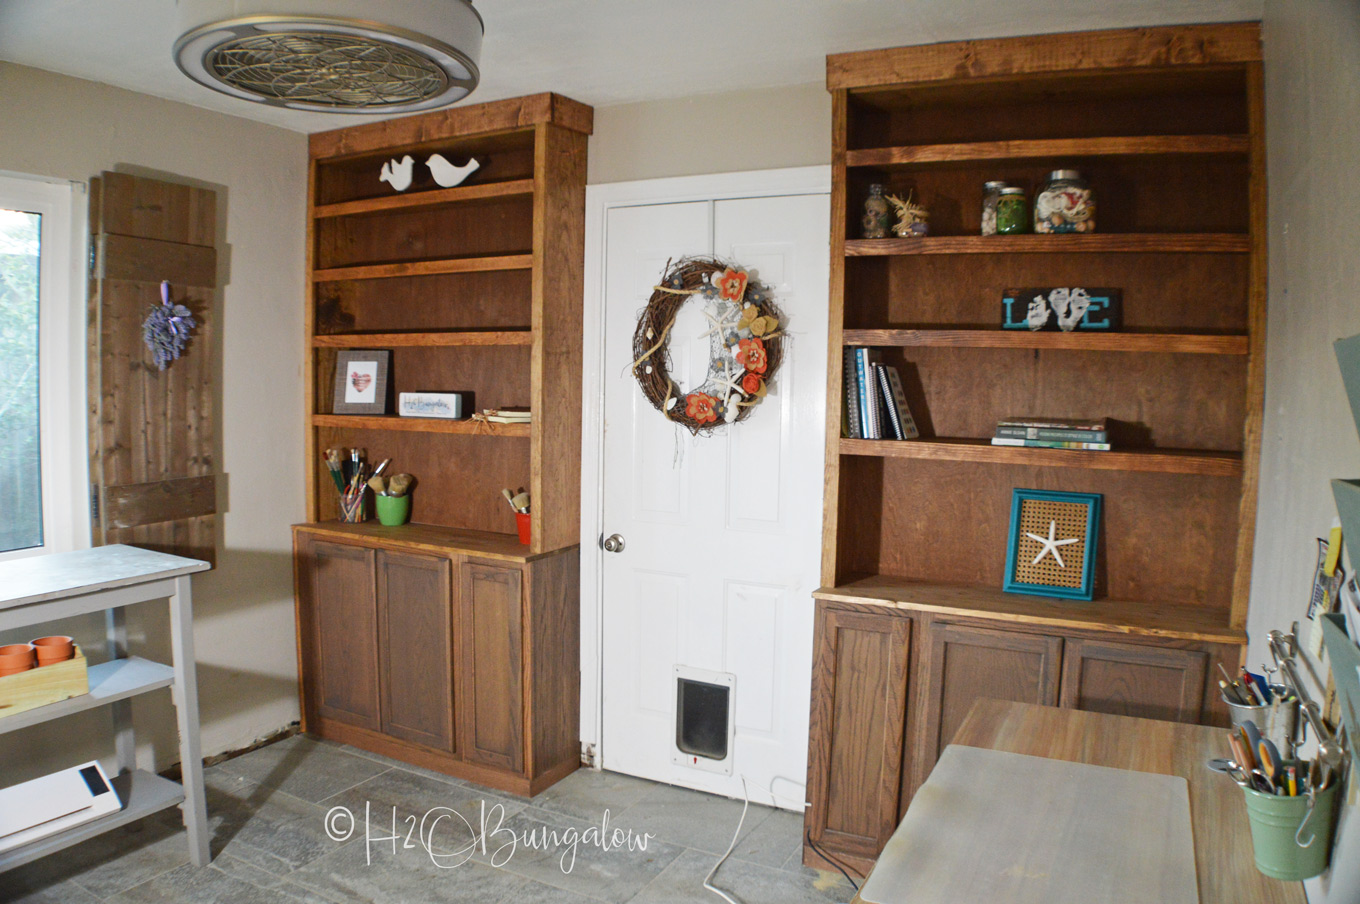
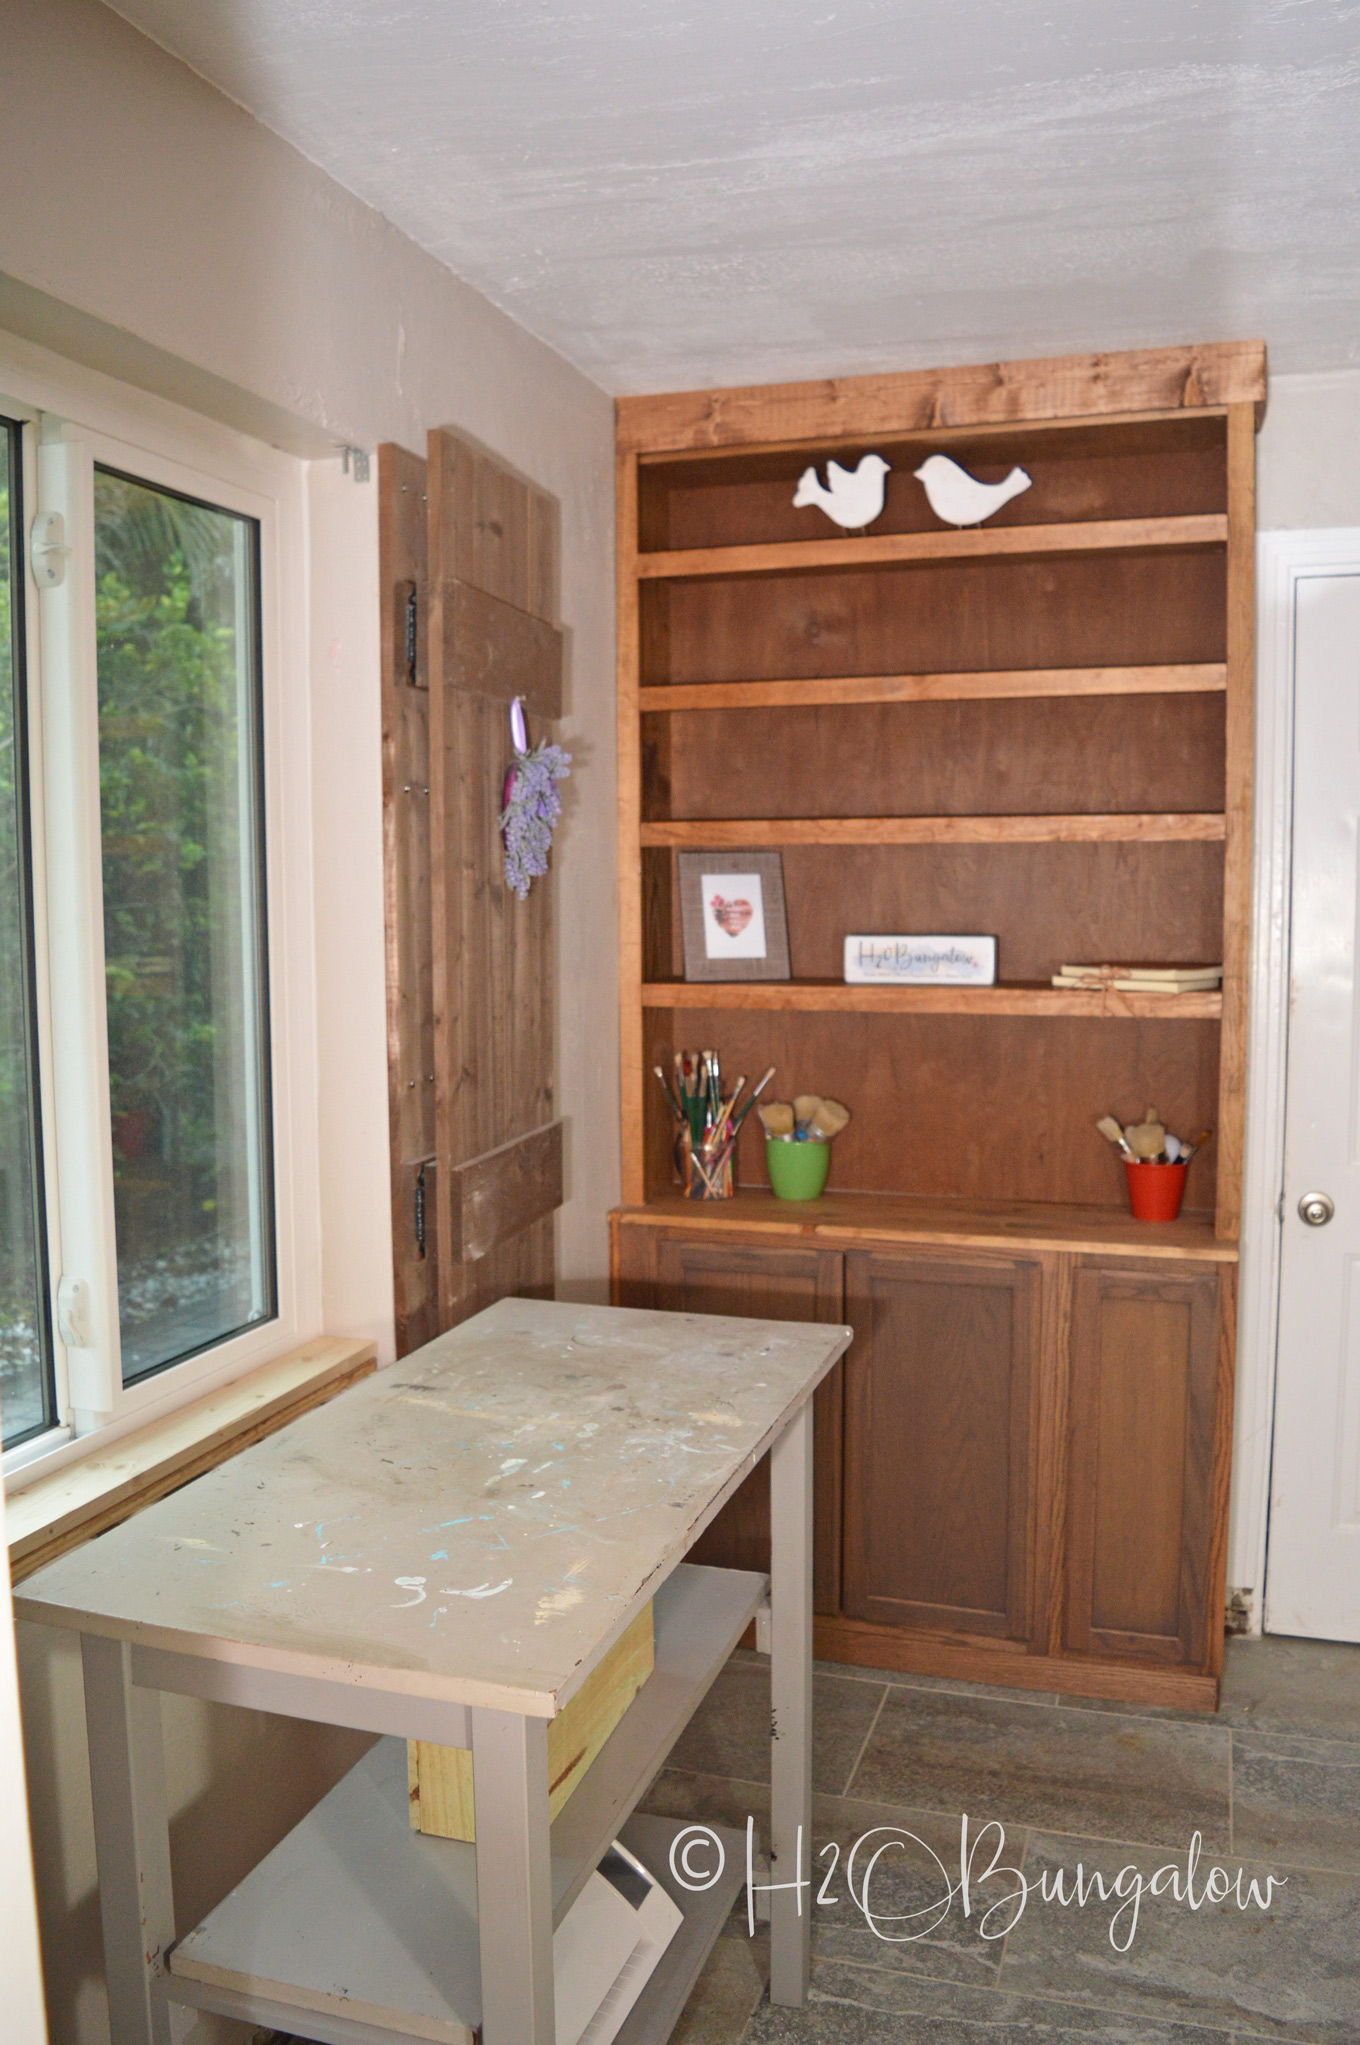
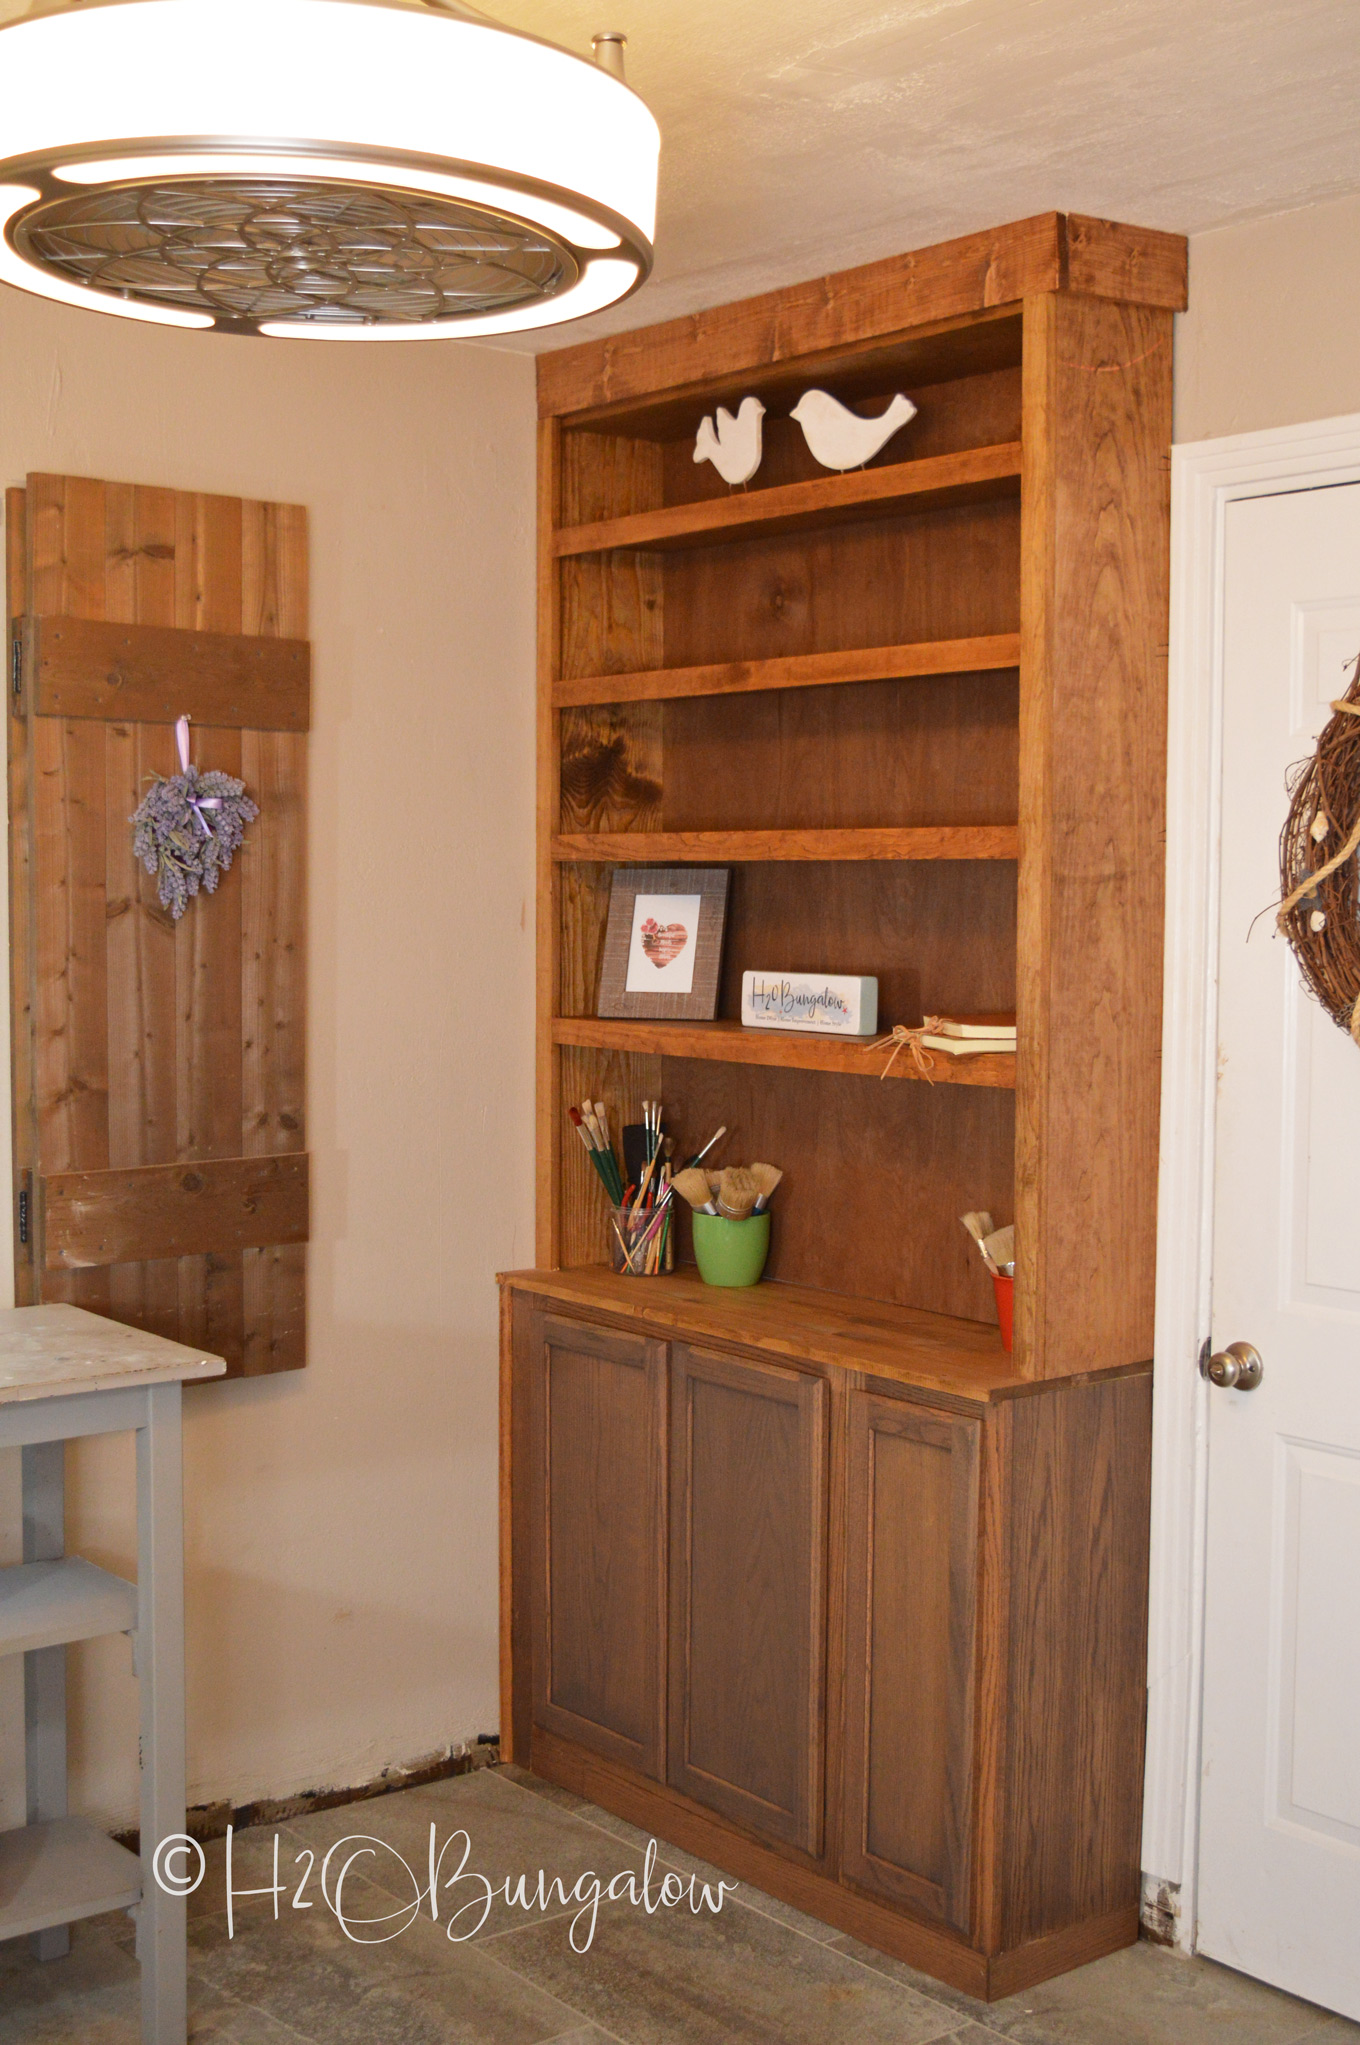
Todays project, how to build built in bookcases with cabinets is a biggie and has been one of my top posts of the year and also one of the many Creative DIY Shelving Ideas I’ve shared on the blog. But, if you need storage and want to make custom DIY book cases or want to know how to make built in bookshelves this is the tutorial for you. These two bookshelves with storage cost me under $400 to make!
I love using shelves for decor and storage. Especially in our small home. I made these DIY Industrial Shelving with 2″ thick wood slabs fI found at the local lumber mill. If you’re short on space and want something really cool looking for shelves, check out my DIY Repurposed Picture Frame Wall Shelves, They are a favorite! I made these DIY Reclaimed Wood Kitchen Shelves in the kitchen and the bathroom at the North House and they look great!
The savings alone was motivation enough to tackle building my own bookcases with storage!
I use affiliate links to help you find the supplies I used. You can read my full disclosure policy here.
DIY Built In Bookcase Tutorial
Supplies needed to build built in bookcases with cabinets
- unfinished wood wall cabinets, 15 and 30 inch I used these cabinets Looking back, I’d use these from Home Depot if I were to build DIY built ins again.
- 2- 12 x 30″ unfinished wood end panels
- 1 x 10″ boards for the shelves
- 2 x 3″ wood for the base
- 14 x 48 x 1″ board for the base top – Home Depot or Lowes has a variety of choices
- 1/4″ plywood for the shelf backing
- 1 x 6″ pine board for trim
- 1/4 x 2 1/2 x 36″ oak trim for wall to base trim
- Choice of additional trim if desired
- Gorilla Glue Construction Adhesive
- brad nails
- Kreg 1 1/4″ pocket screws
- wall anchors
- L brackets
I used these tools to build my DIY built in bookcases
- Ryobi 10″ table saw
- Ryobi 10″ miter saw
- Ryobi One + drill
- Ryobi One + jigsaw
- Kreg K-4 Jig
- Kreg clamp
- Ryobi One + random orbital sander
- extra clamps
- Ryobi Airstrike One + brad nailer
- 3 foot level
- combination square
How to Build Built In Bookcases With Cabinets
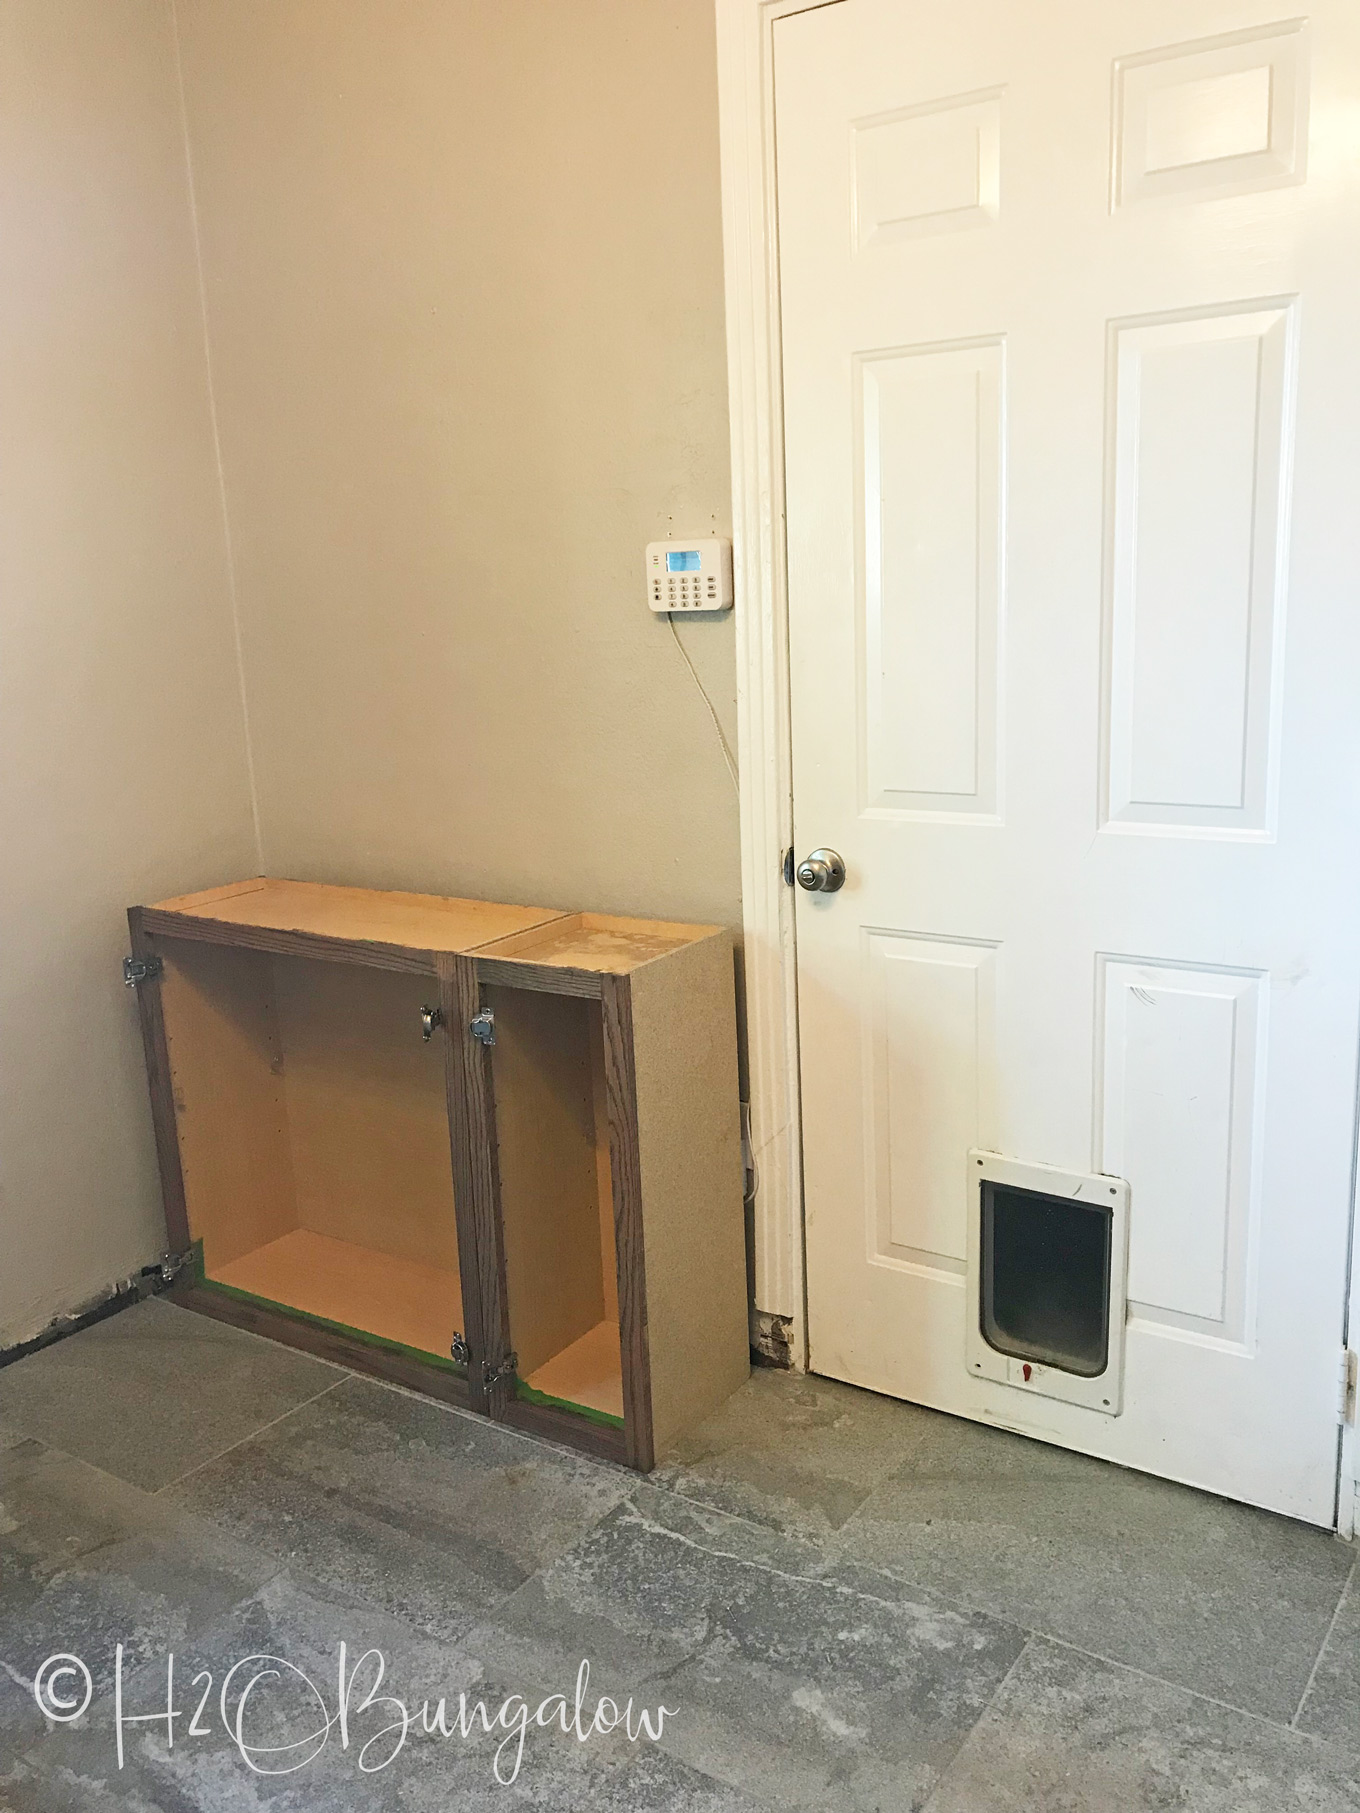
I used unfinished wood wall cabinets as the base for my built in bookshelves. They come in several sizes. I used a 30 inch and a 15 inch wall cabinet for each side of the door which gave me a 45 inch built in bookcase on each side of my door.
I prepared the area for my new builtins before I started to build them. I had an electrician move an electrical outlet and I removed the baseboards.
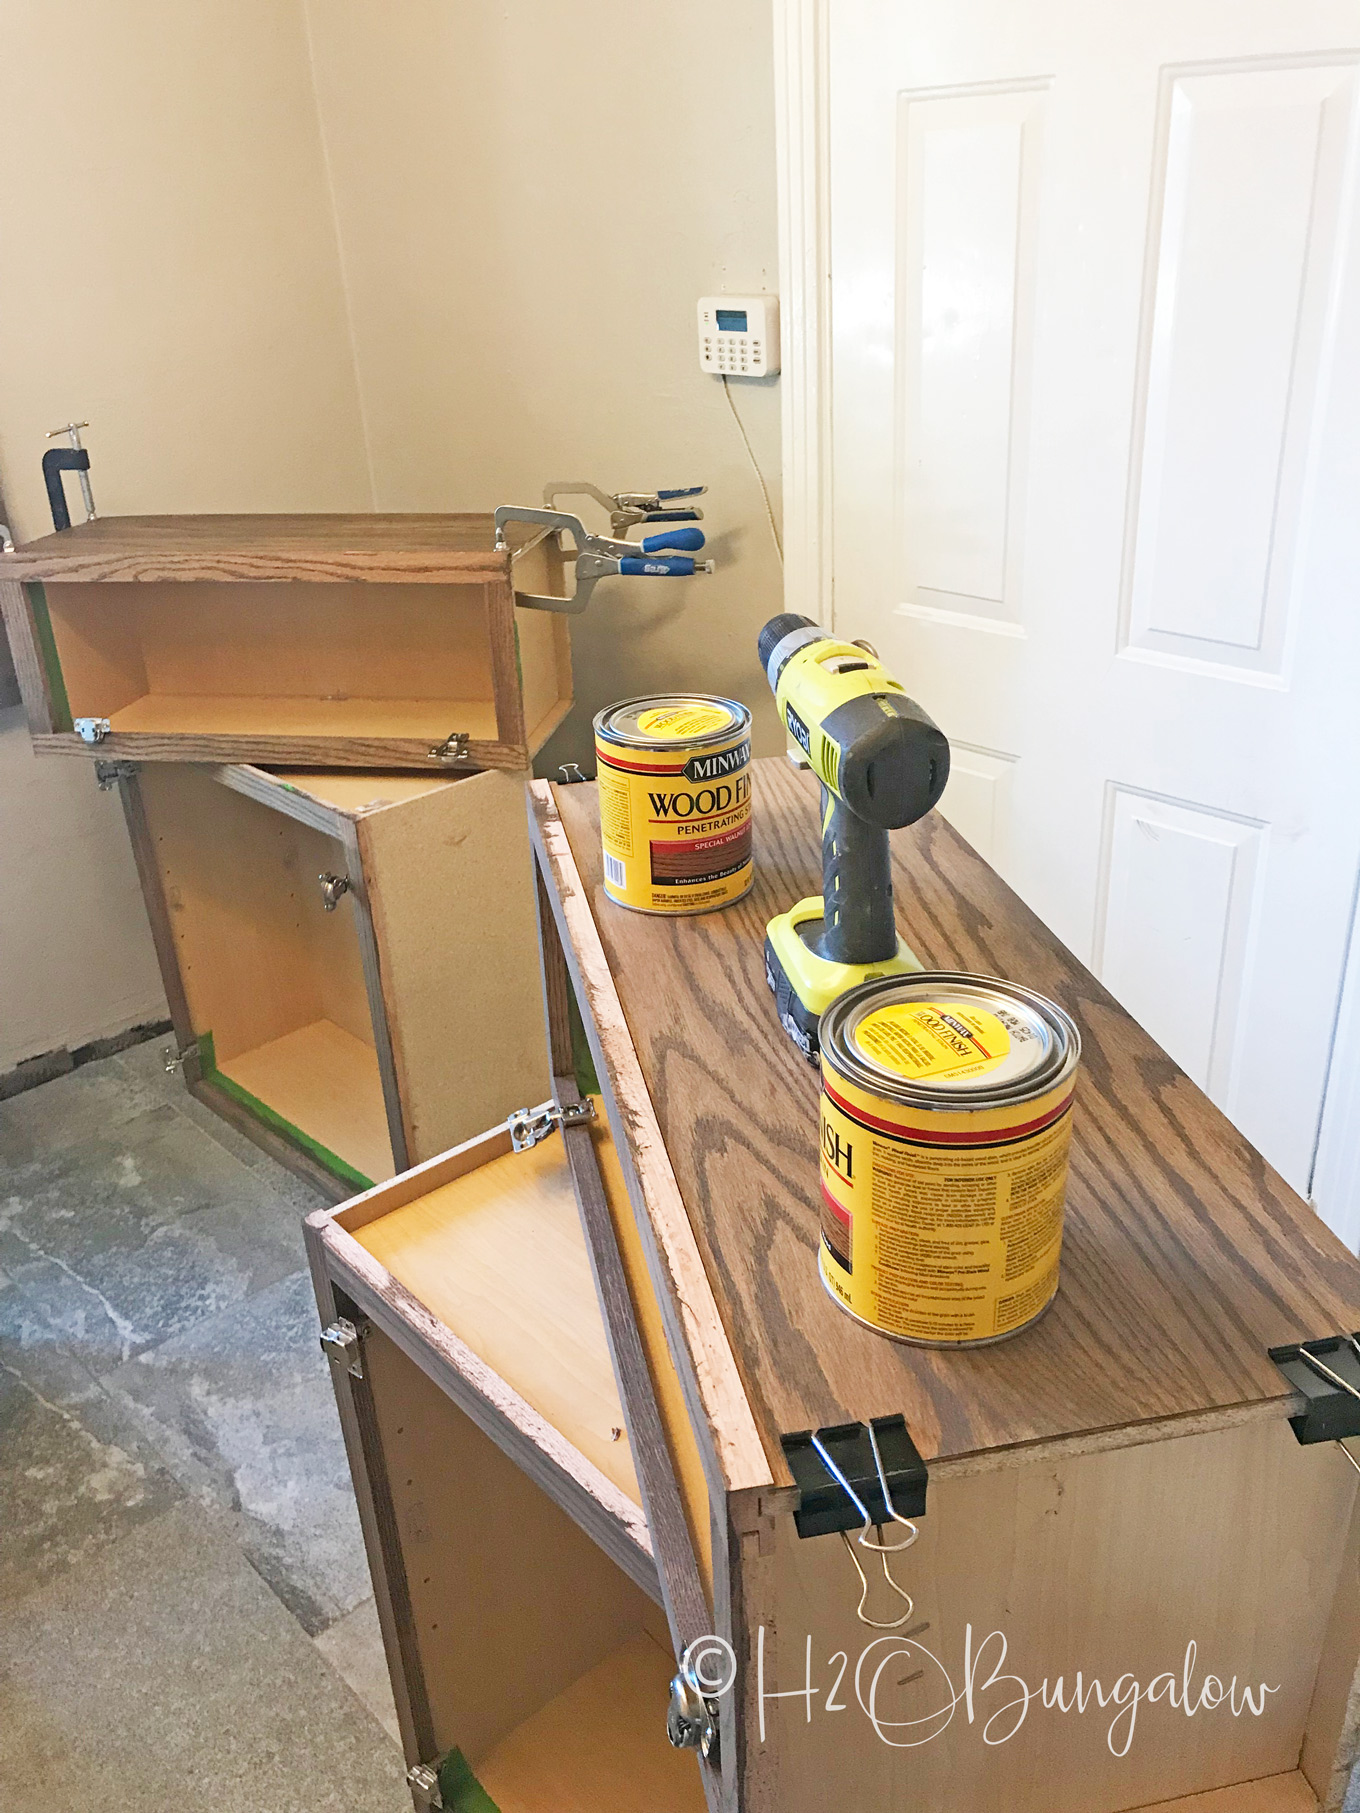
This is also a good time to talk about the finish you’ll use on your DIY built in bookcases. It’s easier to prestain or paint your pieces before they are assembled. I had the perfect finish in mind for my new DIY builtins…unfortunately, I didn’t like it once I started and scrapped the idea. That is why you see some of my book case pieces unfinished. I’m planing on refinishing my bookcases at a later date.
#1. Remove the cabinet doors. Put the doors aside and screws into a container.
Step #2 – Glue on end panels to the side of the cabinet that will face out. Use clamps to hold the panels in place until it dries.
Tip~ Metal office clips work great in place of clamps in a pinch 🙂
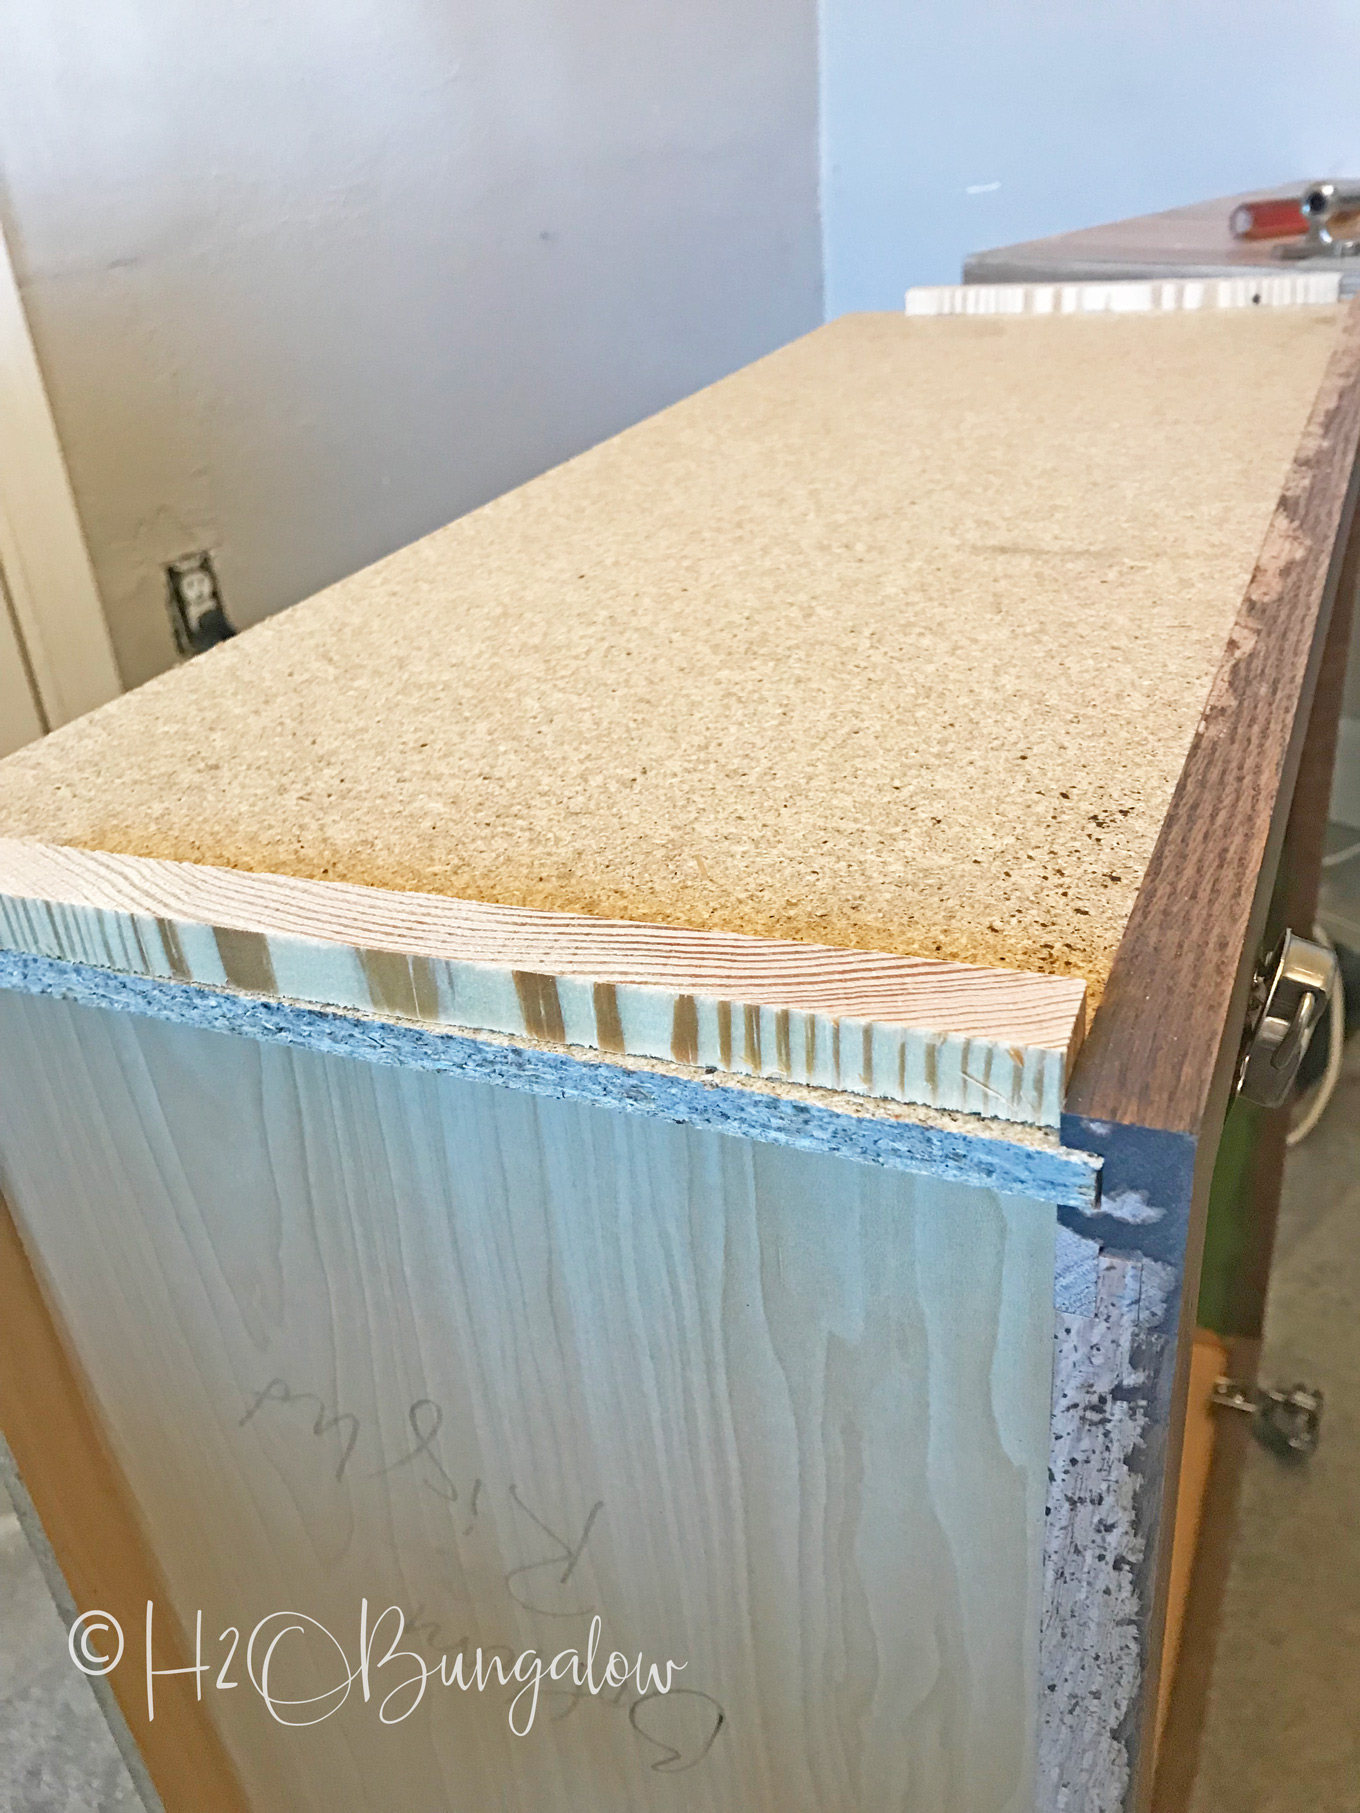
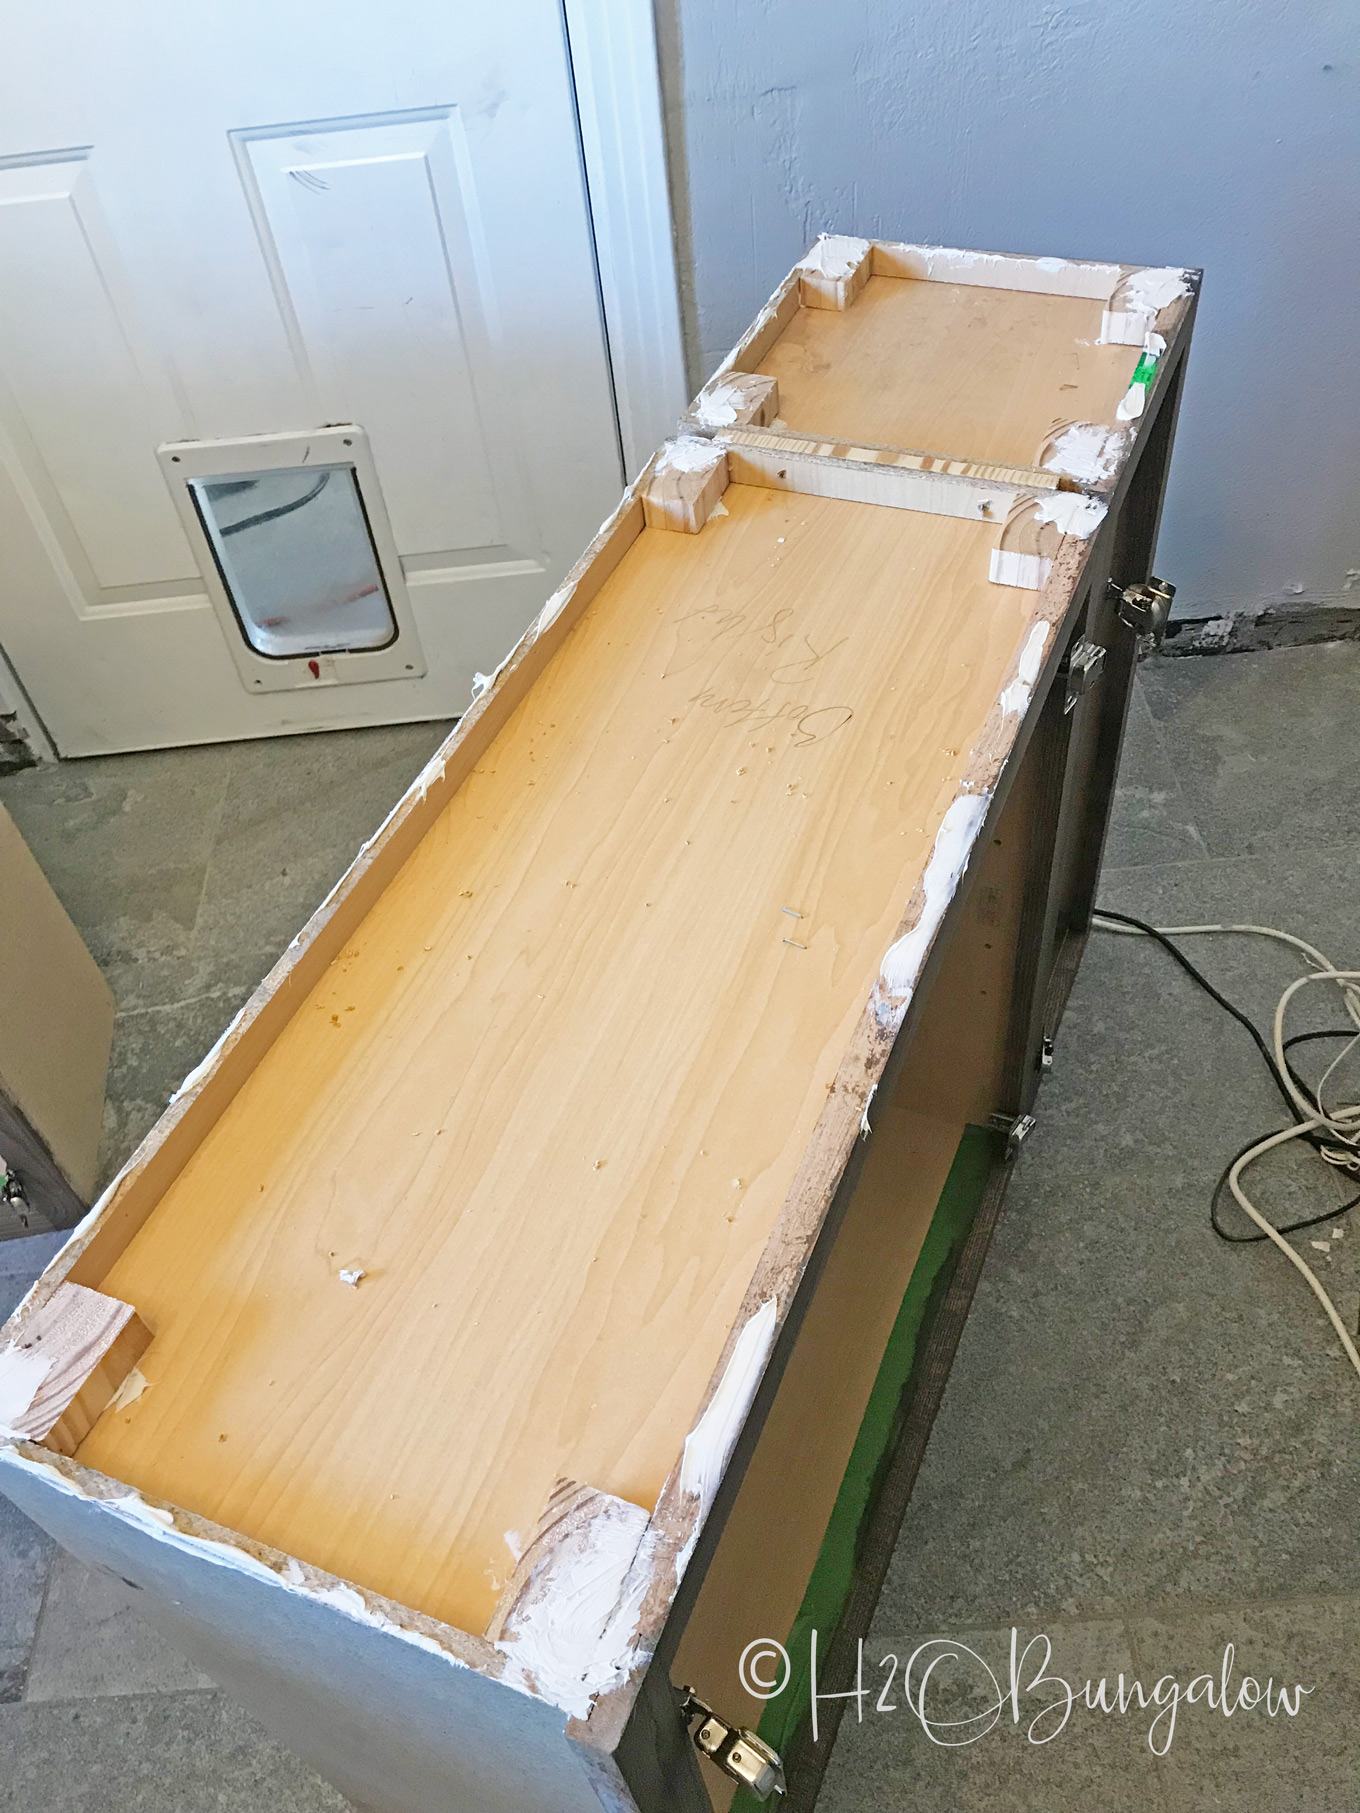
Step #3. Attach the base cabinets together. Because the cabinet faces is wider than the cabinet frame, there will be a space between the sides when they are are placed side by side. I added wood in between the cabinet bases at the top and bottom, glued and nailed them with the nail gun. It’s easier to work with the cabinets upside down so you don’t need to flip them over until the bases are attached.
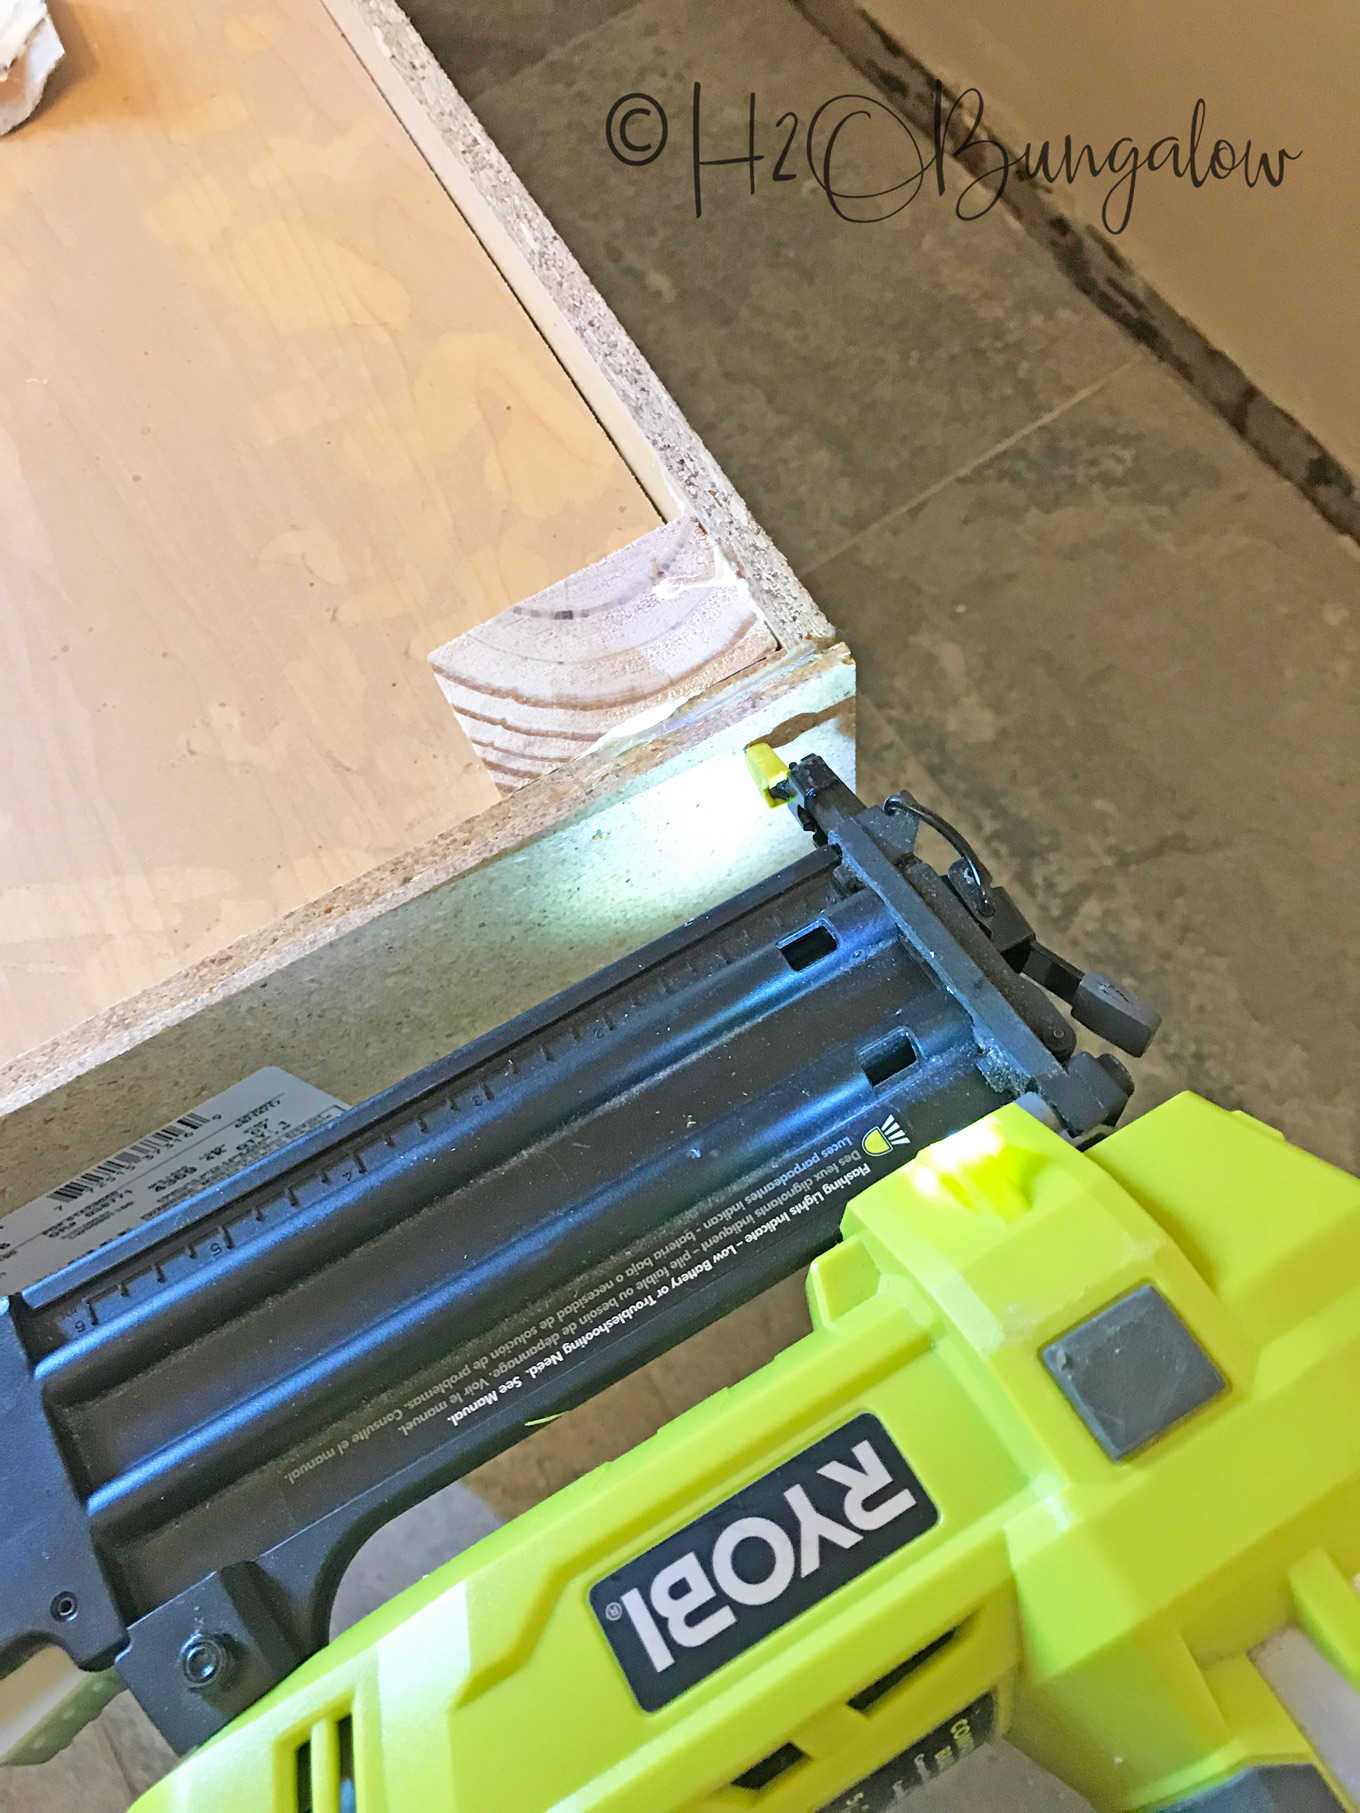
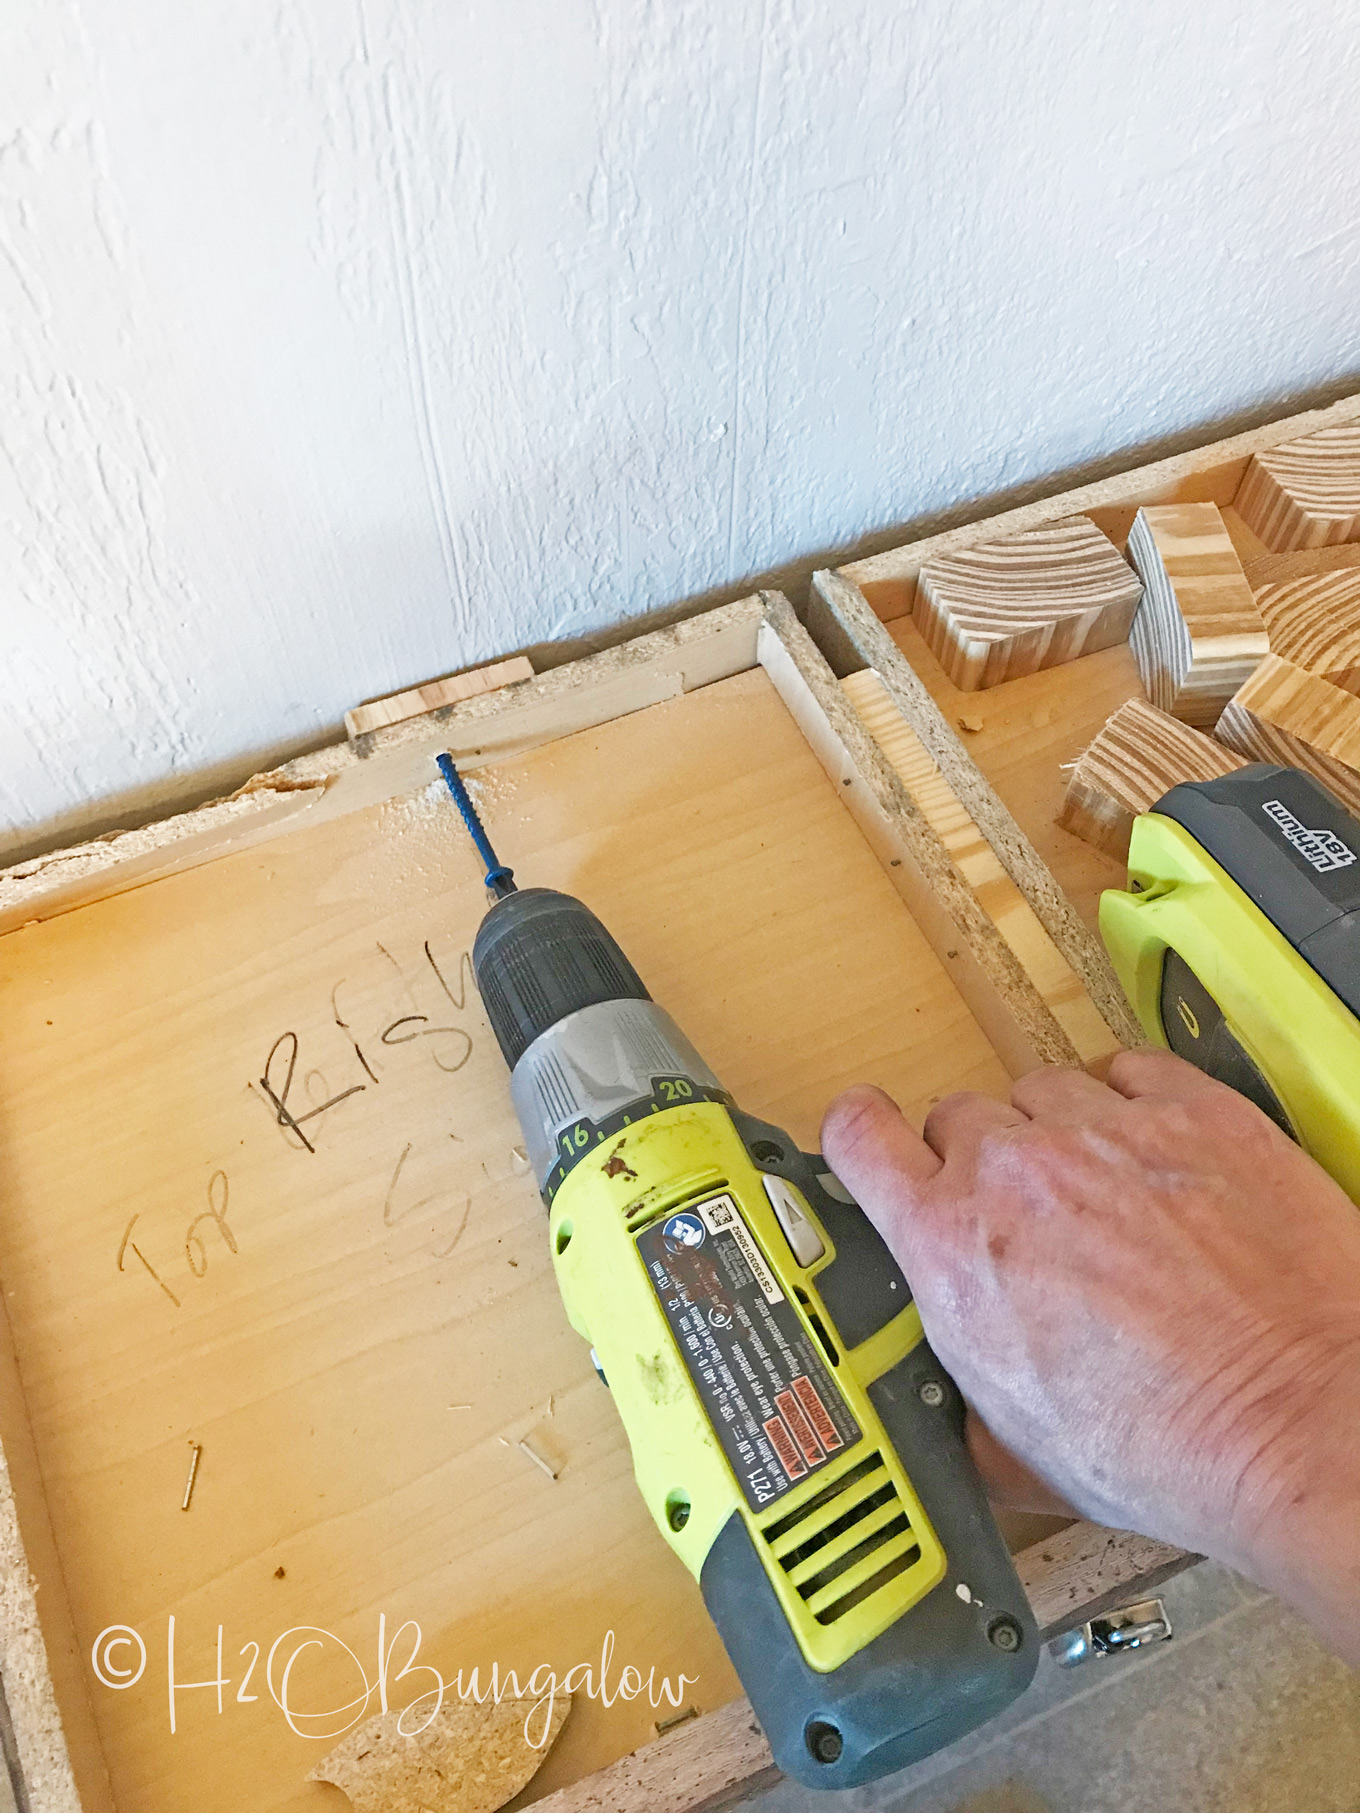
Step #4. Add support blocks to the corners of the bottom of the base. As soon as I saw that the frames of the cabinets were made from pressed wood I knew we’d need to add more support to the built in shelves. I cut blocks from extra 2 x 3″ wood as additional support. Cut each piece flush with the bottom of the cabinet base. Attach with glue and pop a few nails in with the nail gun for extra support.
Step#5. Assemble the built in shelf base. Use 2 x 3’s to make a large rectangle that will fit along the entire base of the cabinets. Attach a 2 1/2″ oak piece along the front and side of the base that will be visible. Use wood glue and 3/4″ brad nails to attach the oak facing.
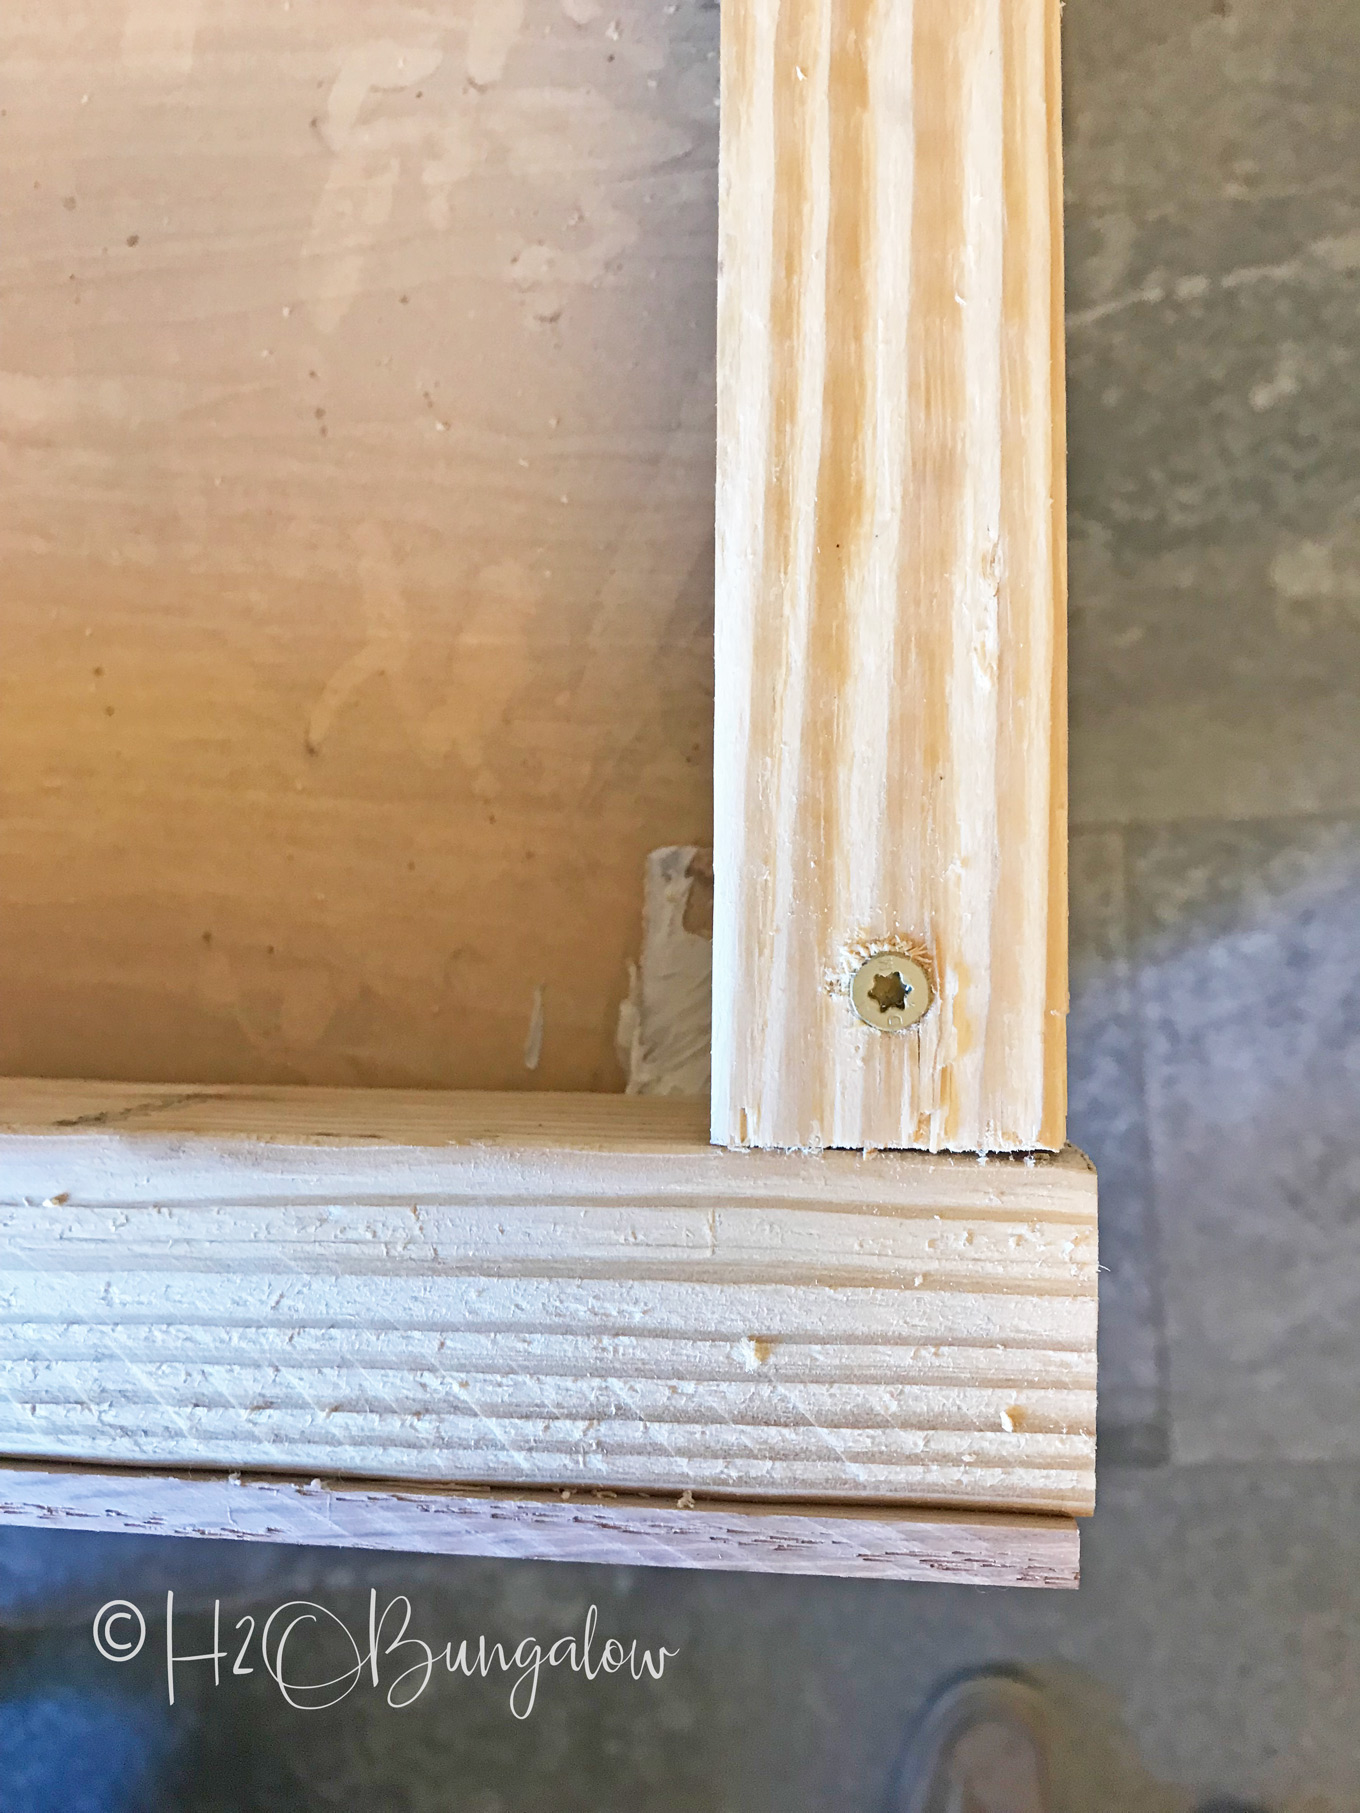
Attach with wood glue and let dry. Use long screws to attach the base frame to the blocks. At this stage the base was pretty heavy. Use two people to carefully turn over and put in place.
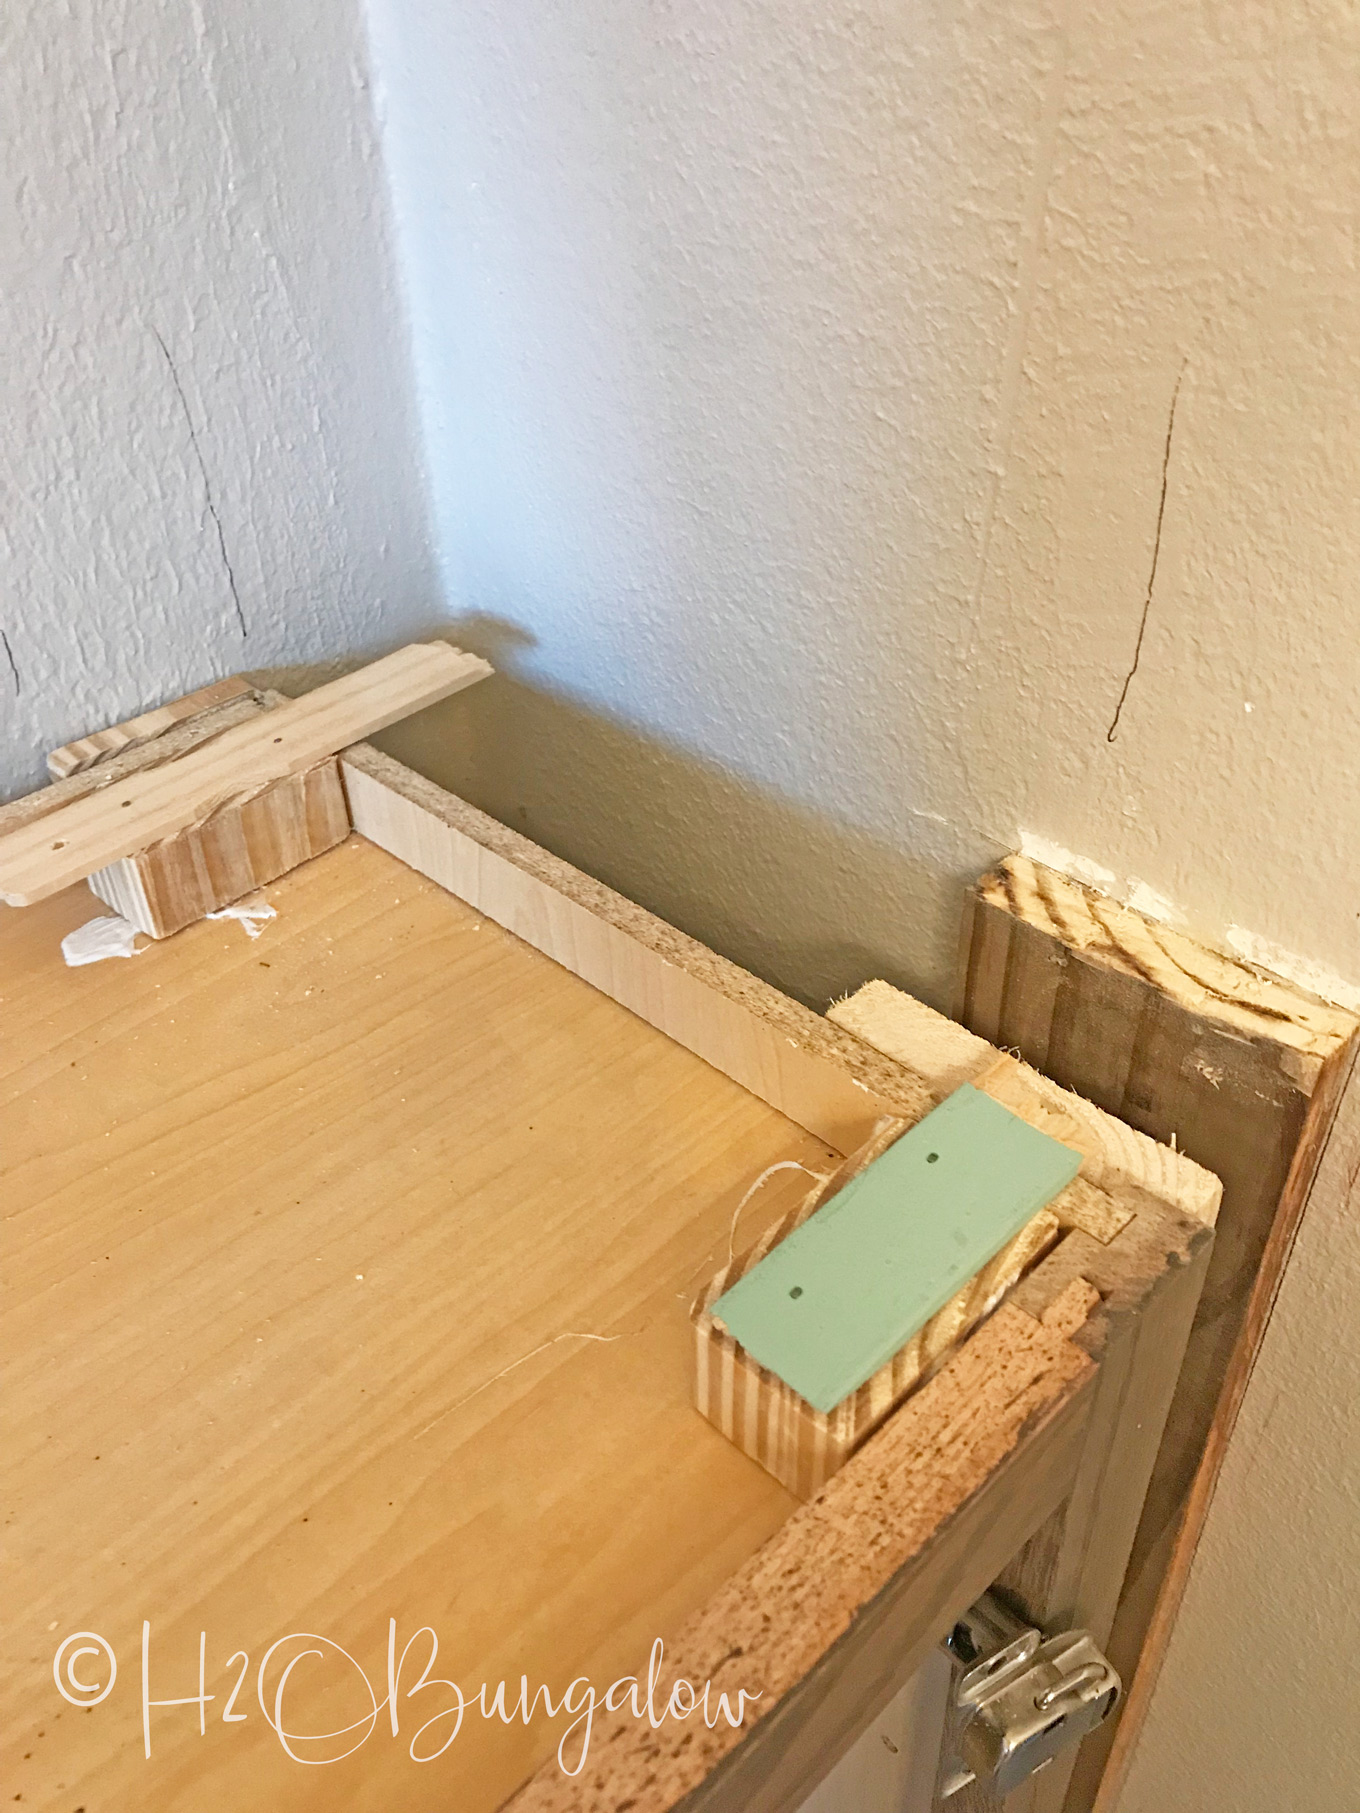
Step #6. Add trim braces. Before attaching the built in bases I added trim braces to the wall and cabinet ends. I used scrap wood and set it back the depth, 1/4″ of my trim. This way there is something to attach my 2 1/2″ trim on that will cover the space between the end of my base cabinets to the wall on each side.
Step 7. Attach the builtin base to the wall. Use anchors to secure the base to the wall. Again, you’ll see I shimmed between the wall and the built in cabinet base.
Tip ~ Label all your pieces! You’ll see in the photo below and lots of my pictures that I write on and label everything. It’s a project saver when you’re tired or are working with lots of parts!
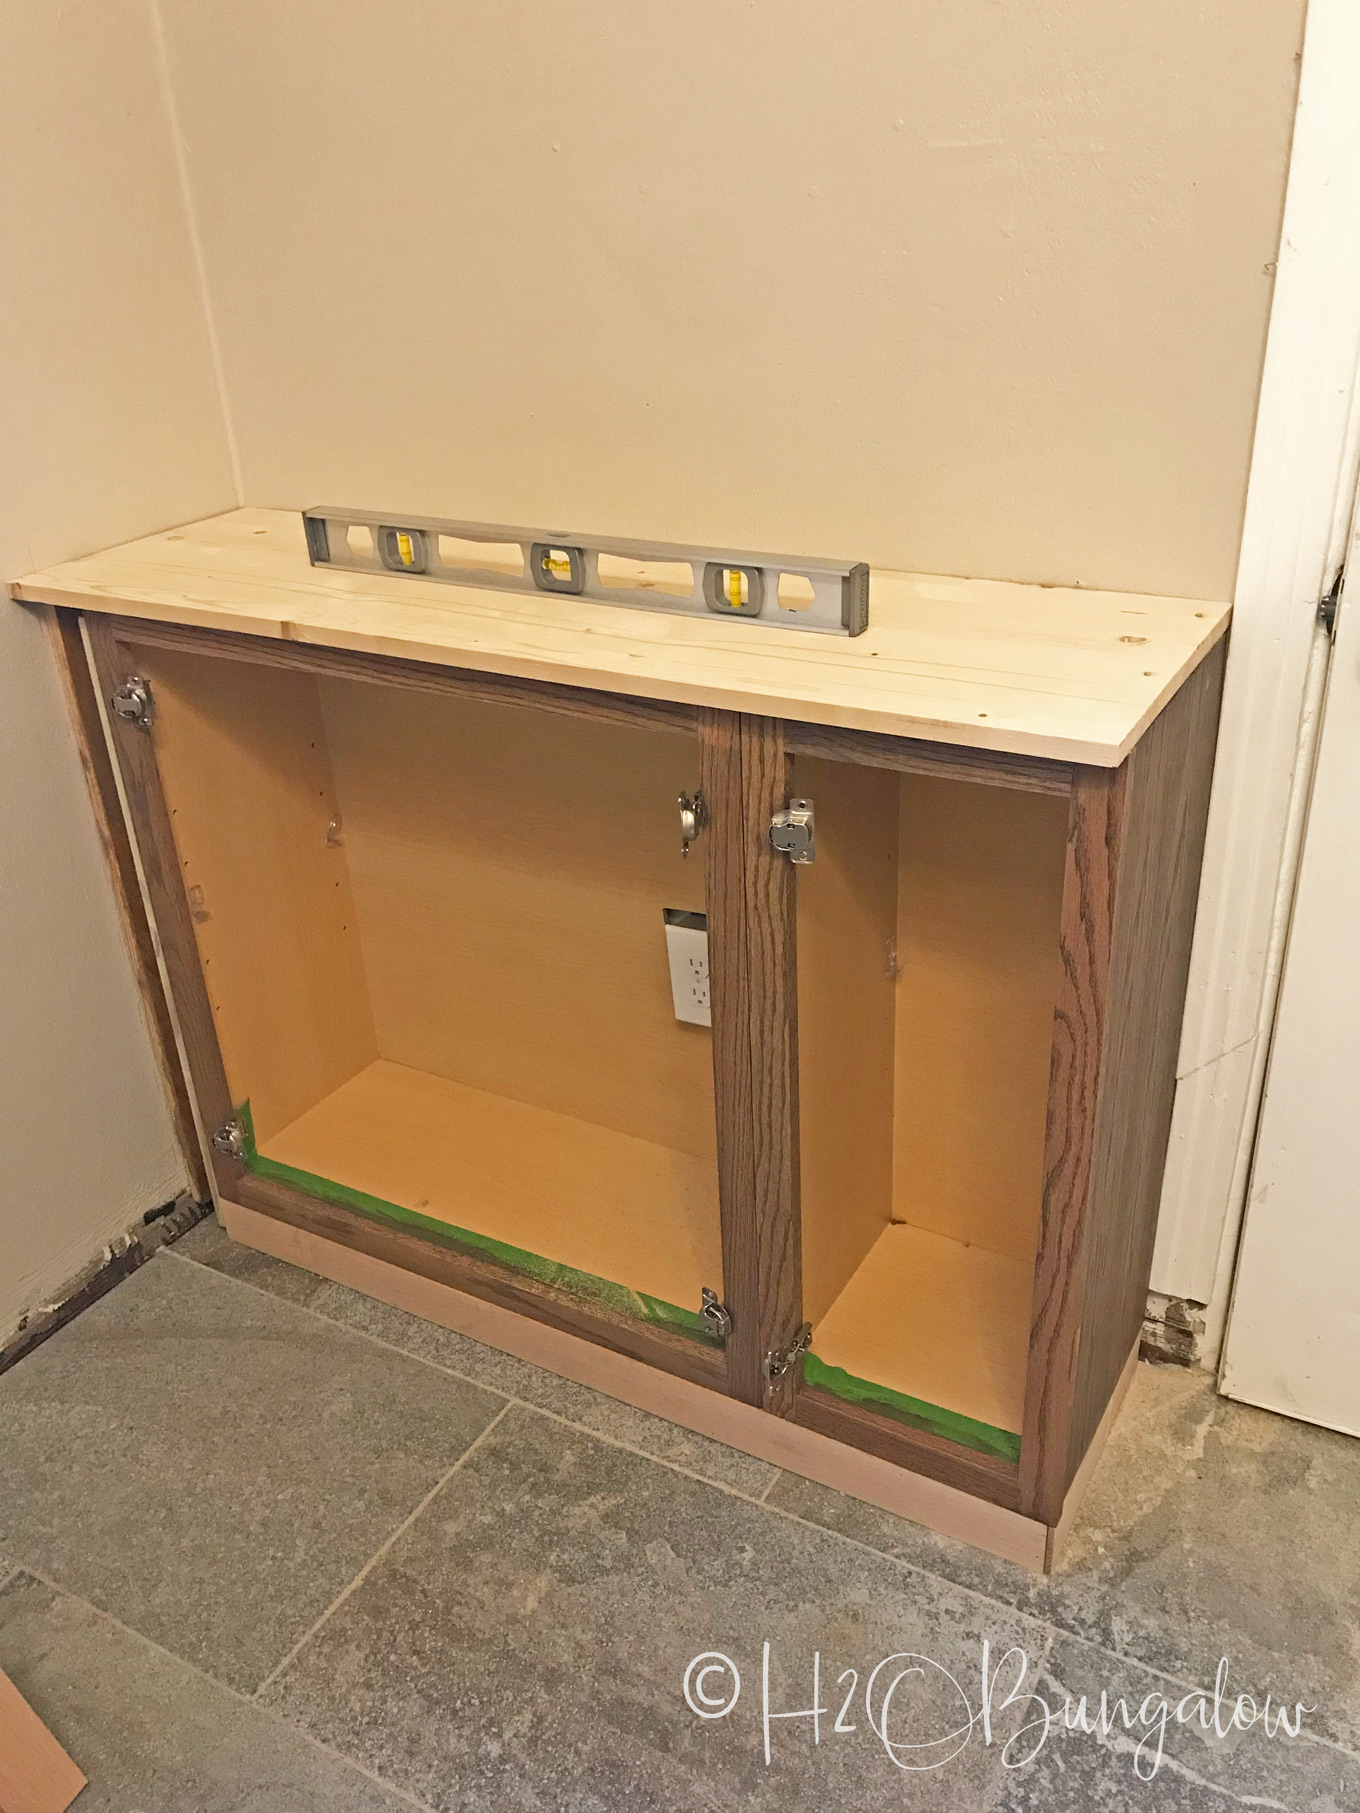
Step #8. Check to see if your bases are level before adding the shelves. Place the base top on the cabinet and check to see that it’s level.
Floors are often unlevel, especially in old homes. This side was off slightly and I needed to raise one end a tad. If I didn’t, my book cases may not have been straight once I added them. A little bit off on the bottom can show up a lot on the top of a tall project. I learned that the hard way when were working on my DIY Interior Double Barn Door in the North House last spring.
I used paint stirrers as shims because they were the perfect size to level my countertop. I held them in place with a few nails from my Airstrike nail gun. Not pretty, but effective 🙂
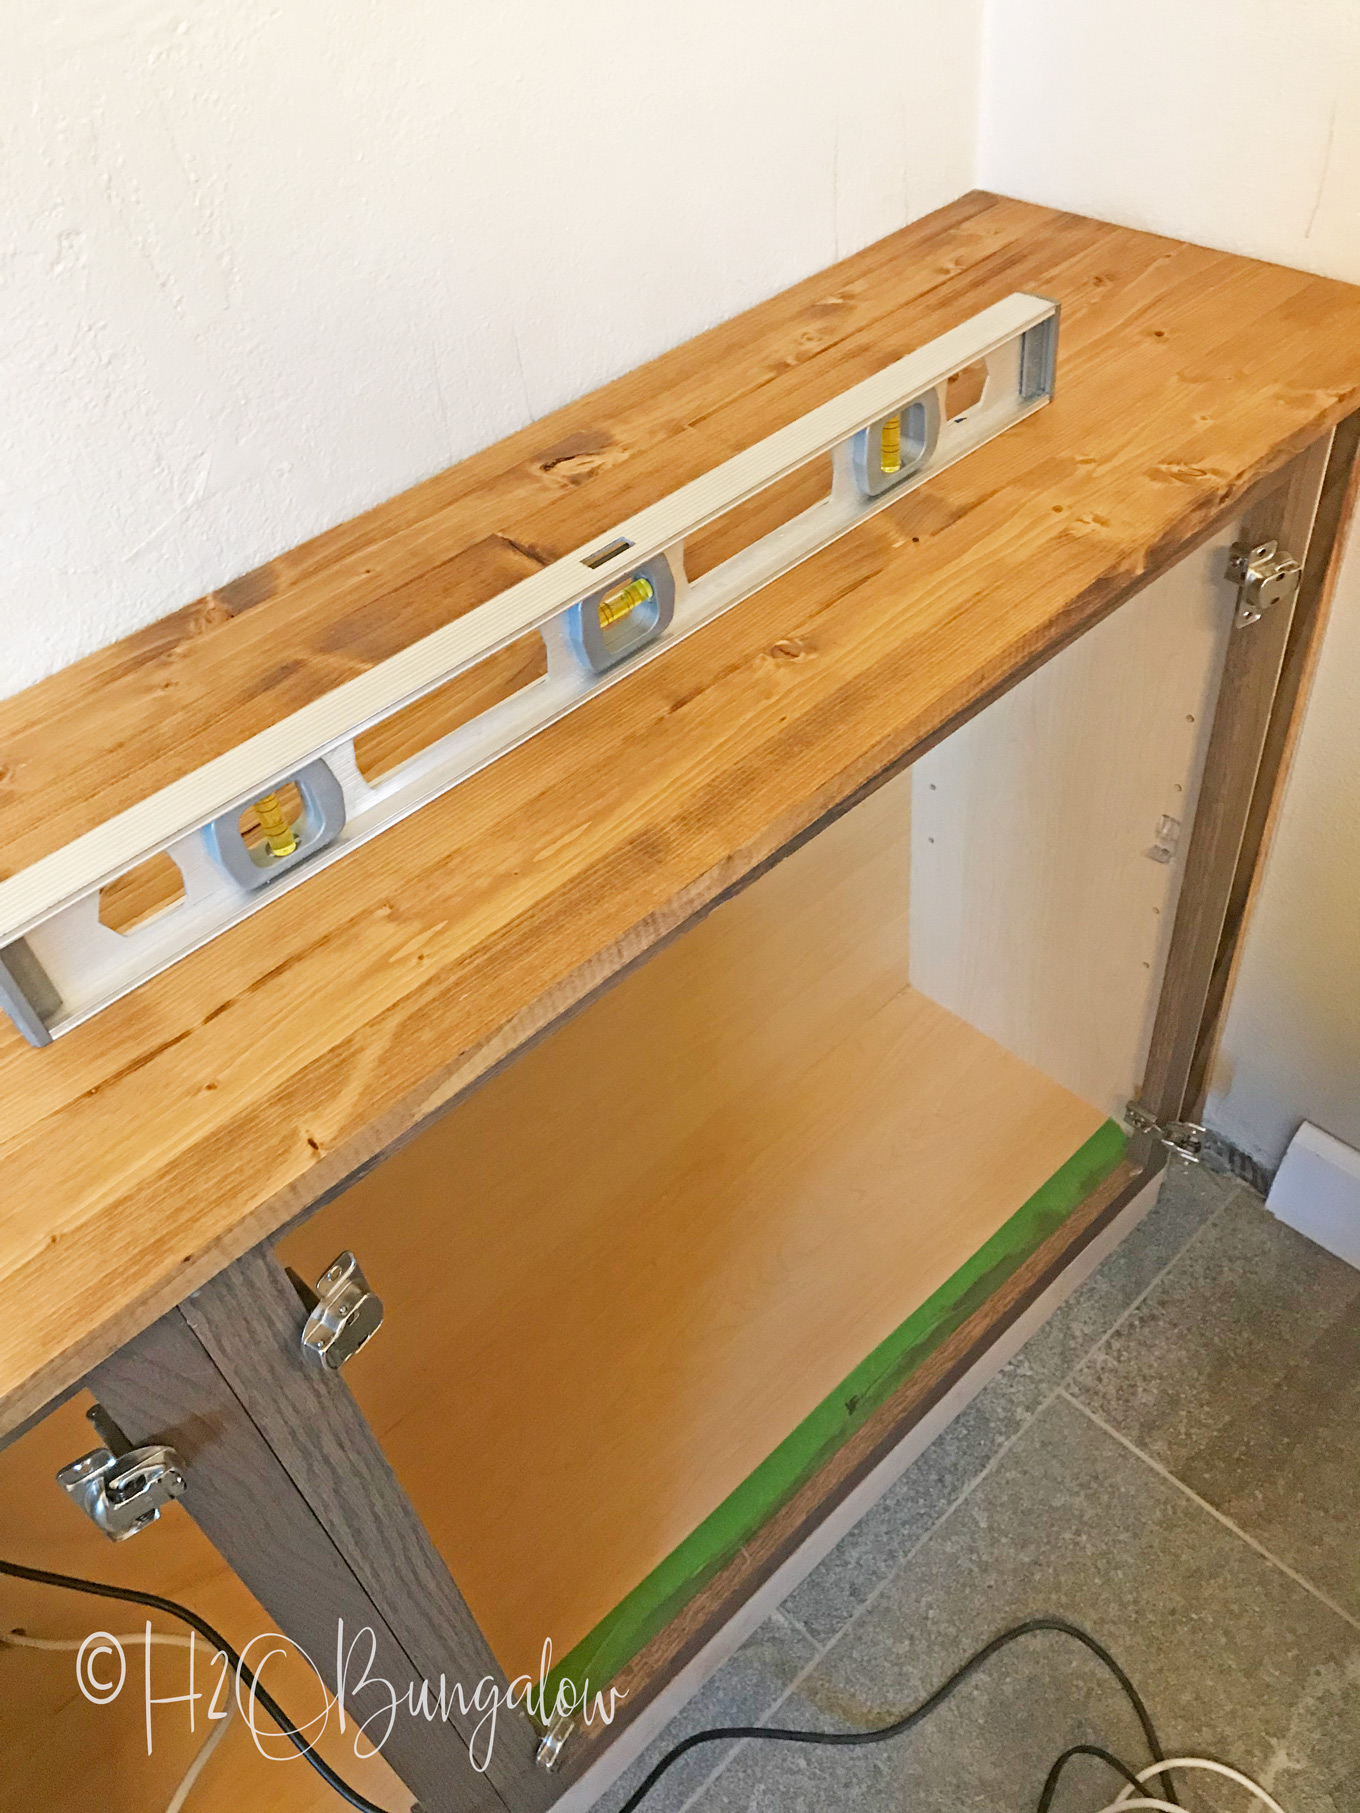
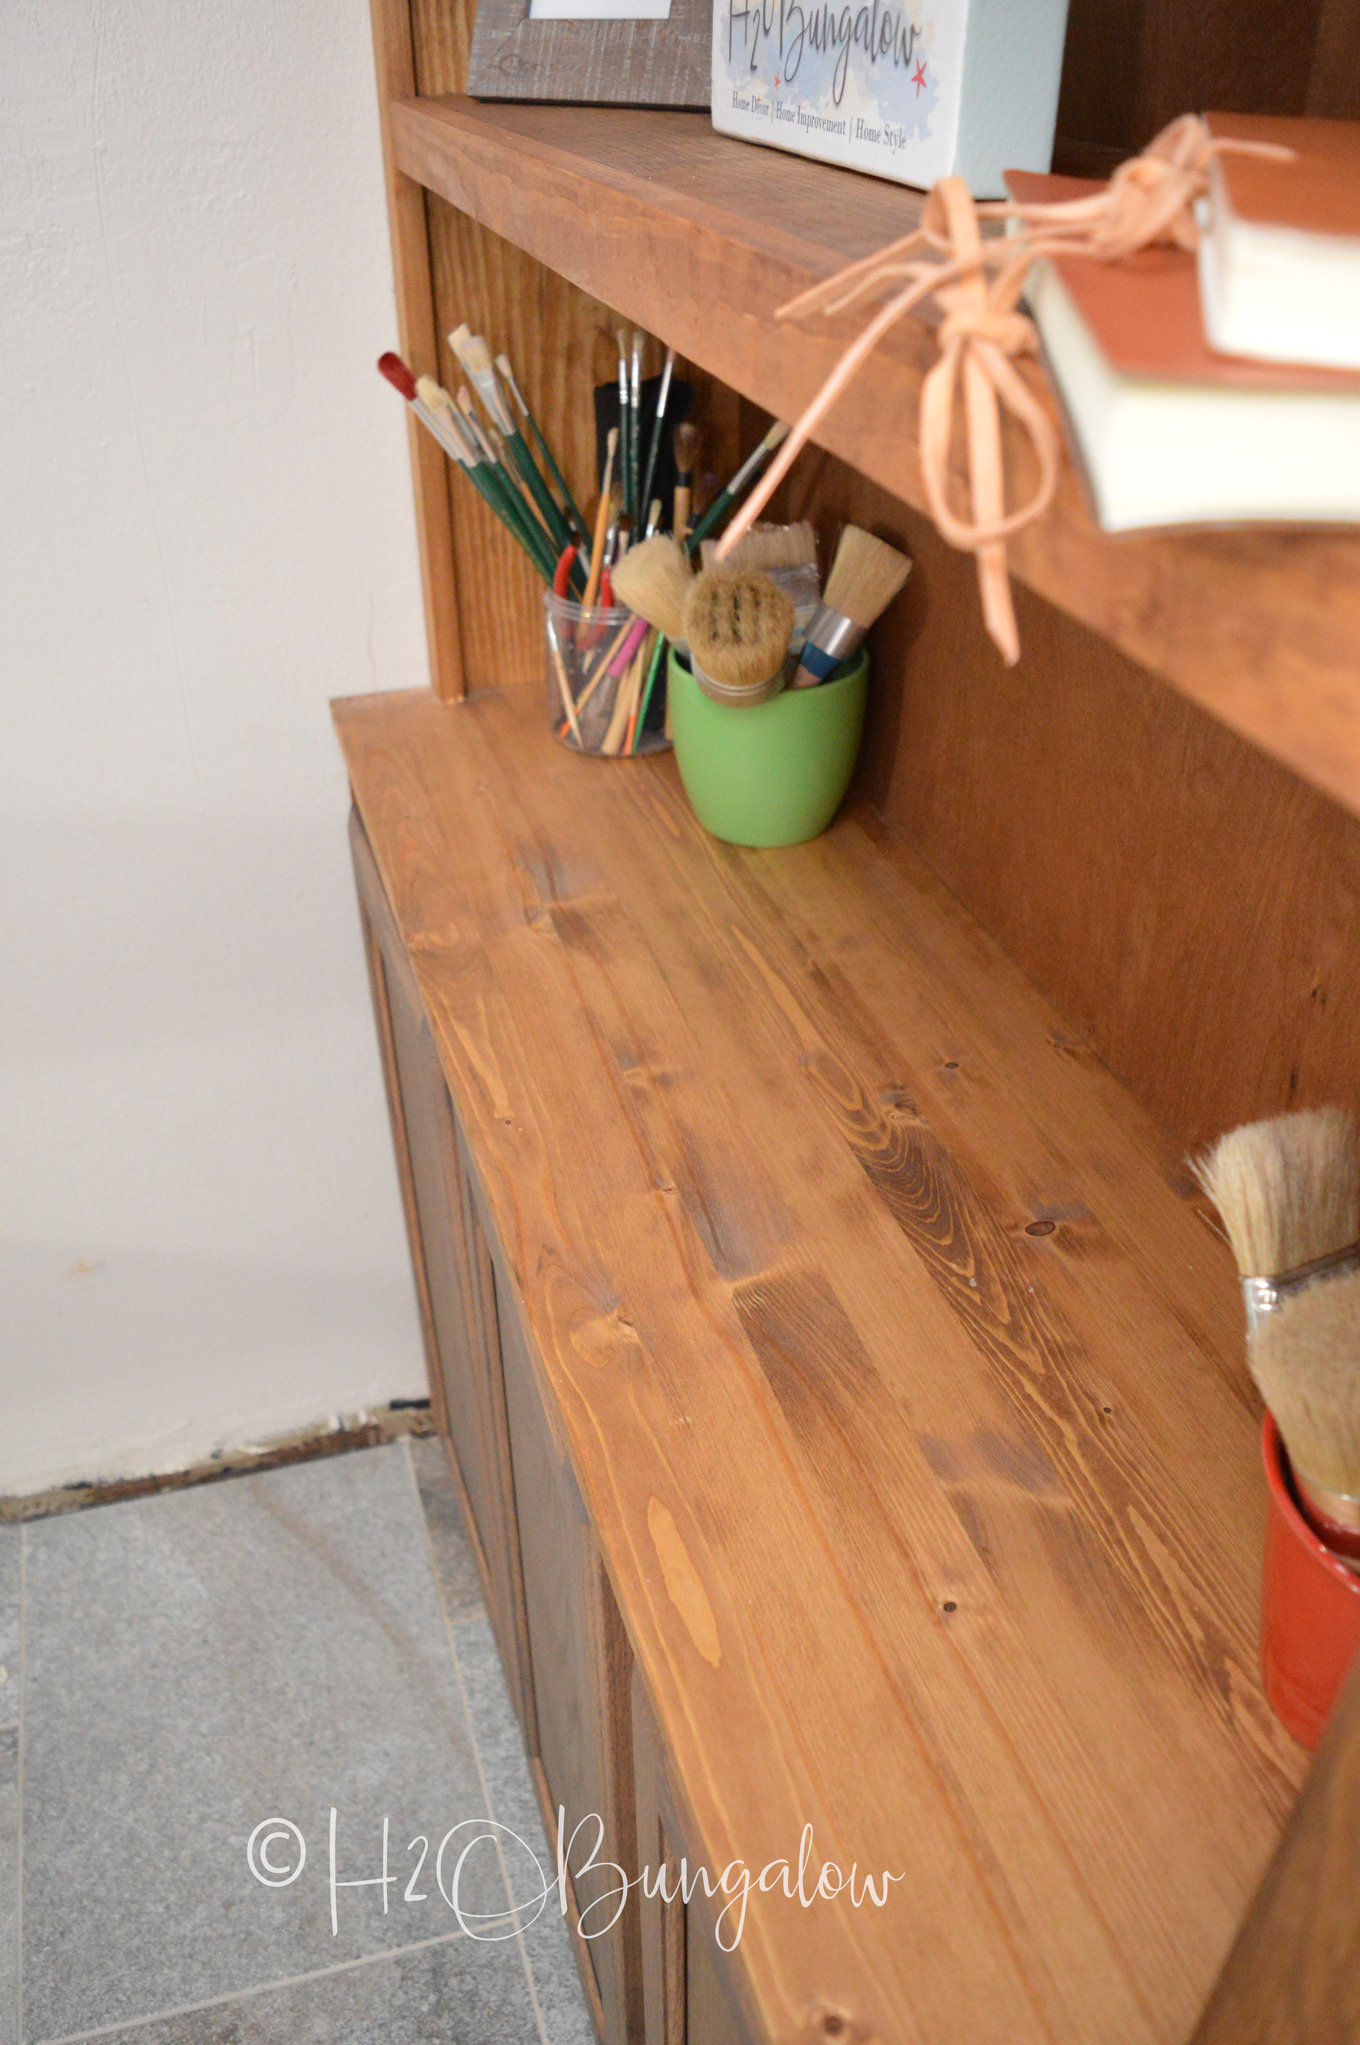
Step #9. Attach the base tops. Cut the top to size and attach with a few brad nails onto the corner sections where there are wood blocks underneath. I only did this at the edges and in the back where the brad nails wouldn’t be seen.
Yay! The tops are level and it’s time to put the bookcases together!
How to Make the Bookshelves for the Built Ins
Step #10. Cut the sides of the shelves. With the top of the base in place, measure the distance from the top of the base to the ceiling. Mine was 62 inches. I deducted 3 inches and cut 4- 1 x 10″ boards at 59 inches for the bookcase sides.
Step #11. Measure and cut the shelves. Because my built in bookcases wee covering the entire wall on each side of a door, I wanted my DIY builtin bookcase ends to be flush with the sides of the base cabinets. I took 1 1/2 inches off the base cabinet top length and cut 5 shelves per bookcase.
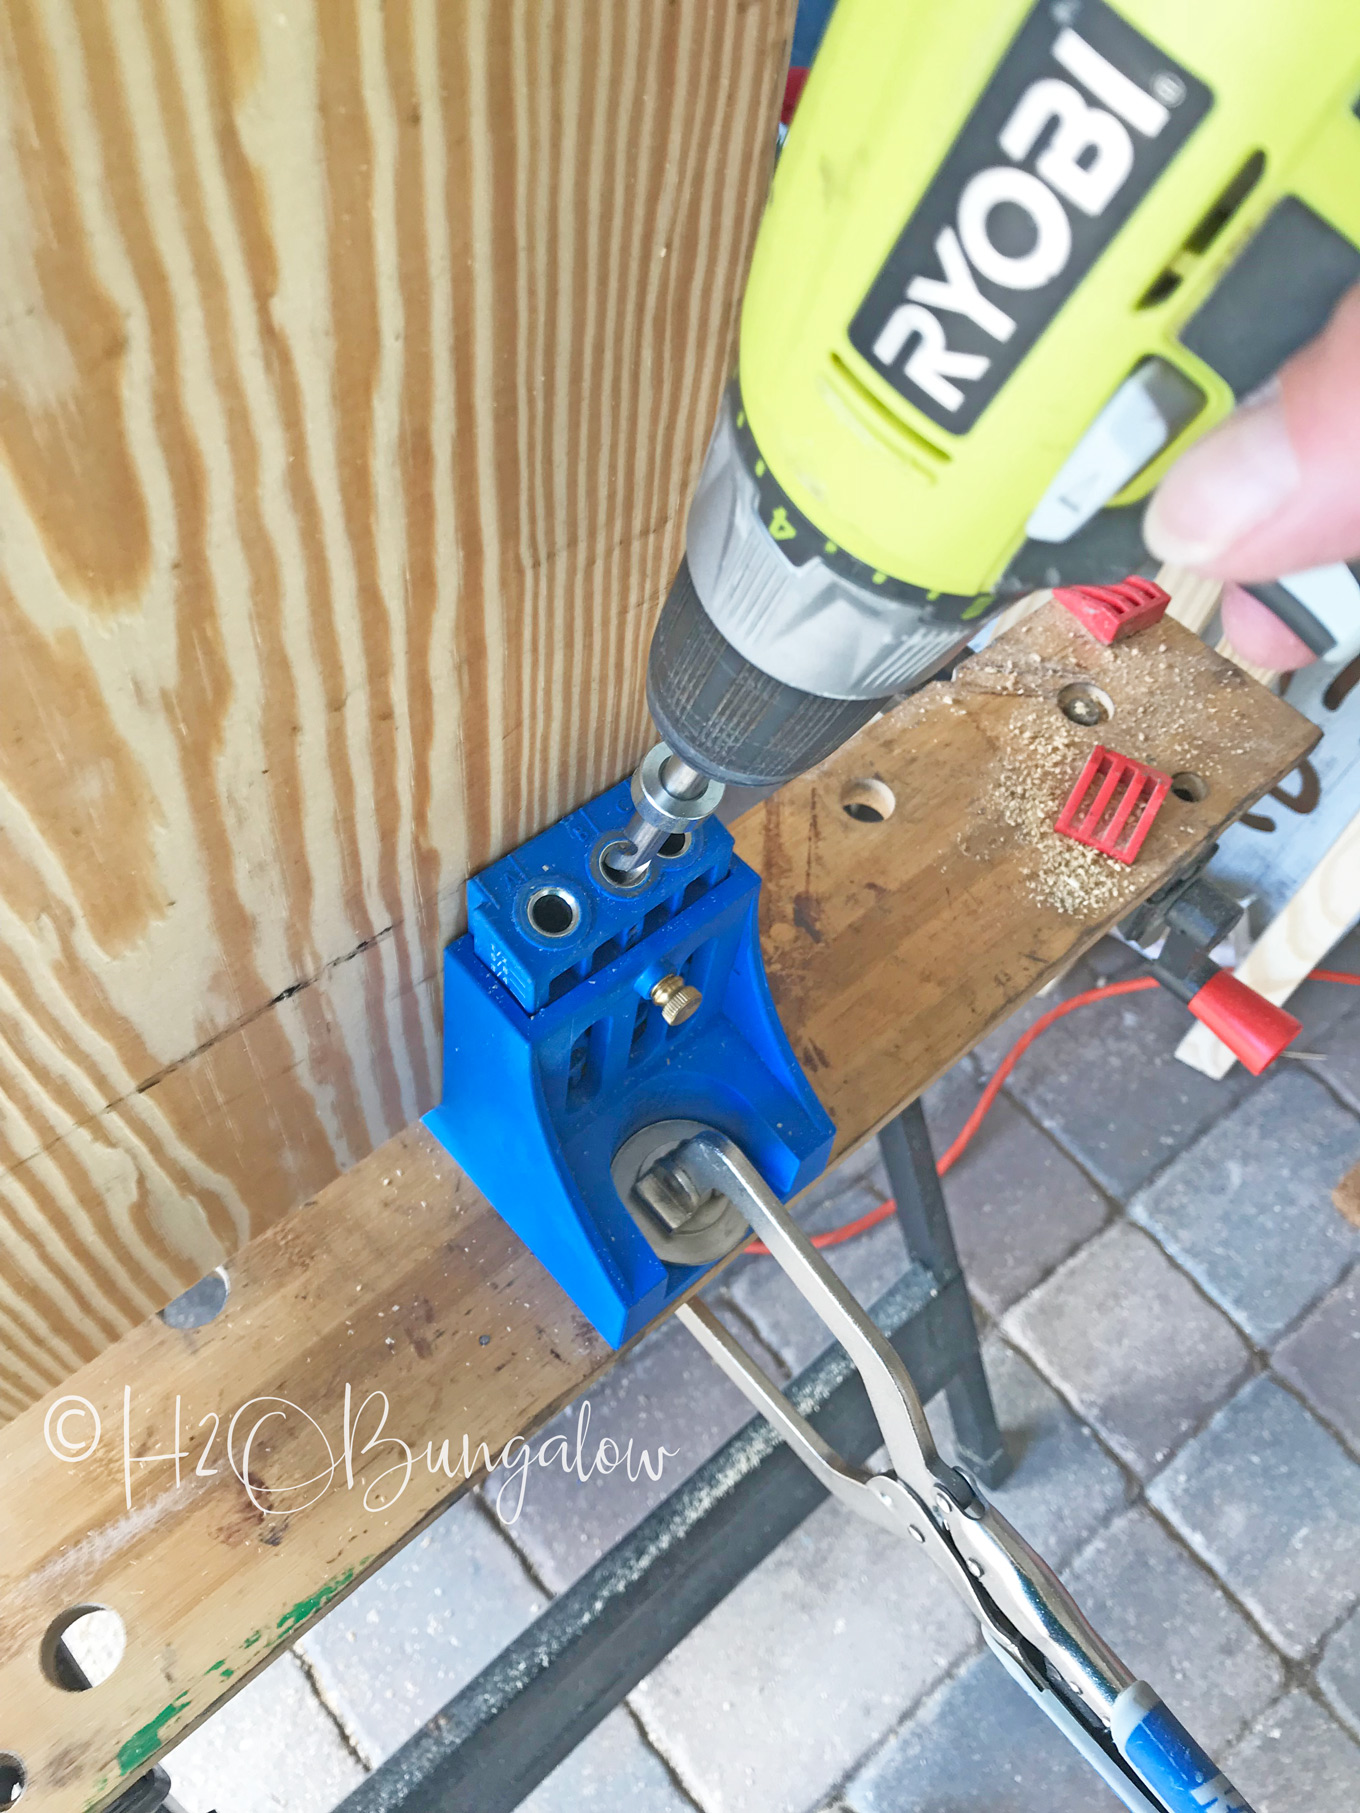
Step #12. Make pocket holes on the underside two ends of each shelf. Look at each shelf carefully and select the best side for the shelf top. Use a Kreg Jig set to 3/4″ and make pocket holes and inch or so from each end on the underside.
Tip ~ You’ll save yourself time and strength if you set your Ryobi drill to impact (#2 setting on top) and your torque around 6 when making pocket holes. Also, pulling out the drill bit and pushing it back in to let the sawdust out helps the process and keeps extra sawdust from packing in the drill bit.
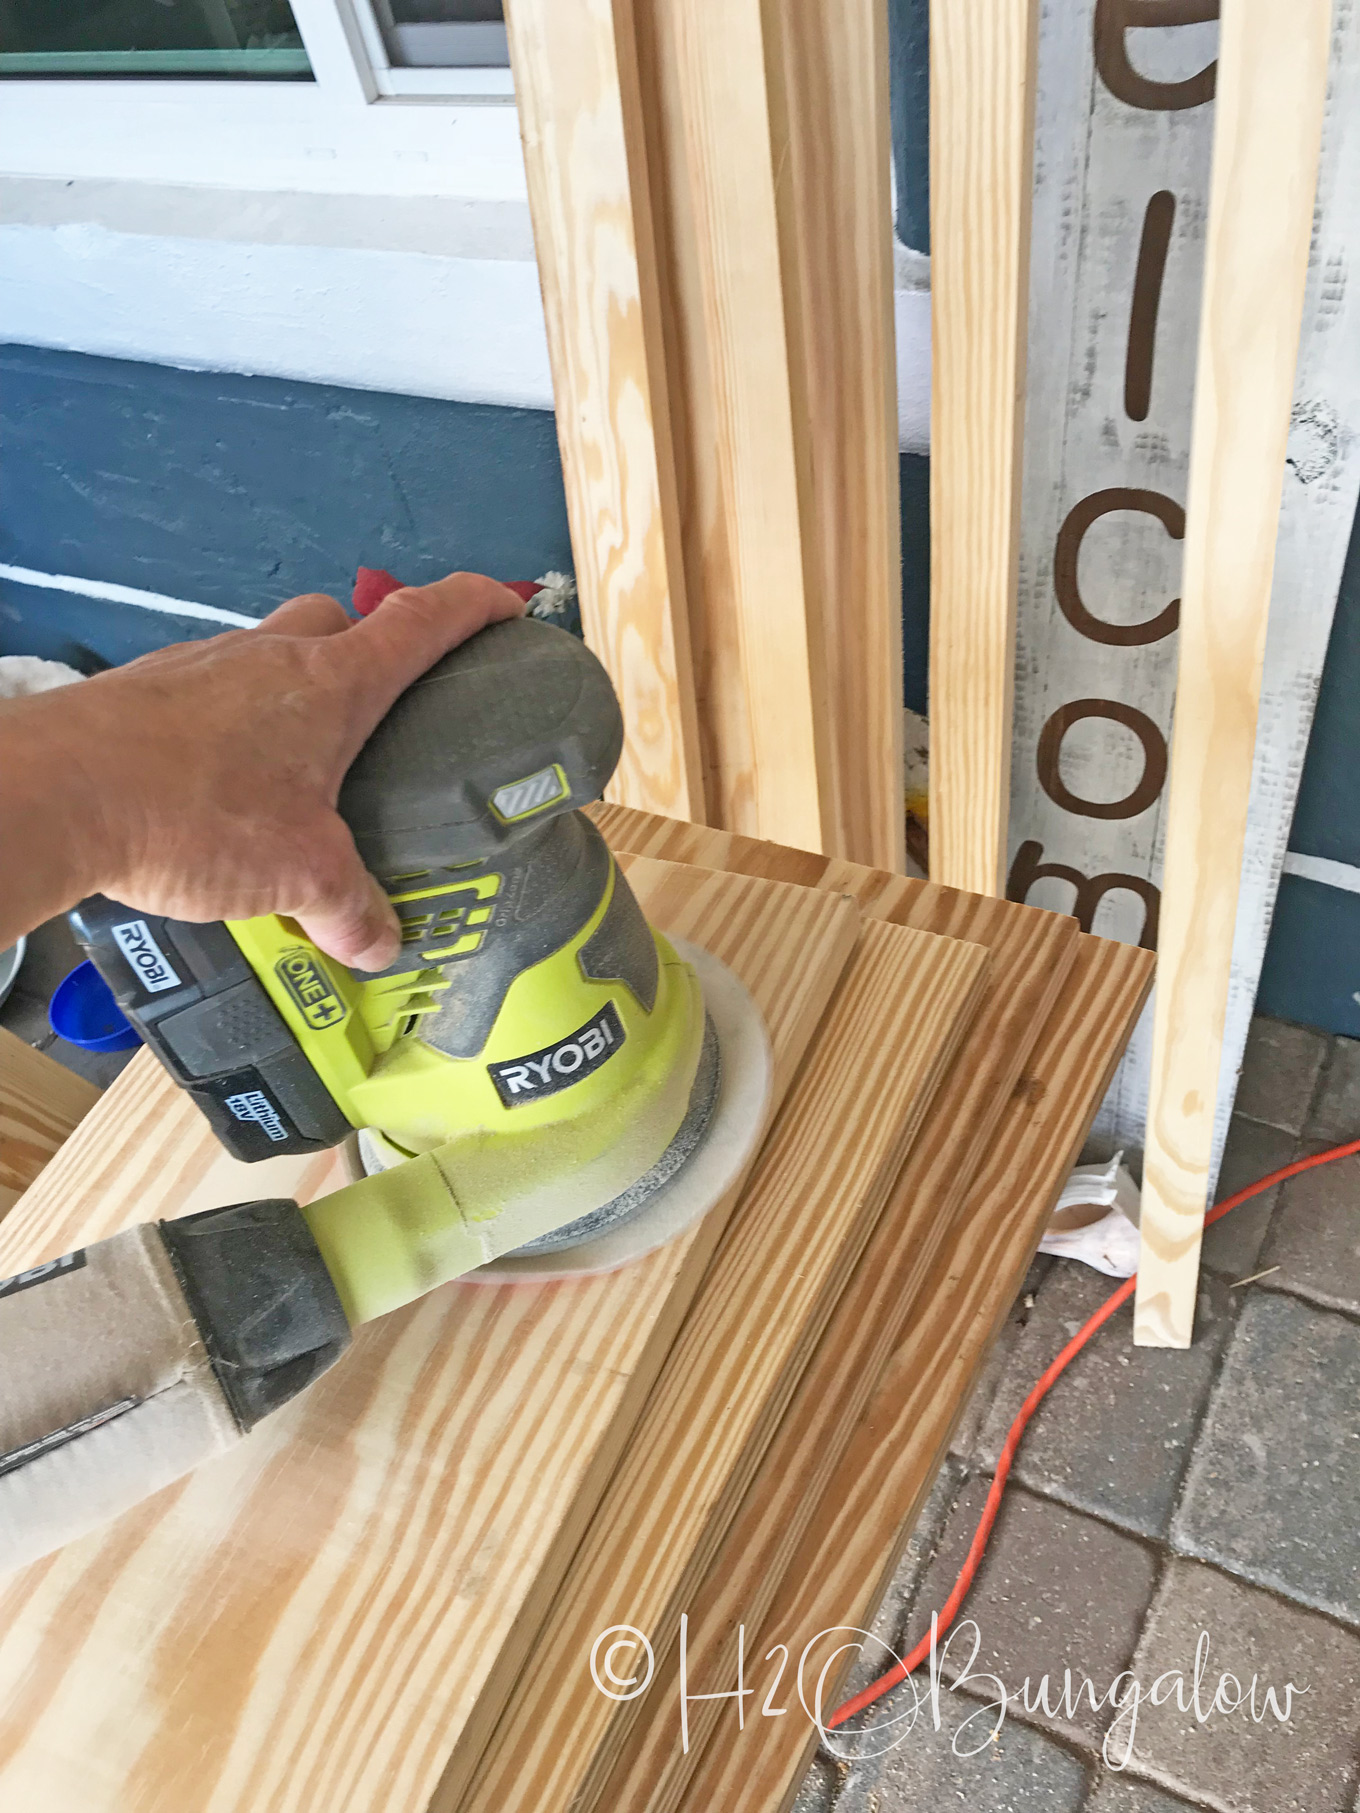
Step #13. Sand, baby sand! Sand the tops and bottom of each shelf.
Time saver tip ~ Place several bookcase shelves on a surface at once to sand. Sand each side and remove each one as you work your way down the pile.
Step #14. Assemble the shelves for the DIY Built in bookcases. Starting at the top of each shelf, I measured and marked each inside board of my DIY built in bookcases from the top down and used a combination square to draw a line across each board. The intervals were, 2.5″, 10,” 20″, 30″, 42″, and 17″. In case you’re wondering, the reason I left a space at the ceiling was to fit my hand and drill in to place the anchors on the wall. I knew the trim would cover up the anchors.
What would we do without girl friends!
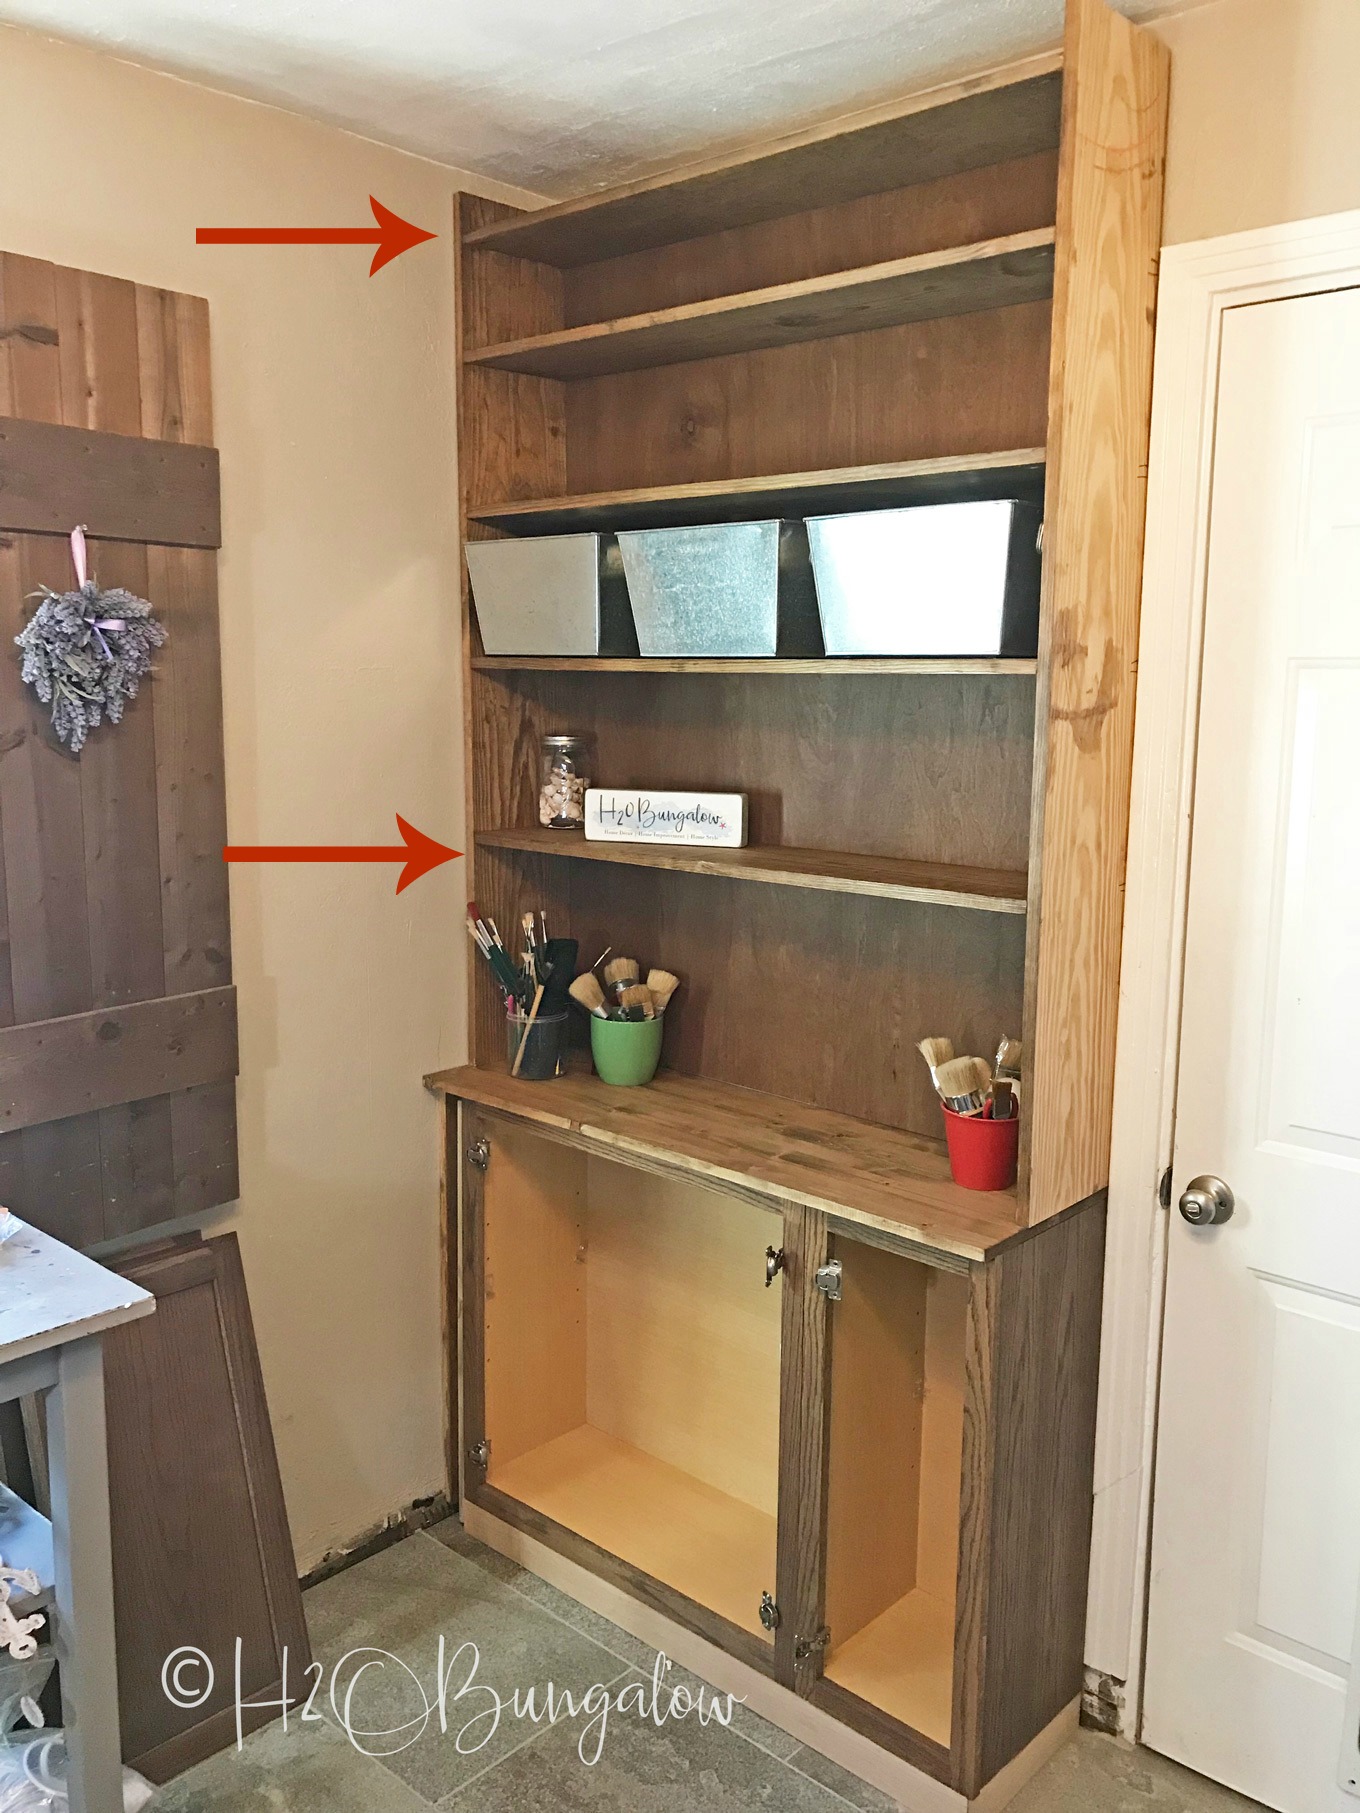
It took 3 of us to assemble and flip the upper part of my DIY bookcases. I laid one side on the floor and attached the top and bottom shelf, we carefully flipped it over and attached the other side. I lined the top of each shelf up with the pencil line I drew. You’ll see red lines on the two shelves we attached first in the picture below.
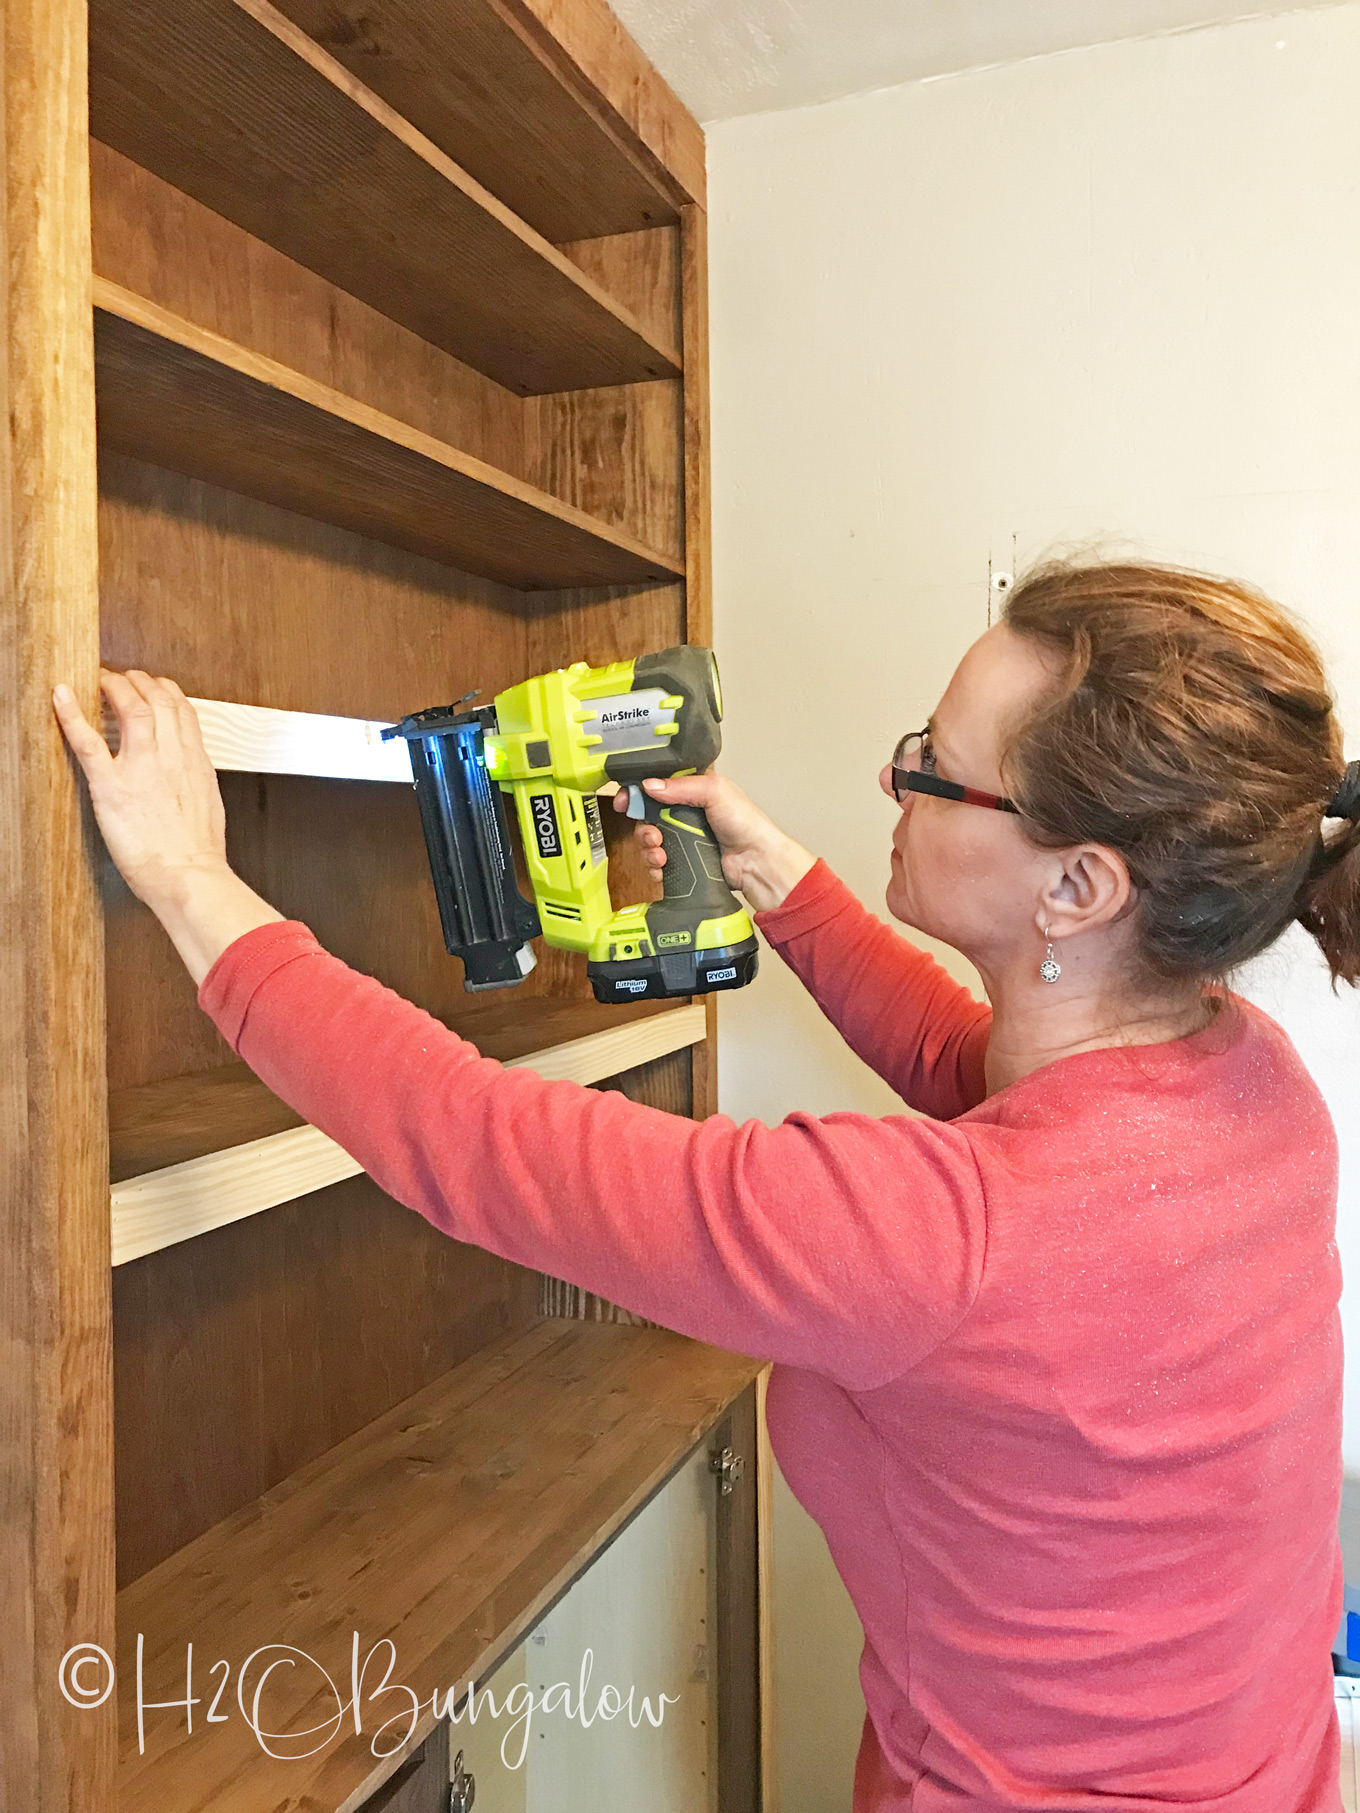
Attaching the rest of the shelves was easy. I used 1 1/4″ Kreg pocket screws to assemble the bookcases.
Step #14. Attach the back of the built in bookcases. Measure and cut the 1/4″ plywood with a jigsaw. It goes without saying (but I will ) to take your time and cut straight lines. I made the backing just a tad smaller then the bookcase so the edges wouldn’t change my outside dimensions of my bookcase. This was important since I was fitting each built in bookcase in the space between a door and a wall.
Step #15. Attach “L” brackets to the top of the shelves. I planned to anchor the wall side of the shelf end and the other end to the wall. Attaching the brackets is whole lot easier at this step!
Step #16. Place the bookcases onto the built in cabinet bases. These babies were heavy! It took 3 of us to lift them and put them in place.
Step #17. Anchor the top of the bookcases to the wall. I used Tapcon anchors to anchor the bookshelf portion of the bookcases to the wall at the top of the bookshelves. Our walls are concrete block. If you have studs then use the appropriate anchors for studs.
Step #18. Trim the bookcases. Use wood glue and the brad nailer to attach all the trim. I ripped a 1 x 6″ board for the top trim and attached it to the shelf frame underneath. Next, I added the two side trim pieces. The sides and shelf front trim pieces are all the same size, 1 x 1 3/4″, and were ripped from 1 x 6 boards.
Last, I added the shelf trim onto the front of the cabinets. It’s flush with the top of each shelf. This step is optional, but I think they looked more substantial with the trim on.
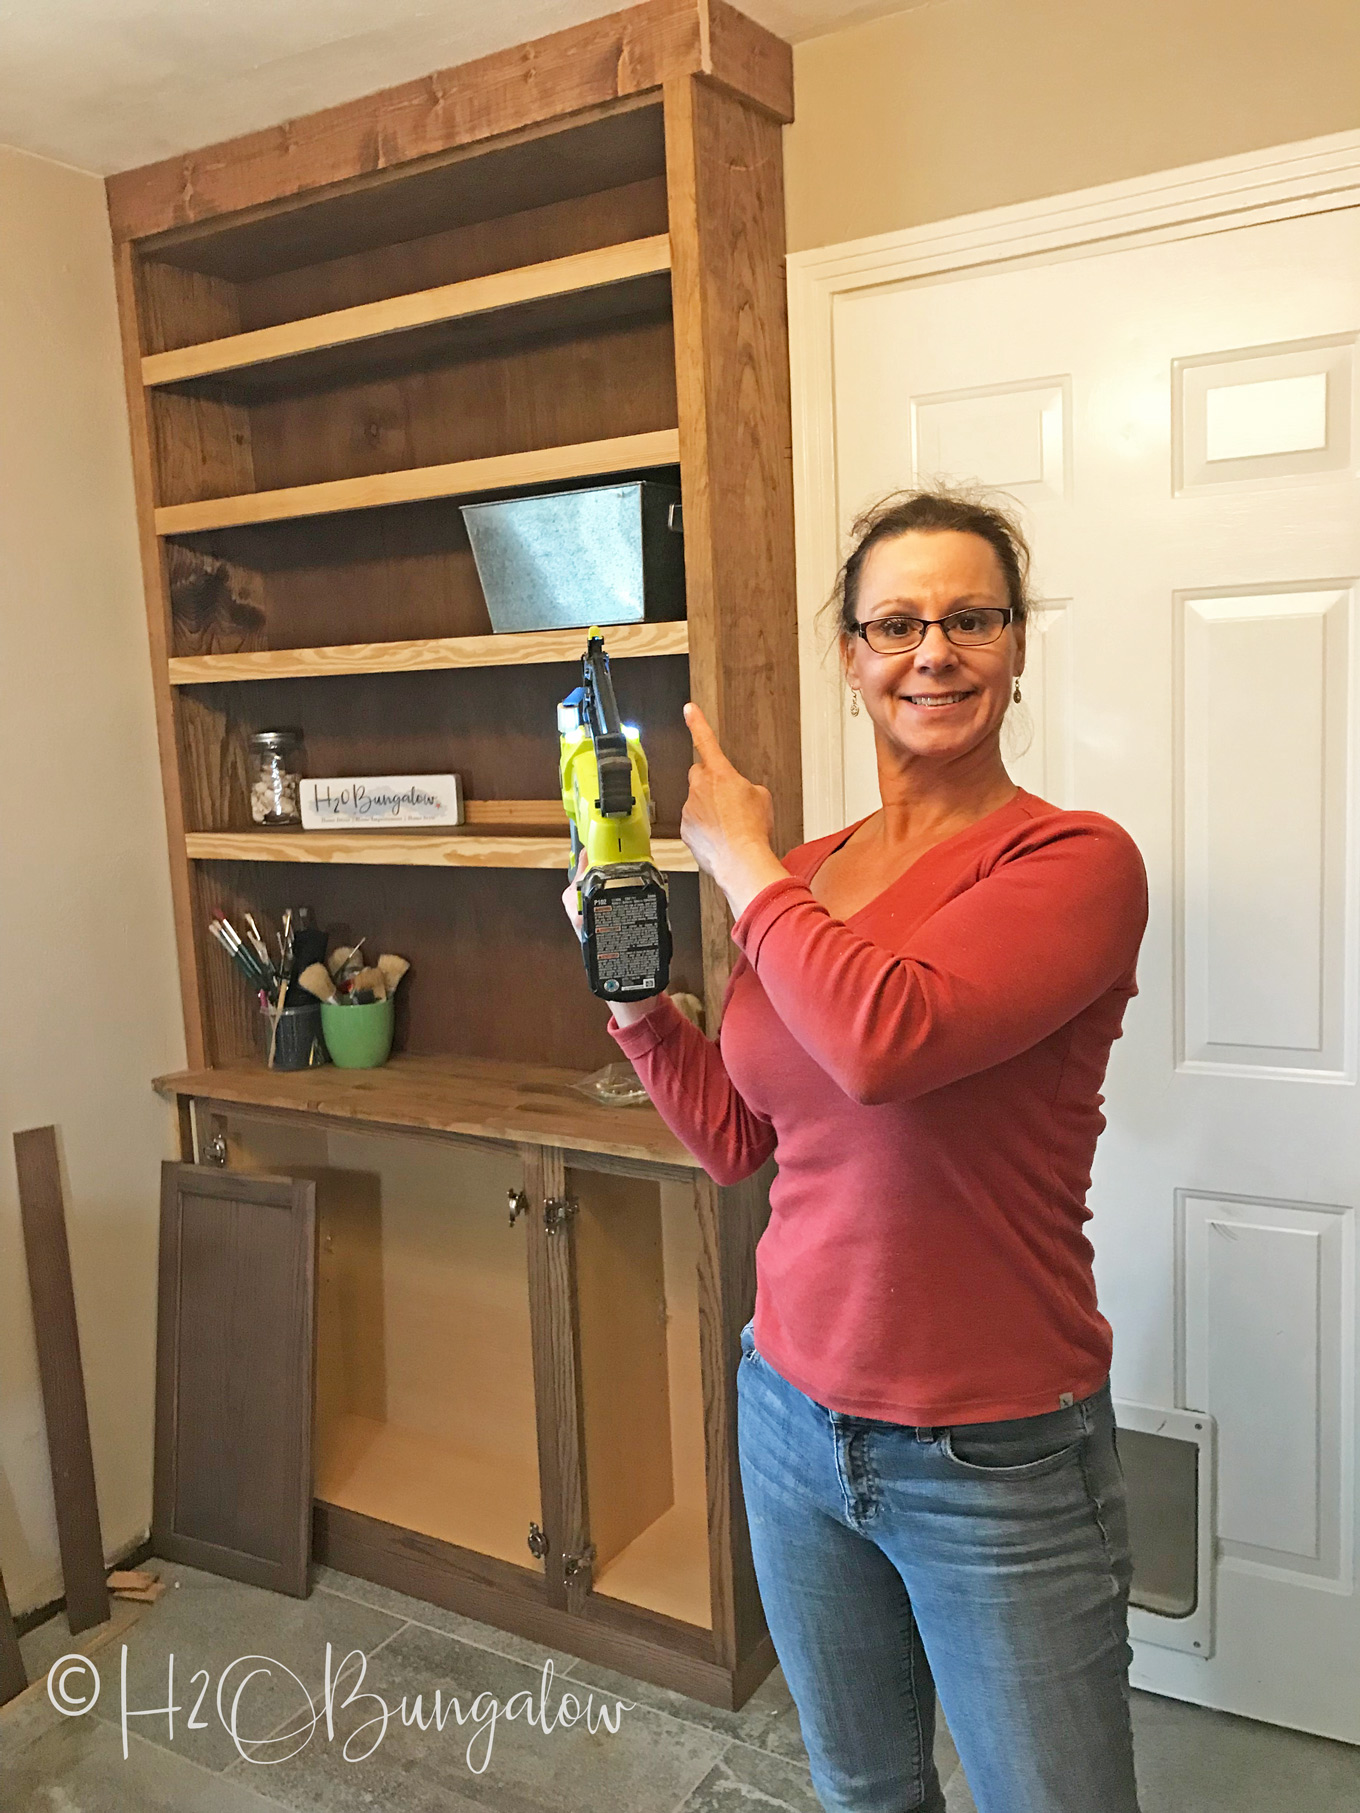
Oh my gosh…I’m almost done! If you had questions about how I assembled my DIY built in bookcases in any of the instructions above, I think you can see clearly in this picture how everything came together. You may choose to use store bought ceiling moulding but I wanted my built in bookcases to be basic to match the style of my office and my DIY Interior Wood Shutters that my Dada and I built a few years ago.
The rest was easy. I put the doors back on my cabinet bases and stained the rest of the pieces.
Holy cow! This was one heck of a project!!
Pin this tutorial for later!
My built in bookcases are going to help keep my creative workspace organized and clutter free. I can’t begin to share how excited I am to have storage and a place to put my supplies!
I still have a few things to finish like putting the baseboards back on and drilling a hole in the top for the printer cords.
I’m loving my new hidden ceiling fan light in here too!
Now that I’ve shared how to build built in bookcases with cabinets, are you ready to tackle some of your own?
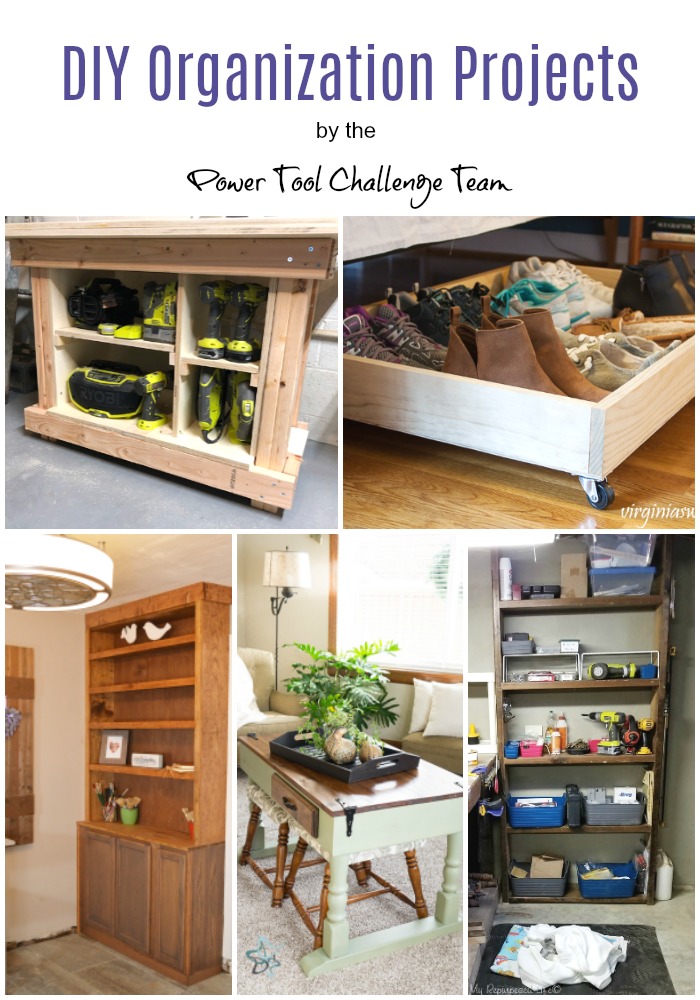
Today’s post is also all about organization and it happens to be Power Tool Challenge Team day. I’ll share what the rest of my team built today for their organization projects.
Scroll down to find my how to build built in bookcases with cabinets tutorial!
Create and Babble – Simple DIY Workbench
Virginia Sweet Pea – DIY Under Bed Storage Drawer
H2OBungalow – How to Build Built In Bookcases with Cabinets – That’s me!
Designed Decor – Puzzle Game Table
My Repurposed Life – Easy Build Storage Shelf

Megan says
I am so envious of your skills! I’d love to build my own built-ins in my living room. Thanks for sharing at #MerryMonday
Wendi says
Hi Megan and thank you! I love how these turned out and yes, you can do this too! Everyone starts somewhere I do with learning to use a drill. The end result is worth it, look at how much money I saved on building these myself!
Alisha says
Why would you choose the Home Depot cabinets next time over the Lowes ones? Thanks!
Wendi says
hey Alisha…Why I’d choose the Home Depot cabinets over the Lowes is a good questions. I thought I added that part into the post…I guess not! The Lowes version is oak and I ended up using southern yellow pine for the shelves. Mixing the woods doesn’t work well unless you plan on painting the entire project. Home depots are a birch or something similar and I could have used a plywood with a similar grain and then given my project a light finish. I’m planning on refinishing these in the near future because I’m not a fan of the dark stain. Thanks for your question!
Alisha says
This was so helpful. Thank you for taking the time to post a detailed tutorial. They look great!
Wendi says
Hi Alisha and you’re welcome! I loved making these built ins. I needed the storage in the worst way and building them myself was by far the most economical way to get the job done. I hope you consider tackling a project like this yourself. Thanks so much for your note and visit.
Patty says
I love your bookcases and that is exactly what I want on each side of my fireplace, you did a really great job.
The more I look at you ceiling fan light fixture the more I love it, guess I will start my search.
Wendi says
Hi Patty and thank you! I’m thrilled they are done, it was a bit of work, but worth every bit of it 🙂 I ‘m not loving the color or finish of the bookcases, so… you’ll see a new project with those redone sometime soon. I know, I can’t leave well enough alone! LOL Yes, the light is wonderful.. I hope you find one you love as much as I do this one! Good luck on your search!
Vaness says
They look great. I need to do this in my office.
Wendi says
Hi Vanessa! You would love them! It was a bit of work, especially since I tackled building these myself…but, they are so worth it! Thanks so much for your visit and note and I hope you are dong well!
DeDe Designed Decor says
Wow, what a project! They look fantastic and I would not even know that it was not one complete unit! Awesome job!
Wendi says
Hi Dede and thank you! I’m so ready to start organizing my office now that I have new storage and built ins!