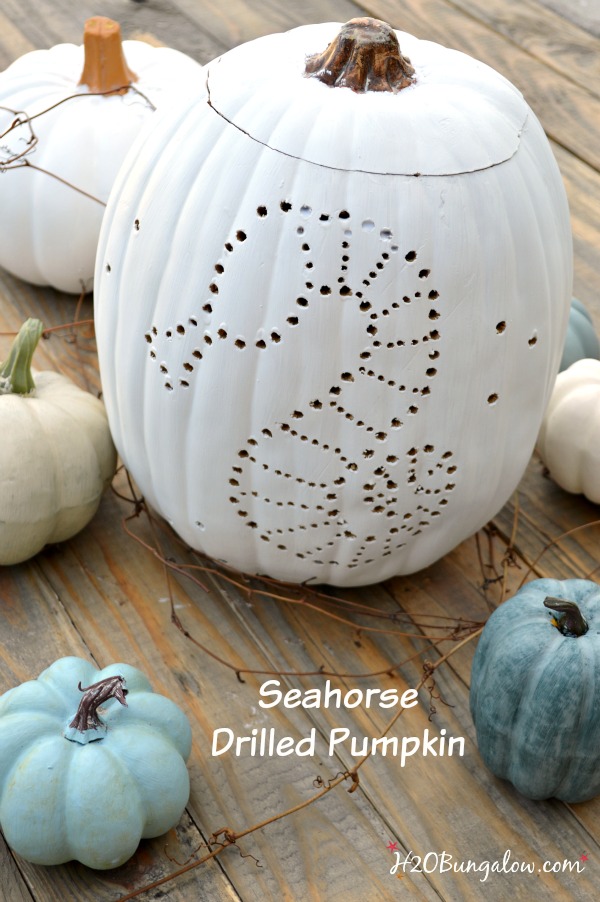
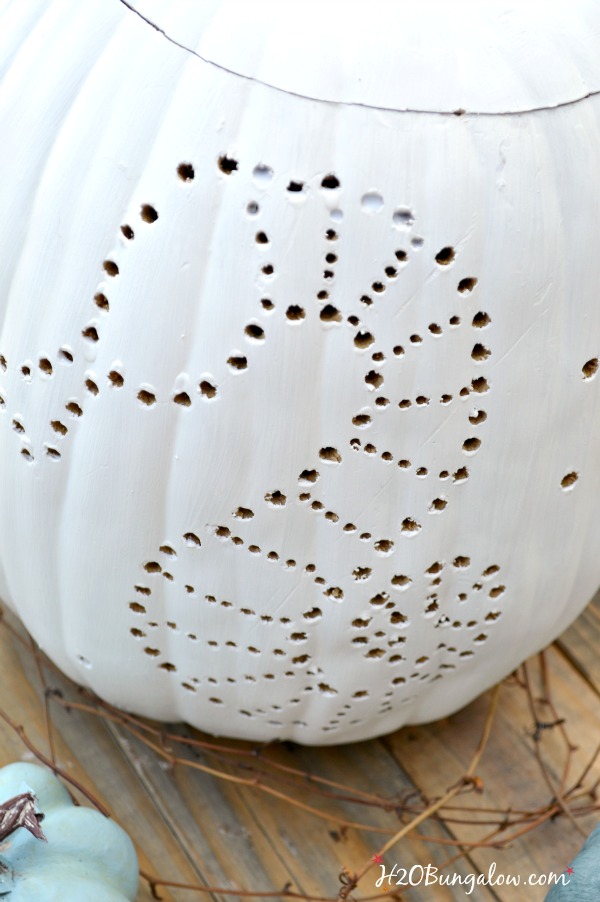
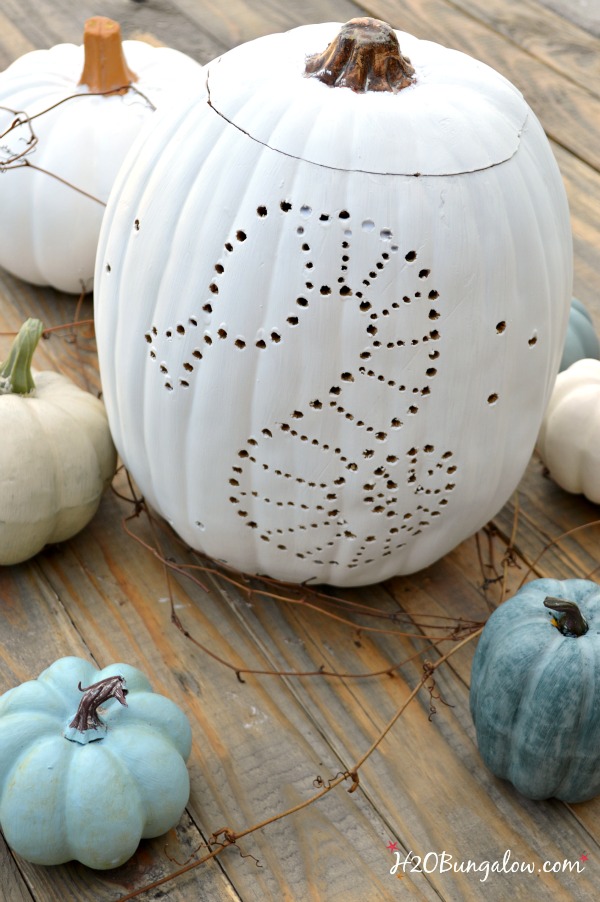
I gave you guys a peek of my coastal drilled pumpkin a weeks ago. Yes, I decided to drill my pumpkin into a seahorse and it was easy! This makes a great last minute Halloween or fall decorating project. Even if you aren’t a tool user, you can do this!
Seriously, it’s that easy!
Let me show you how to drill a pumpkin 🙂
Supply list to make a DIY coastal drilled pumpkin. I use affiliate links to help you find the supplies I’ve used.
Real or artificial carveable pumpkin
tape
coloring book character or simple outline shape printed
colored pen to trace the shape
assorted drill bit sizes – I just used a large and a small for this project
DecoArt Chalky Paint in Everlasting
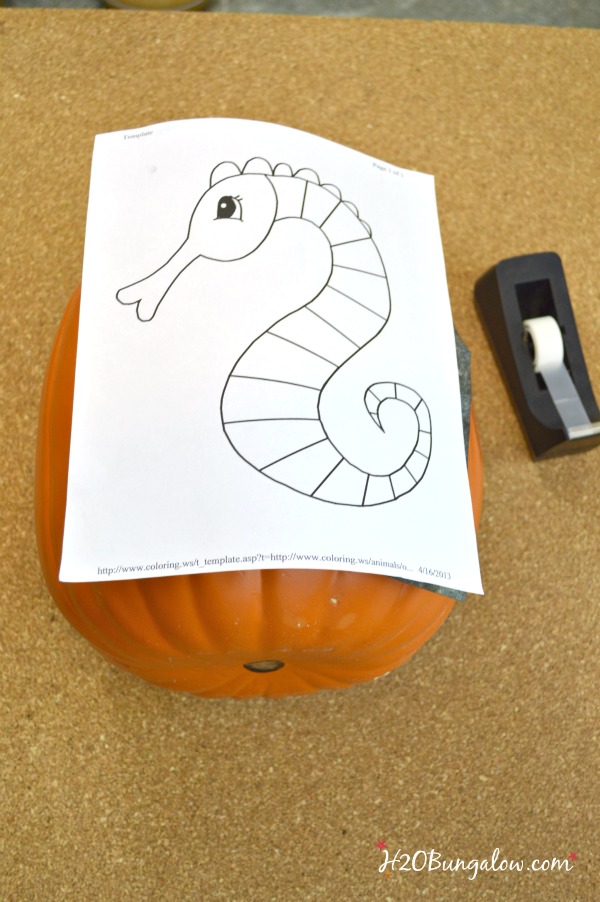
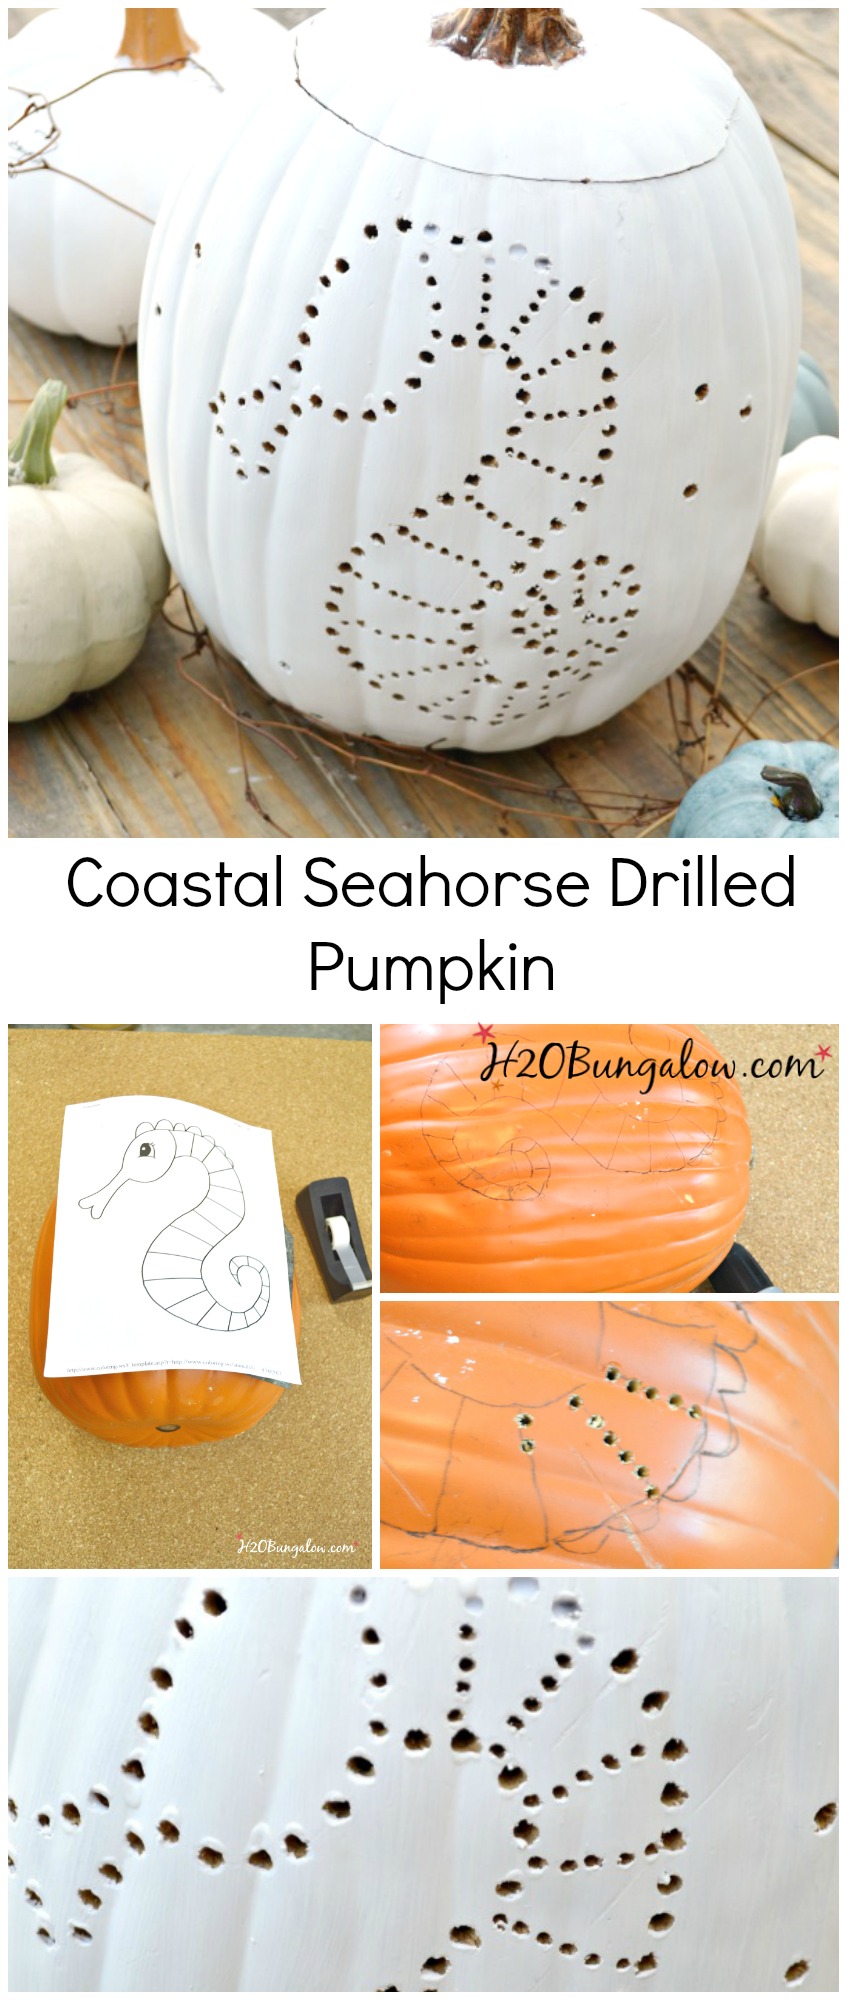
Use graphite paper to trace the outline of your shape onto the pumpkin. Use a little tape to hold it in place.
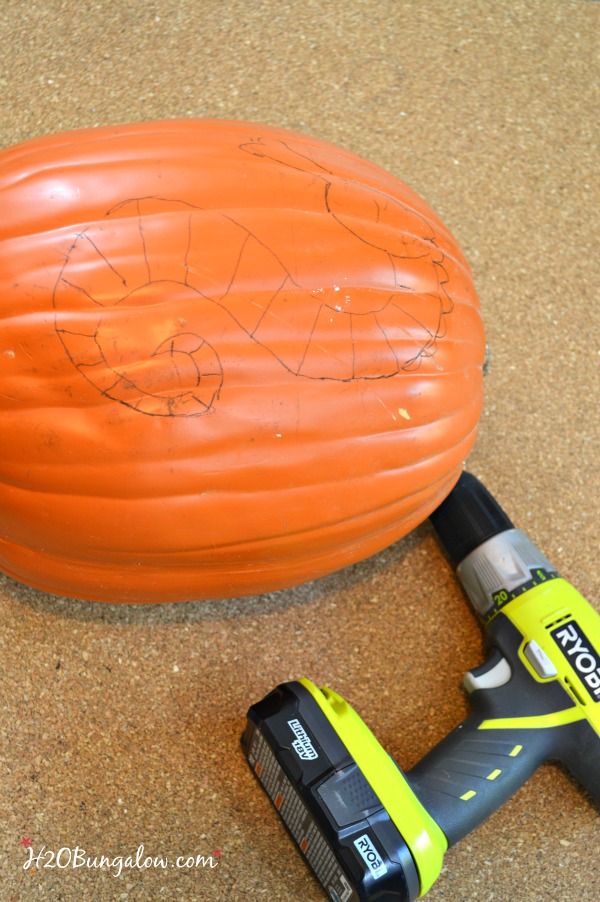
This is what your design will look like after tracing it onto your pumpkin.
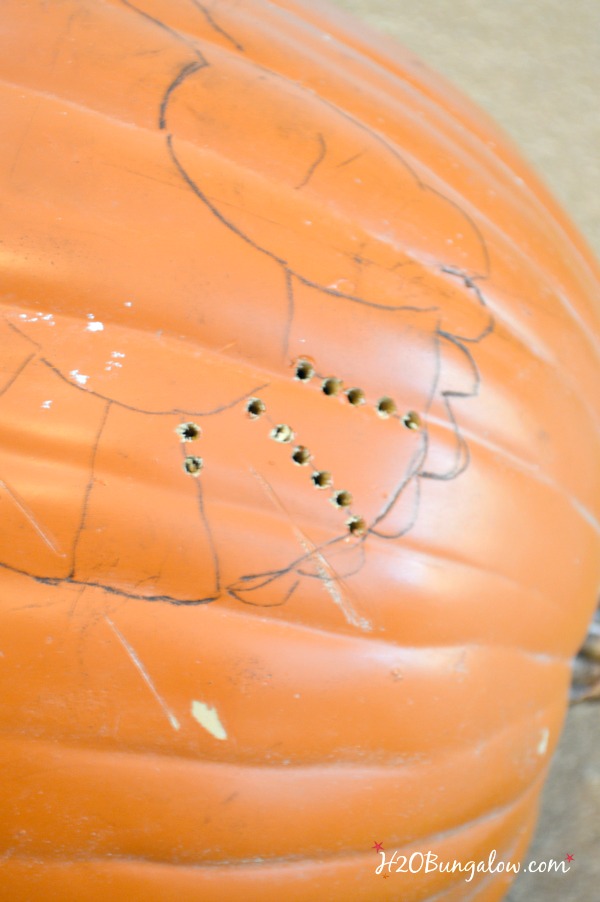
Grab a few drill sizes and plan which you’ll use where. I used two, the small one on the inside detail and the large one on the outside of my seahorse.
I painted mine with a coat of DecoArt Everlasting Chalky Finish paint and gave it a coat of DecoArt Ultra-Matt Varnish.
Use a toothpick to open up any painted holes.
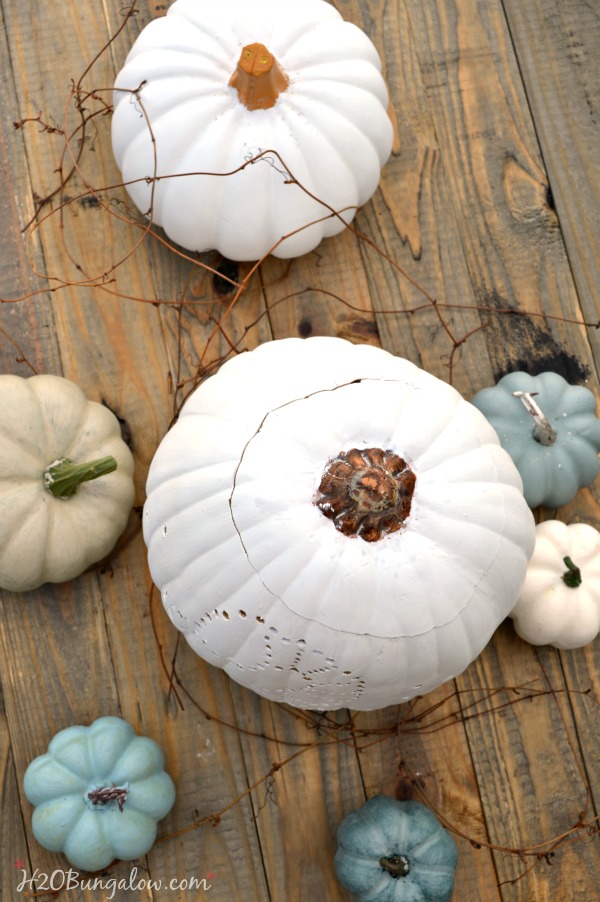
Well use our coastal drilled pumpkin on our front porch DIY bench on Halloween.
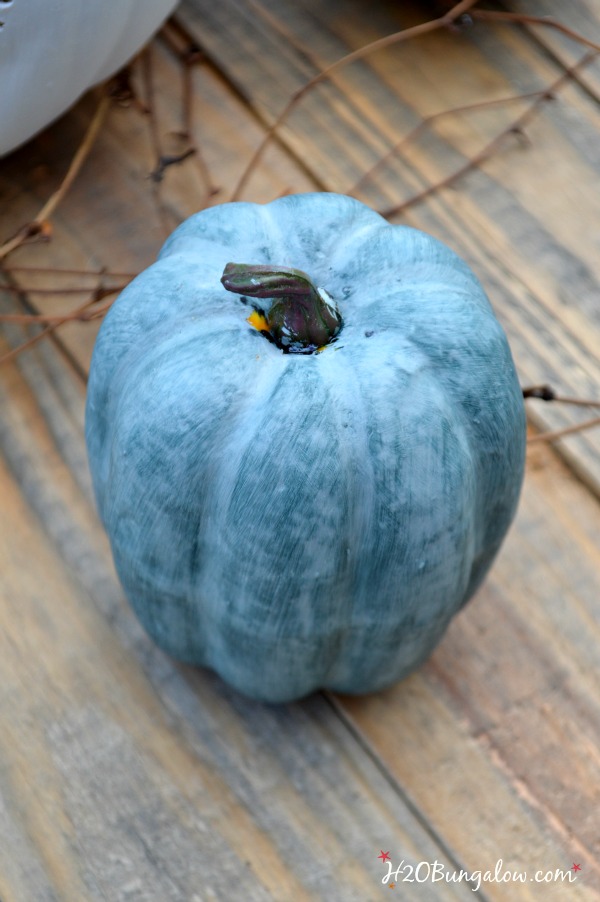
I couldn’t resist painting a few more pumpkins in gorgeous muted shades of blue. This one is may favorite.
Now that I’ve shared how easy it is to make a coastal drilled pumpkin, are you ready to try your hand at drilling a pumpkin with a drill yourself? Here’s a little graphic to pin just in case you want to save this for next year. You can also check out more Coastal Fall Decor Ideas for more inspiration.
Happy pumpkin drilling!
Oh…
If you decide to drill a pumpkin or even better, make a coastal drilled pumpkin…please share on my H2OBungalow Facebook page!

Michelle Leslie says
Awwwww that’s just so incredibly cute Wendi. I think I’m going to give it a try with our Dremel. Now I just have to find a pumpkin 😀
Wendi says
Hi Michelle! With your talent, I have no doubt you’ll come up with something spectacular! A Dremel is a perfect tool for doing this in layers too! I can’t wait to see what you make! Do you have Halloween where you are?
Teddee Grace says
I thought for sure I’d see one last photo with the interior illuminated!
Wendi says
Hi Teddee…Good point! I’m not sure why I didn’t share an illuminated picture of my seahorse. I may have been on a deadline when I made it and there was no time for a night photo. I should add a photo, probably next year since I’m renovating the North House in VT and won’t get back to FL until No some time. Thanks for the suggestion!
simple nature decor says
so cool and unique, thanks for sharing this on Dream Create and Inspire.
Maria
Wendi says
Thank you Maria! This was such a fun project to do, I hate putting it away until next year:)
Megan @ C'mon Get Crafty says
Very cute, and very coastal! Love how you made this, thanks for sharing the how to over at Merry Monday! Tweeted!
Wendi says
Thanks Megan:) It was on my want to make list for the longest time. I finally made the time and did it this year!
Denise/DIY Crush says
Soooo very pretty!!! Love the seahorse!!! I’d love to have you come over and link your post up to my craft party which starts at 7pm EST. and is new every Thursday! I also pin every post!
diy-crush.com/blog/category/link-party/
Wendi says
Thank you so much! I’ve wanted to do one of these for the longest time. It was so easy, I don’t know why I waited!
Shara @ Palmettos and Pigails says
Thanks so much for the tutorial-it came out great! We have a couple of neighbors who I think used a similar technique and I was wondering how they did it. I’ll be pinning this for next Fall!
Wendi says
You’re welcome! I’m thrilled my tutorial worked well for you. It was much easier than I thought it would be. Thanks for stopping in and leaving me a note that it worked so well:)
Mary-In the boondocks says
Ok this one you have to send over to my house!!
Wendi says
Mary… I knew you’d love it the moment you saw it! It would be beautiful in one of your lovely scenic photos you share!
Marie from The Interior Frugalista says
Cute pumpkins Wendi! I still decorated for Halloween instead of sneaking out of dodge, I might consider carving them with a drill. So much easier than using a carving knife. Hope the painting in Dallas is going well for you.
Wendi says
Thanks Marie! I can easily imagine you decorating a fun pumpkin or two with a local Canadian theme:) Next year, I’ll have to make more…this was crazy easy to do! Dallas went well, my back and hands are achy from so much painting, but the cabinets look fantastic!
Marie from The Interior Frugalista says
Glad to hear it Wendi!
gail says
cute pumpkins wendi!
I don’t decorate much these days… but maybe someday I will again.
Scheduling some pins so I remember this!
gail
Wendi says
Thanks so much Gail! It’s getting harder to decorate here too. Especially since we don’t have little ones and neither does our neighborhood!