This little bath storage cabinet makeover has been a long time coming. It was a neglected run down cabinet hidden away at the back of my closet for almost a year. It was also a lot more work than I initially thought it would be. Only because I was kind of figuring out how to do this as I was going along. Oh, and then there was an extra little twist I had to work into this makeover as well.
What kind of twist you ask?
This project is for Themed Furniture Makeover Day, and you guys know what that means! It means I had to fit my makeover into a theme.
This months theme for our group of furniture refinishing bloggers?
Animals.
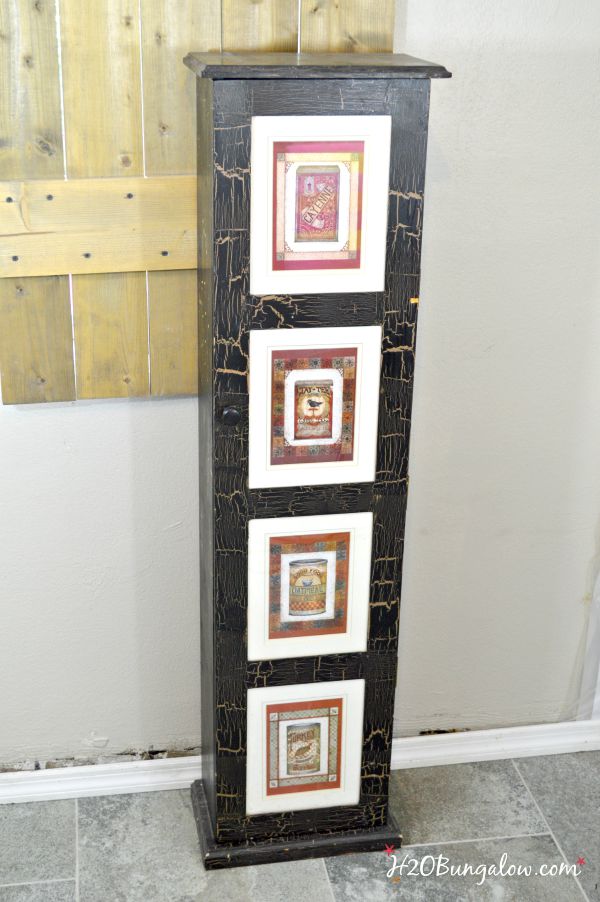
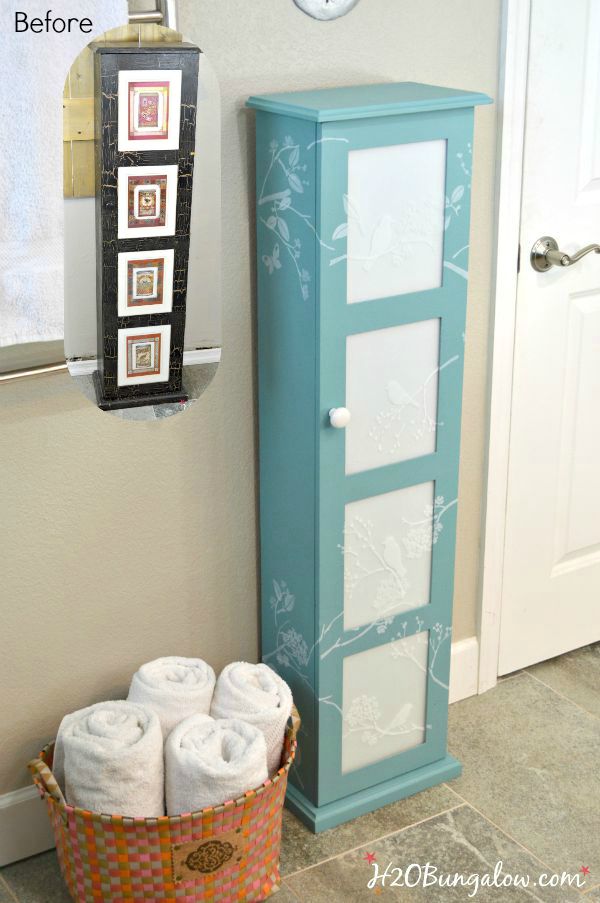
This little beat up storage cabinet was tucked away in my closet but I was using it as a bathroom storage cabinet. It was a tad too ugly to take out. I made it over somewhere around 2001, and it looked like it too. It was time.
All I had to do was make my bath storage cabinet makeover fit an animal theme. Simple, right? I think the challenge was making over my cabinet into something I’d actually like and use.
Digging through my stash of supplies felt like I was trying to come up with a new outfit for date night 🙂 I mixed and matched paints, decorative items, stencils and finishes until I had piles of stuff everywhere. I even tested out several paint combinations on the inside of my storage cabinet.
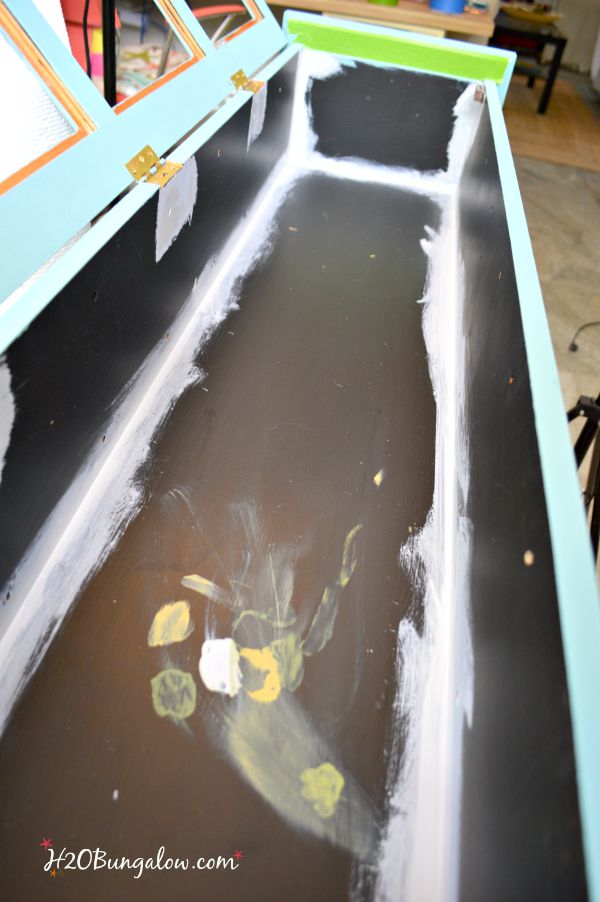
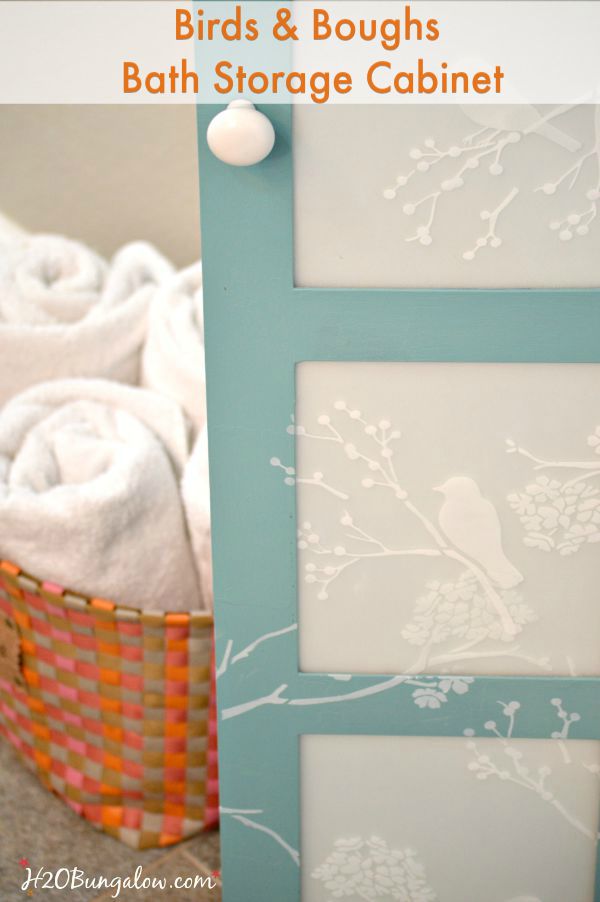
I ended up choosing a light grey called Yesteryear for the inside and a pretty blue-green Cascade on the outside. Both are acrylic based which I think will wear well for a non-distressed bath cabinet. I decided to frost the glass panels with frost glass paint and stencil the entire cabinet with my bird stencil in a white acrylic based multi-surface paint. I picked a poly sealer from my stash from DecoArt because I had some left over from another project. I also like the finish and it’s at an afordable price point.
I’ve never tried frosting glass before this project. I’d just picked up a jar on clearance at Michaels and was itching to try it out. It worked great…after a few learning curves and one ruined glass panel that I had to switch out :). How to frost glass is a technique and a post on it’s own, so I’ll share it next week.
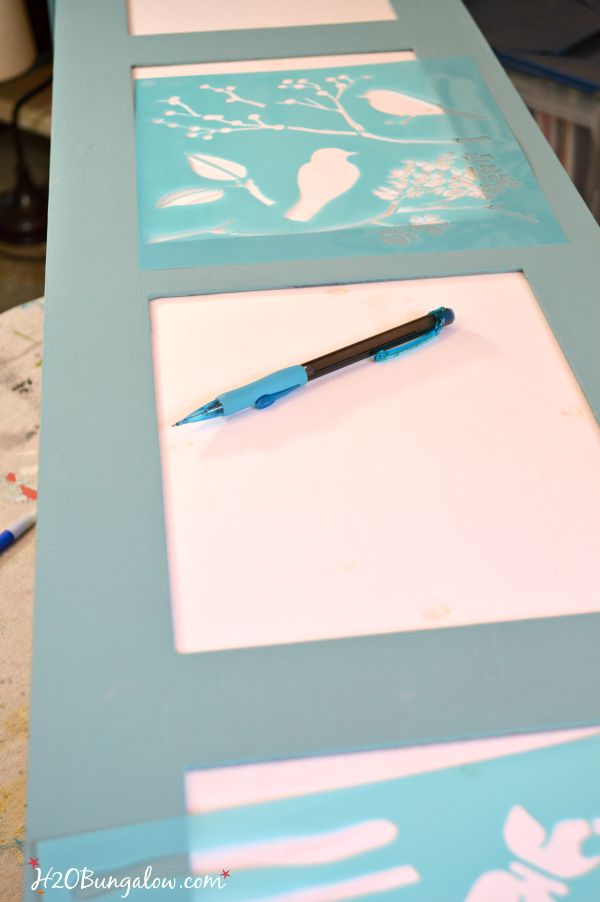
Once I had the glass frosted, I still needed to add my birds and branches. I used plain copy paper in the glass openings to test stencil layouts on paper before ruining any more glass 🙂
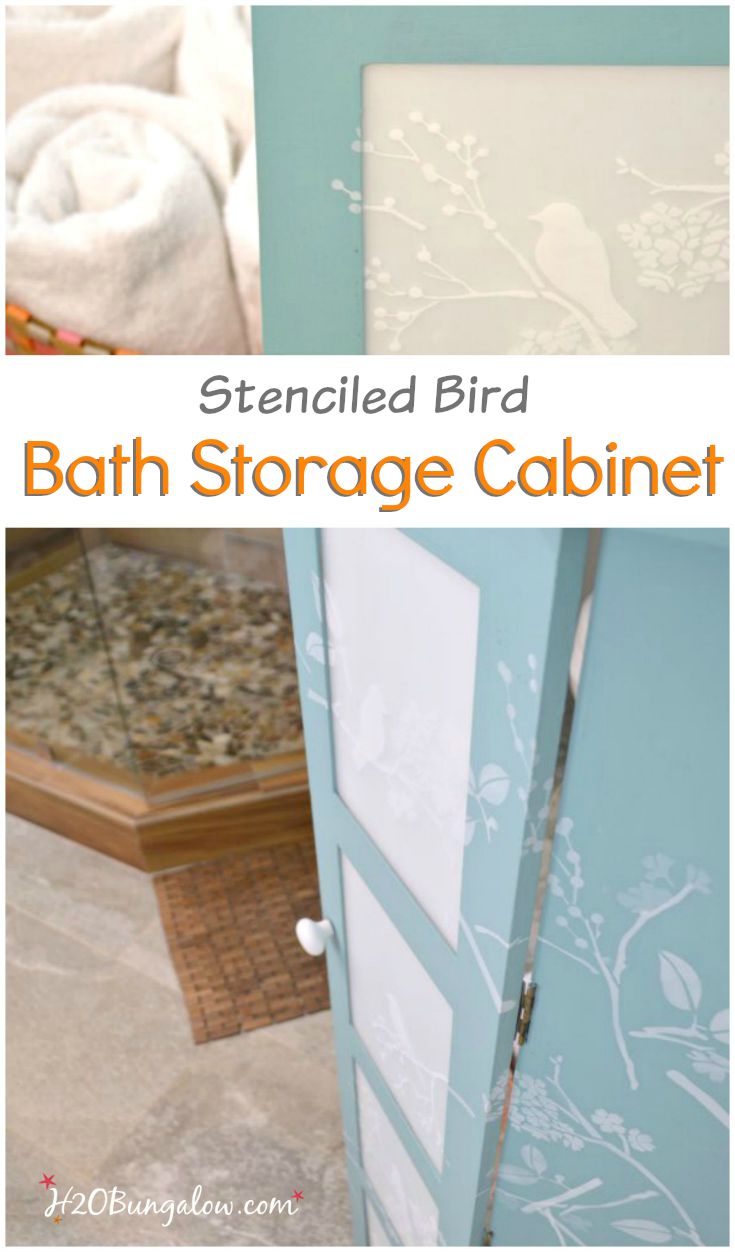
Once I had my stenciled bird layout, I built my design out from the center. This stencil was kind of complicated since there were so many pieces that make the whole. If you’re trying this, start with the bare branches and add the leaves, flowers, birds or butterflies in layers. I layered each one of these on the entire project before moving on and adding a new layer.
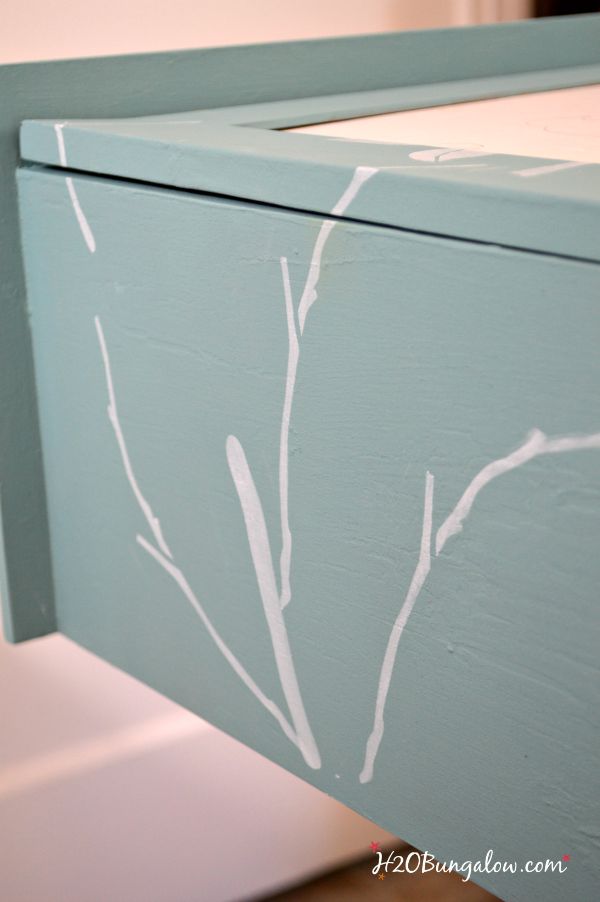
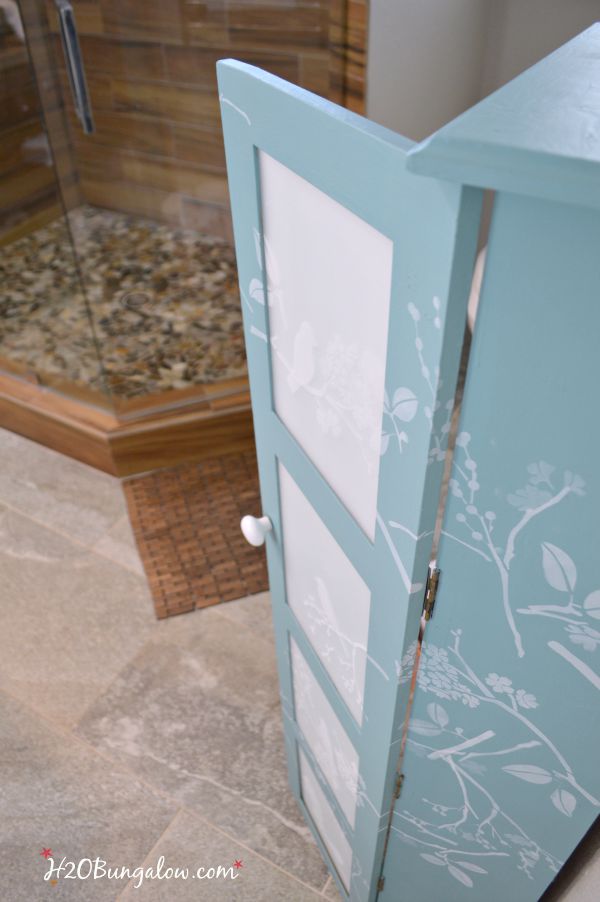
I wanted this bathroom storage cabinet makeover to be unique:) So I decided to stenciled my pattern over corners and across the frosted glass inserts. I took the glass in and out several times in this process. You’ll only have to do this once because I’m showing you the easy way 🙂
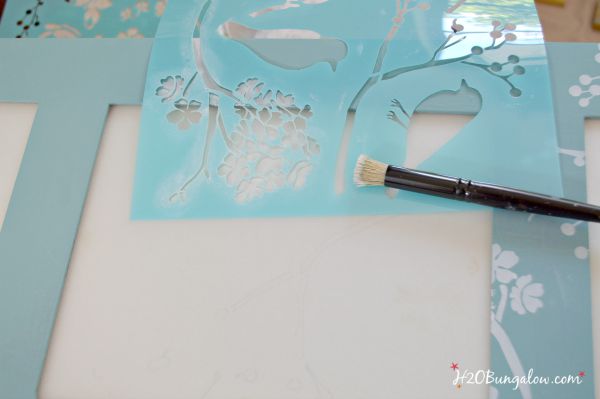
With the glass insert in place, position the stencil.
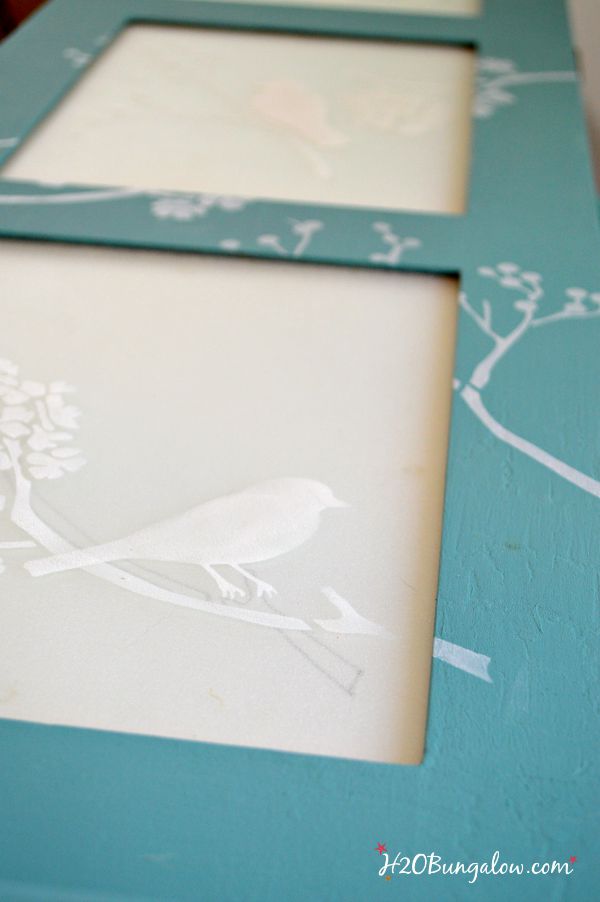
Next, stencil the area on the cabinet frame and on the glass where the stencil lies flat only. Don’t worry about stenciling where the stencil isn’t laying flat. Your glass will look like this. Next, take out the glass, line up the stencil on a flat surface and fill in the gaps at the edges. Easy, right?
I sealed my cabinet with two coats of poly since it was headed for our bathroom, and lots of humidity.
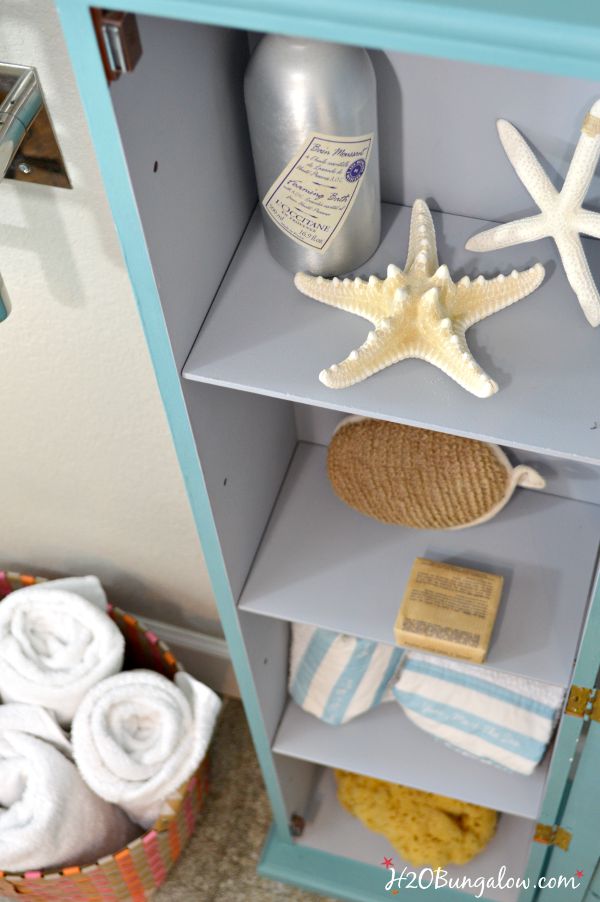
When I put it all back together and put the shelves back inside.
I loved it! It was worth all the extra work.
There’s plenty of room inside to keep the all the items I’d keep in a medicine cabinet or a closet. Of course I made it look pretty for you guys. It won’t look this tidy next week;)
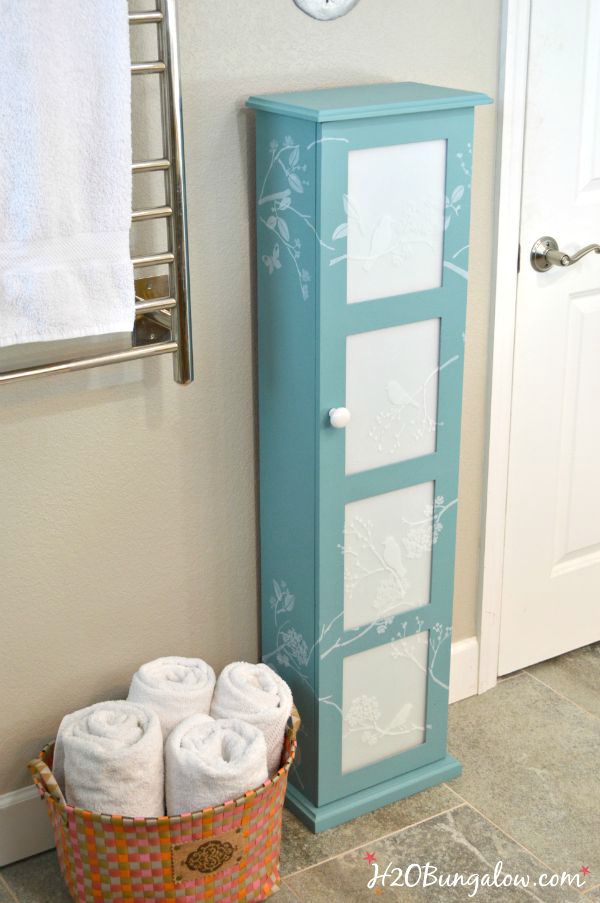
I’m happy with the wild bird and twig pattern I created. It kind of cascades down from the top left to the bottom right.
The stenciling looked the best with plain ol’ white copy paper behind the frosted glass. I love that the glass is frosted. The new look is clean, crisp and fresh.
..and yes, that’s our heated towel bar. Seriously, everyone should have one. They keep towels fresh in the humid summer and warm and toasty in the winter. If you haven’t seen our awesome master bath addition and the DIY Open Shelf Vanity I built, you need to! This was just one of the many Creative DIY Shelving Ideas for Organizing and Styling for your Home.
I love a good before and after picture don’t you?
So what do you hink of my frosted glass bath storage cabinet makeover? Could you use one of these too?
Here are a few of my favorite Themed Furniture Day projects Faux Painted Cargo Furniture and I still love my Starfish Stenciled Side Table.
OK, my friends, are you all ready for more animal furniture makeovers? How about several. Browse all the projects below. Click on any photo you’d like to see and it will take you to that post!


Jenna says
What an amazing transformation! The birds, the frosted glass, and the color just works together so beautifully. We’re featuring your project on our Weekend Features post on Sunday. 🙂
Wendi says
Yay!! How Awesome and thank you so much! It was an amazing transformation, one that I’m happy worked out since we needed the storage!
Cat @ Pocketful of Posies says
Wendi,
You did a fabulous job making over your bathroom cabinet! It is so beautiful! The bird stencils were the perfect compliment! we would love if you stopped by and shared some of your posts at our Dream. Create. Inspire. Link! Party that is going on right now. I hope we’ll see you there!
Cat
David Nguyen says
Your frosted glass bath storage makeover? Awesome! That pastel color and those birds just make your bathroom look pretty and pleasant.
Wendi says
Thanks so much David. This cabinet was so useful and so dated before I had to do something to move it out of the closet so It would be easier to get to. I’m super happy with how it turned out too. Thanks so much for your visit!
Christy @ Our Southern Home says
Wow! You really made this piece over beautifully! The placement of the the stencils is perfect!
Wendi says
Thank you so much Christy:) It was fun y=to try a randome stencil project. Our theme and tour was really outstanding this month. I’m excited for next month already!
gail says
You are so smart to test out your stencil Wendi–I’m just a fly by my seat sort of gal…. usually regretting my decisions! 🙂
I love the new look of your little storage cabinet. The colors and the stencil are perfect for each other!
what a beauty!
gail
Wendi says
Thank you Gail! I was running behind and no time left for repainting so I had to get it right the first time! I’ve found myself in trouble too many times with guesswork! Thanks so much for your visit!
Denyse @ Glitter, Glue & Painy says
I absolutely love your cabinet, Wendi! The color you used is gorgeous. It’s all Perfect!!
Hugs,
Denyse
Wendi says
Thanks so much Denyse:) I so happy the stencil art turned out..it had so many pieces to put together I wasn’t sure I’d pull it off!
Paula@SweetPea says
I like that this is your cabinet’s second makeover. Your update is so pretty and looks great in your bathroom. I love the way you wrapped the stencil design around the cabinet and the colors that you used for the piece are so pretty.
Wendi says
Thank you Paula. I liked the idea when I thought of wrapping it around the corners. I can’t wait to start using it:)
Jen @ Girl in the Garage says
Wendi this is so lovely! I love the colors and how you painted the stencil. And that is one handy storage cabinet to keep in your bathroom- I need one! 🙂
Wendi says
Thank you:) The color felt like it belonged in the bathroom if that makes any sense at all:) We are going to love the storage!
Breanna says
Wow this piece came a long way! It turned out beautifully! Awesome job!
Wendi says
Thanks so much Brenna! I’m loving it a whole lot more now!
Lucy @ Patina Paradise says
Wendi, your piece is so elegant and I love the subtlety of the white on white… it almost looks like handmade paper. I would love it if you would share it at tonight’s blog party… Friday’s Furniture Fix… patinaparadise.com
Wendi says
Thanks so much Lucy:) I did stop over and share my little bird cabinet. Have a great weekend:)
Jeanette says
This is a refreshing makeover. I remember the style of the before piece. I’m sure there is something tucked away here in the same style.
Wendi says
Funny Jeanette, That was the style back then! I’m happy to have brought it out of the year 2000 and into the present. Plus, it won’t have to live in my closet anymore!
Larissa ~ Prodigal Pieces says
What a refreshing update, Wendi! I have that same stencil and love it. Your cabinet is perfectly tweet-worthy!
Wendi says
Thank you my friend:) If you have the stencil, you now how many parts there are…holy cow! I wasn’t sure my brain was going to wrap around attaching them all and making some sense out of the twigs, birds. boughs and flowers. I’m calling my version a dense thicket:) Thanks so much for stopping by & have a good weekend!
Nancy @ Artsy Chicks Rule says
Wow what a difference!! That is an amazing makeover. I love the colors and how delicate it looks with that pretty stencil! 🙂
xo
Nancy
Wendi says
Hi Nancy! It doesn’t look like the same cabinet. I’m glad I can pull it out of my closet and free up some extra space now:) The stencil was fun to try on this:)
pt says
That turned out beautiful.
Wendi says
Thank you so much. It was special since this piece was my first ever makeover from over 15 years ago! Thanks for your visit and taking the time to leave a nice comment:)
Marie@The Interior Frugalista says
You do such beautiful work Wendi – just love your cabinet redo. The beachy colors and that adorable bird and branch stenciled detail is so pretty. I’m curious why you added the white bond paper to the back of the frosted glass?
Wendi says
Hi Marie! That’s a good question. The glass panes were originally picture frames so they stay in place like the back of a picture with solid boards and little clips at the edges. I coud probably rig something up to have it open in the back..but, I ran out of time on the project:)
Karin Chudy (ART IS BEAUTY) says
Wow what a difference! It doesn’t even look like the same cabinet!
Fabulous Job!
Hugs,
Karin
Wendi says
Thanks so much Karen… that’s the best kind of makeover…when it doesn’t look anything like the original version. In this case..that’s a very good thing!
Christy@Confessions of a Serial Do-it-Yourselfer says
Oh wow, Wendi! Night and day!! I bet that cabinet was hot in 2001, but it was definitely time and you made it stunning!! Another gorgeous makeover, my friend! XO
kim says
REALLY nice – love the color and the birds!
Wendi says
Thank you so much Kim:) I was lucky on the color because I already had it and loved how it turned out. Thanks so much for your visit and taking the time to leave me a nice note:)
Lindsay Eidahl says
What a great transformation. It doesn’t look like the same piece. Very pretty!
Wendi says
Lindsay, It’s a very good thing it doesn’t look the same! Thanks so much for your visit & have a good weekend!
KariAnne says
You are so clever! I love how the stencils go around the cabinet!
Happy day friend!
karianne
Wendi says
Hi Miss KariAnne! Thank you so much:) I loved the idea of bringing the stenciling around the corners as soon as it popped into my head. I appreciate you stopping by & have a good weekend!
Chloe the HandyGirl says
Karianne, you are so right! The stencils are excellent. Subscribed Wendi 🙂
Wendi says
Hi Chloe and thank you! I loved the bird stencil the second I saw it. I couldn’t resist running the branches around the corners. Thanks so much for subscribing, I hope you enjoy and get inspired! Thanks so much for your sweet note too…