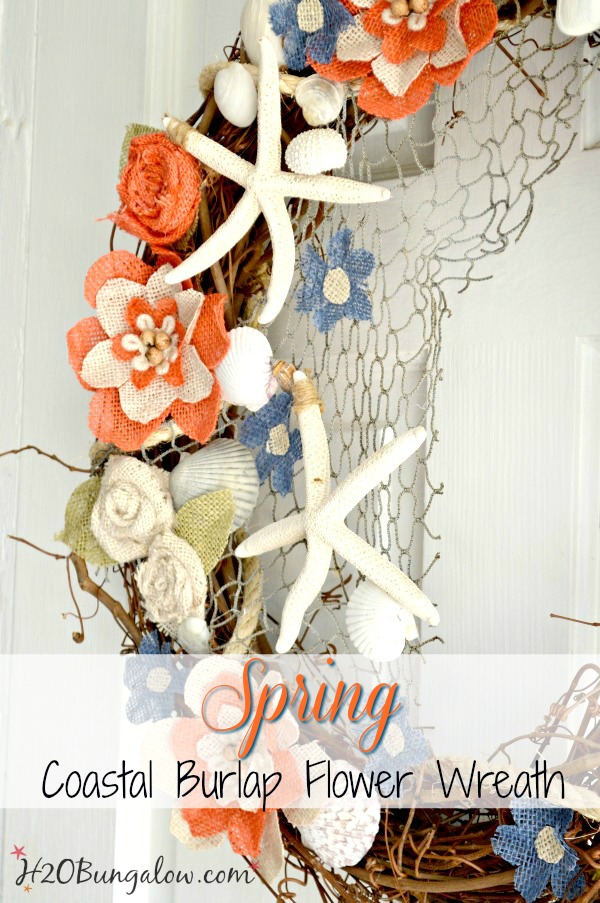
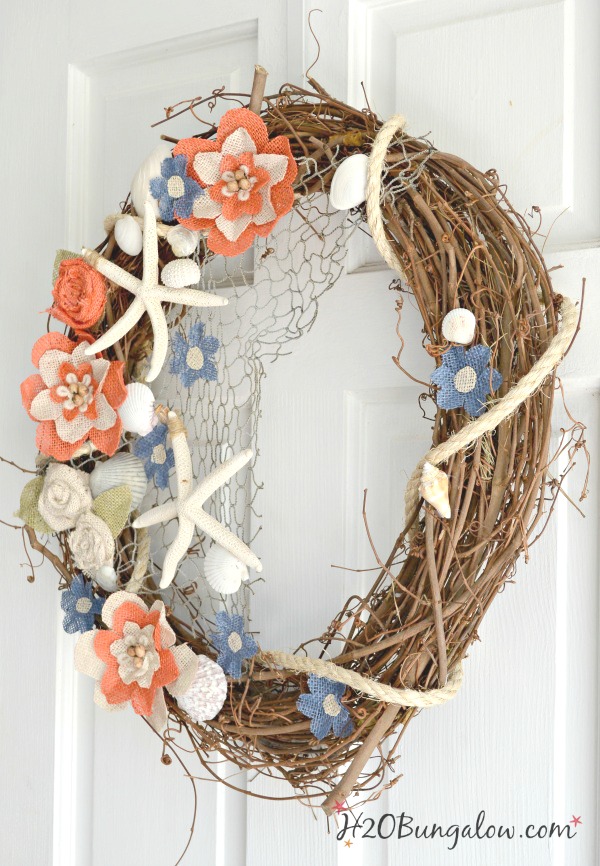
Spring is finally here! It seemed to take forever to come this year with the crazy weather that has been all over the place. Hot one day with the AC running and cold the next with everyone wearing sweaters. That craziness wasn’t going to deter me from crafting my newest project. It’s hanging on the front door and I’m sharing my spring coastal DIY burlap flower wreath tutorial with you all today.
I found the most beautiful burlap colors at JoAnns Fabrics a few weeks ago. You may have seen my crazy cart piled high on Instagram if you follow me:)
Had to have them.
Thank goodness for sales and coupons because I bought lots of colors.
And a single burlap flower in the floral department. With a price tag of $7 each. Ouch!
I bought it, studied it, and I copied it.
So today I can share with you how to make burlap flowers for a wreath and save a lot. My version probably cost a few pennies to make at most!
Now you can take the leftover money you saved and put it towards a pair of pretty spring sandals:)
How to make DIY burlap flowers
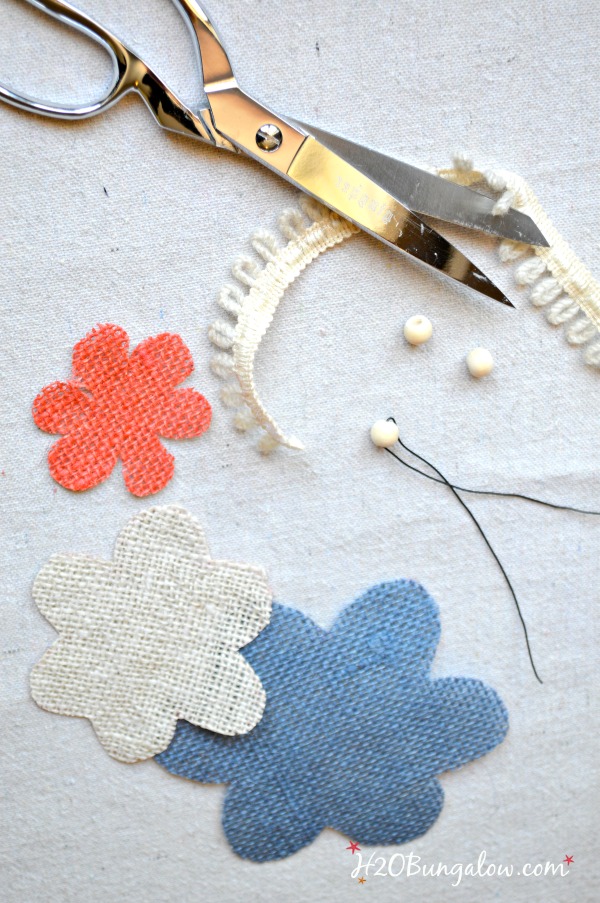
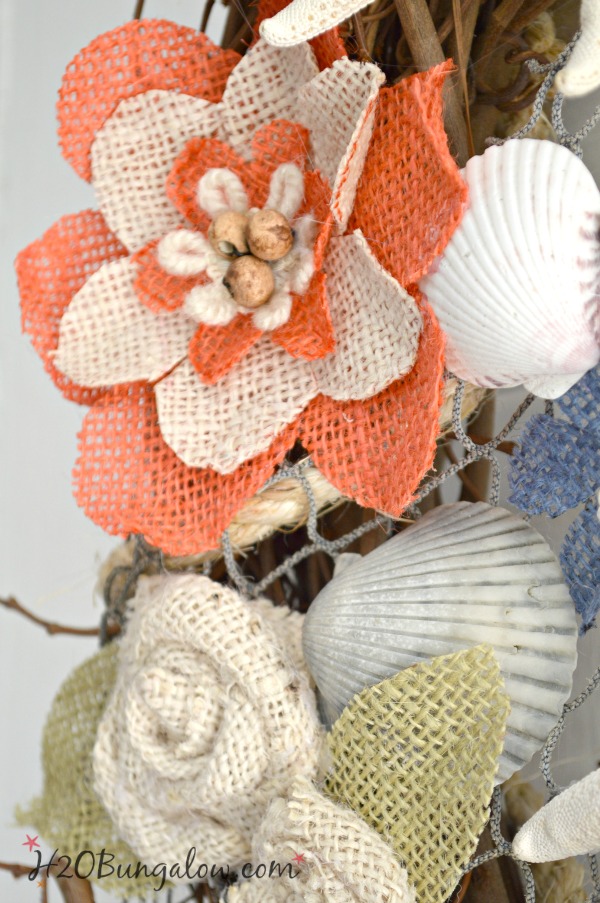
This is how I made the knock off burlap flower. Use stiffy on burlap strips about 12″ wide. This will give the burlap some body and stop fraying. Once it dried, I cut out my flowers.
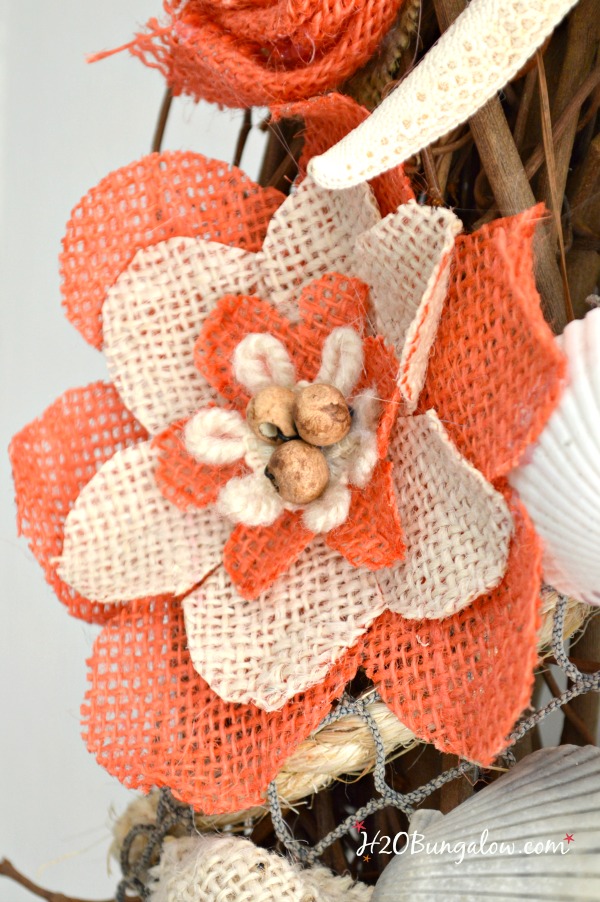
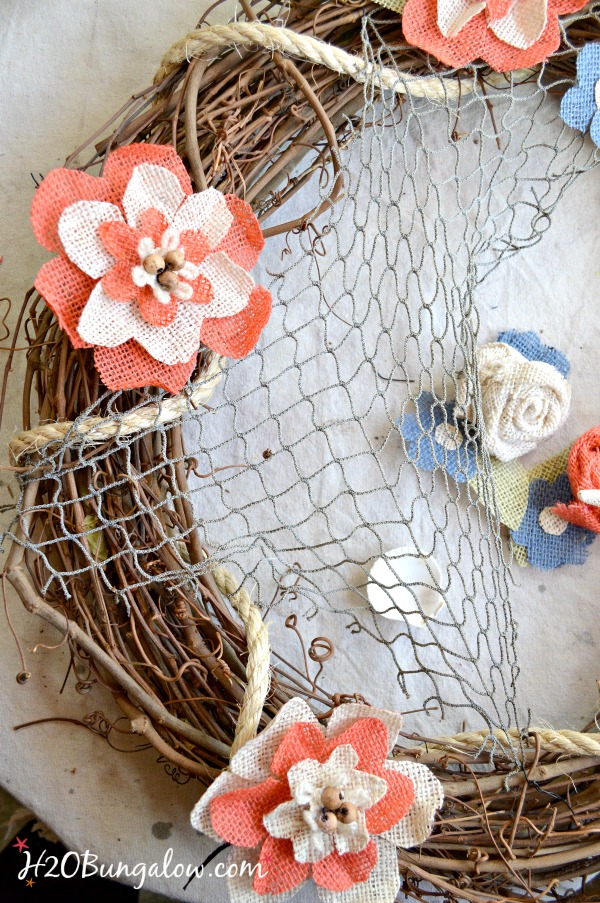
Paint or stain three wood beads and run a floral wire through each one. Twist the three beads on the 3 wires together and hot glue a fabric trim around the base. Put the three flowers together and poke a hole in the center of the flowers. Put the wire through all three flower cutouts.
Easy, no?
You can bend the stiffened burlap to give each flower a little shape. I pinched the smaller petals together.
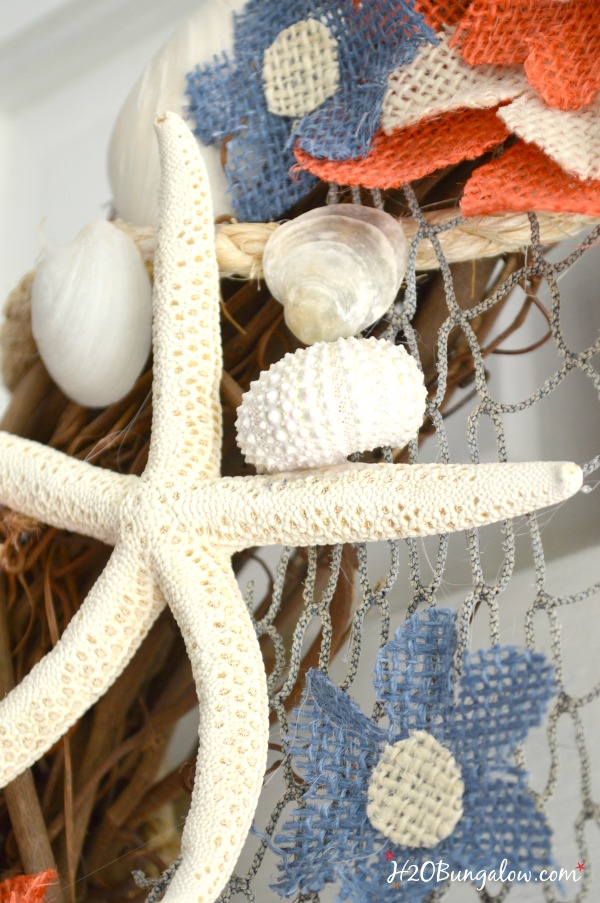
I made blue small daisy burlap flowers from just one flower cut out and a small circle of burlap in the center. I also made burlap rosettes. My sweet friend from Confessions of a Serial DIYer made this good video if you don’t know how to make rosette burlap flowers.
Now that you’ve got the hang of making burlap flowers, let’s get on the wreath making part.
Now, I know a lot of you don’t live by the coast, so leave out the starfish and seashells and add more flowers if a beachy wreath isn’t your thing 😉
How to make my DIY burlap flower coastal wreath
I’ve used affiliate links to help you find the products I used.
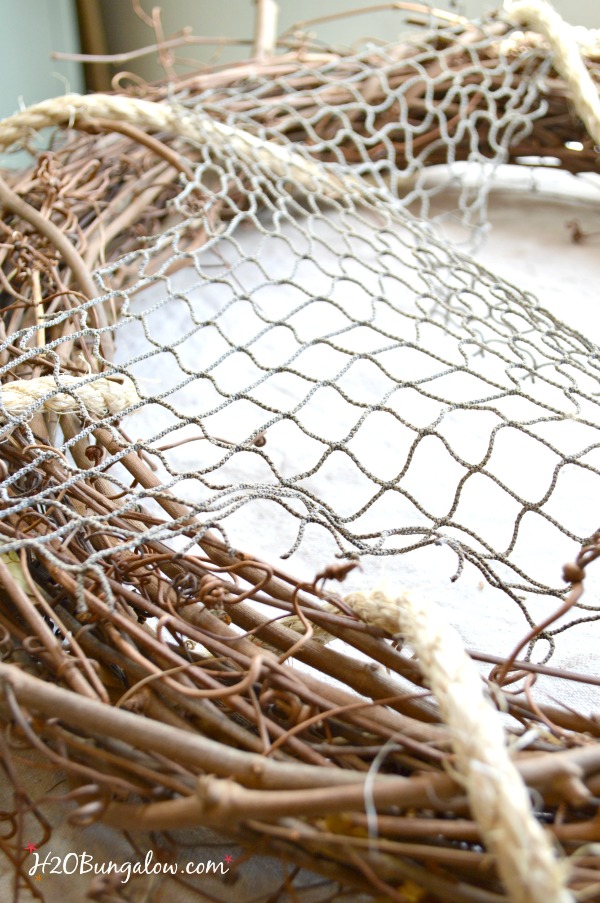
First I started with the background items. I wove seven feet of sisal rope around a 24″ grapevine wreath, attaching it with hot glue in the back. Next, using florist wire I wired a triangle shape piece of decorative fishing net at three points on the side of the wreath.
The rest of my DIY coastal burlap flower wreath is all about placing the items on the wreath. I start with the biggest ones first and work my way down in size, filling in small areas.
I started with three large burlap flowers and wired them to the grapevine wreath.
Then added a few starfish. Hot gluing was a bit tricky on all the uneven surfaces. I tried to strategically place my starfish so they not only looked good but had a few parts touching something that I could glue them too.
Then I kept adding the rest of the burlap flower rosettes and the burlap daisies I made until I liked the way my new burlap flowered coastal spring wreath looked.
My last step was filling in spots with shells from my overflowing collection of shells from our beach walks.
It felt good to finally use some of these!
Easy.
My DIY coastal burlap flower wreath is ready to hang on the front door. You might also like this Easy Fall Boxwood Wreath.
I’d love to know if you make one, and of course I’d love it even more if you shared your project on my H2OBungalow Facebook page!
Looking for more ways to pretty up your front entry for spring? You may enjoy my 5 Tips for Mixed Planters, or How To Spray Paint Outdoor Furniture or maybe your front needs a new pop of color with a colorful doormat .
.
You’ll find my project linked up to these fabulous parties!
Love a good dose of DIY home decor, home improvement, the challenge of woodworking and creative ways to make your home look fabulous?
Me too!
I’d love to share mine with you. Click here to sign up for my post emails and I’ll send a quick note when I have a new project to share.
Social media fan? Don’t be shy say hello! I love when you guys do that! I’m interactive on Facebook and I share lots of other projects and, useful inspiration for the home and content I don’t share anywhere else. Follow H2OBungalow on Facebook and Instagram!
I use affiliate links in my posts. If you should make a purchase I will receive an itty bitty commission at no cost to you. Thank you in advance for supporting my blog and two fur-ball cats who believe they are privileged.

Jenny @ Refresh Living says
I love how this wreath turned out! The burlap flowers with the fishnet are just perfect!!
Wendi says
Hi Jenny & thank you:) I liked the mix and of course had to find a way to add something coastal on my wreath!
Cat @ Pocketful of Posies says
Beautiful job Wendi! I love all the flowers! Its the perfect blend of spring and beach! Thank you for sharing at Dream. Create. Inspire. Link! Pinning!
Wendi says
You’re welcome Cat:) I enjoy your party each week:) Thanks so much for your visit and pinning my wreath!
handmade by amalia says
This is gorgeous! The very best of spring.
Amalia
xo
Wendi says
Thank you Amalia! I loved the burlap colors as soon as I spotted them!
Marie, The Interior Frugalista says
Very pretty Wendi and thanks for the tutorial on how to make burlap flowers. Love the burlap colors you scored at JoAnn’s. Oh, how I wish we had JoAnns here in Canada. Adding the net, rope, and starfish make this perfect for your beautiful coastal home! Oh and p.s. – totally jealous that Spring has sprung where you are.
Wendi says
Hi Marie.. I feel for you still having cold weather! I’m serious, you should be a snow bird like all the Canadian ones we have here! I love the burlap colors from the flowers! I have so much left over I’ll need to come up with a few more projects to use my huge stash on! LOL Thanks for your visit girlfriend XO!
gail says
I can NOT design a wreath, it’s just not in me… I don’t have that part of a design gene. You know how some people are tone deaf? I just can’t put items on a wreath because I just don’t “see” it.
I LOVE your little burlap flowers, they are soooo cute! and are perfect for your wreath.
pinning under Easy Crafts, because for anyone else, this is easy. 🙂 (I’d rather be sawing)
Wendi says
Gail… you crack me up! You have such awesome vision for what you do so well…repurpose and build! I’m constantly inspired by your creativity:) Thank you so much for sharing my project!
Sue@betwixthomandschool says
How clever you are with your colorful Coastal Wreath. I love the addition of the fish netting, I think that elevated the coastal theme more. I was not aware of the colored burlap material, I’m going to check into this. Beautiful Coastal Wreath, Wendi!
Wendi says
Hi Sue! Thank you! I have such a huge stash of left over supplies from projects it’s always nice when I can use some for another project. You’d have a blast with the spring colored burlap too, hope you find some in your area! Thanks so much for your visit!
Patty says
Wendi that is adorable, I will be so glad when it gets warm and stays warm and the wind quits blowing so I can hang a wreath. I love your wreath and the colors are my favs. I just might attempt this or something close to it hopefully.
Wendi says
Hi Patty, I totally get it about the wind, we have crazy wind here too. I’m just lucky that our front door is sheltered. You’ll love the burap colors that are out this spring and the burlap flowers were crazy inexpensive to make. I hope you make a colorful wreath for your front door!
Mary-the boondocks blog says
This is a wreath made for me. How did you know Wendi? Perfect in every way! Now I just need to get in the summery mood, right now we have too much rain and we’re still in that in-between phase.
Wendi says
Hi Mary, I feel for you. We get periods like that here too, than the sun pops out and it’s warm again. These are your colors! hope you find some colorful burlap, you’d make these flowers and do something uber creative with them!