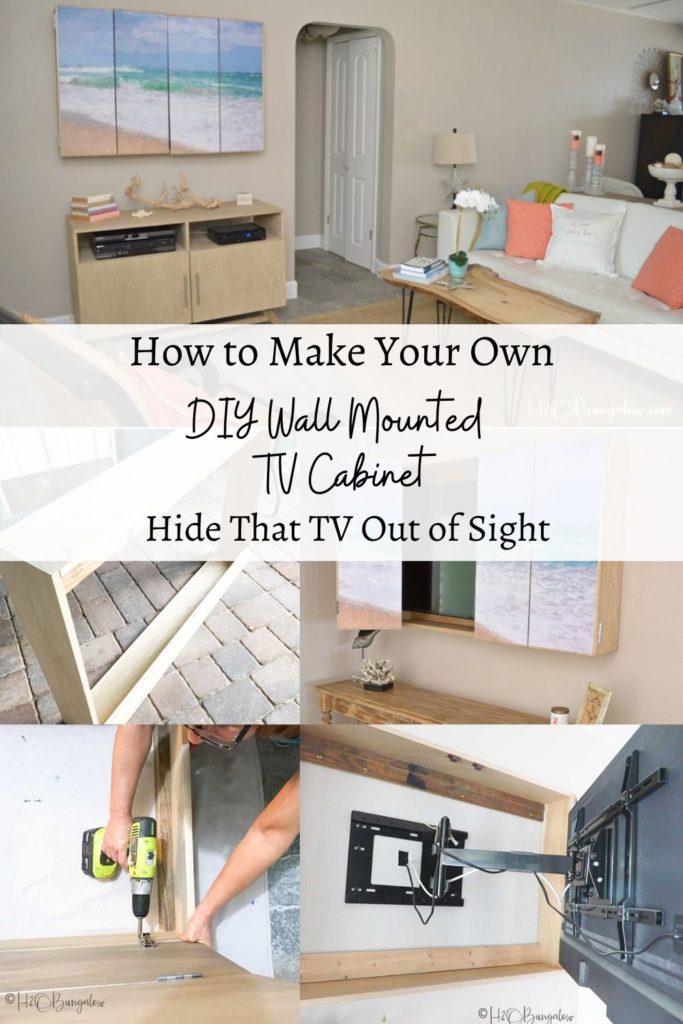
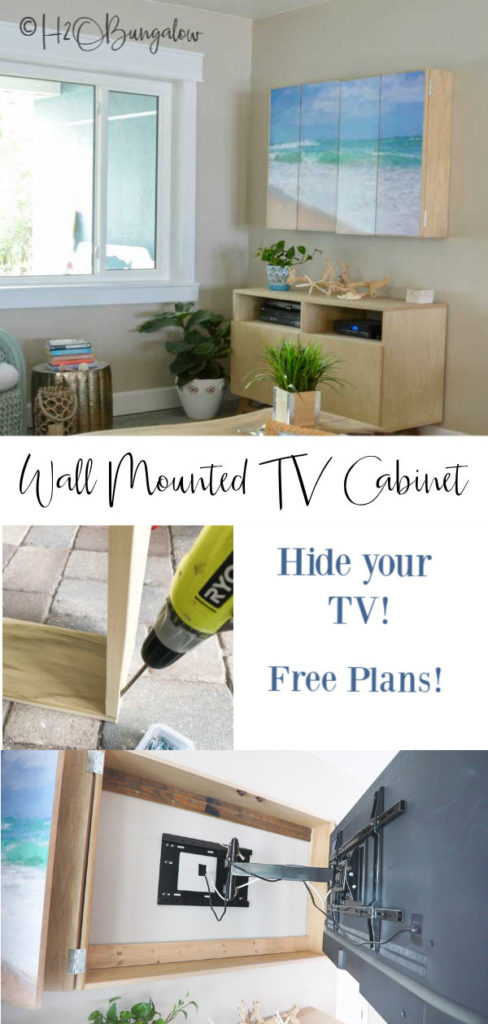
I did it! I thought I’d never actually build a DIY wall mounted TV cabinet for our living room. Partly because I wasn’t sure how to hide the TV. Partly because the thought of me mounting our expensive TV on the wall and running the wires myself seemed intimidating. Guess what? It wasn’t. Building a TV cabinet that looks like art to hide the TV, installing the TV mount and doing the wiring wasn’t so hard after all. I’m sharing my free plans to build a flat screen wall mounted TV cabinet below so you can hide your TV too!
Pin this now for later!
My decorating nemesis for the past 5 years has been the broken TV stand that held our old TV in the corner. It was an unsightly huge black shape that took up a significant amount of space in my small seating area. Bottom line, it was cramping the décor style I’ve been trying to create in our living area.
Seriously, it was.
I’d already built my Hairpin Leg DIY Live Edge Coffee Table and not too long ago I finished my popular Painted Upholstered Chair Makeover . My design ideas for the living room were finally starting to come together!
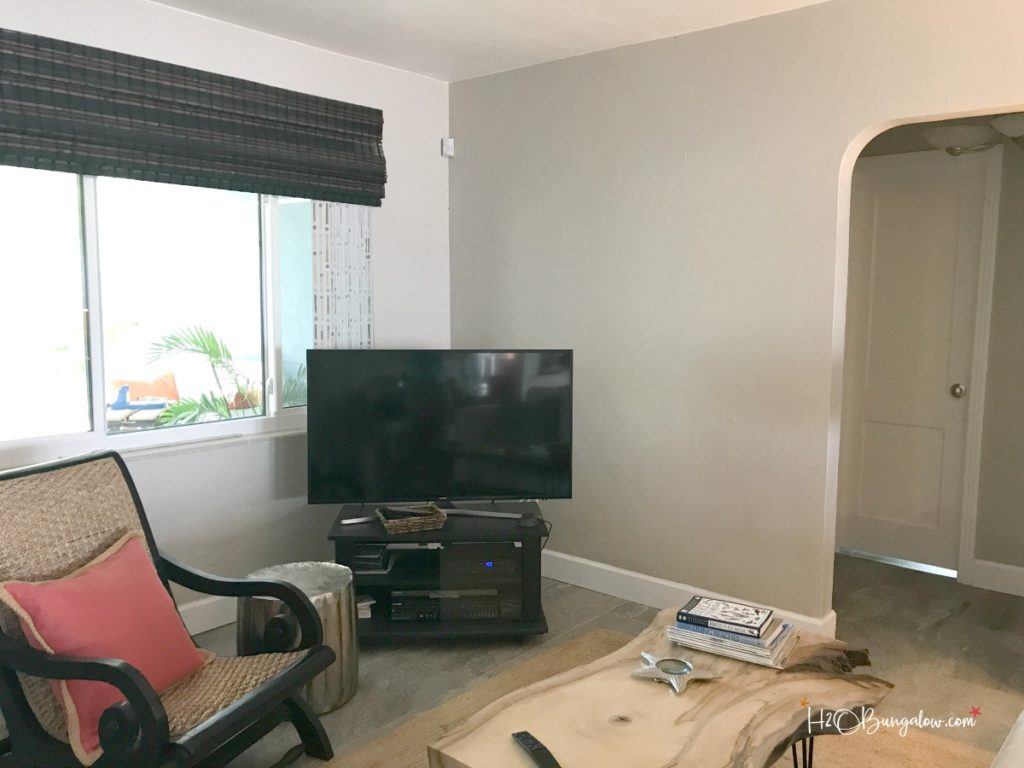
All I needed was for the old TV stand in the corner to go away.
DIY Wall Mounted TV Cabinet
After a lot of research and thinking I came up with the idea of designing a wall mounted TV cabinet with doors that would hide the TV and look like art when the doors were closed. My plan was basically a simple cabinet with doors to hide the TV.
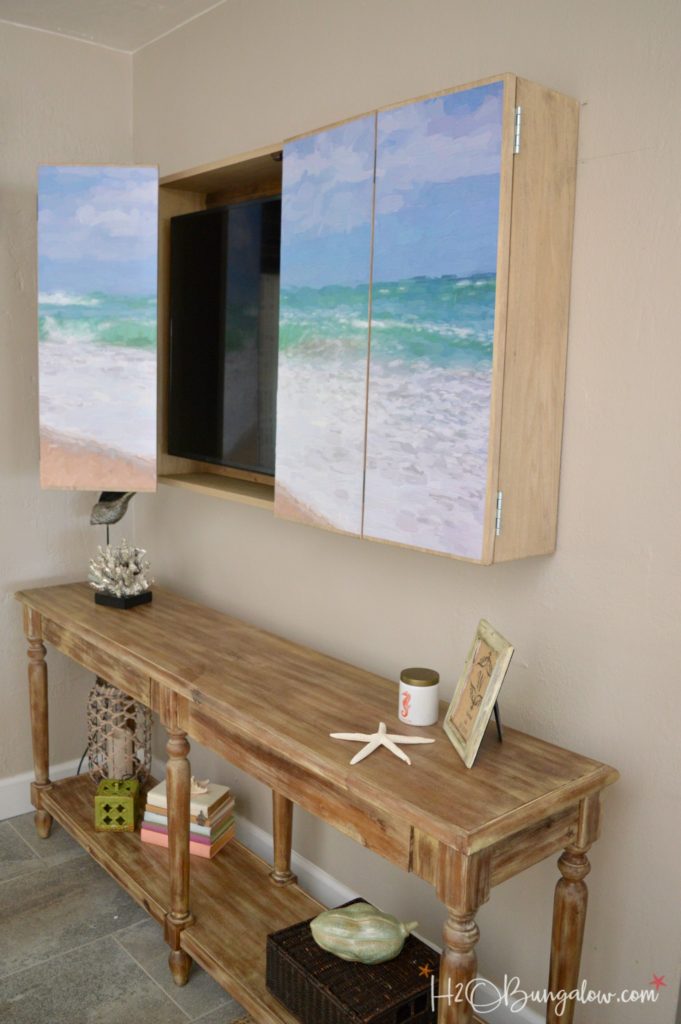
Designing a cabinet to hide my TV was pretty simple. I needed a frame deep enough to hold the TV with doors to cover the TV when we weren’t using it. Simple enough, right? Figuring out how to make it look like art and a trendy piece of furniture was the bigger challenge.
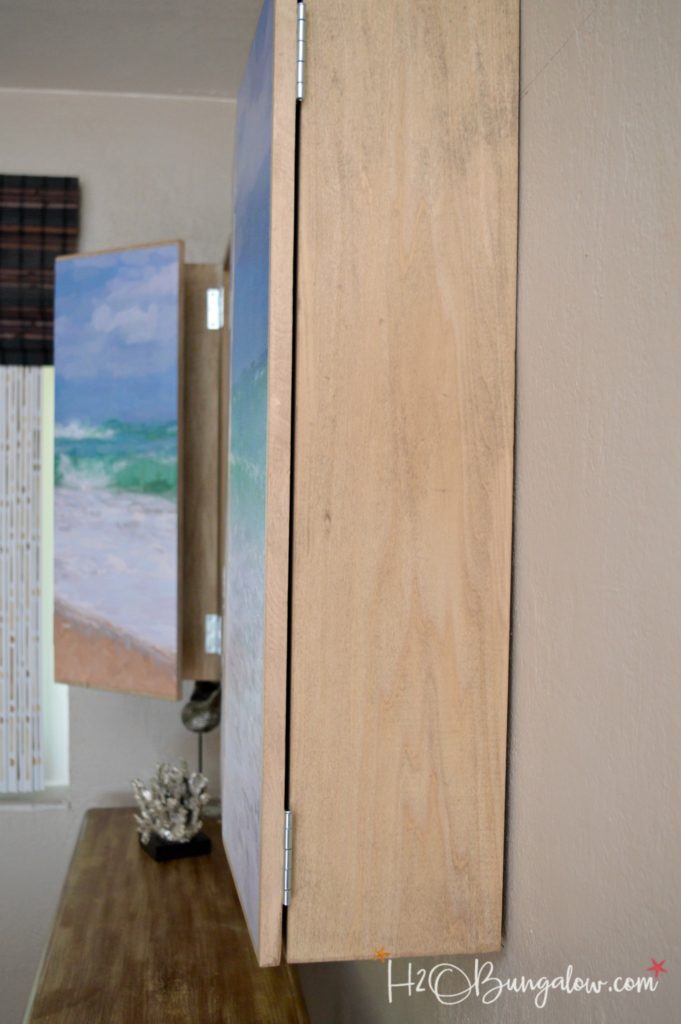
After many hours of researching DIY wall mounted TV cabinet ideas and not finding much, I settled on the idea of mounting a print across four hinged doors on the cabinet.
*Updated in 2019*. I just finished building my new Shaker Cabinet Doors with hidden hinges and realized, that style hinge would have been perfect for this wall mounted TV cabinet project. It was my original intent to use soft close hidden hinges and I goofed when designing the cabinet and didn’t account for the extra space the type of hinge I used.
If you use the Kreg Hidden Hinge Jig with full face frame hinges, the hinges won’t stick out very far and the TV will fit. Even better is the soft close function of the hinges help keep the doors closed. I’d still use the magnetic closures at the inside top of the TV cabinet like I did though.
This DIY wall mounted TV cabinet is for a 55″ TV with dimensions of XXX. Make adjustments to the plan as needed for your TV.
As an Amazon Associate I earn from qualifying purchases. I use affiliate links to help you find the products I used. If you make a purchase I get a small commission at no cost to you.
This is the 31″ extending wall mount that swivels 180° I used for the TV.
Materials List:
- 1-1/4” course pocket hole screws
- 1/4” x 4” or 5” lag screws
- Edge banding (for the doors) – maple works well with poplar plywood
- 4 – 2 1/2″ square non mortise hinges
- 4 face frame self closing hinges
- 1 set of magnetic door catches
- Edge band trim tool
- Kreg Jig– K4
- Kreg Concealed Hinge Jig
- Miter Saw
- Table Saw
- Drill
- Iron
Lumber needed:
- 2 – 1″ x 8″ poplar @ 8’
- 1 – 4’ x 4’ sheet of 3/4” poplar plywood
- 3 – 1″ x 4″ pine @ 6’
Cut List:
- 2 – 1″x 8″ @ 33” – sides of cabinet
- 2 – 1″ x 8″ @ 47-3/8” – top and bottom of cabinet
- 3 – 1″ x 4″ a@ 47-3/8” – bottom support and French cleat
- 2 – 3/4” plywood @ 12 1/16” x 33” – outer doors
- 2 – 3/4” plywood @ 12-1/8” x 33” – inner doors
Steps to build a wall mounted TV cabinet to hide a TV
Step one: Cut lumber to size.
Cut List:
- 2 – 1″x 8″ @ 33” – sides of cabinet
- 2 – 1″ x 8″ @ 47-3/8” – top and bottom of cabinet
- 3 – 1′ x 4′ a@ 47-3/8” – bottom support and French cleat
- 2 – 3/4” plywood @ 12 1/16” x 33” – outer doors
- 2 – 3/4” plywood @ 12-1/8” x 33” – inner doors
Step 2. Add pocket holes to top and bottom of cabinet.
With the pocket hole jig set for 3/4” material, drill a set of pocket holes in each end of the top and bottom cabinet pieces.
You won’t see pocket holes on the inside of the TV cabinet when it’s mounted on the wall. Place the pocket holes on the outside (top of TV cabinet) and outside (bottom of TV cabinet) of the Use the “A” and “C” pocket holes on the jig.
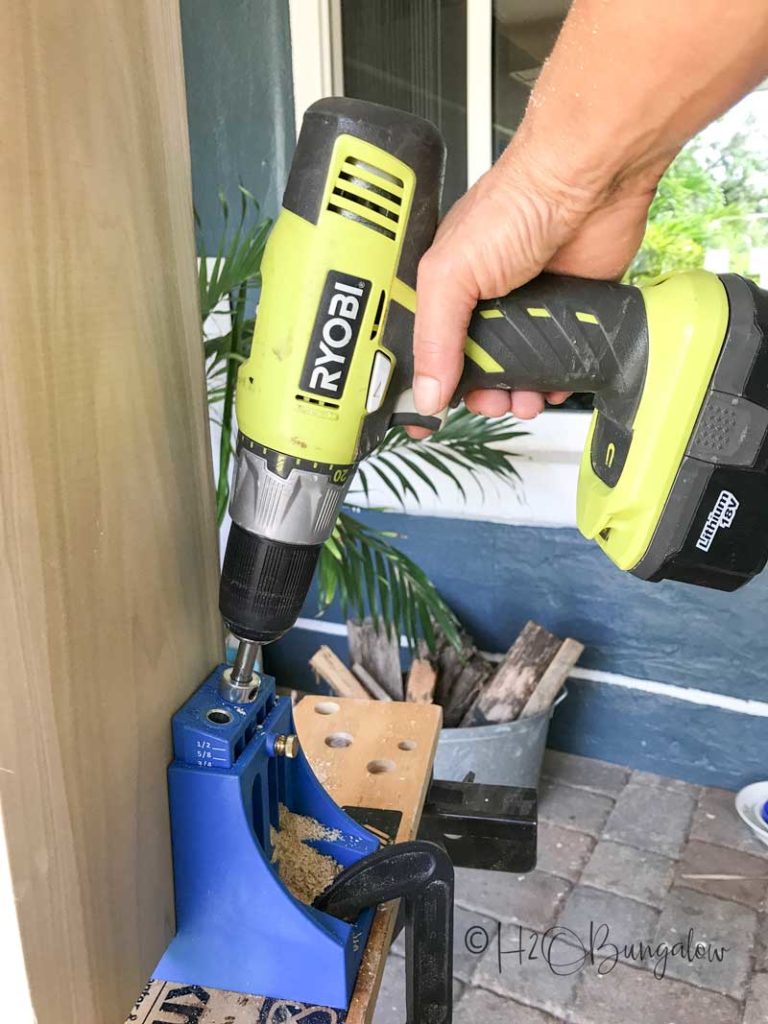
Step 3. Secure the top and bottom to the sides using wood glue and 1-1/4” pocket hole screws.
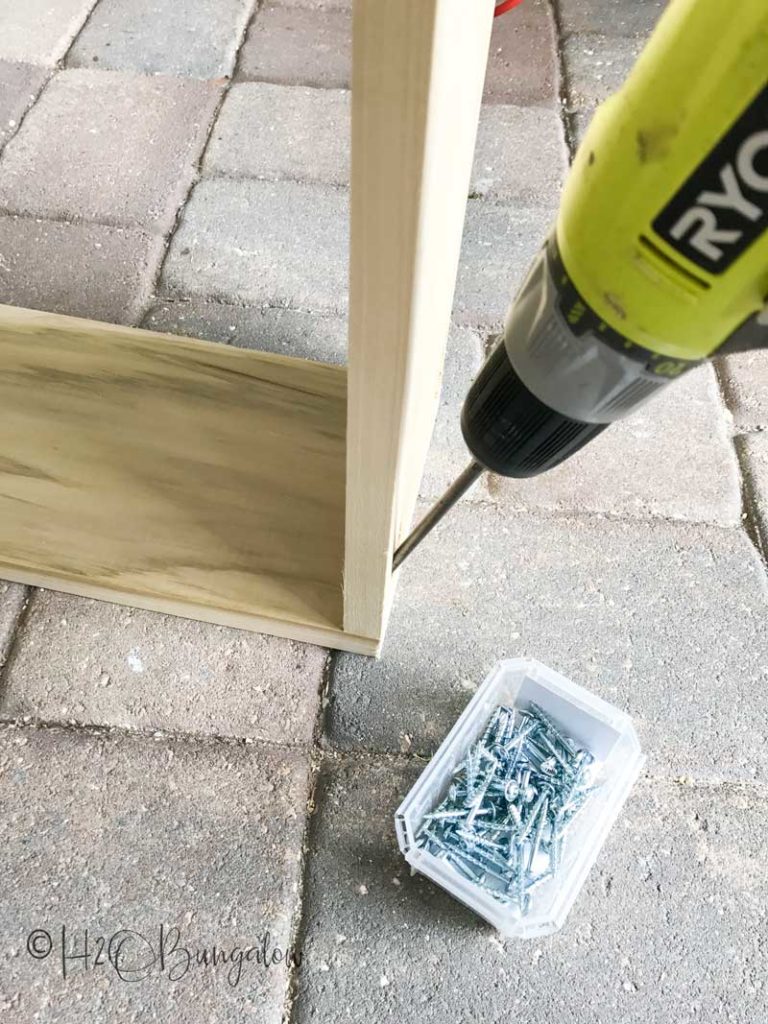
Step 4. Attach back supports
Bottom Support – Use one of the 47 3/8″ support pieces as a back support on the bottom inside of the TV wall cabinet.
On the outside of each support add two pocket holes on each end and three sets spaced evenly on the back. See the picture of the TV Wall Cabinet frame below. Use “A” and “B” hole locations on the Kreg jig.
Attach the support with wood glue and 1 1/4″ pocket screws. The pocket screws will face to the outside of the cabinet (against the wall).
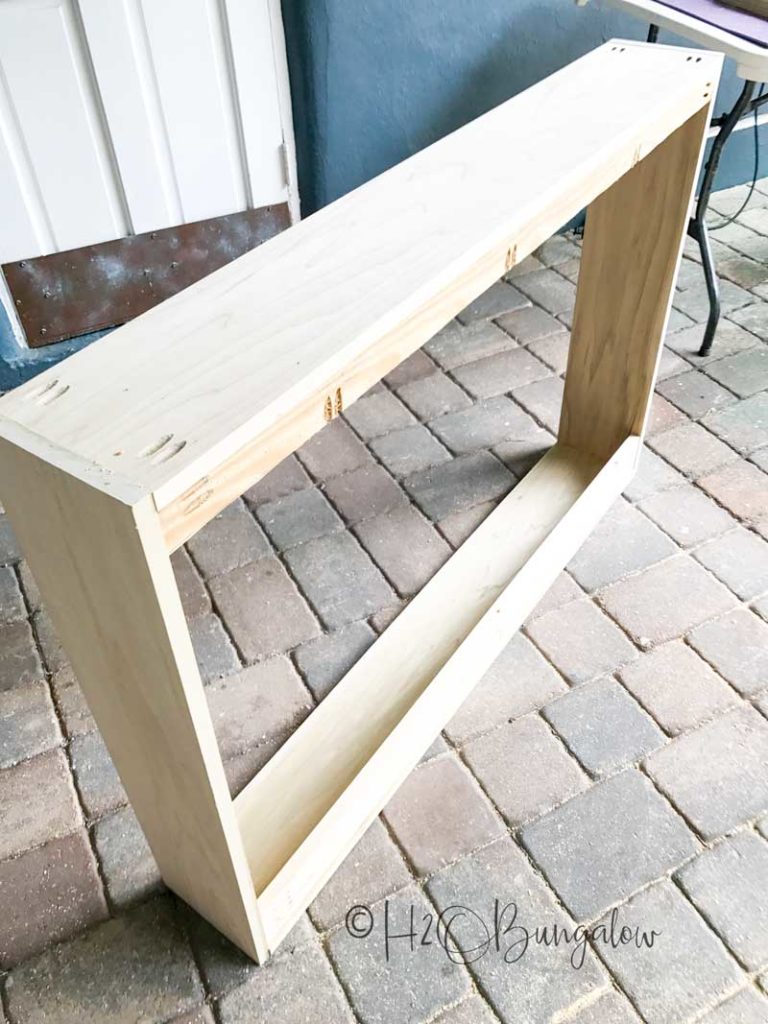
Step 5. Make the French cleat.
Top Support- Use the second 1″ x 3′ @ 47 3/8″ support piece to make a French cleat for the top support. It will fit inside of the top of the TV cabinet. It’s how the finished wall cabinet for the TV will hang on the wall around your TV.
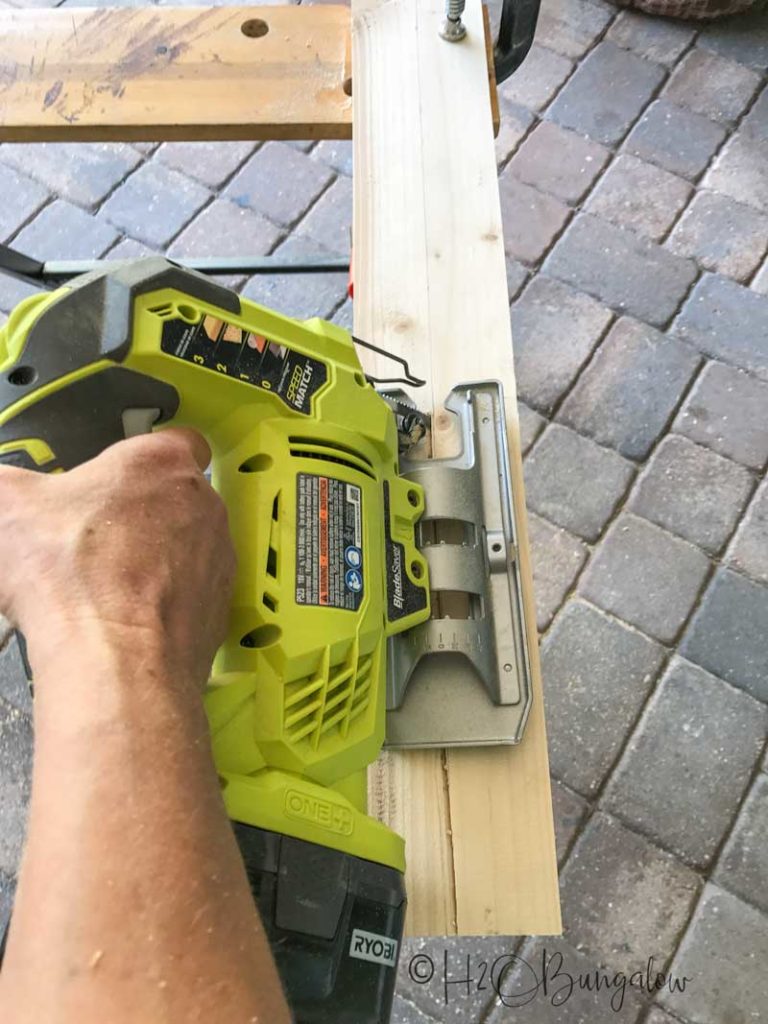
You can use a table saw to rip a 45° angle or use a jigsaw for this step.
To make a French cleat with a jigsaw, set the jigsaw base to a 45° degree angle, clamp the the board and cut a straight line down the middle. Draw a line down the center and cut. Since I didn’t get a picture of mine, I found this French Cleat picture to give you an idea of how it looks, works and fits into the back of the TV cabinet against the wall.
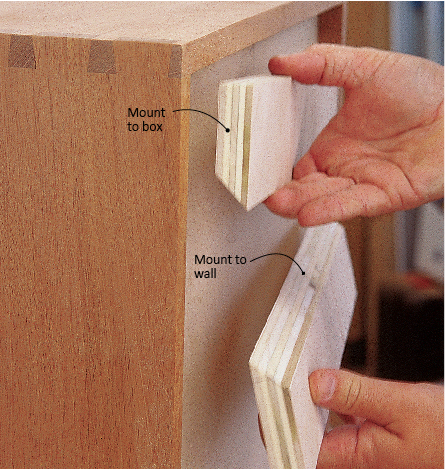
Position one piece of the French cleat with the bevel facing down and put pocket holes on the back. Place two pocket holes on each end and three sets spaced evenly on the back. Secure this piece inside the cabinet flush with the back edges of the frame using glue and 1-1/4” pocket hole screws. See the picture above.
Set the other piece of the French cleat aside. This will mount on the wall to hand the TV cabinet.
Step 6. Apply the edge banding to the outside edge of the TV cabinet doors.
Apply edge banding to the outer edges of each plywood door panel and trim the excess with an edge band trim tool. Here’s a good simple tutorial on how to use edge banding if you haven’t tried it. It’s pretty easy.
Read How to Mount Large Engineer Prints if you are planing to use an image on your wall hanging TV cabinet like I did. You’ll do this before moving on to the next steps.
Step 7. Add hinges to TV cabinet panels.
This is where my plans and directions change, but only in the hinge I used! I messed up and didn’t leave myself enough clearance to use the soft close hidden hinges. They hit the TV when I tried to close the cabinet doors so I changed the hinges to regular non mortise hinges.
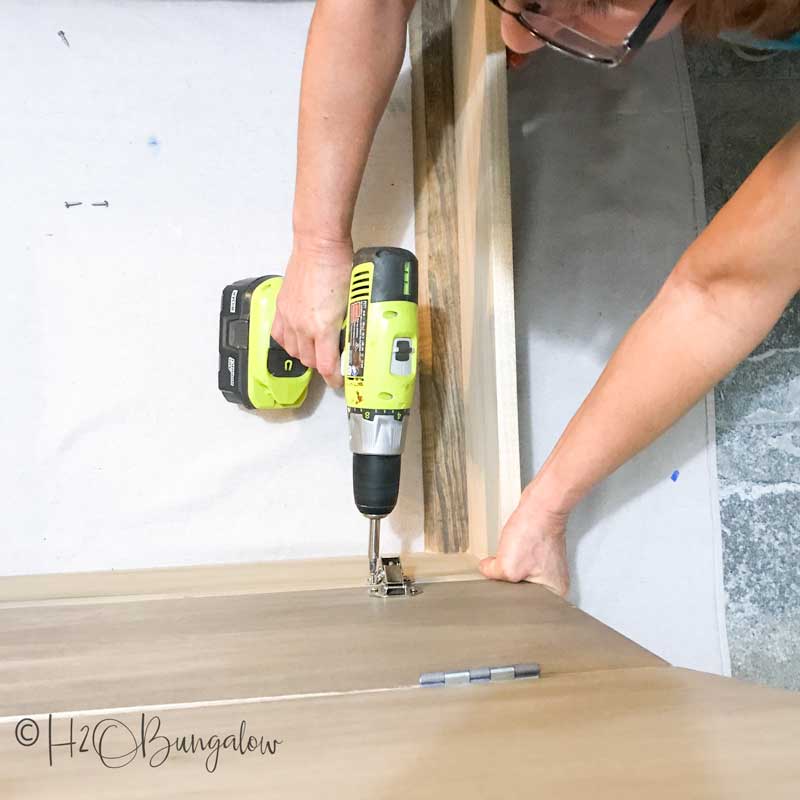
I’m sharing a better way top add hinges to the TV cabinet than I did the first time. You’ll use a Kreg Concealeled Hinge Jig to add two hinge recesses on the two door panels where they will attach to the cabinet frame. You can see how the concealed hinge jig works in my How to Make Shaker Cabinet Doors post.
Attach each set of side panels together. Lay one set of doors on a flat work surface – the 12-1/16” wide door will be on the outside and a 12-1/8” door will be on the inside or middle when all of the doors are closed. Secure two 2 1/2″ square non mortise hinges to the sides of the panel to connect. Do the same for the other set of doors.
Step 8. Install hinges onto TV.
Mark the location of the hinges on the cabinet face of the frame first. Drill pilot holes and attach the hidden hinge to the TV cabinet frame first. Attach the door panel second.
Step 8. Install French Cleat on wall.
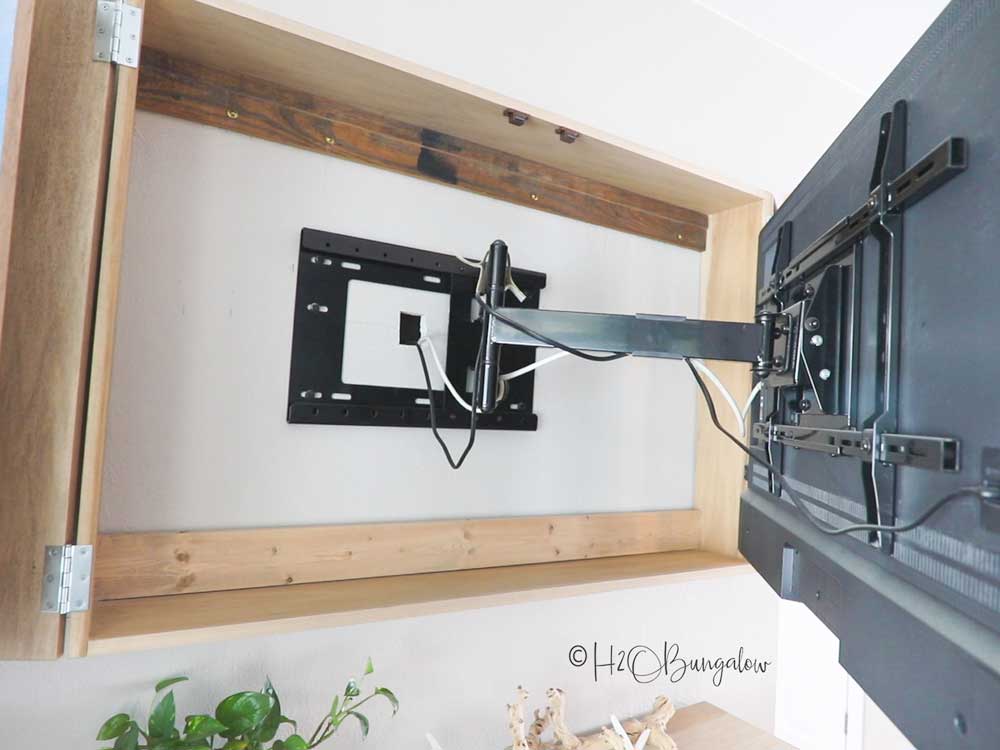
To install the French cleat on the wall, mark the position for the cabinet on the wall and locate the studs in the wall. Lay the French cleat on a work surface with the bevel facing down and mark the position for the studs. Make pilot holes for the lag screws. Position the cleat on the wall and attach with Lag screws.
To hang your new DIY wall mounted TV cabinet on the wall simply lift and place it onto the cleat mounted to the wall. It’s easy to take down if needed and the french cleat is crazy sturdy.
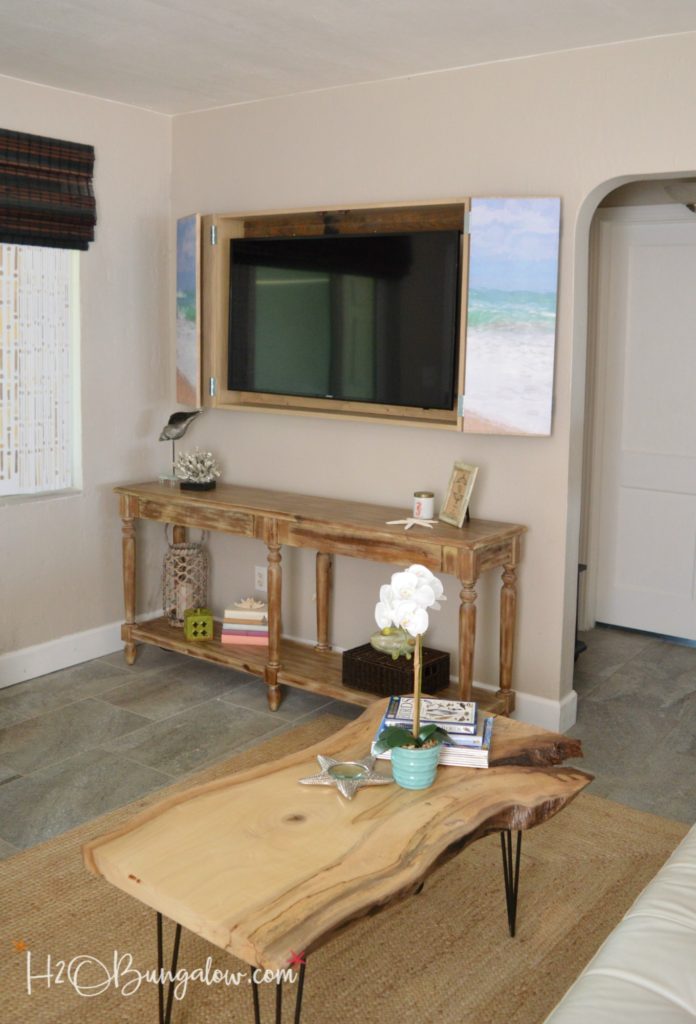
It’s not hard or expensive to make a cabinet to hide your TV and hang it on the wall. I’ve done a lot more work in this room since I first wrote this. Adding DIY Craftsman Window Trim was the finishing touch to my wall mounted TV cabinet. I think I’m finally happy with the way the room looks!
Pin this for later and share with your friends on Facebook!
French cleat to hang the cabinet on the wall gave the appearance of a floating shelf which was exactly the look I wanted. It also made hanging the the TV cabinet and taking it down a breeze.
Don’t feel like building a TV cabinet? Check out these other options below!

Natasha says
Your cabinet is very cool and so much nicer than having the TV sitting out in the room! Battery powered hand tools are awesome. =)
Wendi says
Hi Natasha and thank you! We are all much happier with the TV hidden and the colors match my vision for the room makeover. Good luck on entering!
Victoria @DazzleWhileFrazzled says
That is super cool! Love the beach scene and the aesthetically pleasing way to hide the TV. Visiting form Think Tank Thursday.
Wendi says
Hi Victoria and thank you! I loved the idea of having something pretty to cover the TV too. Thanks so much for stopping by!
Oliver Terry says
Love the way, Well you took that simple metal file tv cabinet. Love it…Pinning it.
Wendi says
You’re welcome Oliver and thanks for sharing my project!
Mary West says
I want to learn how to use the scroll saw!
Wendi says
Hi Mary! Oh my gosh, you would LOVE using a scroll saw. I love mine. The one thing that was really surprising to me the first time I used it was that it felt like using a sewing machine and it was quieter than most power tools. Thanks so much for your visit and good luck on the giveaway!
Jenny.U says
Super cute! I’d like to work with a sander a bit.
Wendi says
Hi Jenny and thank you! I love closing the doors on the TV and hiding it. A sander is one of my most used tools, I think you’d love working with one! Thanks so much for your visit and best of luck on the giveaway!
Lorie says
Wow!! That’s creative!! Great job!!
Wendi says
Hi Lorie and thank you so much! We love the new TV cabinet and especially since I can hide it. Thanks so much for your visit and good luck on the giveaway!
Mary-The Boondocks Blog says
Wendi that is really impressive- No one would suspect that there is a TV hiding behind the beautiful artwork. A very pretty and practical solution.
Wendi says
Hi Mary and thank you! I had to find a way to hide that TV…our space is so small and the TV took up so much space. I fell in love with the print and the colors were coastal which is what I wanted:) Wait till you see the matching media console I’m building! Thanks so much for your sweet comment my friend!
Vickie says
Love your TV cabinet. I really like your posts on painting upholstered furniture. I will be trying that!!
Wendi says
Hi Vickie and thank you so much! I love how the TV cabinet turned out. I’m so happy you found the painting upholstered furniture post useful! Have fun with your project and let me know if you have any questions I can help with!
Paula says
You never cease to amaze me, Wendi! I love, love your wall mounted TV cabinet. What a great addition to your space!!
Wendi says
Hi Paula! Thank you so much! I’m SO happy I finally tackled this one. The old TV stand and I did not get a long at all! LOL
Marsha Mintz Williams says
Hi Wendi,
You did a beautiful job.. and I would love to mount our TV over the mantle in our living room. Since we live in a very rural area and have to use satellite for reception where would I locate the receiver box? It has to be in the open enough for the remote to signal.
Marsha
Wendi says
Hi Marsha and thank you so much! Funny you mention that. We have electronic boxes that need to be in the open too. I staged this photo with our sofa console but..I’ll share a secret, I’m building the matching console that goes underneath the TV. It has open slots for the electronic stuff. I’m hoping to share it in the next week or so and I’ll have downloadable plans for it too 🙂 Let me know what you think of it when you see it! Thanks for your sweet note & good luck on the giveaway!
Geri Ann says
It’s beautiful Wendi, I love the print you used!!!
Wendi says
Hi Geri Ann and thank you so much! I searched high and low for a print that fit my vision. I even printed one that Hubby nixed because he didn’t like it at all. I’ll share my source on it next week, it’s a deal. I’m working on adding fresh colors into my living area and I think this anchors the theme. We’ll see in a few months when I’m done with everything…LOL Thanks so much for your visit & sweet note! Good luck on the giveaway!
Marie says
Very clever and perfect for your coastal home, Wendi. It looks lovely above your sofa table and the print is gorgeous too! Pinned
Wendi says
Hi Marie! Thank you! It’s been a journey getting this room to the point that it looked cohesive! I’m pretty excited. I still have lots more to do but I’m off to a good start. Thanks so much for your visit & hugs my friend!
Jeffrey Michael says
Hi again Wendi,
Do you mind if I place your images of the TV cabinet on my Etsy shoppe update page? Etsy blesses those with shoppe updates.
Best regards,
Jeffrey Michael Mollet
Wendi says
Hi Jeffrey, of course you can! Please give the blog credit for the photos.
Jeffrey Michael says
I will! Thank you Wendi!
Rhonda says
I loved the TV cover. I also have the older set of Ryobi drills, sander etc. I love them! I would love the new set with lithium batteries.
Wendi says
Hi Rhonda and thank you! I love my Ryobi tools too. You’d love the new One+ cordless tools! Thanks for your visit and good luck on the giveaway!
Trena Cable says
What an awesome idea! It turned out great plus gave you more space. I would love to have any of these tools actually but I’m a little intimidated by the jigsaw. My husband usually does the cutting with “his” tools. About time for Mama to get her own. #girlsrule
Wendi says
Hi Trena! Yes, girls do rule! I completely understand that power tools can be intimidating. I was intimidated when I started too. Start slow, wear safety protection and you’ll be fine! Good luck with the giveaway!
Chelle Chapman says
I LOVE this! I envy you being allowed to play w/ power tools!! I would so enjoy having my own set!! I could have some fun learning to use a jigsaw!! Thank you for the opportunity to get my hands on some wood crafting wonders!
Stacy says
Wow. That is actually amazing. It covers the tv but it’s also Art. Great idea!
beverly e says
Your tv project looks great! The only power tool I know how to use is a drill. Thanks for the giveaway!
Kate Horrell says
Wow it’s looks fantastic.
Wendi says
Hi Kate & thank you! I waited far too long to come up with a solution for the TV. I’ve been excited about finishing and sharing it for the past few weeks. Thanks so much for taking the time to leave me a sweet thumbs up!
Jeffrey Michael says
Hi Wendi,
You did a wonderful job on TV Cabinet! I am impressed. It looks as my coastal print turned out equally nice on the doors. I look forward to next week’s post!
Have a magnificent day,
Jeffrey Michael Mollet
Wendi says
Hi Jeffrey and thank you! I’m in love with your print! It’s even prettier in person and up close in person. I’m sure you were wondering what I had in mind when I mentioned I wasn’t making a traditional wall art item with it. I’m sharing the details on how to use and mount engineer prints next week. Of course I’ll share where I found your awesome print as well!