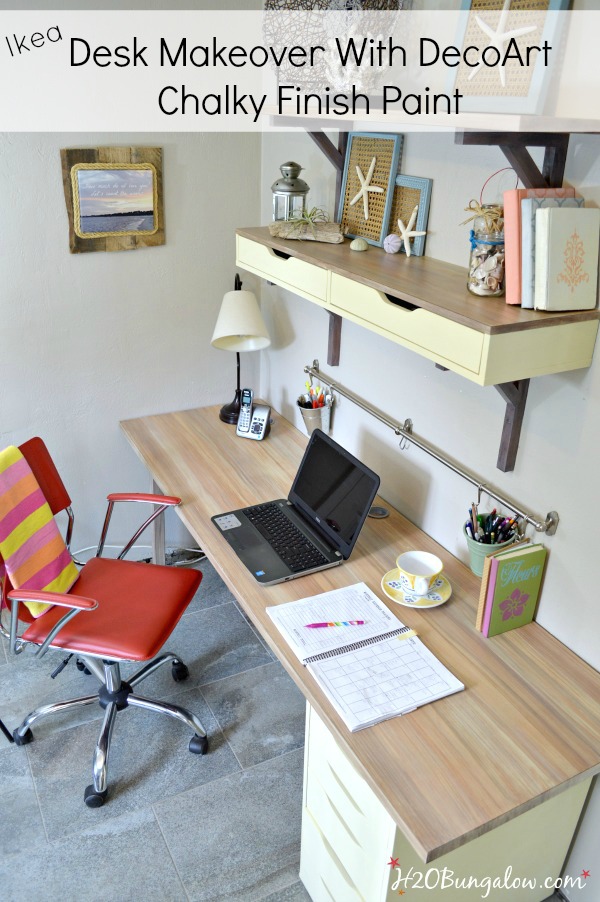
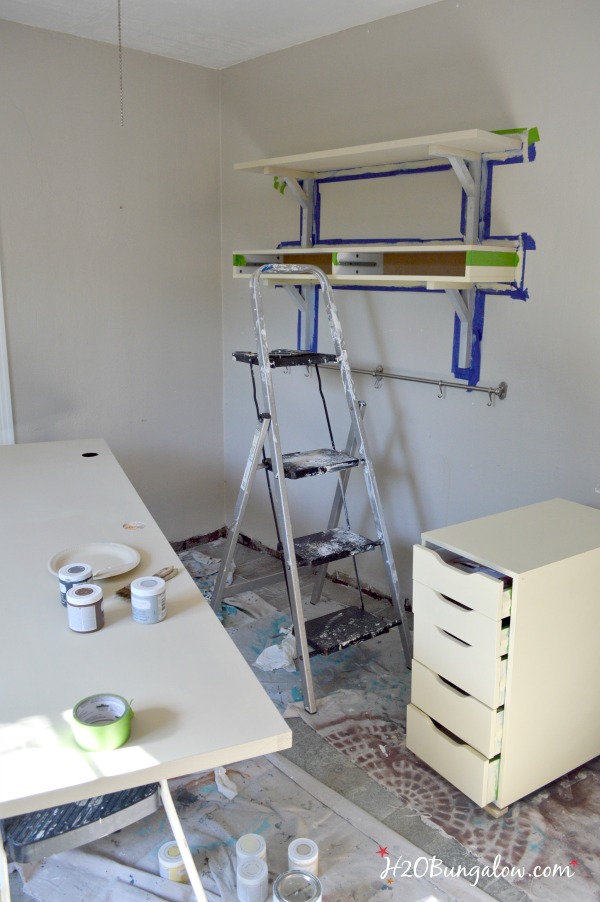
A few months ago we moved a few rooms around. What was my office/guest room became just my office. Out went the sofa/bed, out went the side tables, pillows and other stuff we’d managed to fit into this small room. What I was left with wasn’t even close to what I’d envisioned my office/studio would look like. I’ve managed to squeeze in a project or two over the last few months for “my room” in between the bigger home projects on my list. Today I’m sharing a biggie. My Ikea desk makeover with DecoArt Chalky Finish Paint.
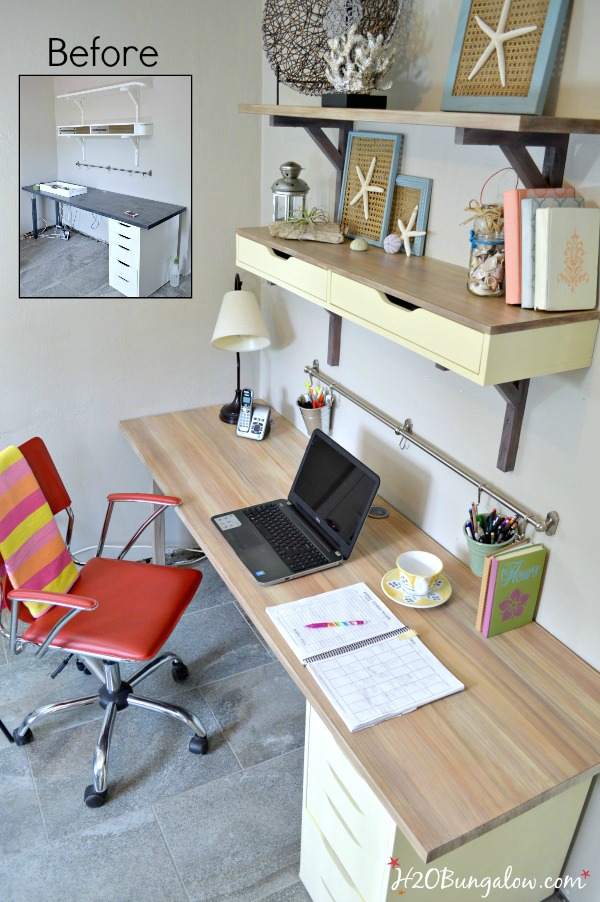
I put all this together two years ago when I started the blog. It was clearly time for an Ikea desk makeover and DecoArt Chalky Finish paint was the perfect product for this task. The desktop is a hollowcore door from Home Depot, the base and shelves are from Ikea. At the time my office was a part-time guest room so I went with an easy nautical red white and blue theme. Later it turned into no theme at all. Just a hot mess.
But it’s changing for the better, definately not such a mess anymore. It’s soft and femine and it’s all mine!
I’m going to share how I did my Ikea desk makeover using Chalky Finish Paint from DecoArt.
Here’s my supply list.
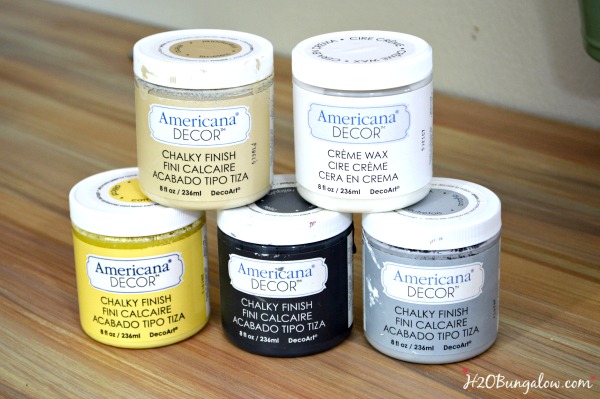
- DecoArt Chalky Finish colors desk base Delicate (yellow) Everlasting (white), faux wood colors Timeless (tan) for the basecoat, Rustic (brown), Relic (dark grey) and Yesteryear (light grey).
- DecoArt clear wax
- wax brush
- paint brushes, one good quality and one chip brush
- four inch foam roller
- plastic bowls
- paper towels
- painters tape
- 320 grit sand paper
- TSP (trisodium phosphate) to clean and prep
- primer for melamine surfaces
Begin by prepping the surfaces. Use 100 grit sand paper to roughen up the smooth surface of the melamine desk and shelves. Next, wipe everything down thoroughly with TSP to degloss and clean the surfaces to paint. Tape off drawer edges as well as any other edges that touch the wall. Prime the melamine surfaces with a good primer. DecoArt Chalky Finish Paint normally doesn’t require a primer and probably didn’t on this project. Since this is a high use item, I decided to go the extra step to make sure my desk stayed nice looking.
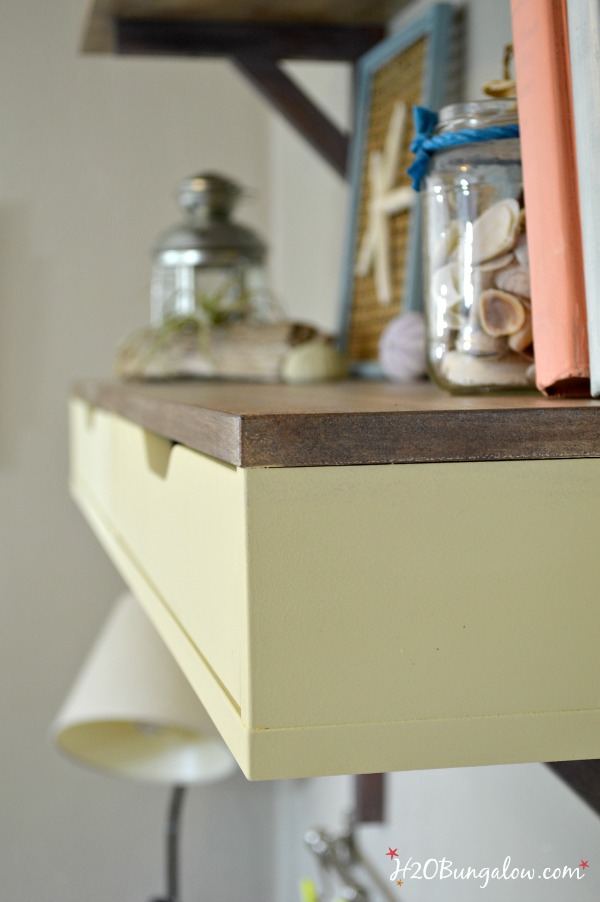
Desk drawers and shelf drawer base instructions – Mix about 1:4 of DecoArt’s Everlasting (white) to Delicate (yellow) paint to get a soft yellow. If your color is still too bright add a 1/2 teaspoon of grey or brown to tone it down. Using the foam roller, paint two coats of yellow onto the base and drawers allowing each coat to dry thoroughly in between coats. Lightly sand with the 320 grit sand paper using a light touch, just enough to help smooth the surface. Allow the paint to dry overnight and follow with two coats of clear DecoArt Wax.
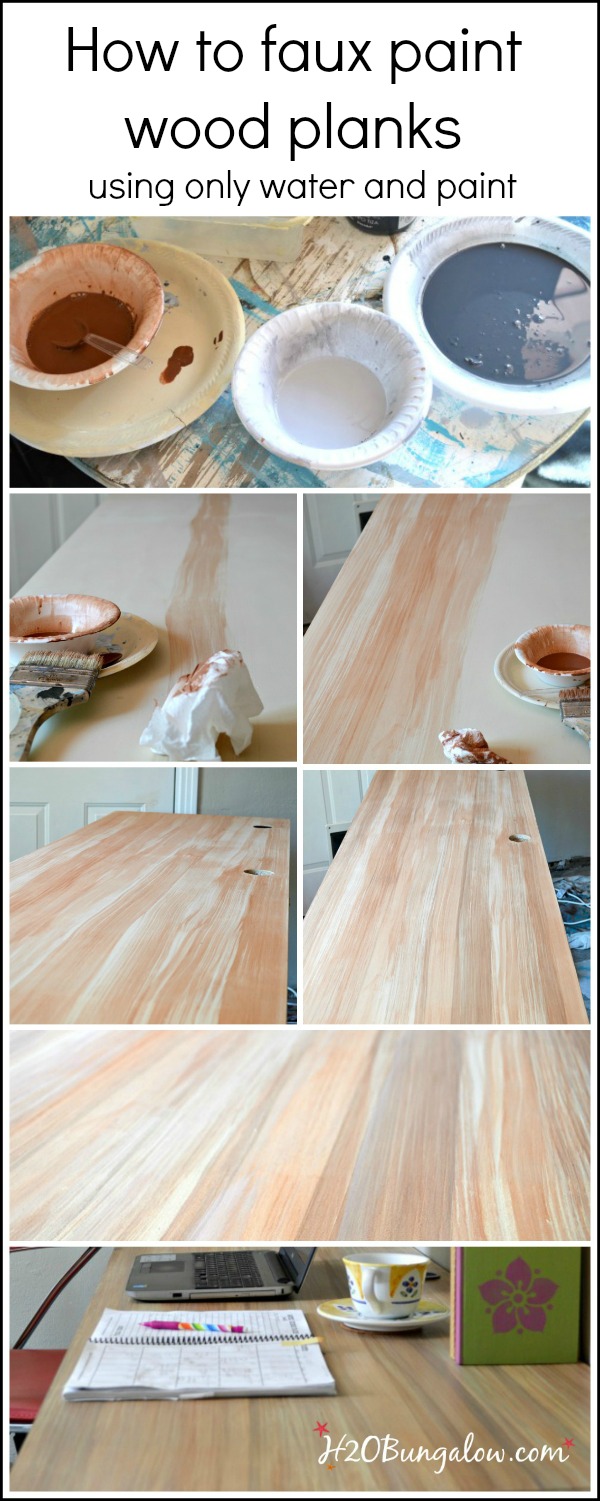
Faux wood grain instructions for the desk top and shelves – To get a faux wood grain you’ll paint a base coat of Timeless onto the desk top and shelves. Let dry. Make three paint washes of about 1 teaspoon of paint mixed with 1/4 cup of water. Use brown, light grey and dark grey. Using an old chip brush dip it in the brown wash, starting at one end of your surface make a long pass straight across to the other side. Immediately run a bunched up clean and dry paper towel along the freshly painted surface. The paper towel will blend the paint into the base coat. Start with a fresh paper towel when needed. Continue until you’ve covered the entire surface but leave areas in between untouched. See the photos below for the steps. Follow the same instructions but with less coverage using the light grey and then the black wash. For example, maybe only use 3 passes of the light grey wash and two of the dark grey wash. If more detail is desired, continue by mixing the washes to get new shades of brownish grey and add more striations as desired. It’s important part to make long straight pases from one end to the other of each surface without stopping or picking up your paper towel.
Allow the paint to dry, and seal with DecoArt clear wax and buff. That’s it.
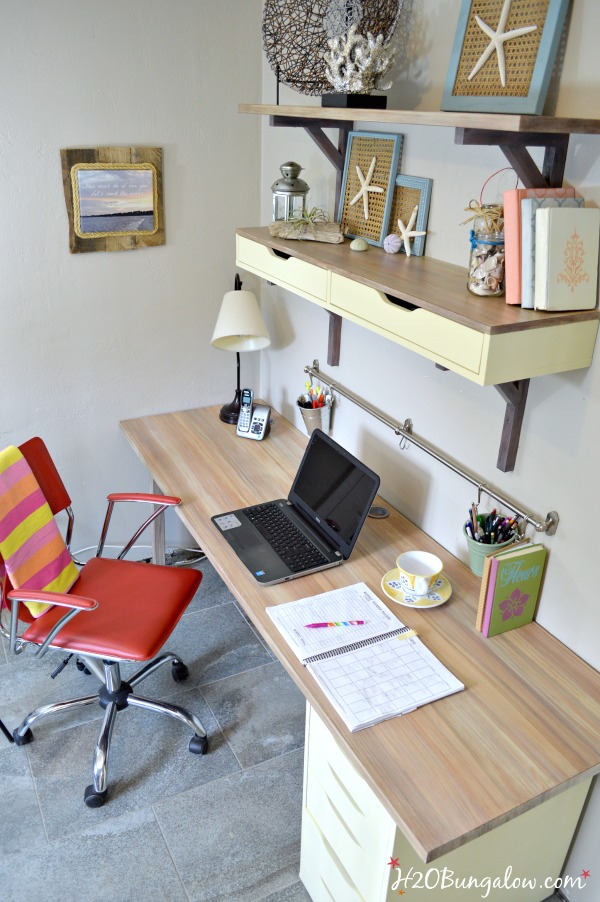
The room looks warm and inviting!
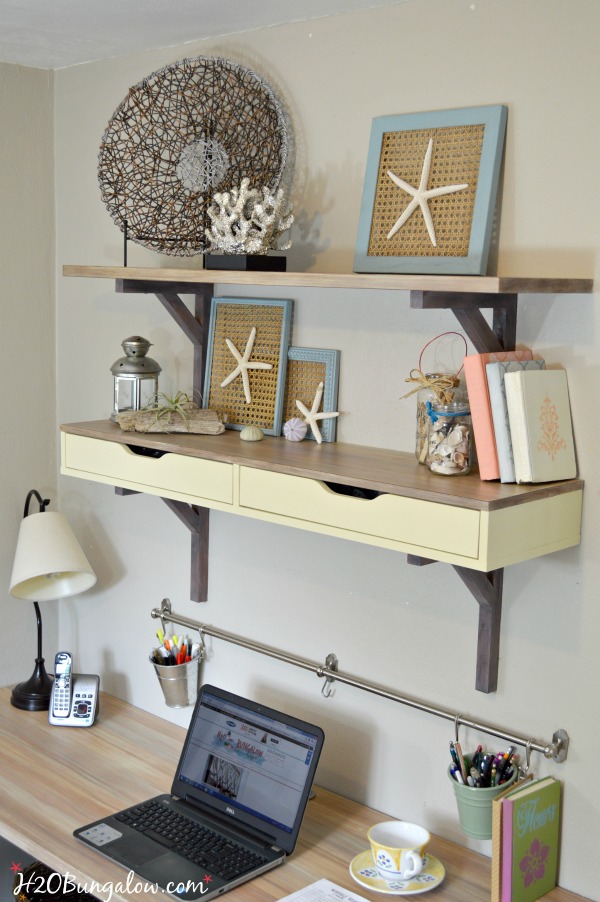
I’m loving the soft yellow.
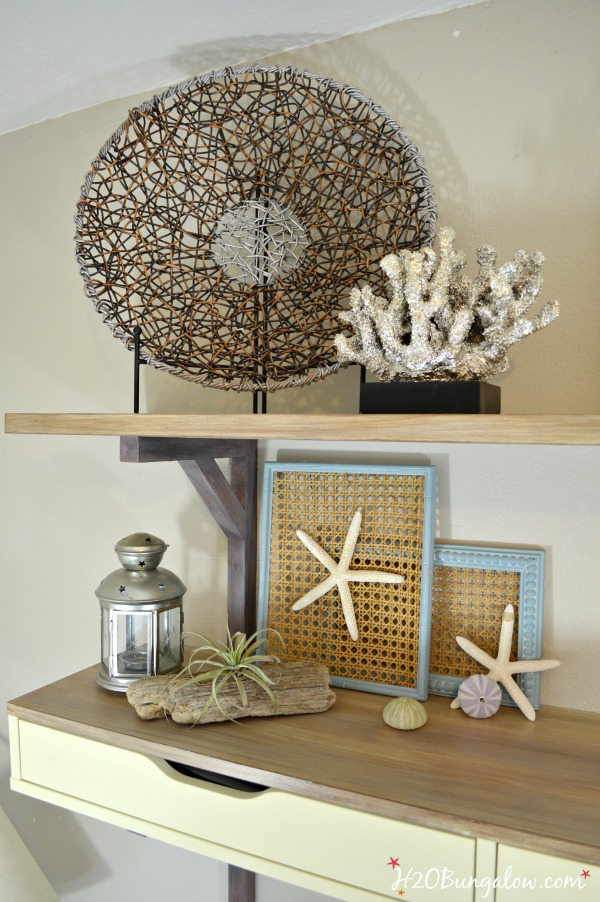
The faux wood grain on my shelves and desk top add lots of depth and interest.
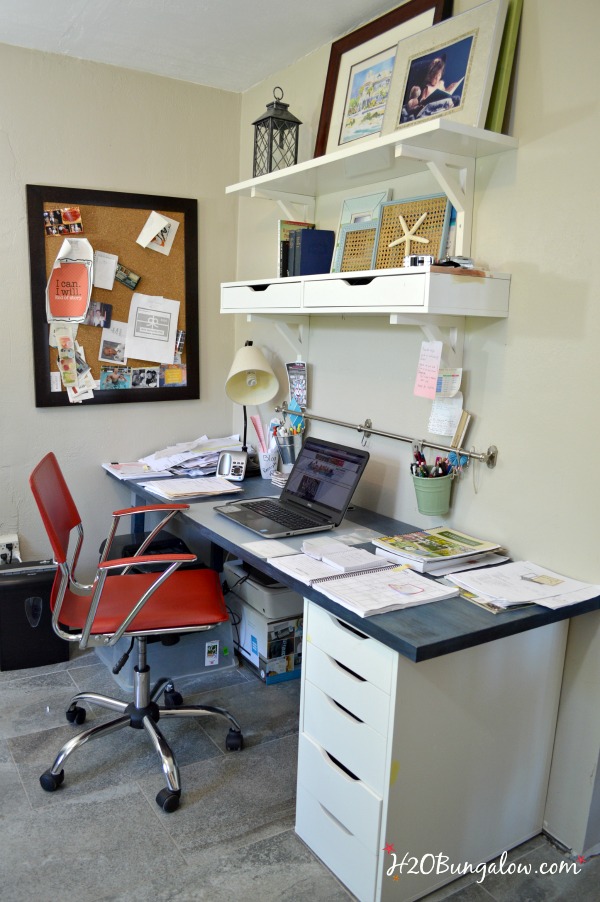
Here’s a little before and after. Wow! There was nothing wrong with the before, it just didn’t fit into the new look I’m creating.
I can’t promise I’ll keep my desk as clutter free as it is in this picture, but… I think I’ll be motivated just so I can see the beautiful desk top!
Here are a few more projects I’ve done with DecoArt Paints Grainsack graphic table , Reuseable Fabric Grocery Bags and How To Paint An Iron Bed Frame.
Visit the DecoArt Chalky Finish website for lots more painting and project inspiration. You’ll find color inspiration and finishing opions as well as specialty products!
But wait… there’s more! Click here to find out all about the fabulaous..and I mean MONEY and product you could win. First place, how about $2000! Click this link to get all the details!
As you might have guessed this is a sponsored post, I was provided product and or compensated for sharing this information. All opinions, craftiness, and projects are 100% my own and never for sale. I’ll only share items I think have value for my readers.
Linking up here: Between Naps on the Porch, Cedar Hill Farmhouse, Thrifty Décor Chick, Refresh Restyle , MondayFunday, Maybey She Made It,, Create Link Inspire, Ju


Cher @ Designs by Studio C says
Absolutely love this, Wendi! I have been waiting (not so) patiently since you posted a peek on FB… I am dying to try this – thank you so much for sharing!
Wendi says
Hi Cher…You’ll love doing this finish! I’ve also used other colors to mimic driftwood, etc. It’s super easy. The biggest part is keeping straight strokes on long areas. Have fun and share a photo when you do this!
Mary-In the boondocks says
At first I thought your after picture was your before… silly me. Then I noticed that you actually created the wood finish yourself. and then you left me speechless!! It is so much more cohesive now!! Wonderful job!
Wendi says
Thanks so much Mary! I love the new desk top. It was pretty before, but the colors weren’t soft. Now it feels feminine and I love all of the striations of the faux wood.
Lynn says
Wendi… I absolutely love how this turned out. You’d never know that was a door 🙂 All of it is just beautiful!!
Wendi says
Hi Lynn… Thank you! Yes, it was a damaged door from Home Depot and I think I paid like $12 for it 🙂 The best part about paint is I can “repaint” when the mood strikes. This desktop fits my current style and it’s serene…. Thanks so much for visiting & your comment:)
Vanessa says
Wendi,
I love how this turned out. The faux wood looks great too. Awesome job and I am drooling over those shelves on the wall. Great pieces too.
Wendi says
Thanks so much Vanessa! The shelves are Ikea too.. I just fauxed them to look like wood. Funny when everyone else is painting over wood.. I’m making “faux wood”. Thanks again for stopping by my friend:)
Marie@The Interior Frugalista says
Fabulous Wendi! I love the technique you used for the top and the shelves (great tutorial BTW). The soft yellow is very pretty as well. Your new office space is coming along nicely.
Wendi says
Thanks Marie.. I’m trying to squeeze in a project or two when I can. There are so many other more important “to dos” on the list.. but I have to say walking into my serene work place feels so good!