Concrete countertops, cement counters, whatever you want to call them, are crazy popular now. This is a project that any enthusiastic DIY’er can tackle with great results. I’m sharing an in-depth DIY concrete countertop tutorial with a video on how to make DIY concrete countertops and save a bundle.
When you’re done reading this, you’ll be ready to tackle your own concrete countertop for a vanity, kitchen or table with confidence. Really, I promise! Once you’ve made them, be sure to read How to Wax Concrete Countertops so you know how to care for them. You may also like my post on building DIY wood countertops
As you might have guessed this is a sponsored post, I was provided product and /or compensated for sharing this information. All opinions, craftiness and projects are 100% my own and I’ll only share items I think have value for my readers! You’ll also see affiliate links in this post to help you find the products I mention:)
DIY Concrete Countertop Tutorial
I met the Buddy Rhodes Concrete Company at the Haven Blogging conference last spring when I attended a learning session on DIY concrete. Sitting in Jeremy’s class, right then and there I was certain that this product was going on my new master bath vanity that I was building.
After Jeremy assured me that working with the Buddy Rhodes products and tackling my own DIY concrete vanity countertop was something I could do, I was ecstatic!
I knew a custom concrete countertop for my vanity was in my future, would be stunning, and I’d save a fortune doing it myself!
Let me start by saying I was not experienced at building or tool mastery when I took on this project. I’d only tackled a few “tool” projects before tackling this one. What I am, is open-minded not afraid to try and, game for the challenge.
In other words…you can do this too!
Just roll up your sleeves, wear an apron and be ready to get a little bit dirty. It was fun! We made a short video on the steps and processes. It’s my first video ever, so just overlook what isn’t perfect…and me with no make-up and hair in a clip:)
The video will be useful to those of you who are ready to tackle DIY Concrete countertops yourself. There are a few tips and lots of visuals to help you with your own project.
I use affiliate links in my posts. If you should make a purchase I will receive an itty bitty commission at no cost to you. Find my full policy disclosure here.
I’ve organized this post by the workflow. As you can see, this was a several day process with the bulk of the work in the beginning.
- Select Product
- Build Concrete Mold
- Concrete
- Day 1. Mix & pour concrete, let cure overnight
- Day 2. Remove countertop from form, slurry and let cure overnight
- Day 3. Wet polish and slurry, let cure overnight
- Day 4. Dry polish, seal and let cure
- Day 5. Install
Step 1. Selecting the Products You’ll Need
The new Buddy Rhodes Catalog of Concrete Products and Techniques, is full of useful information, recipes and products that will make you want to create cool stuff. It’s a well-organized place to start for selecting the type of project and product you’ll need for your concrete project. Click on the catalog picture below to download one for yourself. Be prepared to be inspired🙂
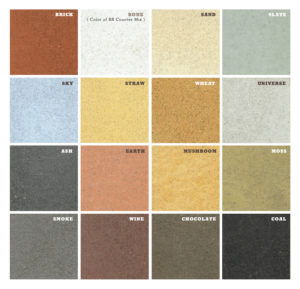
I started by selecting the color I wanted for my concrete. Buddy Rhodes has lots and lots of colors to choose from, including custom matching to Benjamin Moore paint colors! It was a tough decision. This color chart is a small sample of what they offer.
Next, we figured out how much product was needed for my vanity countertop. There’s a handy Product Calculator on their website to help you figure that out. If you have any questions, you can always call and ask for assistance, they’ll be happy to help.
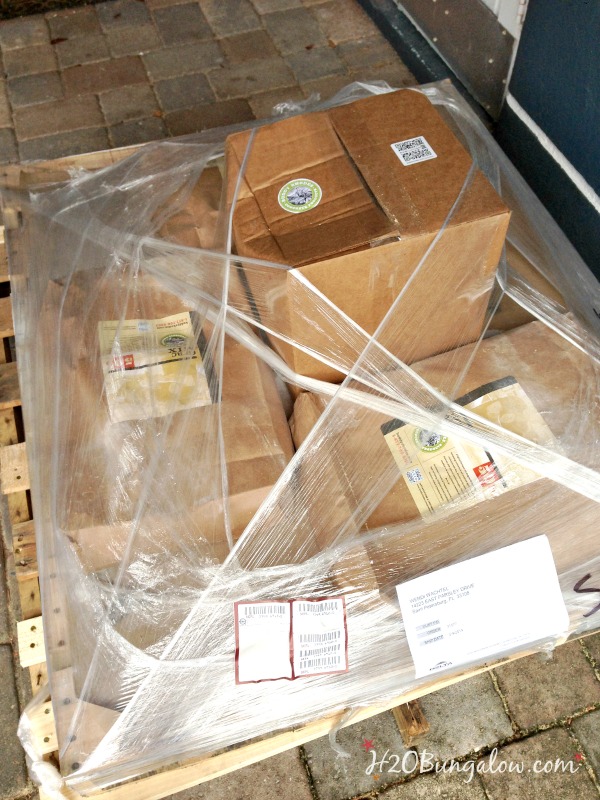
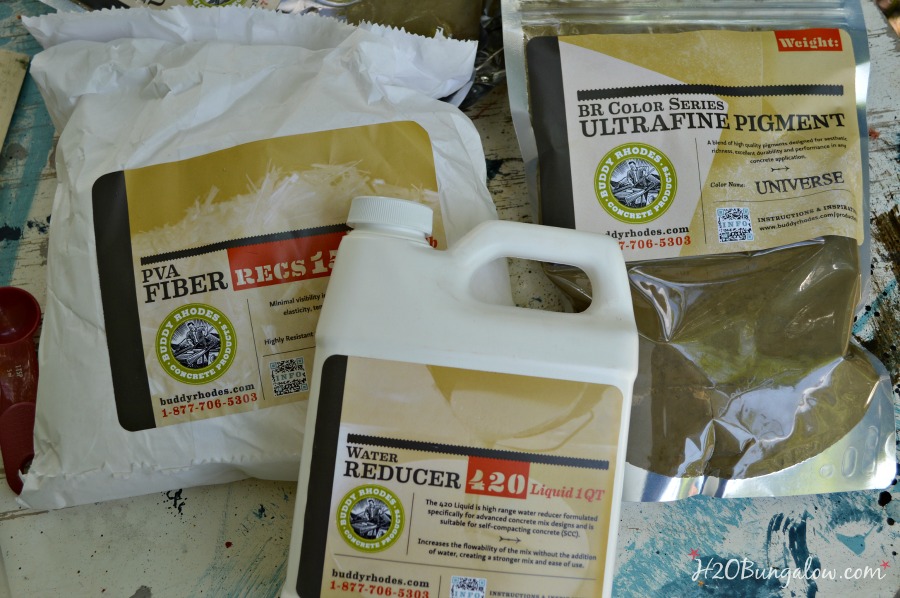
This is how my concrete product arrived. There were three 5o lb bags of concrete mix and the other Buddy Rhodes products on my supply list. You can find local distributors on the Buddy Rhodes website or order directly from Buddy Rhodes Co.
Step 2. Building The Concrete Mold
Next we built the mold for our vanity counter top and backsplash. Which was surprisingly simple.
Supplies you’ll need to build your DIY concrete counter top mold.
- Sheet of melamine for the base of your mold
- Melamine ripped (cut) in long strips for your mold sides, cut them to the depth of your counter top and backsplash.
- Double sided tape
- Boards to lay across the saw horses and under the sheet of melamine for extra support
- Caulk
- Vaseline
Tools you’ll need.
- Saw horses
- Table saw
- Cordless brad nailer
- Carpenters square and tape measure
- Pencil
- Caulking gun
- Popsicle stick
Building the concrete mold is simple. Using your table saw, you’ll rip strips of melamine to the depth you want your counter top. Ours was just under 2 inches. If you’re also making a bathroom backsplash it doesn’t need to be the same depth as your countertop. We made ours about 3/4 – 1 ” We figured that out late and you’ll see how we dealt with it in the video:)
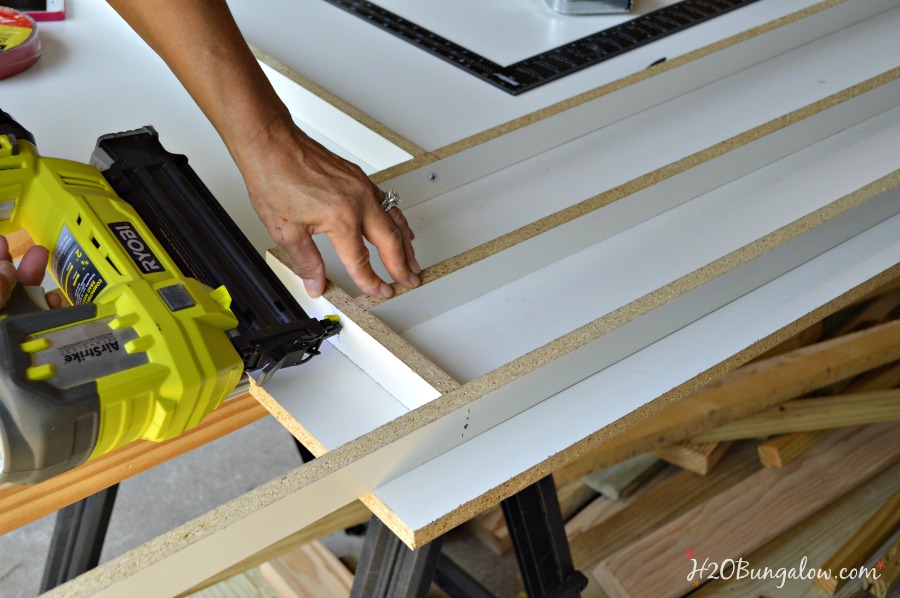
Build your mold by laying your support boards across your saw horses, followed by a sheet of melamine on top of it. Next, assemble your concrete mold sides with the ripped strips of melamine. Join the corners like you see in the picture, with one end sticking out. Use your brad nailer to attach the mold side sections.
I also made a small extra mold as a sample or test surface. Since I haven’t worked with concrete before, every step of the processes started on this piece.
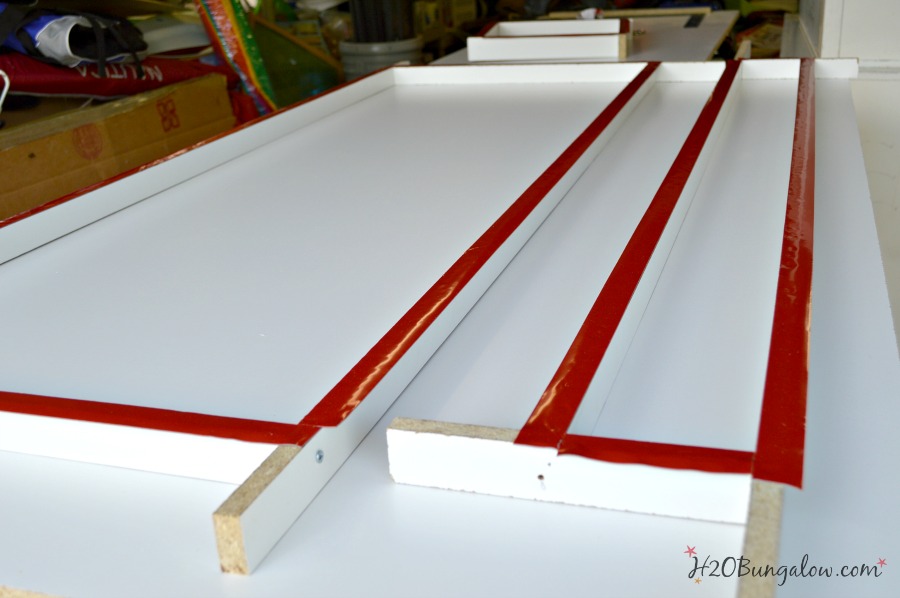
After all the sides have been joined together to make a frame, you’ll attach it to the melamine base sheet. Place your double-sided tape on the bottom of all edges of your frame area only. Your tape will probably be wider than your melamine. Be sure to line it up so no excess tape protrudes into your mold area because you want nice crisp corners 🙂 Turn your mold over and tape down in place to your melamine base. This is your concrete countertop mold.
Hold on…you’re not done yet!
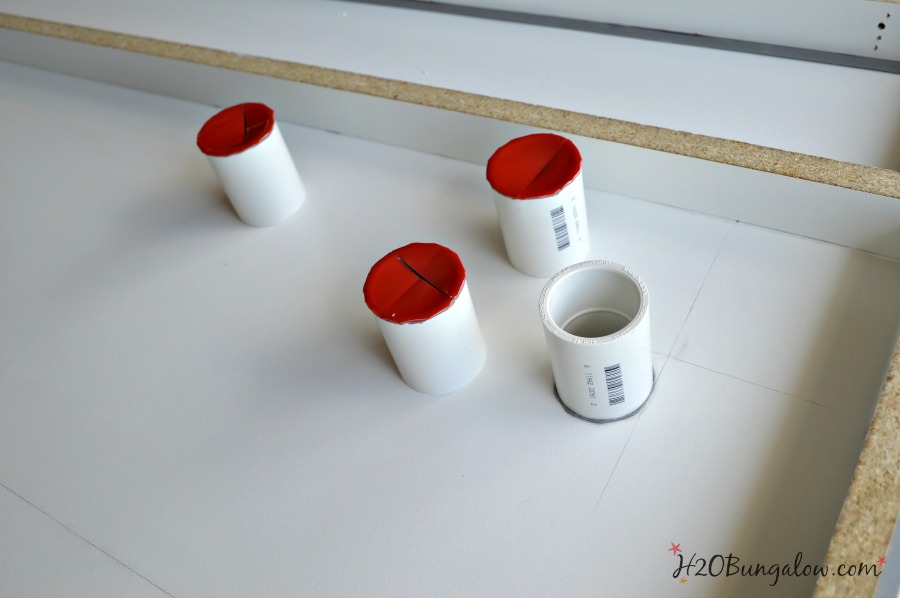
You’ll need to prepare for placement of your plumbing or any holes you’ll need in advance. There are two ways to tackle this. You can use a piece of pvc pipe and double-sided tape to make your holes part of your mold or you can drill out the holes later.
If you drill your holes later, keep water flowing onto the drill bit as your drilling to keep the bit cool. If you make your holes with your mold, double-check your placement, sink location, faucet location, overhang, backsplash and any other measurements you need to account for! I speak from experience!
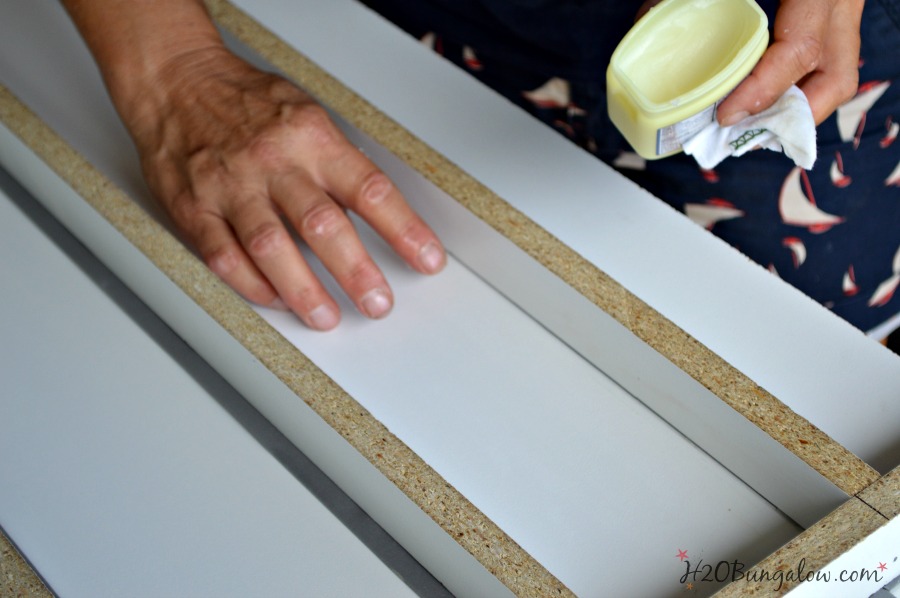
Next, you’ll seal the concrete mold seams. Follow these steps to get a perfect crisp edge on your DIY concrete counter top. Start by spreading a thin coat of Vaseline on the sides and base of your mold where the two pieces meet. Be careful not to get Vaseline into the corners where the two pieces of melamine meet.
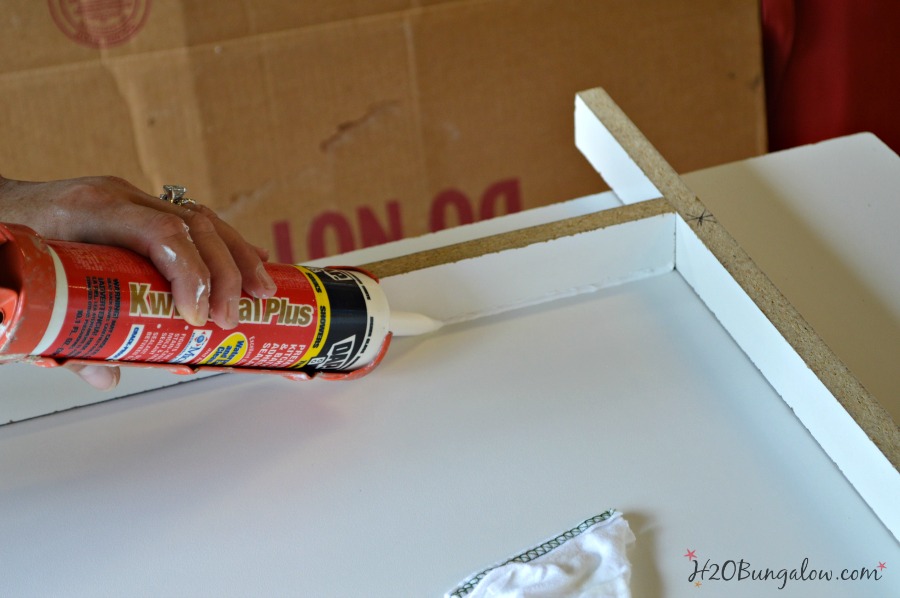
With a steady hand and a thin bead line, you’ll caulk the joints (where the two pieces of melamine meet) along the base and up the sides of the corners. These caulked areas will be your corners.
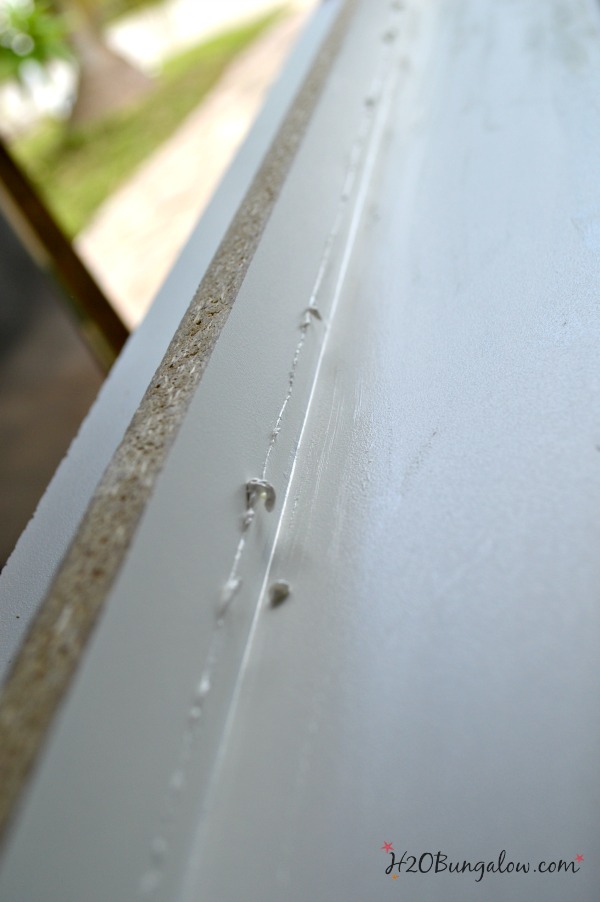
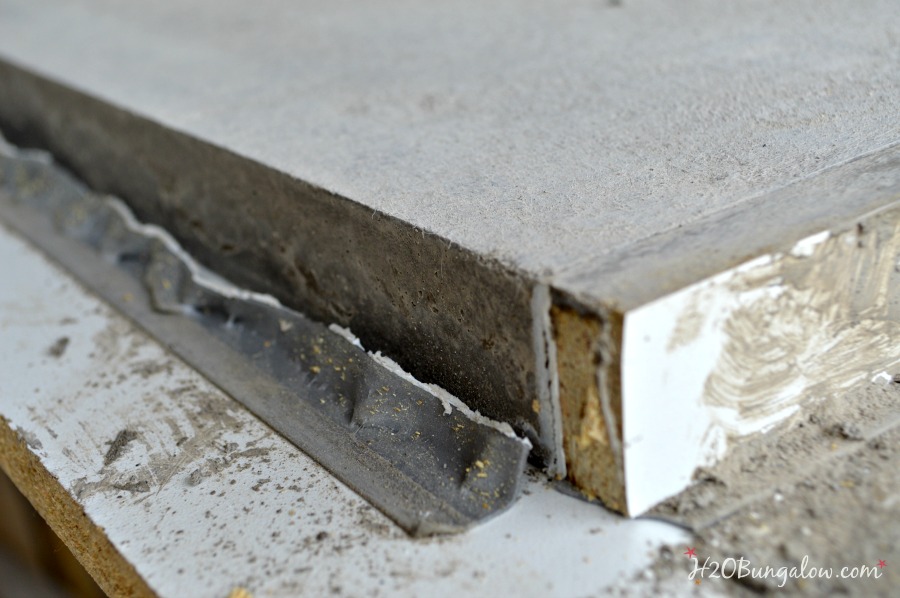
I don’t have a picture of this step. but, take a popsicle stick with a rounded end and run it along the bead. You want your joined seams to look like the picture below. Your Vaseline layer will prevent the excess caulk from sticking to your mold in areas you don’t want it to.
Now you’ll turn off the lights and leave it overnight. Because there is a thin layer of Vaseline on the outer edges of the joined seams, you’ll be able to pick up and wipe away all the excess caulking, leaving perfectly sealed seams. After the caulk has dried, carefully wipe away any extra that is on the sides of the joined corners.
Your concrete form is now ready for the next step, mixing and pouring your concrete. Yay!
Step 3. Pouring Concrete
Supplies you’ll need to make your DIY concrete countertop.
- Buddy Rhodes GFRC Blended Mix
- Pigment
- PVA Fiber
- Water Reducer
- Bone Paste
- Sanding Disc – you’ll find it in the Buddy Rhodes tools section of the website.
- Penetrating Sealer
- Satin Sealer
- Cold water
Tools you’ll need.
- Mixing bucket, you can use a 5 gallon bucket but I’d recommend a larger mixing container
- Concrete mixing paddle. Also called a paint mixer and can be rented from Home Depot for about $20/day or purchased at Harbor Freight for about $100.
- Long flat bar, or screed that reaches across the width of your cement counter top. The edge of a level would work great, we used a piece of 2 x 2 wood.
- Safety goggles
- Rubber gloves
- Face mask or respirator
- Plastic drop cloths
- Random orbital sander
- Plastic tablecloth with felt backing , like the plaid picnic disposable kind you’d use for picnics.
- Rubber mallet
Day #1 – Mix & pour concrete, let cure overnight
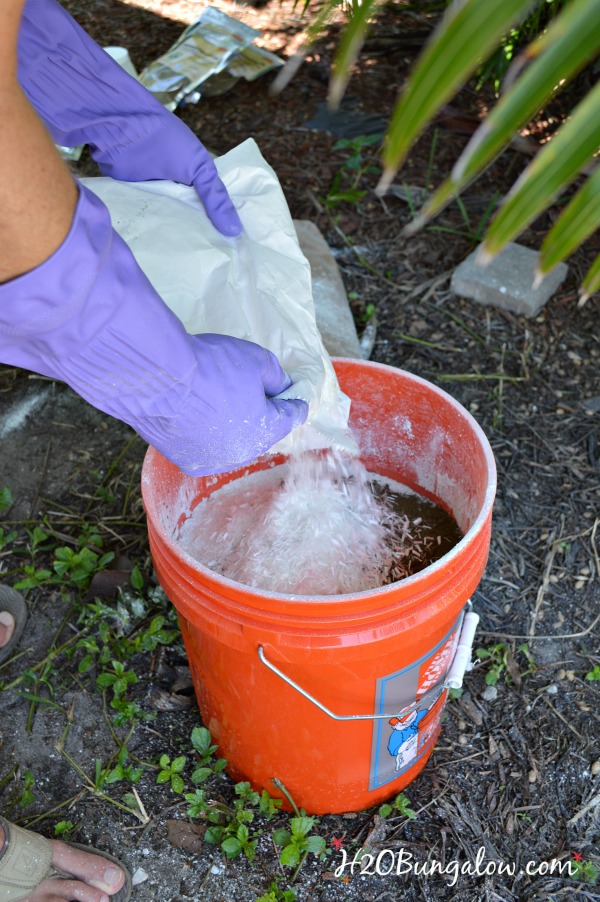
We made the concrete in 3 batches. Each batch started with a bag of GFRC Blended Mix, a bag of Pigment, a bag of PVA Fiber, Water Reducer and ice water.
We were using the newly released product line and some of the mixing instructions have changed since then. Refer to page 14 of the Buddy Rhodes catalog for mixing and proportion instructions.
OK, are you ready? Put on your safety gear and plan to mix outside.
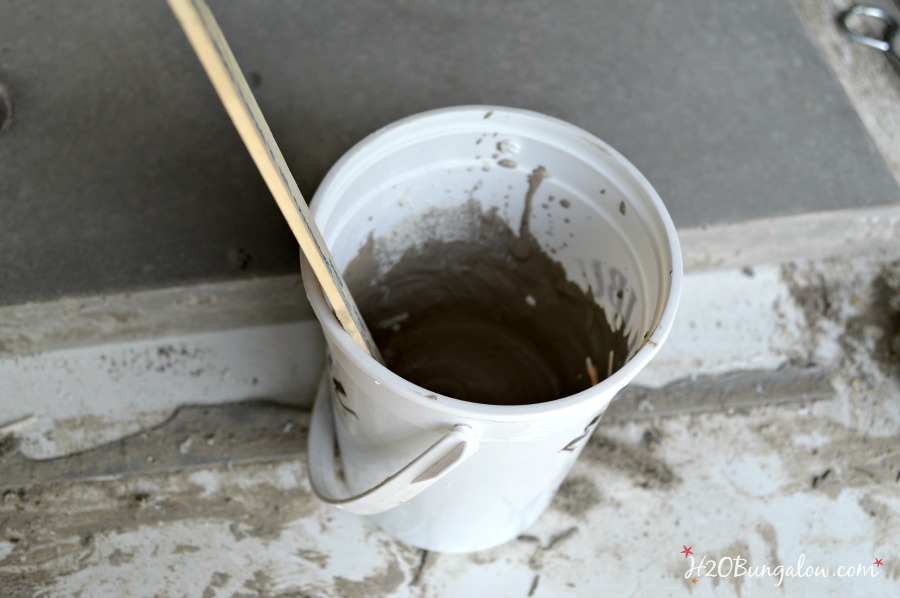
We mixed each of the three bags as a separate batch. The instructions said to make a pancake batter consistency. After adding all the water and the water reducer, our concrete mixture was still a bit thick, like a very soft cookie dough or icing. You’ll see this in the video.
The class I attended at the Haven conference used a thick mixture to press the concrete into the mold, which is pretty much what we did. Well… maybe we glopped (another fun word!) it into the mold. That’s the beauty of this product, there is flexibility in it!
Another good point to share is holding on to the concrete paddle mixer while it was running was tough for me. It required a lot more strength than I had. Curious, as I am, when my husband walked away from the mixer for a moment I thought I’d try it out.
As soon as I switched on the mixer, it spun out of my hands with lots of force and got tangled up in the cord while the mixing bucket spun around in circles. It didn’t spill, but it was a tangled mess…
It was a pretty funny sight and very I Love Lucy like 🙂
You’ll see the consistency of our concrete in the video. I have a few pointers to make mixing your concrete easier. I’d recommend a wide bottom bucket. Mixing concrete is very similar to mixing a cake or cookie dough, you’ll have to get the dry ingredients off of the bottom and sides.
We turned off the mixer and stuck our hands (with gloves on) into the mix and pulled the bottom and sides of the dry mix into the center several times. Lastly, in our case, the term “pouring” means the same as grabbing handfuls of wet concrete and plopping them into your concrete mold:) The consistency of mixed concrete can vary, and that is OK.
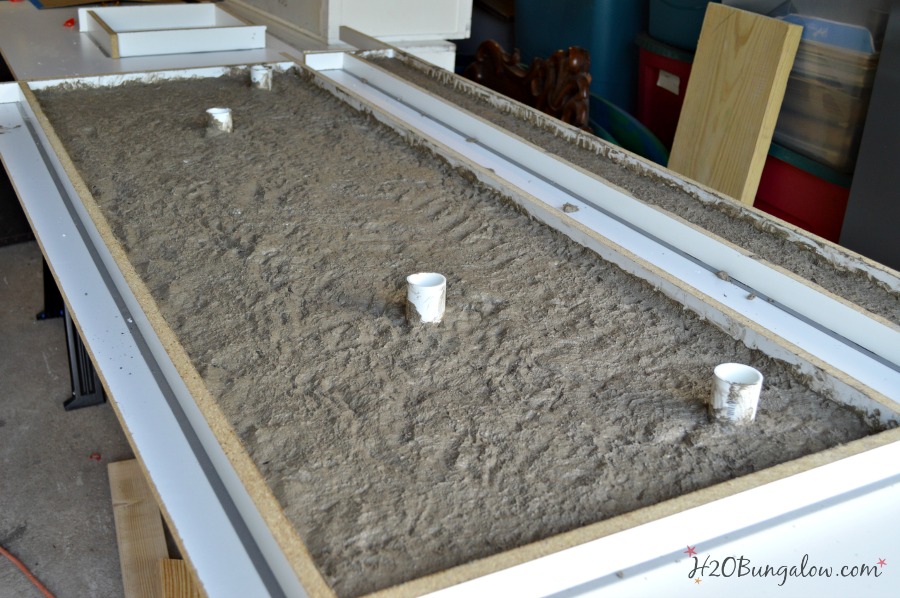
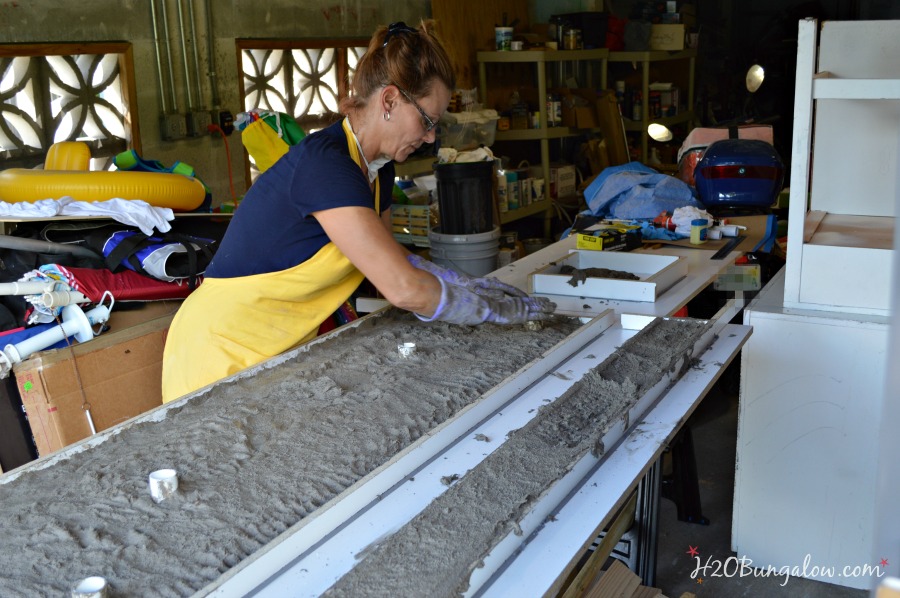
Pour in thin layers, and play “patty cake” to slap out any air bubbles. Make sure you work the concrete thoroughly into the corners, especially if your mix is thick like ours was. You’ll notice that there is no aggregate in the Buddy Rhodes mix. This is not a home improvement store type of concrete mix at all!
You’re going to fill your mold to the top of your sides, patting and pushing any air out of the mix. This is about the time a light bulb went off in my head, and I realized the backsplash only needed to be 1/2 inch thick. I scooped out the extra and “reduced the thickness quickly!”
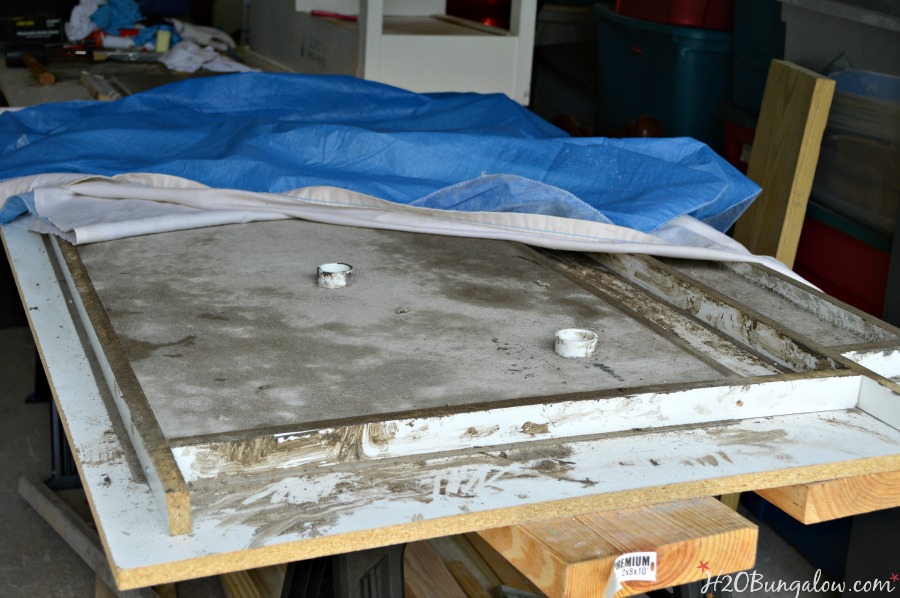
You can see my sample/test mold at the end of my melamine base in this picture.
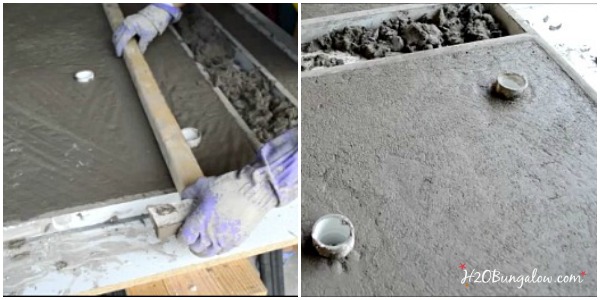
When you’ve filled your concrete mold to the top, work your concrete while it sets. Use your screed, and work across the surface, flattening it and smoothing it out. When you are finished, your project will look like the picture on the right. You’ll see more of this in the video.
Oh…you’ll hear me call this a scrim on the video, I had my terms mixed up..it’s SCREED! So sorry Buddy Rhodes…must have been another Lucy moment!
It will take about 4 hours to set. Get your felt backed table cloth wet, wring it out and place it on your concrete felt side down. You want it to dry slowly overnight and be warm. Again, you’ll find good information on this step in the Buddy Rhodes catalog. We didn’t have a felt backed tablecloth, so I layered an old fabric tablecloth under a plastic tablecloth from the Dollar Store.
The process wasn’t nearly as messy as I thought it would be.
Whew! Day 1 down and I’m ready for a hot shower and a good glass of wine!
The next morning I was like a kid on Christmas day. I couldn’t wait to unwrap my countertop!
Day #2 – Remove countertop from form, slurry and let cure overnight
I used a rubber mallet to help break the seal of the double-sided tape and brad nails. I was hoping it would look good and whew! We had nice clean crisp corners! We also did well with the pvc pipe sections. They made perfect holes and popped out easily when we turned over the concrete slab.
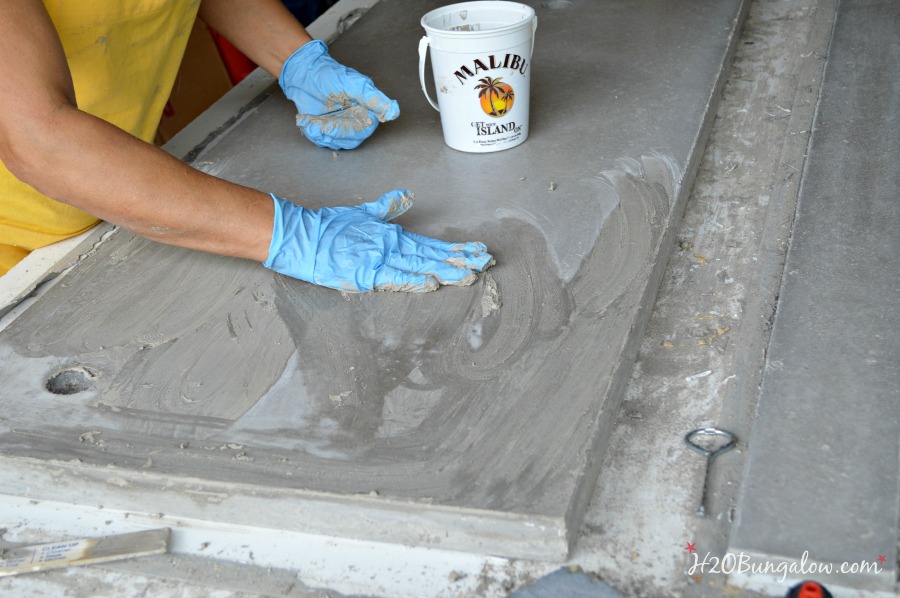
The next step is to flip the concrete sections over, exposing what will be the top and prepare the first slurry to fill in any holes. The slurry is made with the Bone Paste, water and a small amount of the pigment. Mix to a consistency of yogurt and spread over the concrete filling pin holes as you do.
Use a clean rag to wipe away the excess slurry. Let this sit overnight to dry. If you have any deep holes, it’s best to fill with thin layers that dry in-between each application of slurry. You’ll wait 24 hours after the last coat of slurry is applied before moving on to the next step.
Day #3 – Wet polish and slurry, let cure overnight
Polishing the concrete was a mystery to me. Time didn’t permit demonstrating that step at the Buddy Rhodes Seminar at the Haven conference. I read everything I could, watched videos galore on YouTube and asked anyone who’d done it before in addition to getting advice from my contact at Buddy Rhodes.
There are two options for polishing concrete, wet sanding and dry sanding. I was told both are good. The difference is wet sanding is messy and dry sanding produces a lot of dust and it gets everywhere, plus you don’t want to breathe it in.
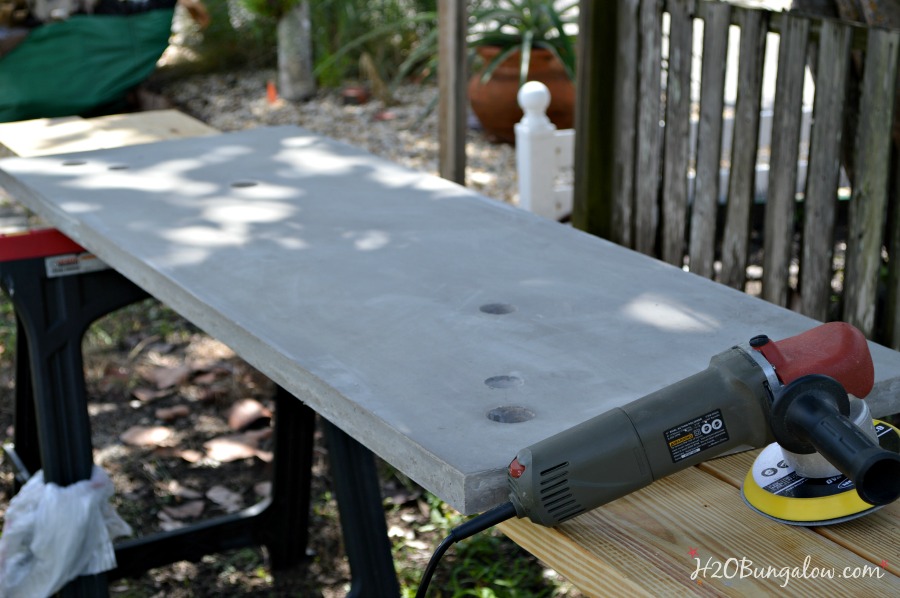
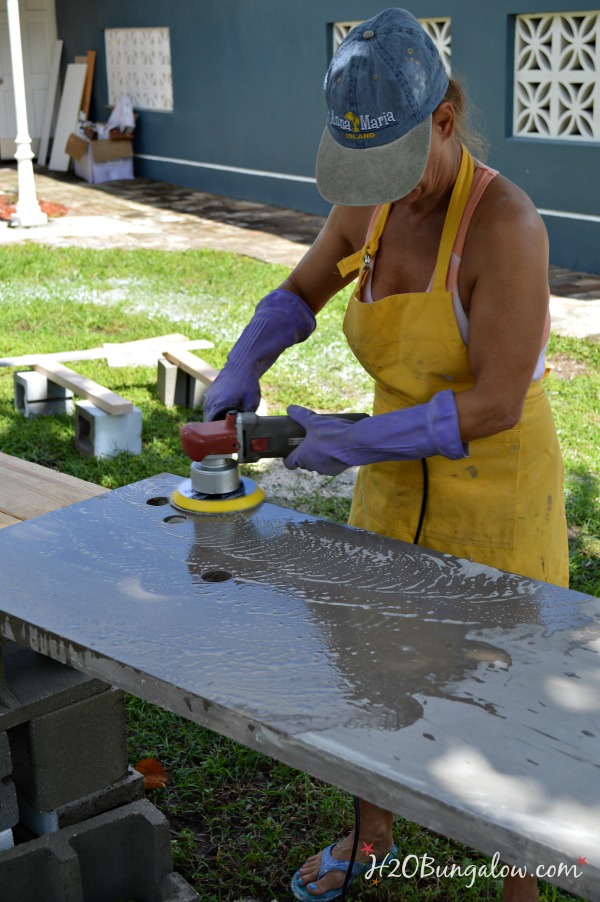
I chose wet polishing and since I knew it would be messy, I decided to do the wet sanding outside. Lucky for me the weather was beautiful, dry, and sunny.
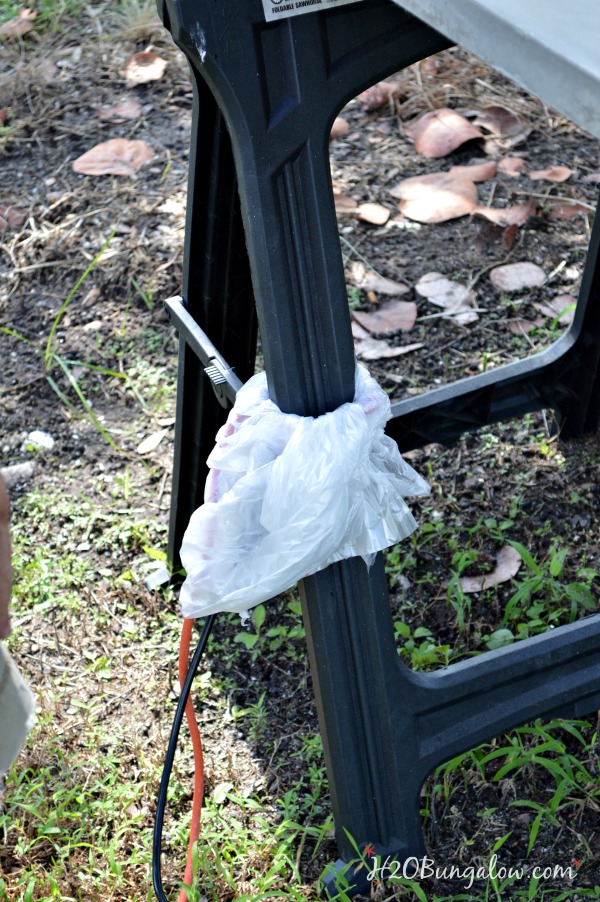
One good piece of advice someone shared with me is to cover the electrical cord connection and keep it off the ground when wet polishing.
The Buddy Rhodes sanding disc will fit on your random orbital sander. Pour water over the concrete countertop and run your sander over the surface until it feels super smooth. You’ll feel it when it’s done. Run your fingers across the surface (without gloves on) and it will be very smooth.
I was also told to keep my sander randomly moving at all times, and overlap the areas I was polishing to avoid areas that are unevenly polished. I kept mine set on medium speed to wet polish, which was about 3000 rpm.
Another good piece of advice from my contact at Buddy Rhodes was to roughly polish the bottom side of my countertop edges. When it’s installed and someone touches the edge it will feel smooth. Smart idea!
I tested wet polishing out on my sample/extra small top before starting on my counter. It was good to build up the confidence before moving forward. I did this for all the finishing steps as well.
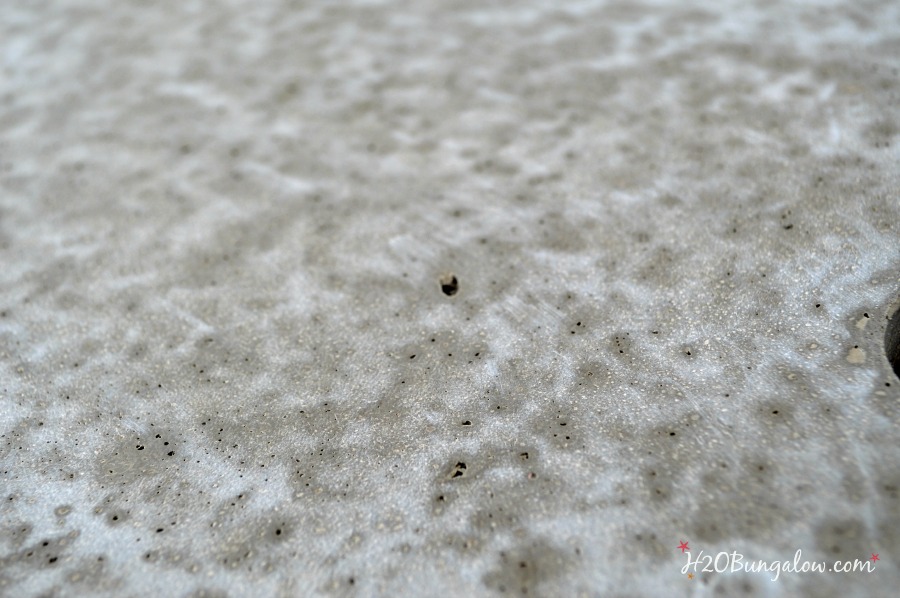
My wet polish exposed more pinholes. So I applied another batch of slurry and let it sit overnight once more 🙂
Day #4 – Dry polish, seal and let cure
The next morning I decided to dry polish a little bit. Honestly, I was just curious to see what it would do. I hit it with a medium speed and then high-speed quickly. It added a shine to the concrete, almost like burnishing paint.
I was impressed with the finish the sanding disc gave me. It was only 200 grit and from several videos I’d watched, I thought I needed a wide range of sanding disc grits to get a good shine. This is a huge time and money saver for the one time DIY’er!
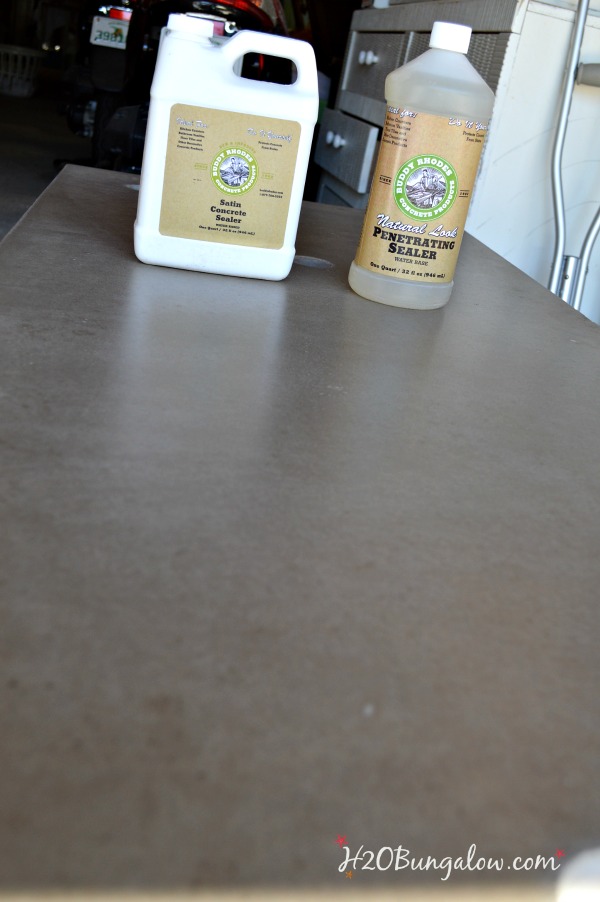
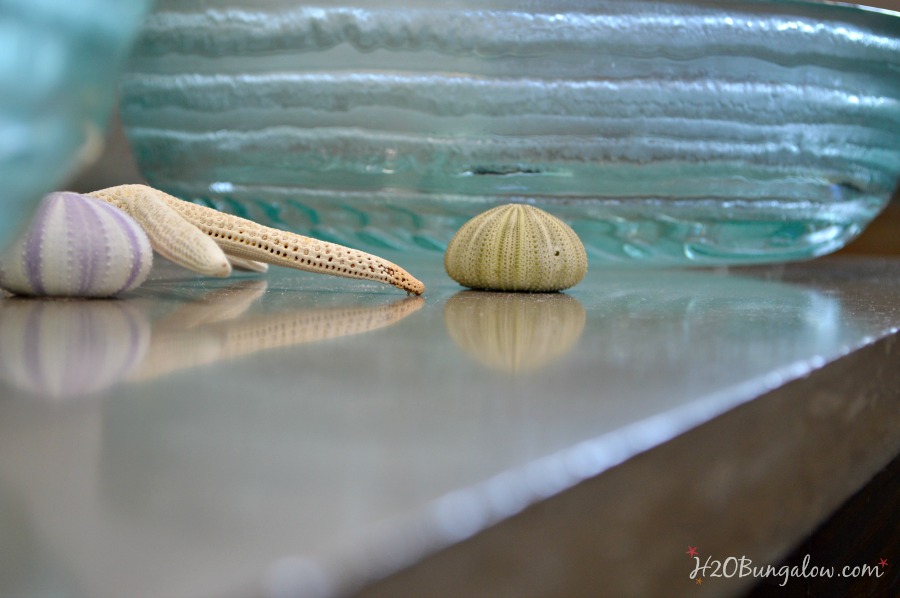
This picture shows the good shine I had with only using the sanding disc. But I wasn’t finished yet, like granite or natural stone, the surface is porous and needs to be sealed. Following the directions on the penetrating sealer I applied about 5 coats, waiting for each one to dry in-between coats. Dry time varies with air temperature. Next I applied the Satin Sealer, again in 4 -5 coats, waiting for each one to dry in-between coats.
Day #5 – Install
My concrete countertop cured for several days while we were finishing the vanity and the bathroom renovation. Otherwise I would have installed it at this time. Do follow the curing advice on the product labels. When we were ready to install it, my husband and I carried it into the house.
If you are not strong, have two or more strong people carry it! One more excellent tip on carrying your new DIY concrete countertop was to turn it sideways, or vertical to carry it. You’ll need to do this anyway to fit through a door. Depending on the size and weight of your project, you’d risk breaking it if you carried it flat or horizontally.
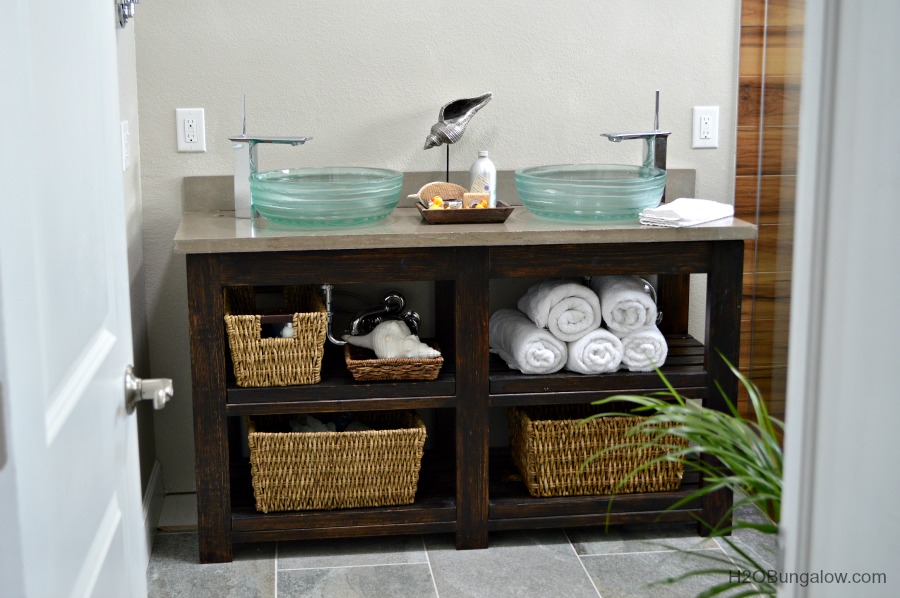
My DIY Open Shelf Vanity that I built supports the weight of the concrete countertop well.
It’s been over two months since we installed our DIY concrete countertop on our vanity. The surface is shiny and durable.
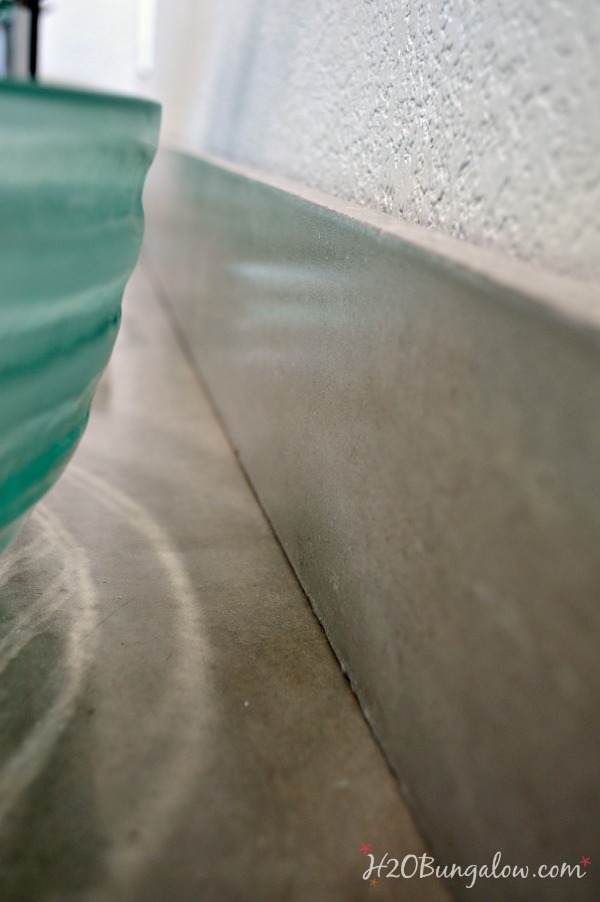
The subtle variations in color from the mix and the slurry layers add artistic character. The backsplash turned out just fine and has a good depth. Once I add a mirror to the vanity, we’ll attach the backsplash to the wall and seal it to the countertop with a little clear silicone.
Was it work?
Yes.
Would I do this project again?
In a heartbeat.
Want more information on Buddy Rhodes Products? Start with their website and catalog.
Have questions? Leave me a comment in the section below!
As you might have guessed this is a sponsored post, I was provided product and /or compensated for sharing this information. All opinions, craftiness and projects are 100% my own and I’ll only share items I think have value for my readers! You’ll also see affiliate links in this post to help you find the products I mention:)
DIY Concrete Countertop
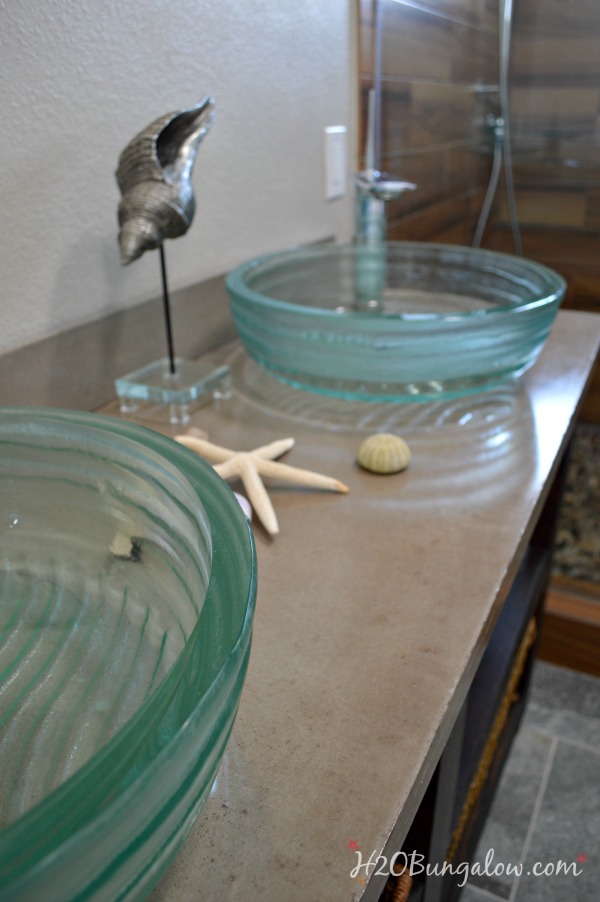
How to make your own concrete countertop with this detailed step by step DIY concrete countertop tutorial.
Materials
- Sheet of melamine for the base of your mold
- Melamine ripped (cut) in long strips for your mold sides
- Double sided tape
- Boards to lay across the saw horses and under the sheet of melamine for extra support
- Caulk
- Vaseline
- Buddy Rhodes GFRC Blended Mix
- Pigment
- PVA Fiber
- Water Reducer
- Bone Paste
- Penetrating Sealer
- Satin Sealer
Tools
- Saw horses
- Table saw
- Cordless brad nailer
- Carpenters square
- Measuring tape
- Caulking gun
- Pencil
- Popsicle stick
- Sanding disk
- Mixing bucket
- Screed that reaches across the width of your countertop
- Safety goggles
- Rubber gloves
- Face mask or respirator
- Plastic drop cloths
- Random orbital sander
- Plastic tablecloth with felt backing
- Rubber mallet
Instructions
- Using your table saw, you'll rip strips of melamine to the depth you want your counter top.
- Build your mold by laying your support boards across your saw horses, followed by a sheet of melamine on top of it.
- Assemble your concrete mold sides with the ripped strips of melamine. Join the corners with one end sticking out. Use your brad nailer to attach the mold side sections.
- Attach the frame to the melamine base sheet. Place your double-sided tape on the bottom of all edges of your frame area only. Your tape will probably be wider than your melamine. Be sure to line it up so no excess tape protrudes into your mold area because you want nice crisp corners. Turn your mold over and tape down in place to your melamine base. This is your concrete countertop mold.
- You'll need to prepare for placement of your plumbing or any holes you'll need in advance. There are two ways to tackle this. You can use a piece of pvc pipe and double-sided tape to make your holes part of your mold or you can drill out the holes later. If you drill your holes later, keep water flowing onto the drill bit as your drilling to keep the bit cool. If you make your holes with your mold, double-check your placement, sink location, faucet location, overhang, backsplash and any other measurements you need to account for.
- Seal the concrete mold seams. Start by spreading a thin coat of Vaseline on the sides and base of your mold where the two pieces meet. Be careful not to get Vaseline into the corners where the two pieces of melamine meet.
- With a steady hand and a thin bead line, caulk the joints (where the two pieces of melamine meet) along the base and up the sides of the corners. These caulked areas will be your corners.
- Take a popsicle stick with a rounded end and run it along the bead.
- Leave to dry overnight. Because there is a thin layer of Vaseline on the outer edges of the joined seams, you'll be able to pick up and wipe away all the excess caulking, leaving perfectly sealed seams.
- After the caulk has dried, carefully wipe away any extra that is on the sides of the joined corners.
- Mix each bag of concrete as a separate batch according to the insructions in the Buddy Rhodes Catalog of Concrete Products and Techniques.
- Pour into your mold in thin layers, and play "patty cake" to slap out any air bubbles. Make sure you work the concrete thoroughly into the corners. Fill your mold to the top of your sides, patting and pushing any air out of the mix.
- When you've filled your concrete mold to the top, work your concrete while it sets. Use your screed, and work across the surface, flattening it and smoothing it out.
- It will take about 4 hours to set. Get your felt backed table cloth wet, wring it out and place it on your concrete felt side down. You want it to dry slowly overnight and be warm.
- Remove form from the concrete. Carefully use a rubber mallet to break the seal of the double sided tape and brad nails.
- Flip the concrete sections over, exposing what will be the top and prepare the first slurry to fill in any holes. The slurry is made with the Bone Paste, water and a small amount of the pigment. Mix to a consistency of yogurt and spread over the concrete filling pin holes as you do.
- Use a clean rag to wipe away the excess slurry. Let this sit overnight to dry. If you have any deep holes, it's best to fill with thin layers that dry in-between each application of slurry. You'll wait 24 hours after the last coat of slurry is applied before moving on to the next step.
- Wet sand your concrete to polish. You can dry sand, but it will be very dusty.
- The Buddy Rhodes sanding disc will fit on your random orbital sander, pour water over the concrete countertop and run your sander over the surface until it feels super smooth. Keep your sander randomly moving at all times, and overlap the areas you are polishing to avoid areas that are unevenly polished. I set mine on medium which is about 3000rpms. If you expose more pinholes when sanding, apply another coat of slurry and allow to dry overnight.
- Following the directions on the penetrating sealer apply about 5 coats, waiting for each one to dry in-between coats. Dry time varies with air temperature. Next apply the Satin Sealer, again in 4 -5 coats, waiting for each one to dry in-between coats.
- Be sure to follow the curing times on your product.
- Carry your countertop in and place it on your cabinet base. Be sure to carry it veritcal (or sidways), not flat, to avoid the risk of breaking.
- Attach plumbing and fixtures and you're done!


Pastor Mark Mayerstein says
I noticed that in the picture the countertop edges look rough. Are they subject to flaking or chipping? Did you polish them as well? I’m thinking an edging of aluminum or steel would protect them. What do you think about that?
Wendi Wachtel says
Hi Pastor Mark,
The edges look a little rough but aren’t rough to the touch. We’ve had this counter for about 5 years now and it hasn’t chipped or flaked at the edges or anywhere else. An edging would work but I think you’d want to plan that out well if it’s going to be flush with the counter top. I think you’d be fine without it, just be sure to pat the concrete into the mold to get air bubbles out at the edges and corners.
Good luck with your project!
Greg says
This looks exciting. We have been discussing how to replace our kitchen tiled counters. So we are wondering if the sealers/finishers are heat resistant so we can put hot pans from the stove or oven on the finished concrete as you have surfaced your vanity?
Wendi Wachtel says
Hi Greg!
I don’t think any of the sealers are going to be heat resistant like granite would be. If it were me, I wouldn’t take the chance on ruining a sealer coating just because it’s so much work to put it on. With that said, no matter what you use as a base coat sealer, I’d use a wax made for countertops on top of everything. I have a post and video that talks about it. I’ve been very happy with how long it’s lasted and water has beaded up well with it. I hope that helps! Thanks for your note and visit.
Suzy Hindley says
Hi Wendi,
Loved yr concrete counter top tutorial, I’m about to do a full bathroom Reno and a concrete countertop. Can I email you some questions about light weight concrete mixes and reinforcement? I’m going to hone mine so seaglass shows thru.
Wendi Wachtel says
Hi Suzy!
How exciting, redoing a bathroom is so much fun! Thanks so much, I love the countertop too. I’m getting ready to make another concrete counter for a single vanity in a week or so. Sure, send your questions, I’d be happy to answer questions that I can. My address is [email protected]
Jen @ Jenron Designs says
Wendy I love this idea, I have been thinking about this for our basement. You really make it look easy so I may be willing to give it try, great tutorial and the overall product is beautiful!
Wendi Wachtel says
Hi Jen!
Thank you so much! I love my concrete counters and they’ve held up well! Sos much so that I’m planning a new concrete counter project for this fall!