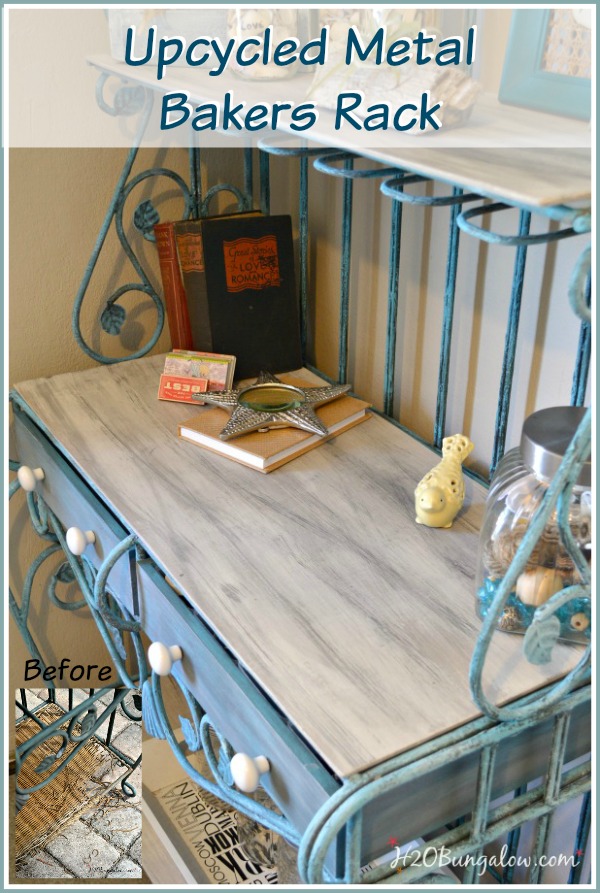
I can’t wait to share my metal bakers rack makeover. I’ll show how to paint a metal bakers rack and give it a completely new look.
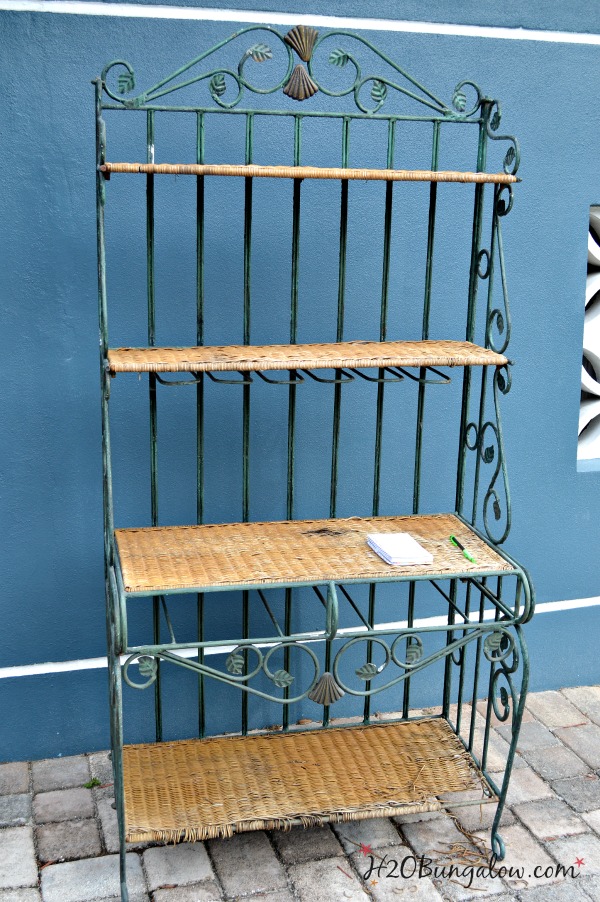
This was one of those Lucy moment projects, as in..uh-oh what did I get myself in to this time? I found this broken down bakers rack at the local Goodwill. It was a fiasco getting it home and then I needed help carrying the behemoth heavy thing into the garage. I endured DH’s hard stare with the silent words of what the heck? and..where are you going to find room for this?
… I wasn’t about to let him know I was thinking the same thing. I’ve always loved bakers racks, I simply needed to find a way to give this old piece a fresh new look.
A couple of weeks ago I had to use the table saw for another project and figured I might as well cut the new shelves for my metal bakers rack makeover while I had it out. It was the perfect jump start I needed to get this project rolling 🙂
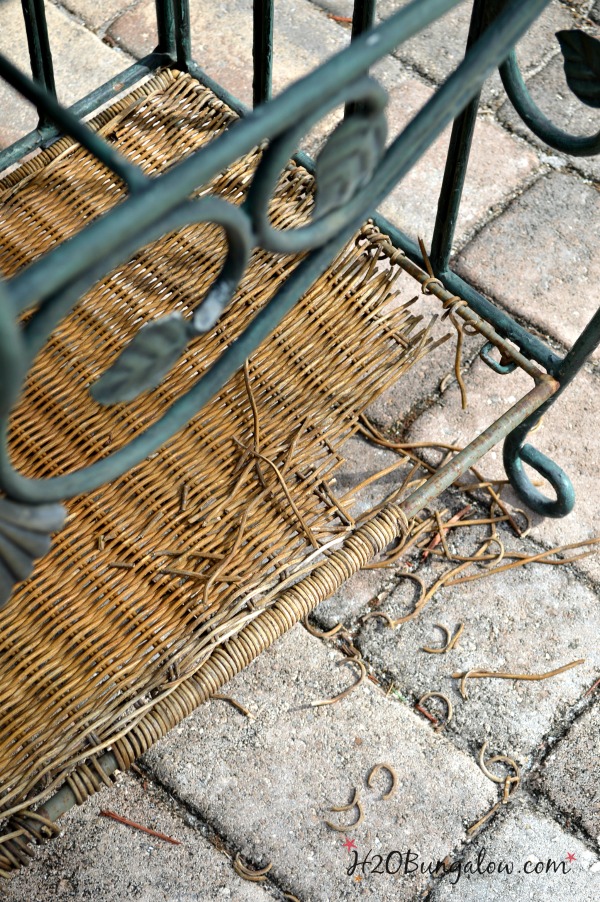
As you can see, it was in rough shape. Removing the wicker was time-consuming. The box cutter blade made me nervous about loosing a finger. What if it slipped? I tried the Dremel tool which cut great, sparks and all. But, the two cutting discs I had worn down really fast and I still had 2 shelves to finish. Next, I took the jigsaw and cut the wicker out of each panel just inside the frame edges and then unwound the rest of it by hand. If you’re trying this, skip the other methods and jump right to the jigsaw.
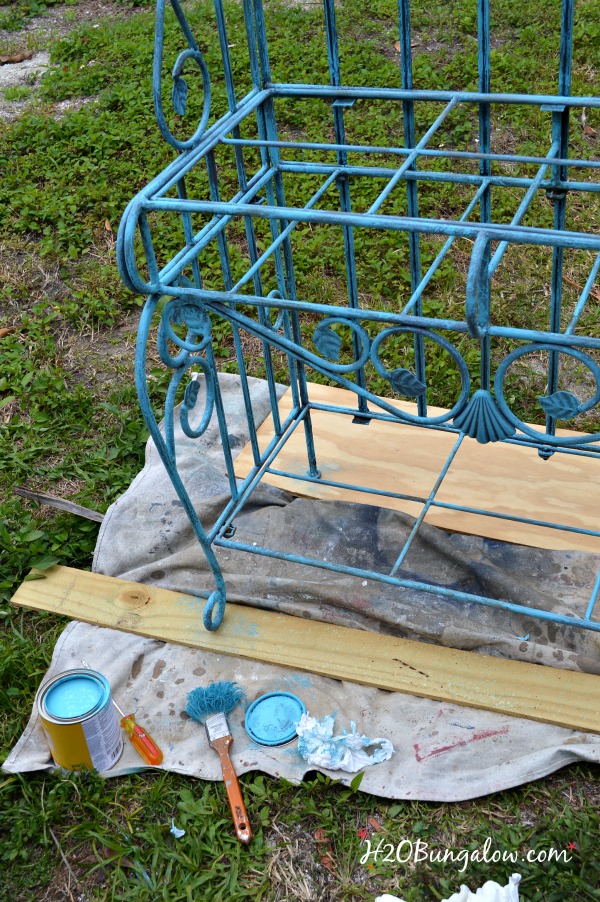
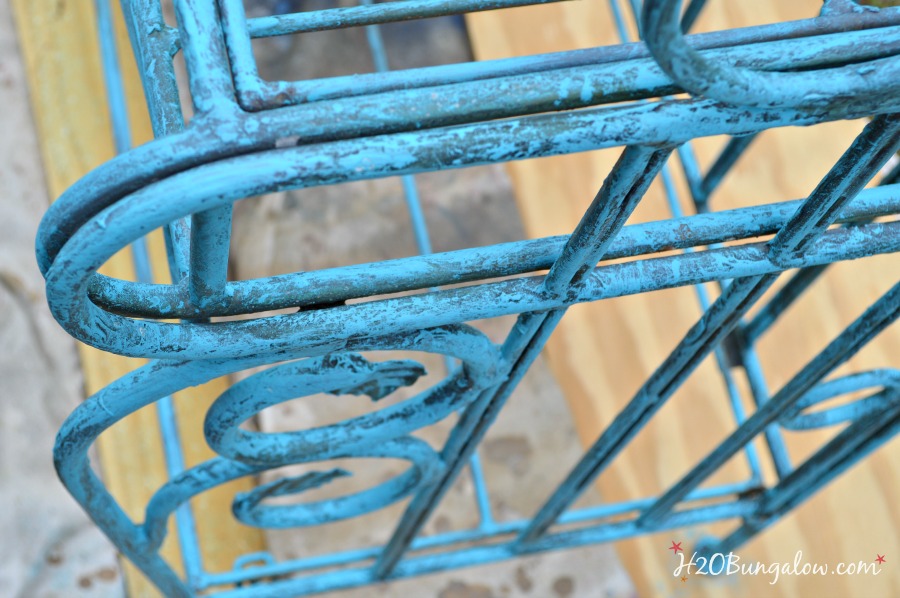
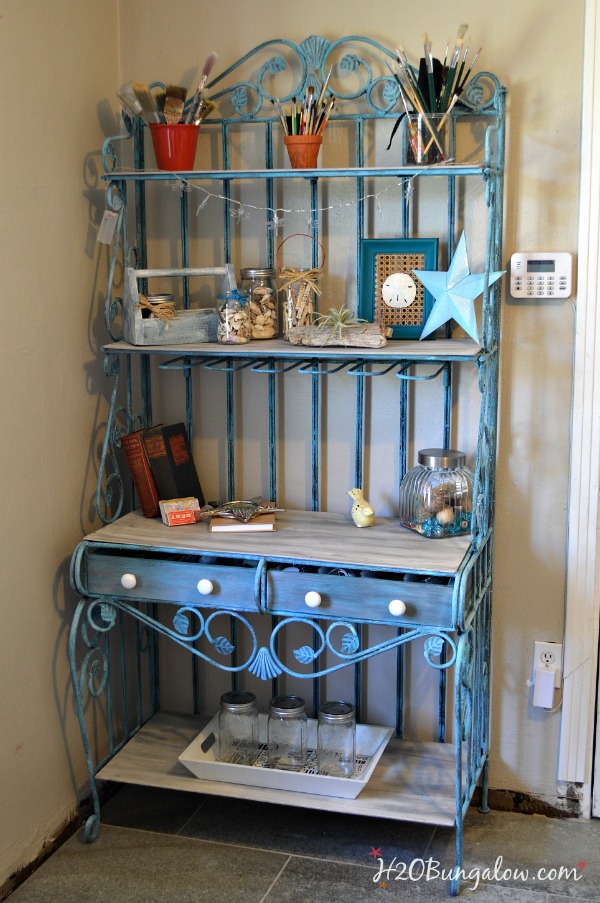
After a good cleaning, I dry-brushed the metal frame with a coat of Benjamin Moore’s Baltimore Sky in a flat finish. Dry-brushing is just using a minimal amount of paint on your brush and almost rubbing and pouncing the paint onto the surface. I used the crummiest brush I had for this job, which was good because I ruined it pouncing on the paint. See it in the picture below. Last I added a little bit of white dry-brushing in a few areas like the leaves and some areas of the scroll work to add highlights. You don’t really see the white, it just gave the areas some interest.
Because the frame had a lot of texture, the paint covered the high areas and left the depressions dark, almost black. My frame took on an aged patina, like it took years to get this color variation. It was exactly the effect I wanted!
The front of my bakers rack frame had two openings that looked like there may have been drawers at one time. I made two drawers and finished them to compliment the frame. I’ll share how to make a simple drawer in a later post.
Here’s how I made the aged patina on the new wood so it matched the bakers rack frame
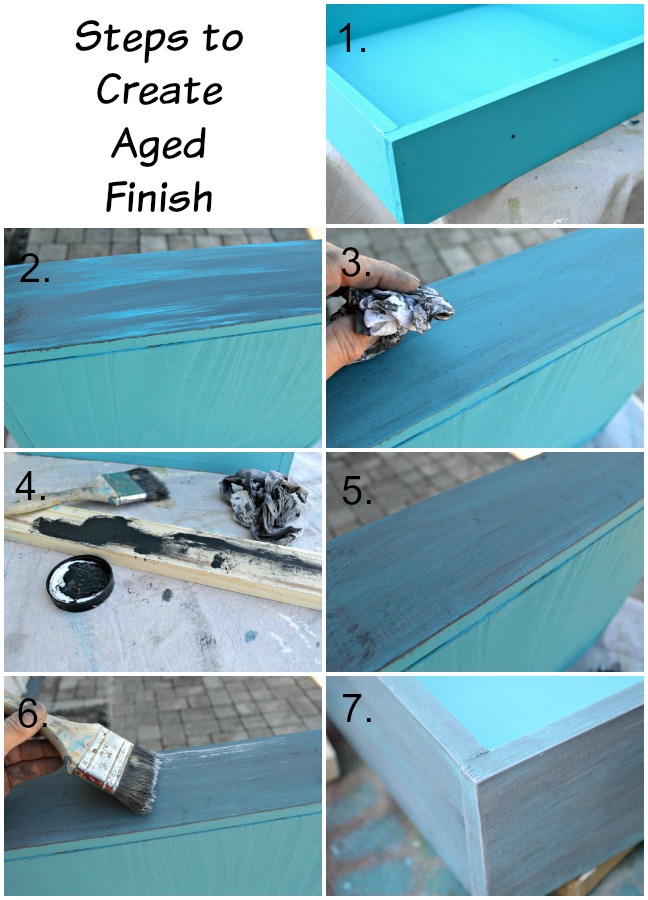
Apply a watered down wash of dark grey.
Wipe and blend it in immediately with a rag or paper towel.
Dip a few bristles into a little black paint, rub extra off onto a paper towel or piece of wood.
Dry-brush and blend in a little black paint.
Follow steps 4 and 5 with a little white paint until you get a color you like.
Seal the drawer with a clear top coat.
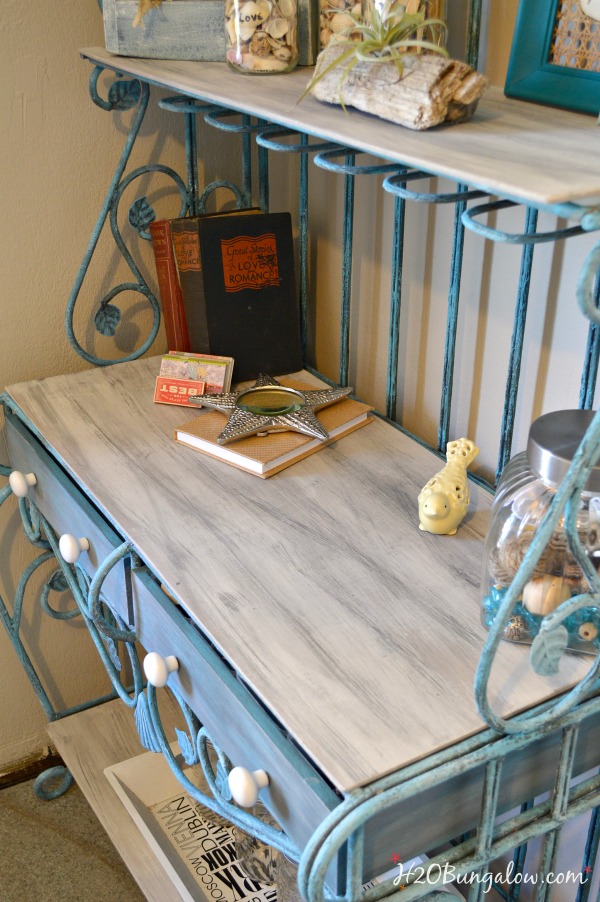
I cut four shelves out of 1/4 inch plywood to replace the broken wicker. The plywood is sturdy enough because each shelf has a frame and metal support on the frame. I’m glad the thin plywood worked so well, I can’t imagine making this bakers rack any heavier! It’s without a doubt, the heaviest one I’ve ever seen.
The new wood shelves were painted the same way as the above instructions. I used colors that looked like old driftwood. I applied them in this order a base tan, grey wash, white wash and little black dry-brush.
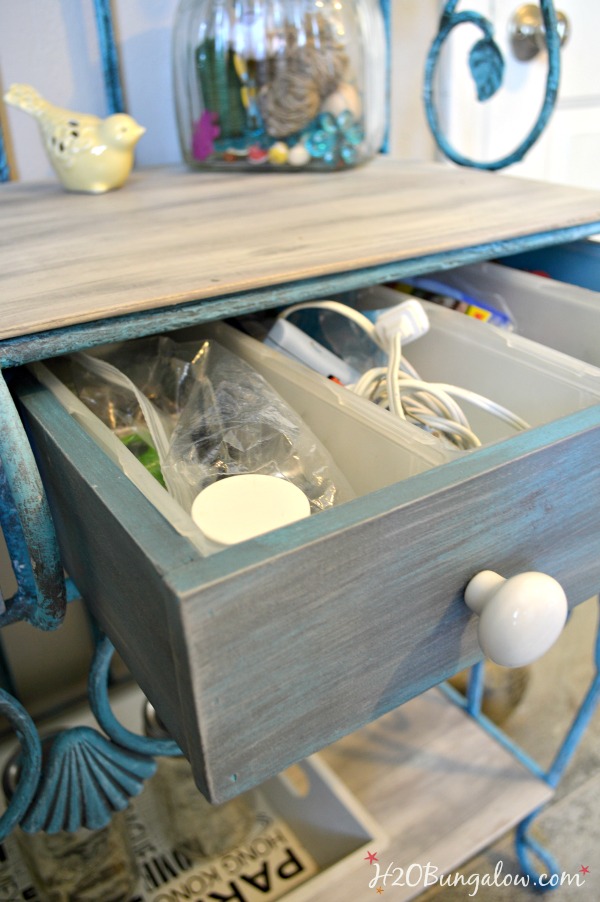
Here’ a close up of the drawers, they match the frame pretty well, don’t you think so? I used the plastic drawer bins I had in my kitchen drawers before I made my new DIY wood drawer dividers.
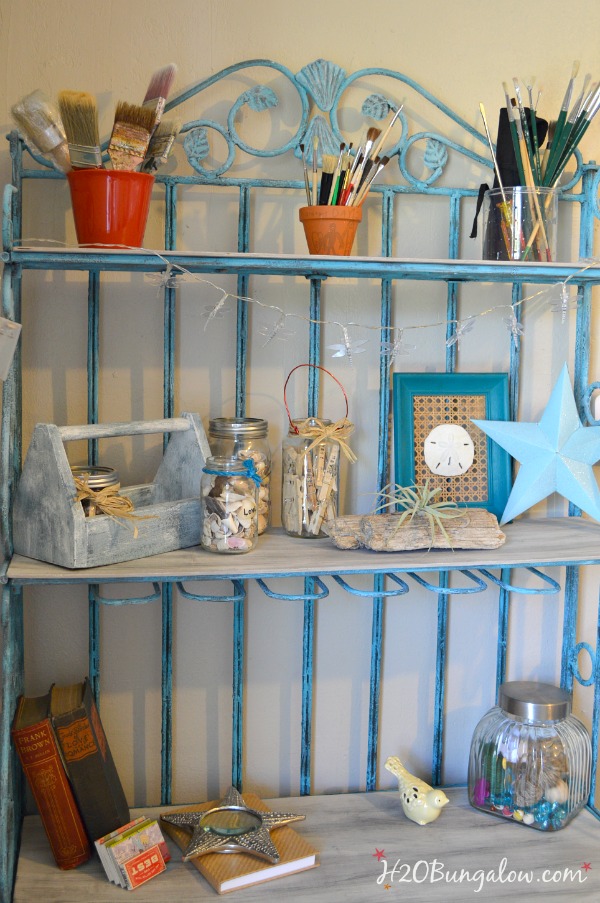
Oh, my! Is this what organized looks like? LOL My metal bakers rack makeover is for my studio/office.
After the holidays we moved some furniture around and my office is no longer a part-time guest room. It’s my full-time office/studio! When you live in a small home, having a room all to yourself is a very big deal!
The aged patina and new wood shelves made this project a keeper. I’m having the best time organizing my supplies so I can actually find what I’m looking for when I need it, and not a few days later. This is the first project in my studio makeover. I have some exciting things planned for my feminine retreat and work space. I can’t wait to share my big plans.
In the meantime, I think you’ll enjoy a few of my other projects. This was just one of the many Creative DIY Shelving Ideas I’ve shared.
I love the rich, time-worn look of a good patina. I rarely find a furniture piece with a perfect patina, and if I do, it’s not in my budget. If you enjoyed this one, you might also enjoy how to create an aged silver finish on furniture or how to create a vintage nautical trunk.

Angie ~ Ambient Wares says
I can’t believe you made your own drawers! It turned out beautiful and one day I hope to tackle some drawer making 😉 Pinned & sharing!
Wendi says
Hi Angie! I did make those drawers….LOL They are so useful, and I think maybe there were some to begin with? Or maybe it was an open shelf there? Not sure, but the drawers were pretty easy to construct. You can do it! Thanks so much for your visit!
W.S. says
Looks AMAZING!!! Love the color, the shelves,…all of it!
Wendi says
Hi and thank you! The color turned out better than I expected it would. Especially with the layers and dimension of the dry-brushing. I think paint always looks better in layers anyway, it add a lot of interest to the project. Thanks so much for your visit and sweet comment!
Suzy says
It’ beautiful, I love it!…now I need to find one!
Wendi says
Hi Suzy and thank you! Remember when bakers racks were everywhere? This one turned out better than I expected and using the layered look with the colors made a huge difference in the outcome. Good luck and I hope you find one. Thanks so much for your visit and sweet comment!
Linda at Mixed Kreations says
It’s beautiful! You did an awesome job on it, and the color is perfect. I’ve bought things and brought them home to receive stares, and wonder myself why the heck i even bought thing. Lol. I’m happy yours worked out
Wendi says
Hi Linda and thank you! I was actually wondering the same thing on the way home…a kind of what have I done this time thought. I didn’t have a plan I just needed storage and the price was right n this shelf. It’s also sturdy, it takes two people to move it! Thanks so much for your visit & sweet note 🙂
judy says
This looks GREAT! Now I know what to do with my bakers rack.
Wendi says
Hi Judy! I’m so glad I inspired you to do something with yours. It’s a nice way to update the look. Bakers racks are so useful and awesome for decorating! Thanks so much for your visit and have fun working on your own bakers rack makeover.
Sherrie's Lucky Quality Finds says
Hi Wendy,
Love Love Love how you refinished this bakers rack!! As heavy as it is, you know it is made well and made to last!! I am in awe over the transformation!! I get ideas (the hubs calls them oh no’s) dreams actually in the morning time, so when I wake up, I’ll say I had a dream about so & so, some of my best ideas have come from those morning dreams. Too funny how we all have different visions for different items.
All The Best!!
Sherrie
Wendi says
Hi Sherrie, I LOVE the bakers rack and it was perfect for my studio. It was by far the best made and heavy one I’ve ever run accross so I’m expecting it will last forever! Love how you find your inspiration. Thanks so much for sharing your story!
kim says
This is total awesomeness!
Wendi says
Thanks Kim! It turned out a lot better than I expected!
Larissa ~ Prodigal Pieces says
Can I just say you ROCKED this makeover!! Wow, Wendi! I’m super-excited to say I’ll be featuring your prodigal piece tomorrow. 🙂
Wendi says
Larissa, Thank you so much for featuring my bakers rack project! I so appreciate it!
Michele says
I have a beautiful bakers rack that I use outdoors. It is quite rusted. Can I paint right over the rust? Do I need to sand it all down first? It is quite big, about 4 feet wide and the back is close to 6 feet high. Gorgeous. I use it for keeping plants displayed. We just moves and are remodeling our kitchen. The new kitchen window (over the sink) will have a direct view of this beautiful rack, so I want to make it really look fabulous. I’m okay with rustic looking.
Wendi says
Hi Michele,
My rack had rust on it too. I would wire brush as much off as possible and give it a good coat of a Rustoleum product that neutralizes the rust first. Then paint away with a product made for outside that has rust inhibitive properties. Ask for assistance in the paint department of your local Home depot or Lowes and they can point you in the right direction. Have fun with your project!
Lou Lou Girls says
This looks so amazing. Pinned and tweeted. We love to party with you, so I hope to see you tonight at 7 pm.. Have an amazing day! Lou Lou Girls
Mary says
This looks great! I just love finding items at thrift stores to bring back to life. Baker’s racks are ones that I always pass up. Not any more! Question…. Could you have put the new shelves directly over the old wicker?
Thanks for sharing this love it
Wendi says
Mary, I always passed them up before as well. I wouldn’t recommend leaving the old wicker on. It’s easy but time consuming to take off. The new wood won’t lay well on top of the wicker either. I hope you find a good one to makeover!
Kirsten says
I love this! We were given a baker’s rack and it’s in our house but…truth be told, it’s ugly. I’ve been trying to figure out how to make it useful & pretty and I love your ideas! I hate the glass shelves that are in it now, so I know I need to build wood shelves. I love the paint job you did on this, too – it’s beautiful! Thank you for the inspiration! 🙂
Wendi says
Kirsten… I’m so happy I inspired you to do something with your bakers rack. They really are handy to have around…just get rid of the dated look. The wood shelves were so easy, just cut 1/4 plywood. It will be sturdy enough as long as there is reinforcement under the glass area. My makeover was so easy and inexpensive, I’m sure yours will be too! Thanks so much for stopping by & leaving a sweet comment!
Marie@The Interior Frugalista says
Wow, building a replacement drawer impressed the heck out of me! Love your bakers hutch transformation and the color is fabulous for your beach house. Congrats on having your very own office/studio space and looking forward to seeing its progression.
Wendi says
Marie! I’m in love with this color this season! love it, love it, love it! Yes, a room of my own & you know what a big deal that is:) I can’t wait to share all of the projects I have planned to make it special!