I just finished painting my fabric chairs and couldn’t wait to share this painted upholstered chair makeover tutorial with you guys. I’m going to be the first one to admit I was skeptical doing about this project. Maybe that’s why the chairs sat in the garage for so long, I think I was avoiding starting this DIY painting fabric chair project I’d committed to doing.
I made it harder on myself too since I left them in the garage gathering even more dust and dirt than when I hid them out there to begin with.
I did a lot of research on for the painted upholstered chair makeover. Ultimately, I used the recipe from The Kim Six Fix How To Paint Upholstery With Latex Paint tutorial. She painted a fabric chair. I liked her instructions on sanding the fabric to soften it but you can’t do that with heavy upholstery fabric so I was on my own with that part.
DIY Painted Upholstered Chair Makeover Tutorial
I use affiliate links to help you find the supplies I used. You can read my full disclosure policy here.
Supplies needed to paint an upholstered chair with latex paint.
- fabric chair
- flat latex paint – my color is Top Sail from Sherwin Williams
- Ceramcoat Fabric Medium
- round paint brush
- water
- fine mist spray bottle
- HomeRight Steam Machine
- Oxiclean Stain remover
- upholstery welt cording or other chair trim
- replacement furniture legs
- leg mounts
- drill
Step one: Clean the upholstered chair before painting it.
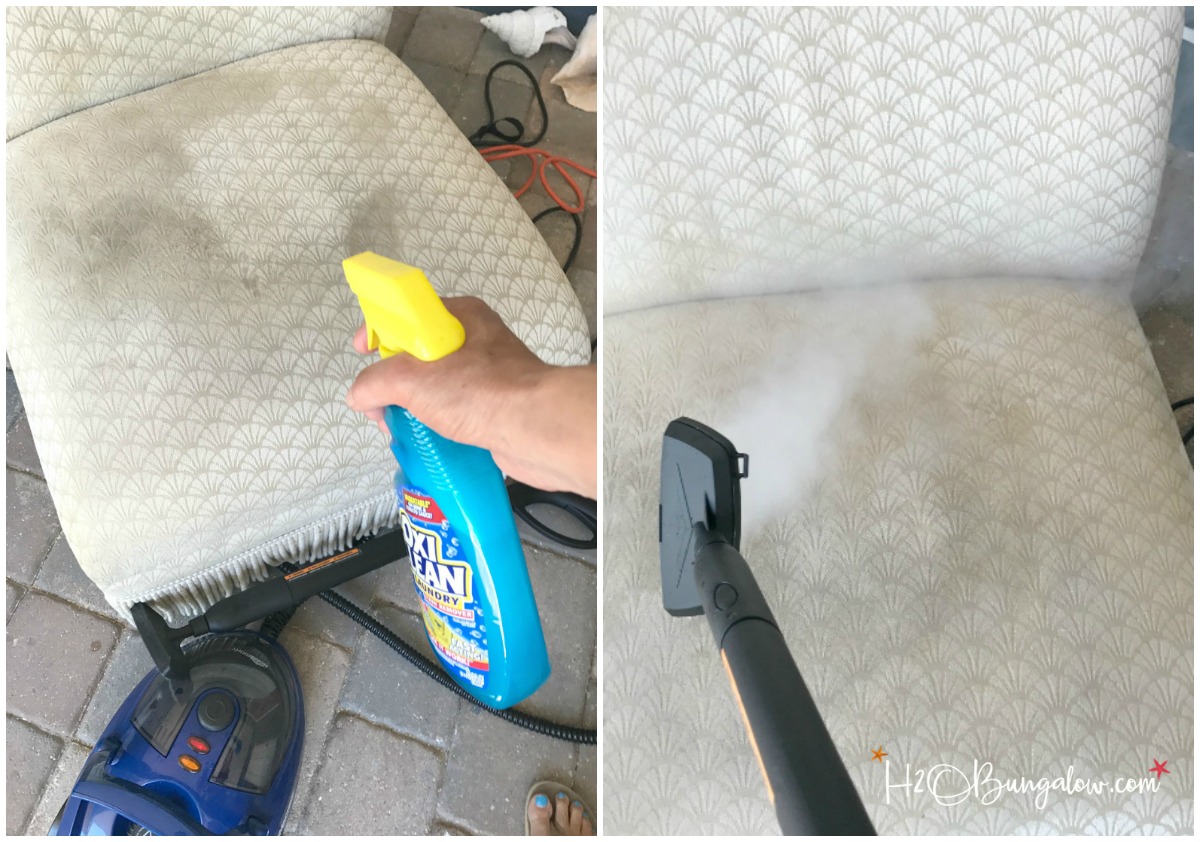
These chairs have been with me for years. They’ve survived kids, pets and have been stored in the garage collecting dust for the last few years. In retrospect, I should have kept them covered in the garage 🙁 I couldn’t handle the idea of painting over the dirt, even if it was our dirt, so I decided to steam cleaning the chairs first.
I diluted Oxiclean with water in a spray bottle, sprayed it on and let my HomeRight Steam Machine do it’s magic. Basically I moved the steamer over each area and let the steam loosen the dirt and then then wiped it off with a towel. The chairs even smelled clean after that.
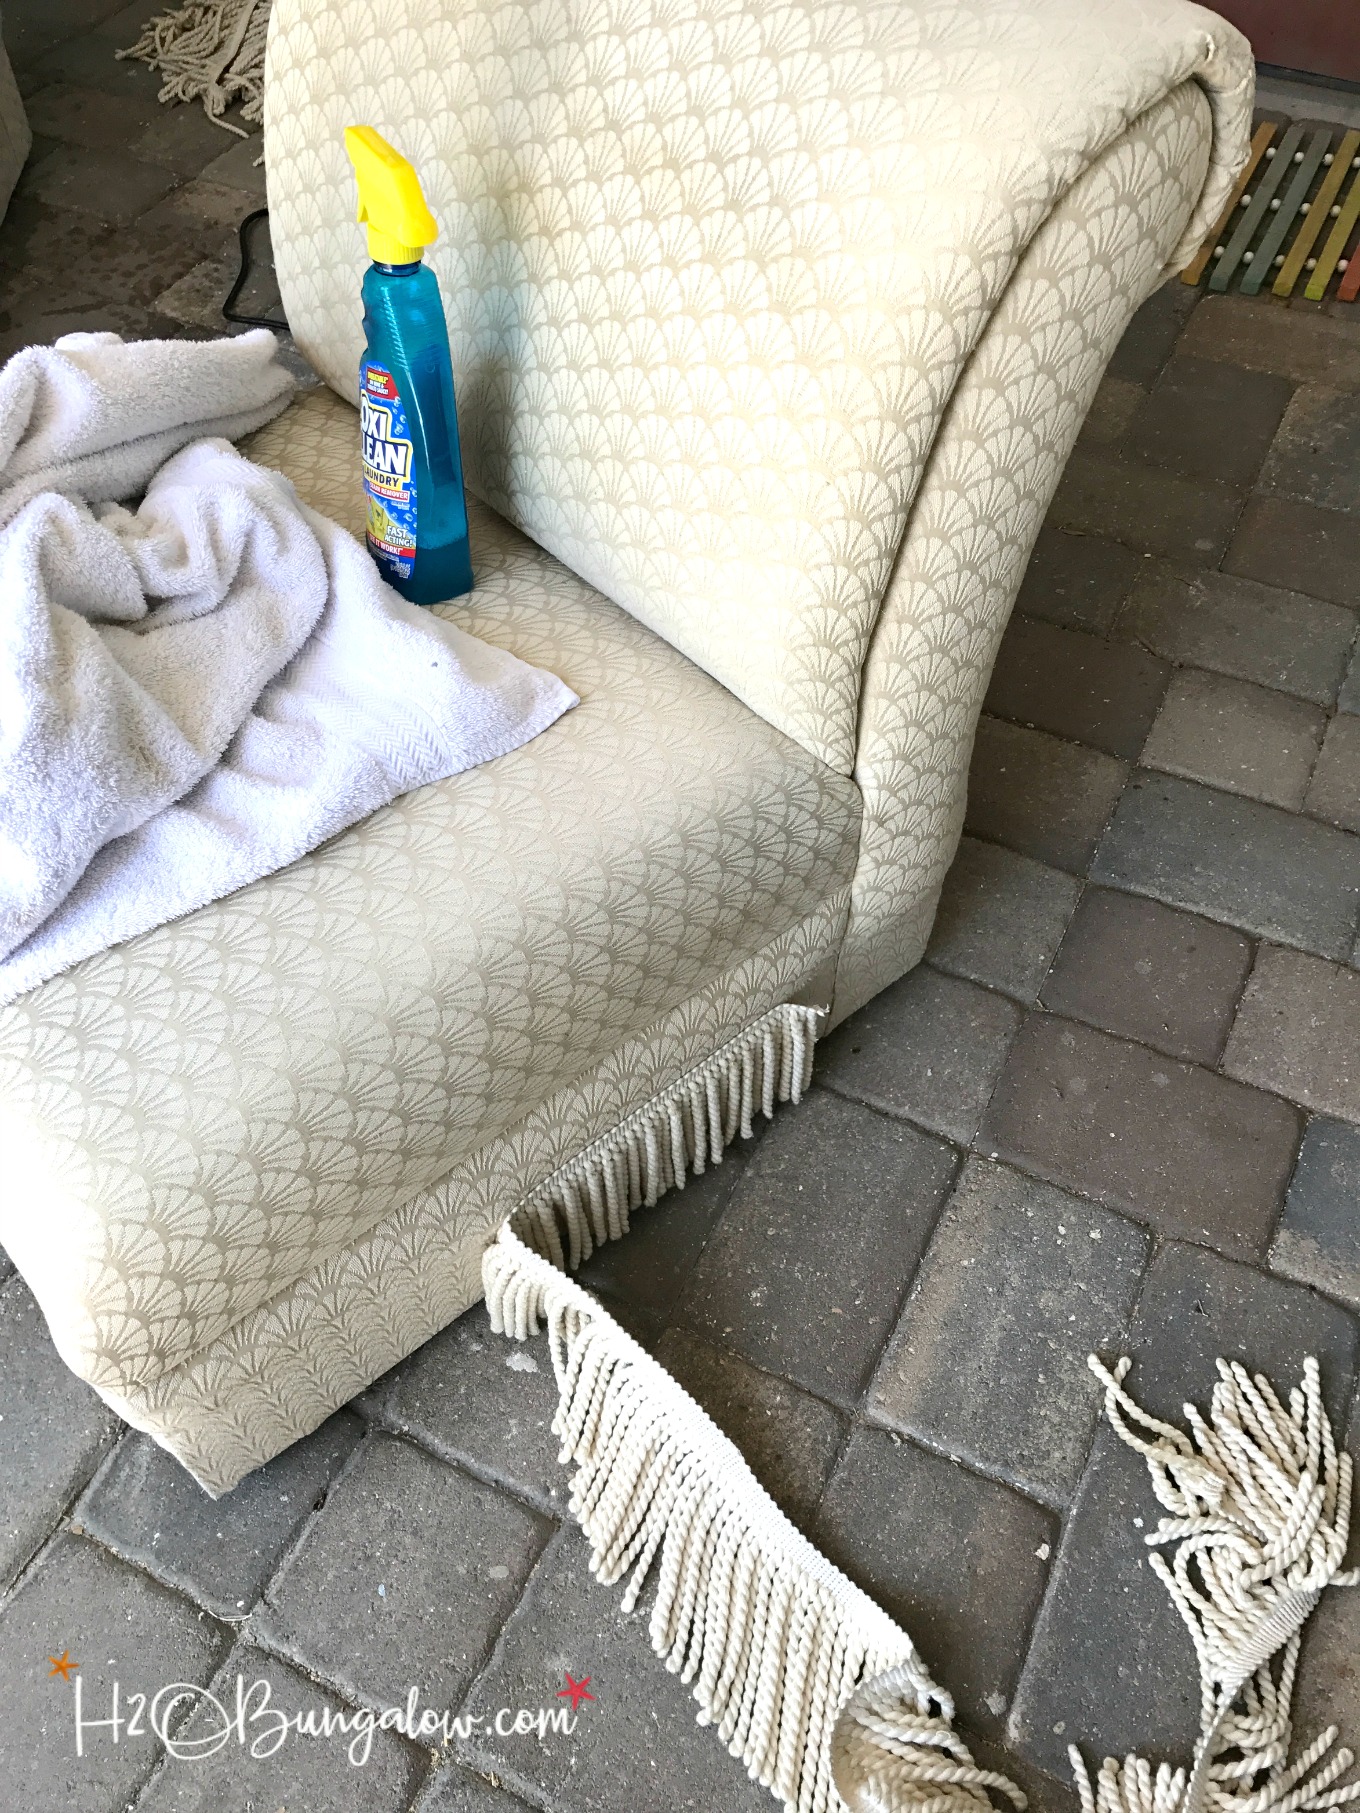
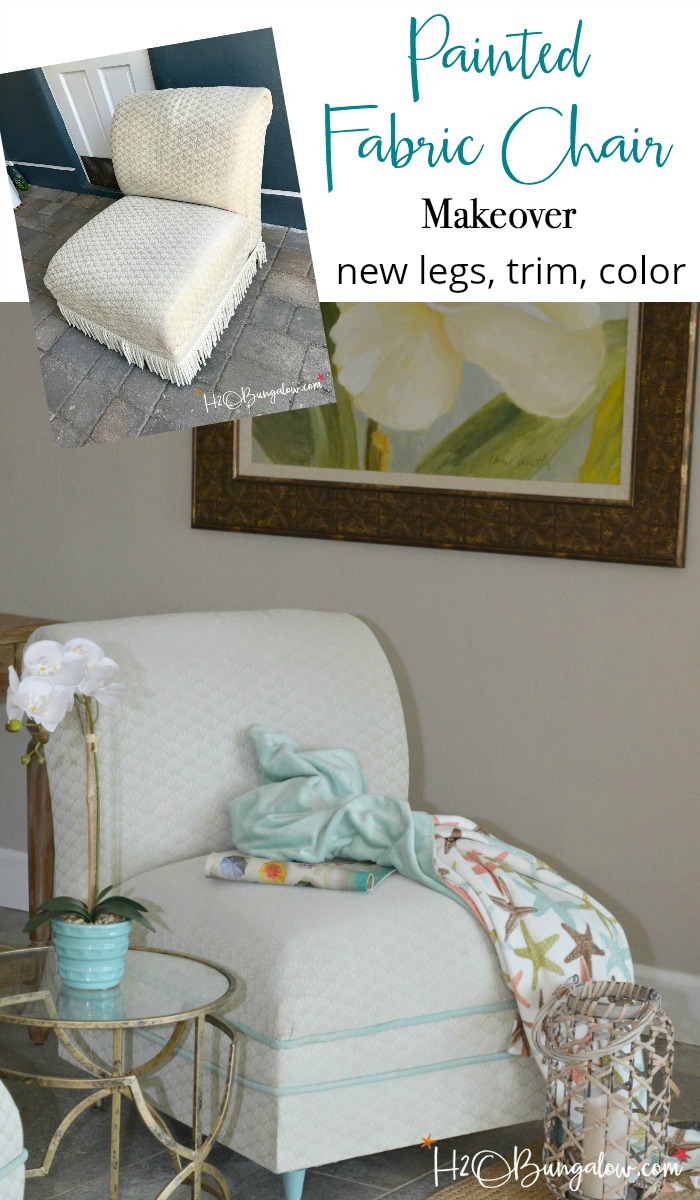
I could have stopped at the cleaning if the upholstery wasn’t a little discolored and still showed some stains. They were also dated, sat really low to the ground and bullion fringe doesn’t fit my style anymore. OK, I’ll admit it, I’ve had them since 2000! In my defense, they are really good quality, very sturdy and the shell pattern in the fabric fits in our beach house decor.
Step two: Paint the fabric chair with the paint mixture
Painting the upholstery was a lot easier than I expected it would be. Mix one part fabric medium with one part latex paint and one part water. I used the recipe from Kim Six Fix, She painted a smooth fabric chair instead of
Stir well. I used one 8oz bottle of fabric medium per for one coat of paint on each chair. Begin by misting an area of the fabric lightly and evenly with water and apply the paint by rubbing it into the upholstered fabric.
After trying a few different paint brushes, the one that applied the paint the best was a large round paint brush. The brush isn’t not one you’d find easily or in a craft store. I put a link to it in the supplies list above.
I made a 2 minute video on how to paint an upholstered chair to show you what painting a fabric chair looks like, how I applied the paint and how easy it was.
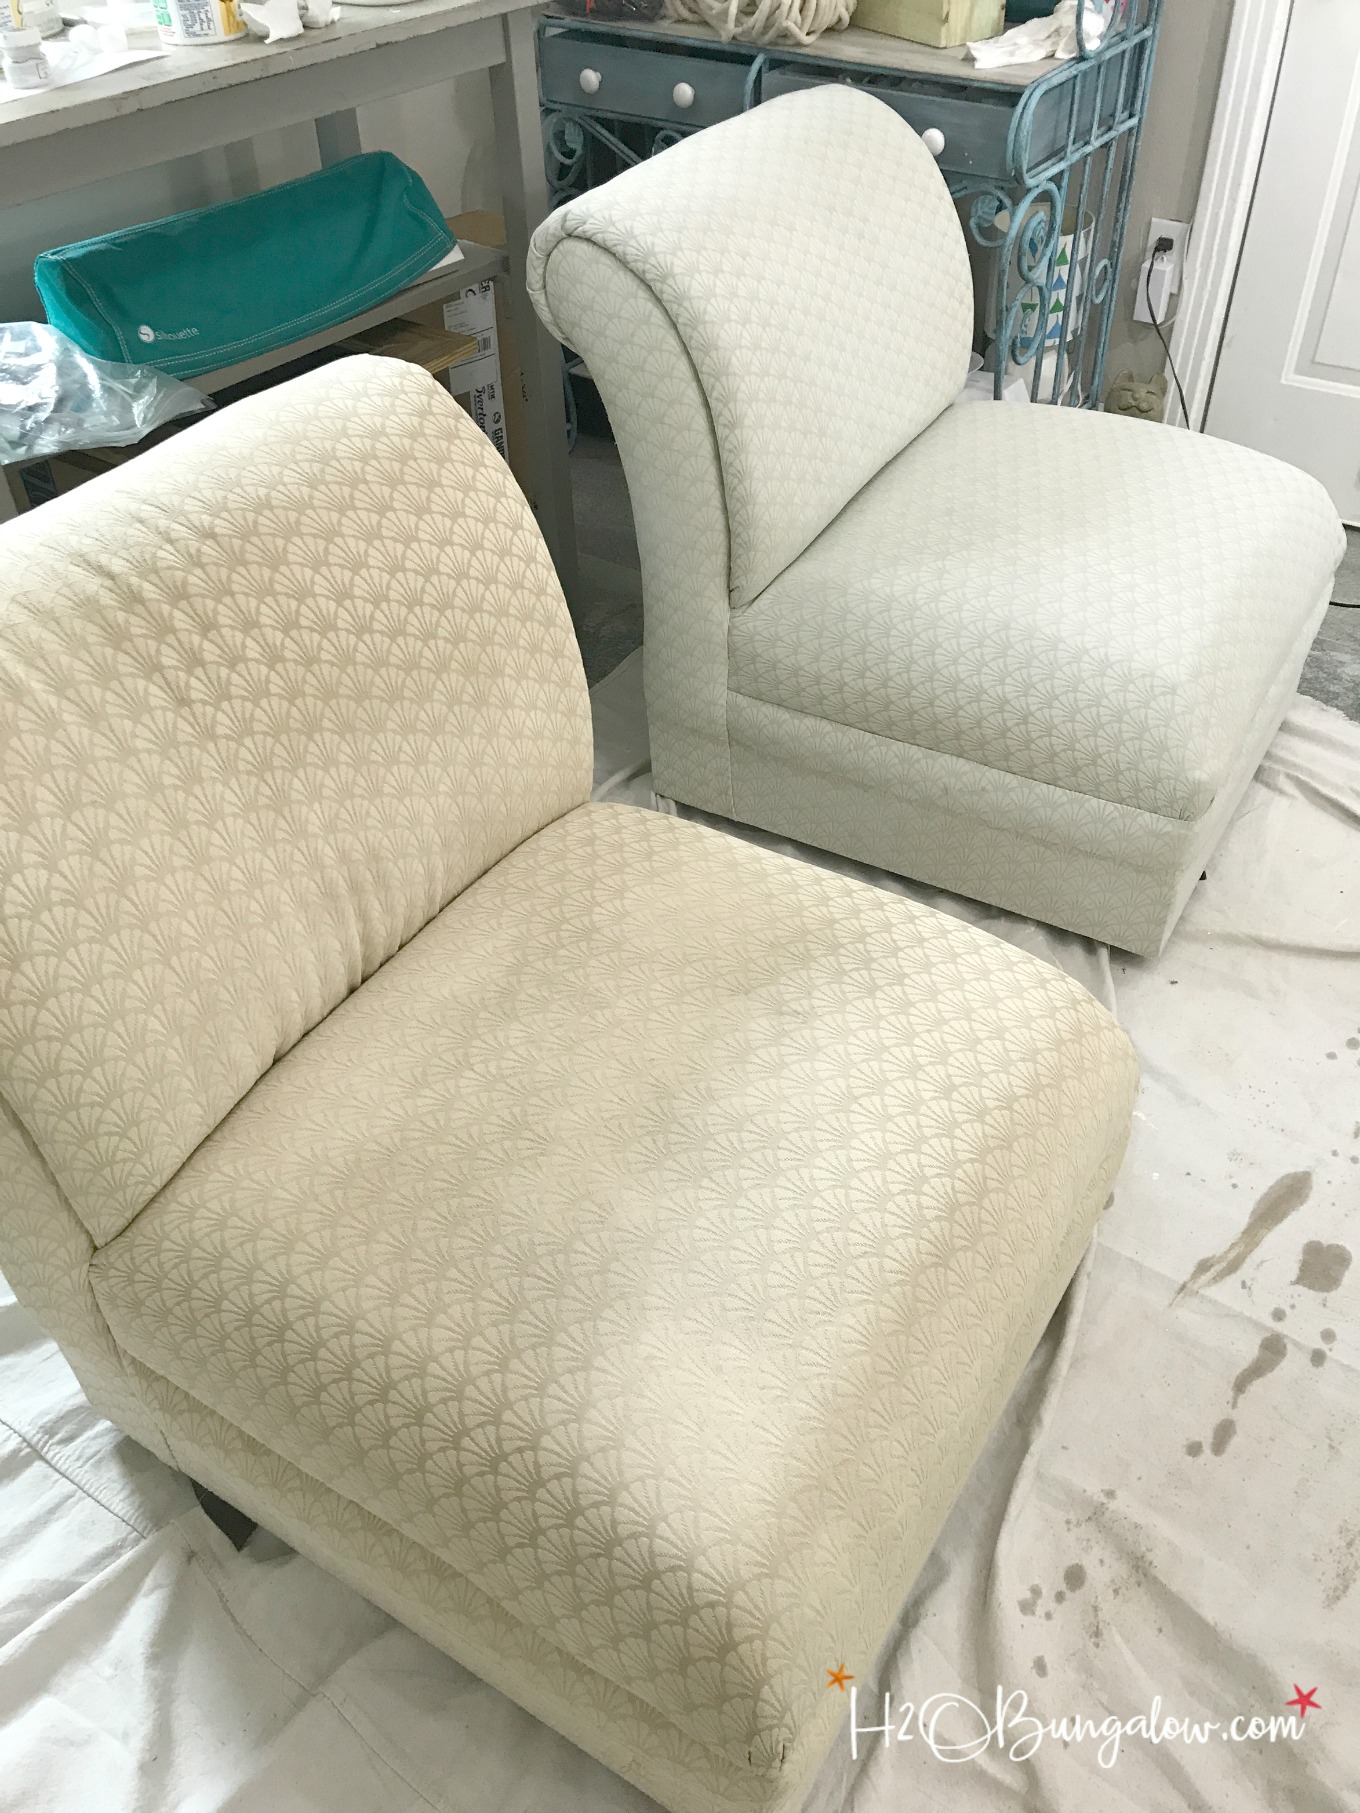
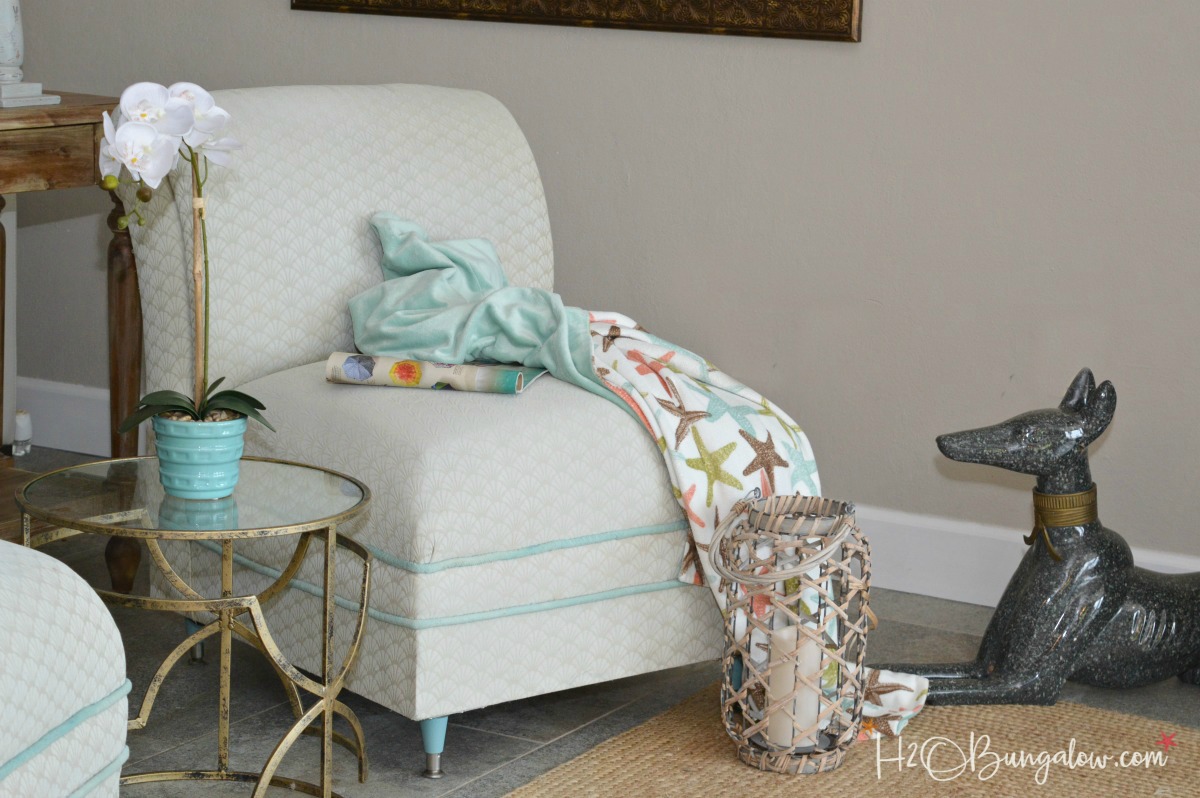
The paint color I used was lighter than the original chair color. The chair on the right has one coat of paint on it. I only needed one coat of paint on my fabric chairs.
Step Three: Add new trim to the painted chair.
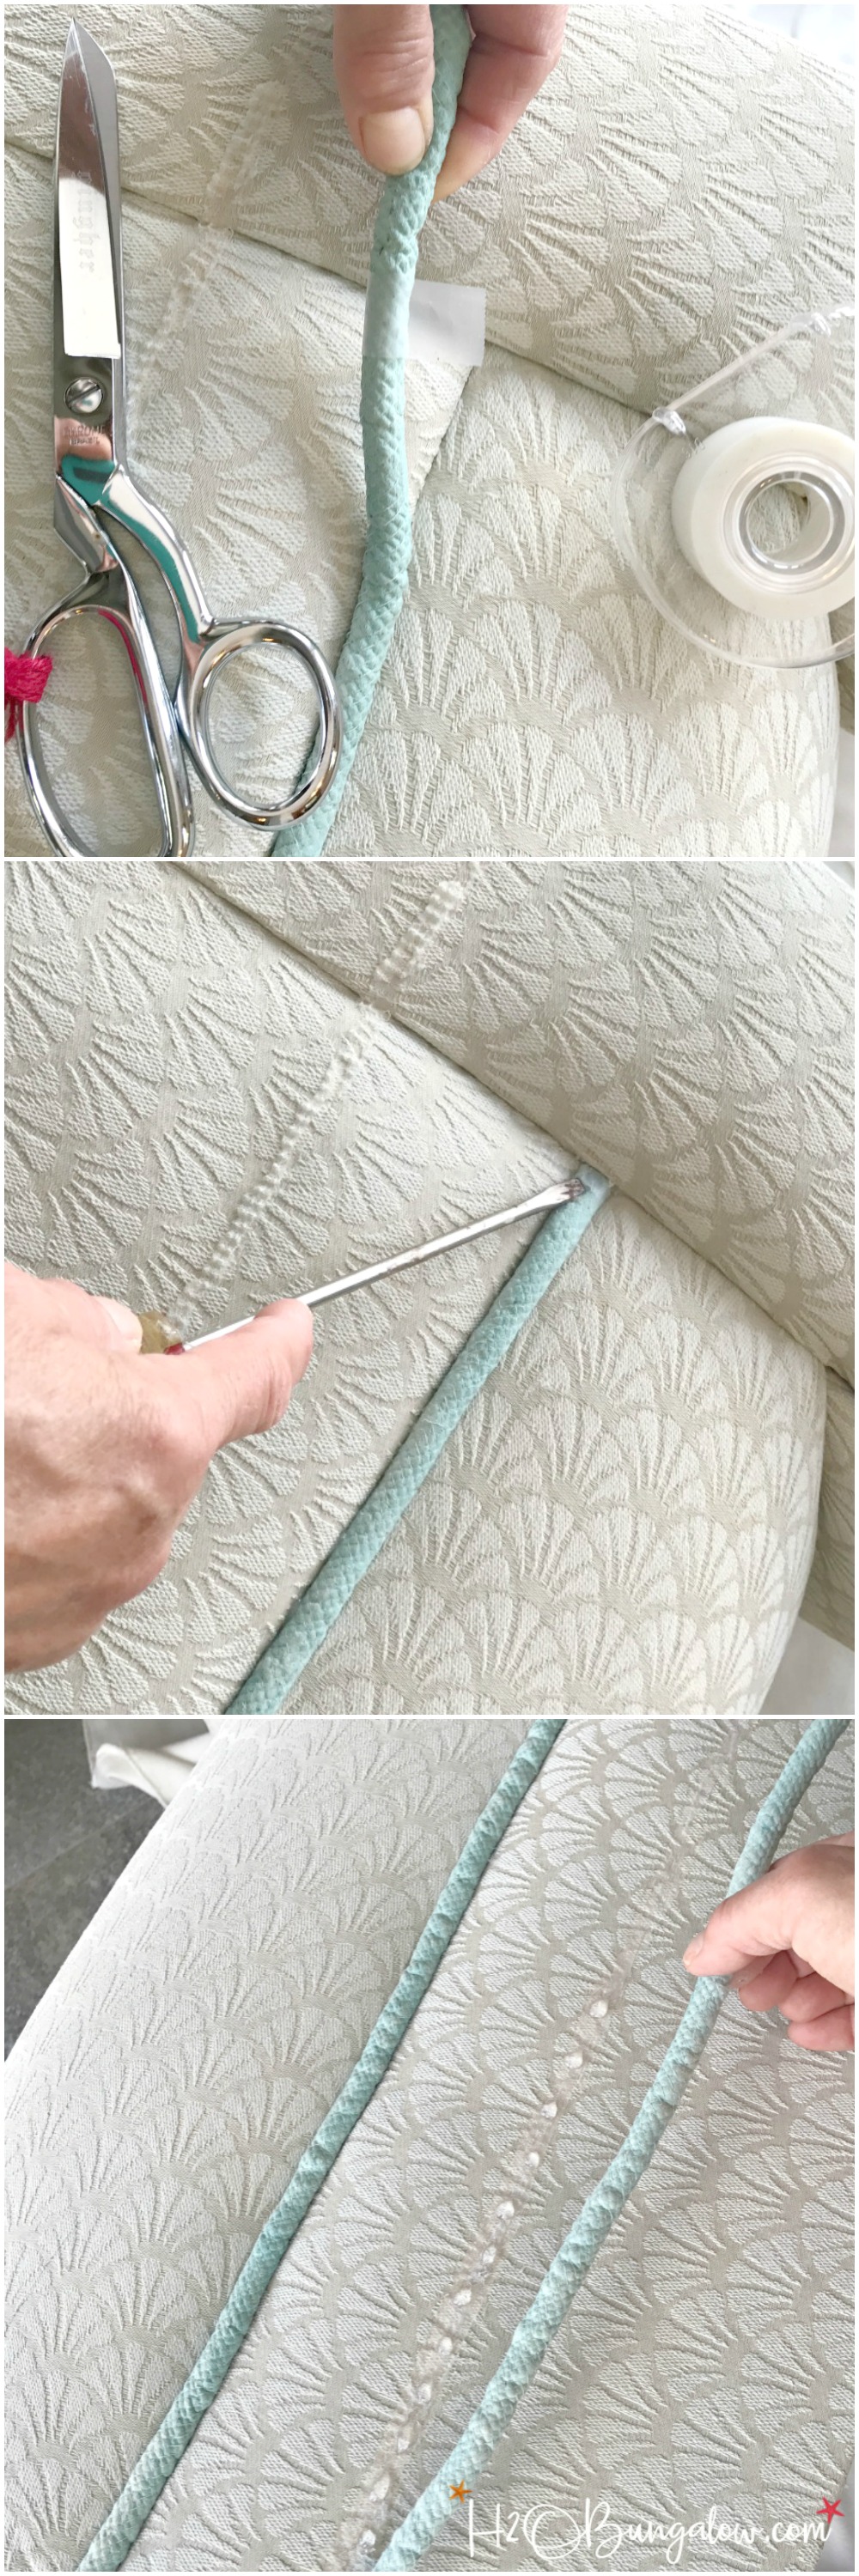
Instead of rope or other trim I used upholstery welt cording and dyed it. To get the light blue green color I used a complimentary shade of craft paint and added fabric medium and water like the recipe for painting upholstery fabric I shared above. I had it drying outside on a flat plastic dropcloth…until it started raining! Ugh. do let your trim dry out laying flat so the color dries consistently. Don’t leave it outside when it will rain! I let the paint on the fabric trim dry completely before attaching it to the painted upholstery chairs. The new trim covered the old glue line from the previous trim. Yes, the upholstery trim on your furniture is put on with hot glue! I also added a little more trim above the first just because I thought it needed more.
Since my trim would unravel when cut, I taped the end and then cut it. I tucked the end into a seam in my upholstered chairs using a screwdriver to help wedge the end in. This spot is where two parts of the chair come together so there is a gap. I used regular high temperature glue sticks and my glue gun to attach the trim. Adding glue dots about the size of small peas along the glue line worked best and helped me attach the trim on in a straight line.
Step Four: Add new furniture legs.
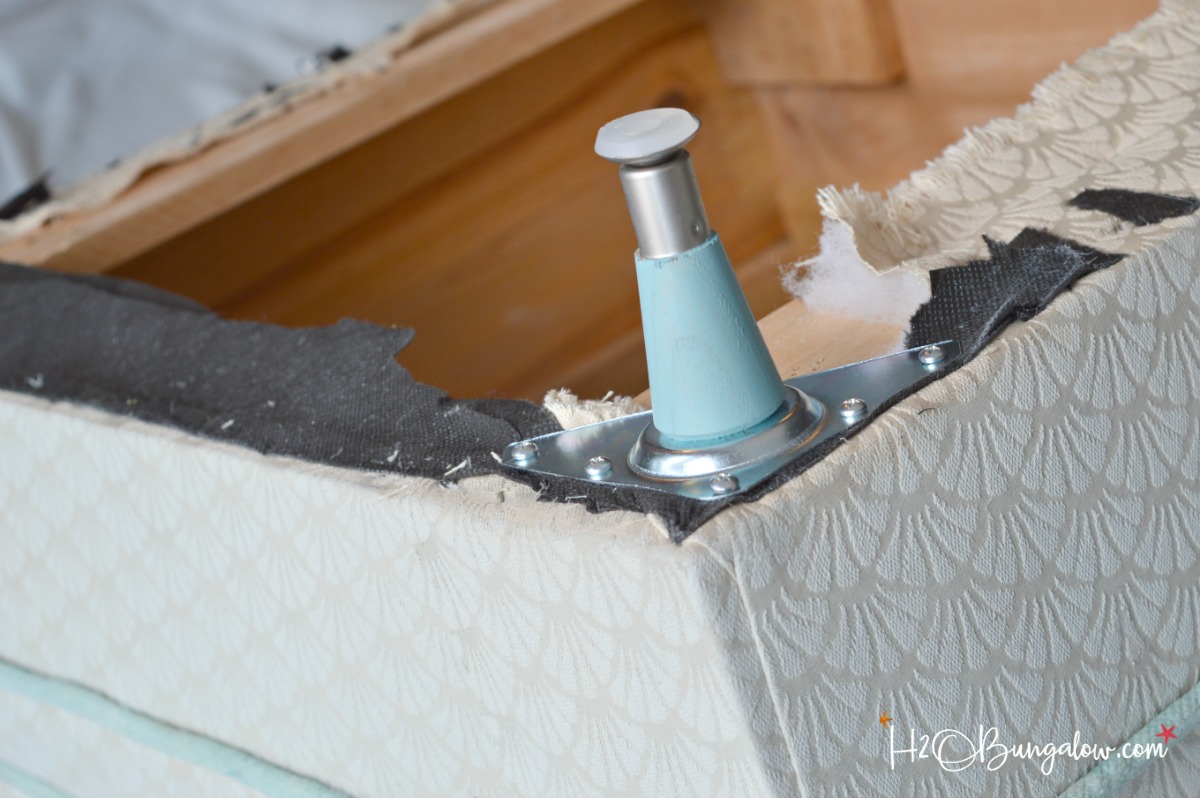
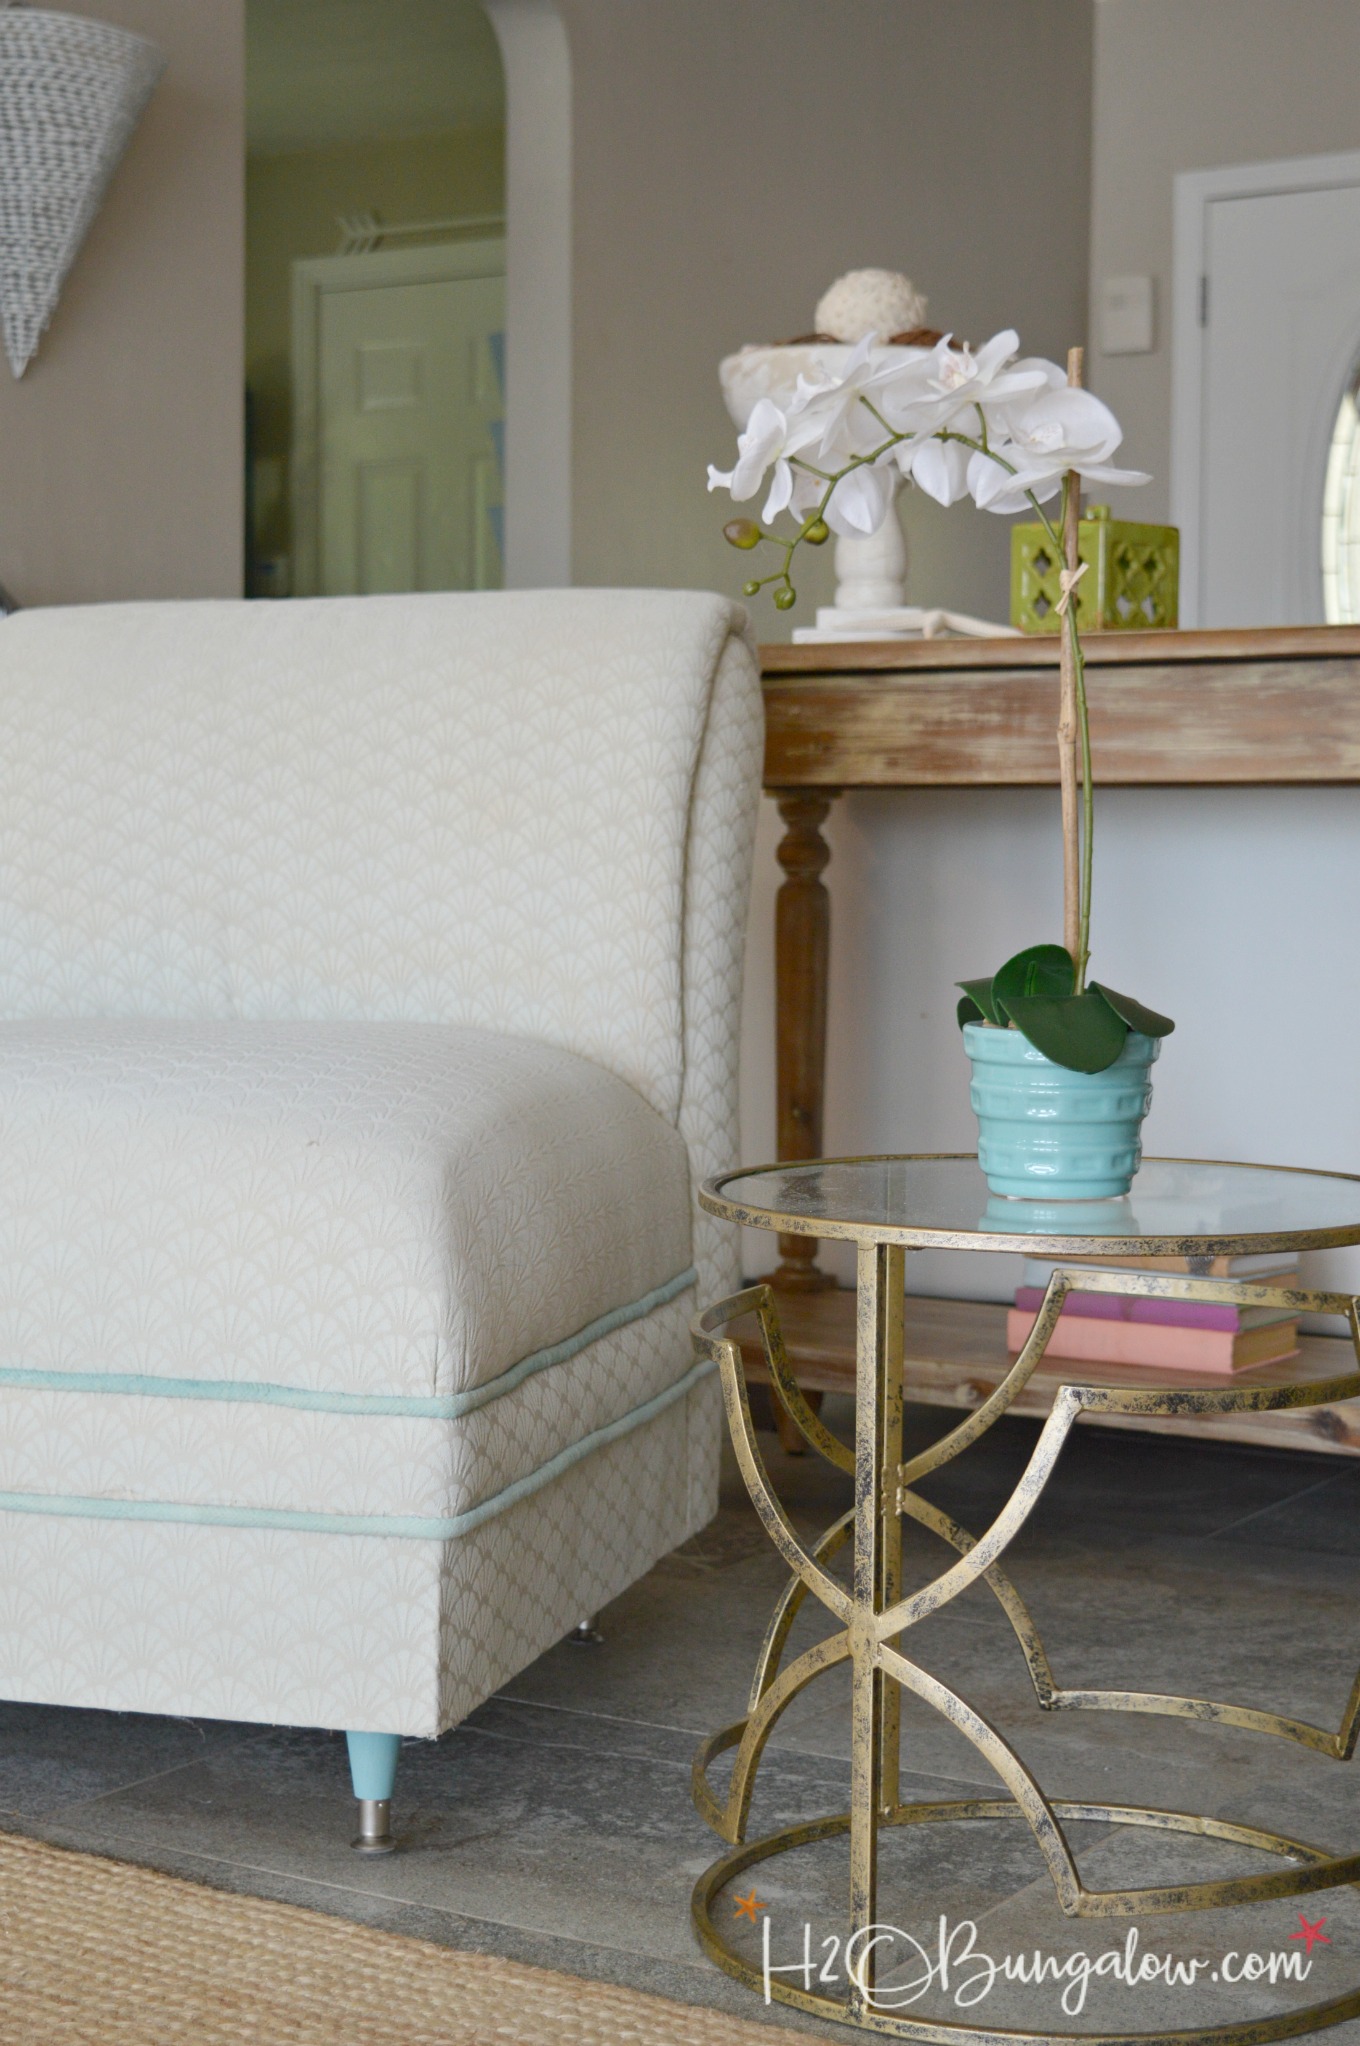
I removed the old flat feet and addd new 3 inch contemporary feet. The new brackets screwed directly onto the bottom of the wood frame of the chair, and the feet screwed onto the bracket. A chair seat should be 18″ from the floor. Be sure to select new furniture legs that are the right height.
That’s how to paint an upholstered chair and update it’s look.
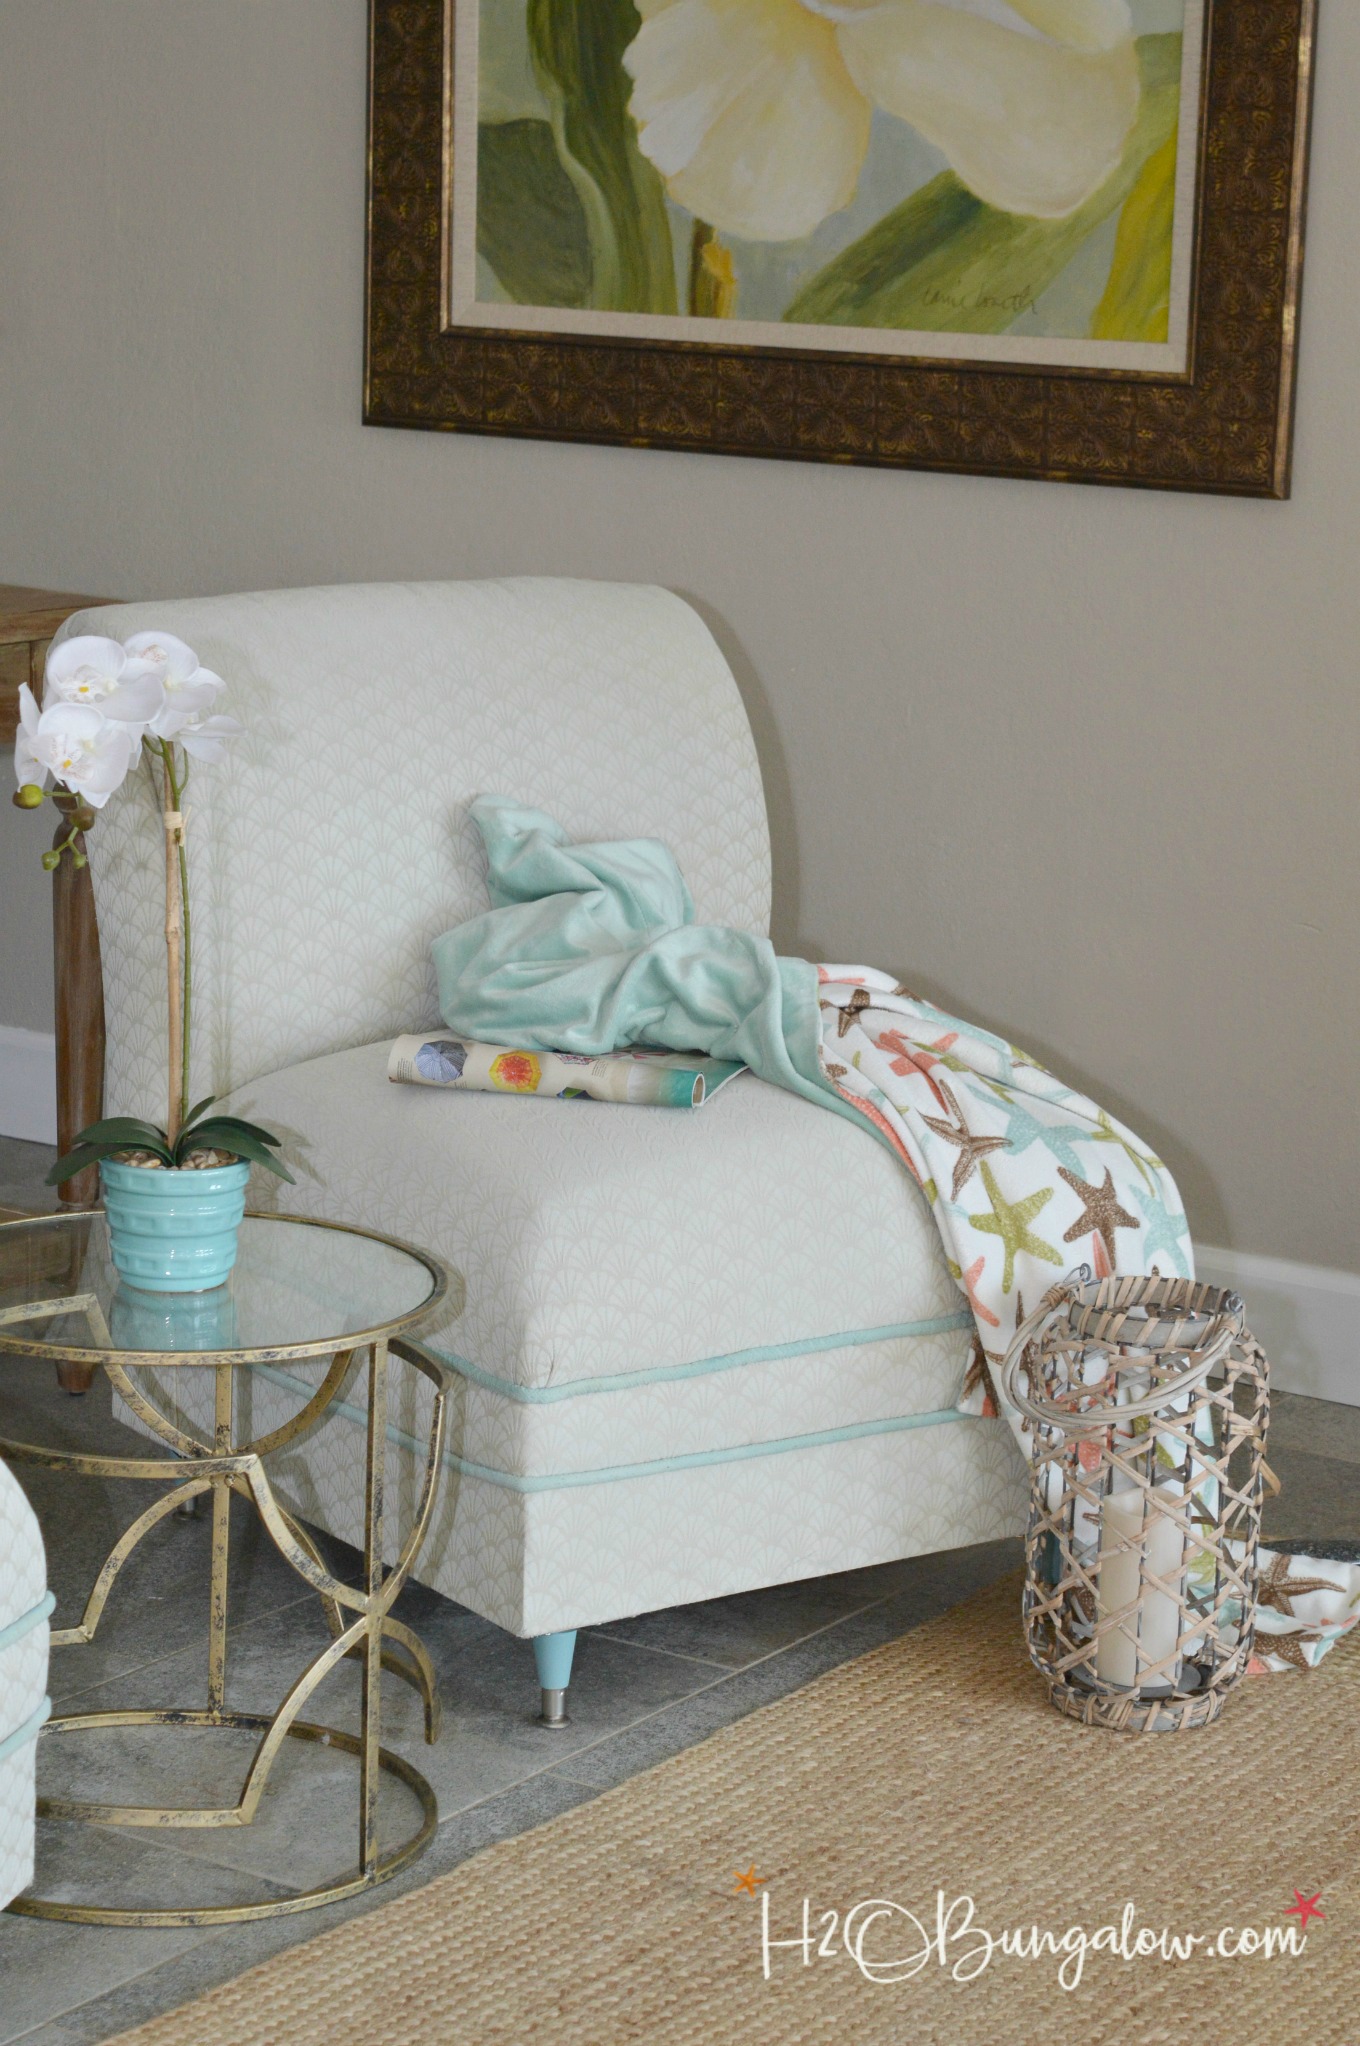
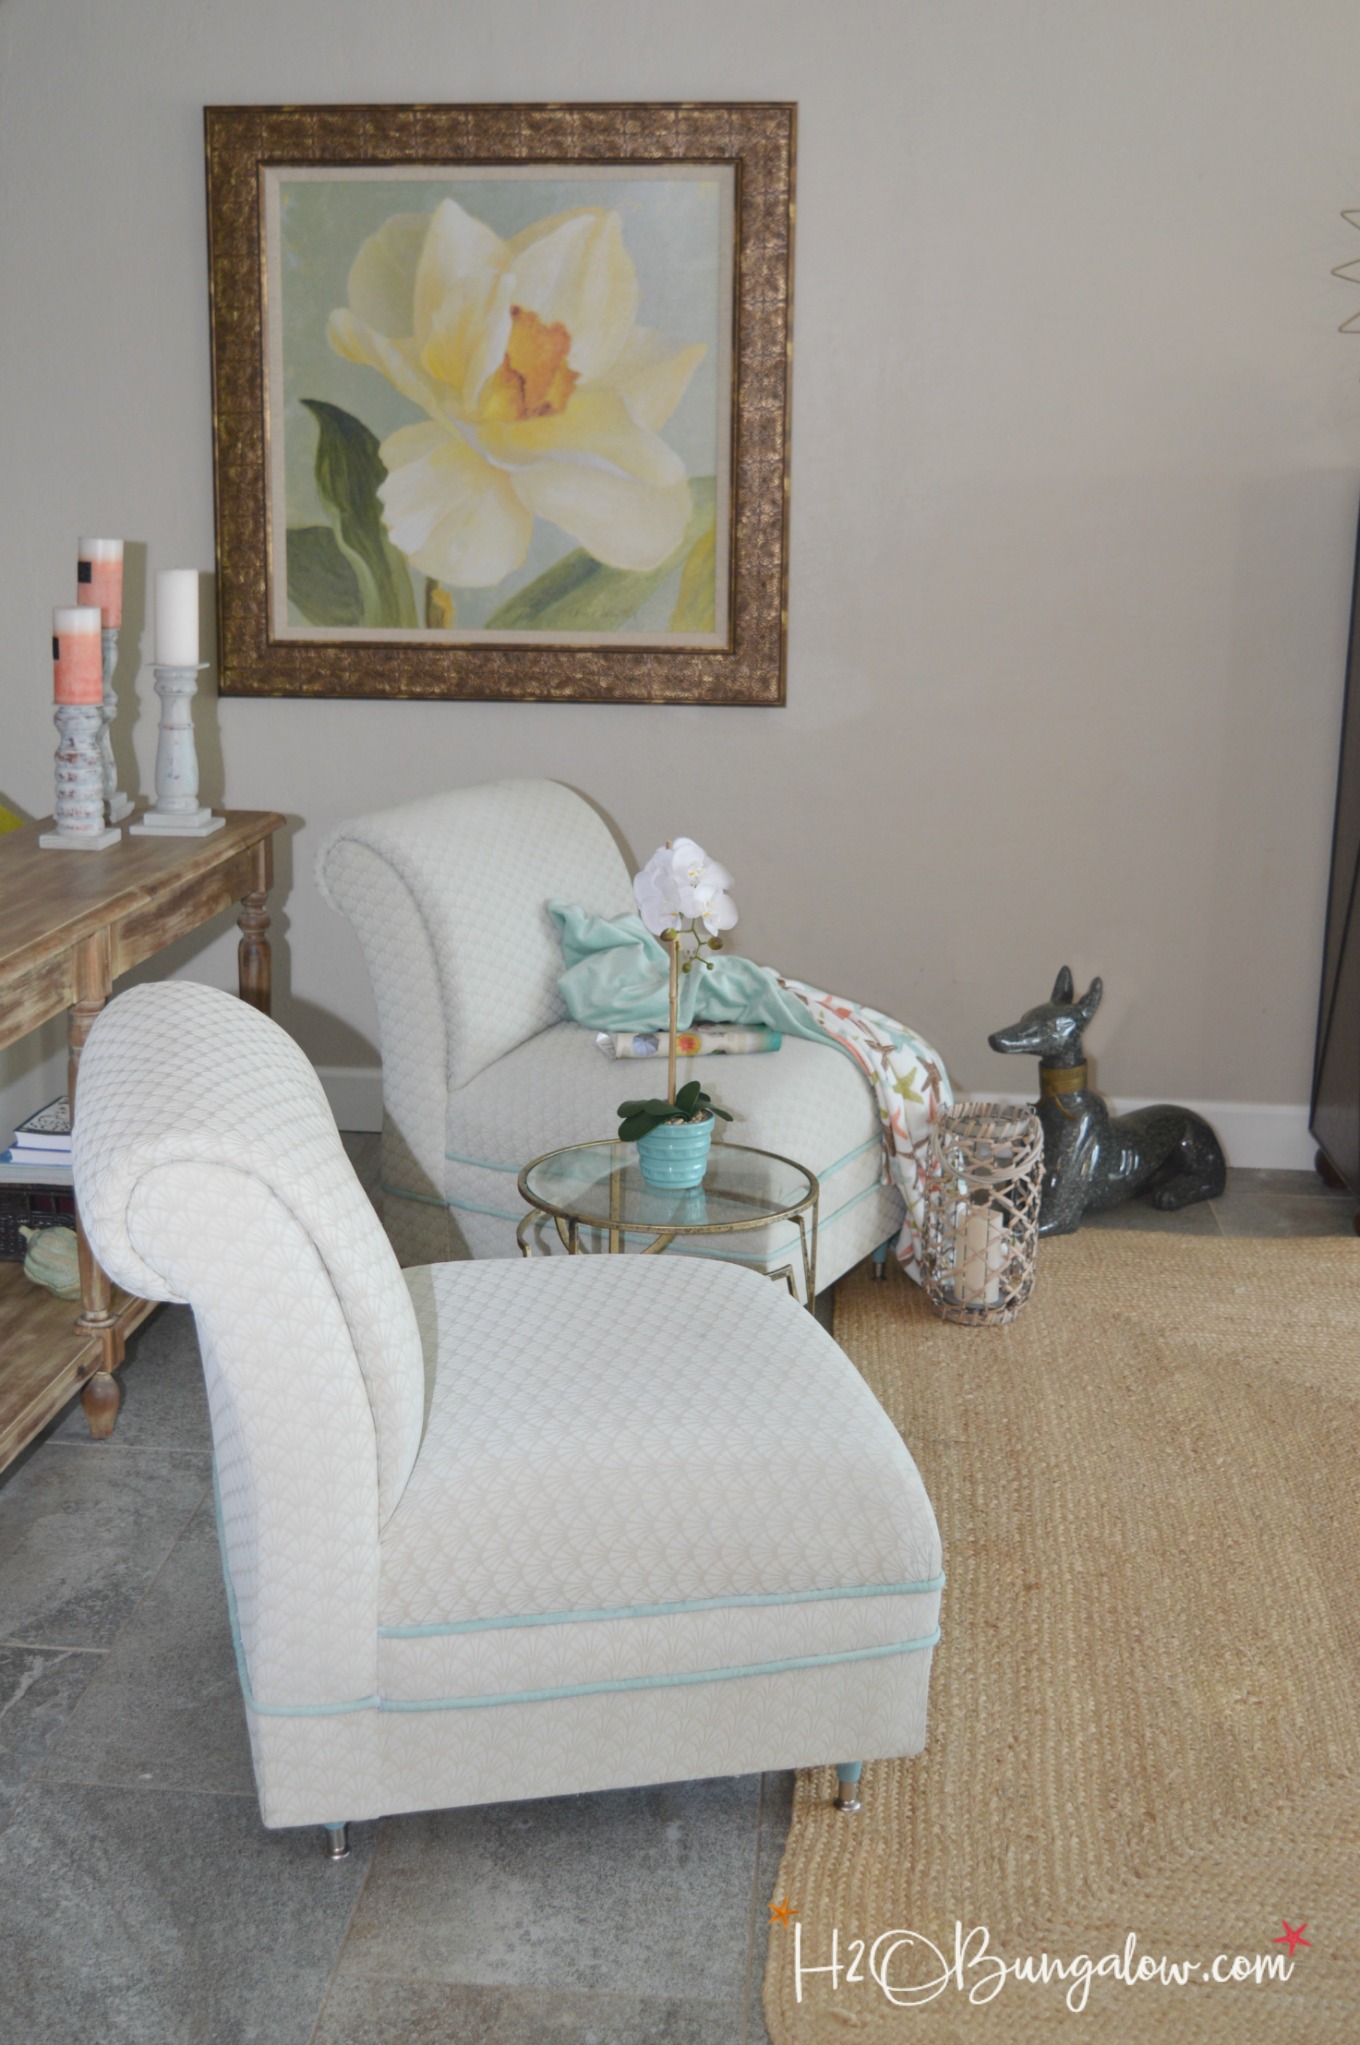
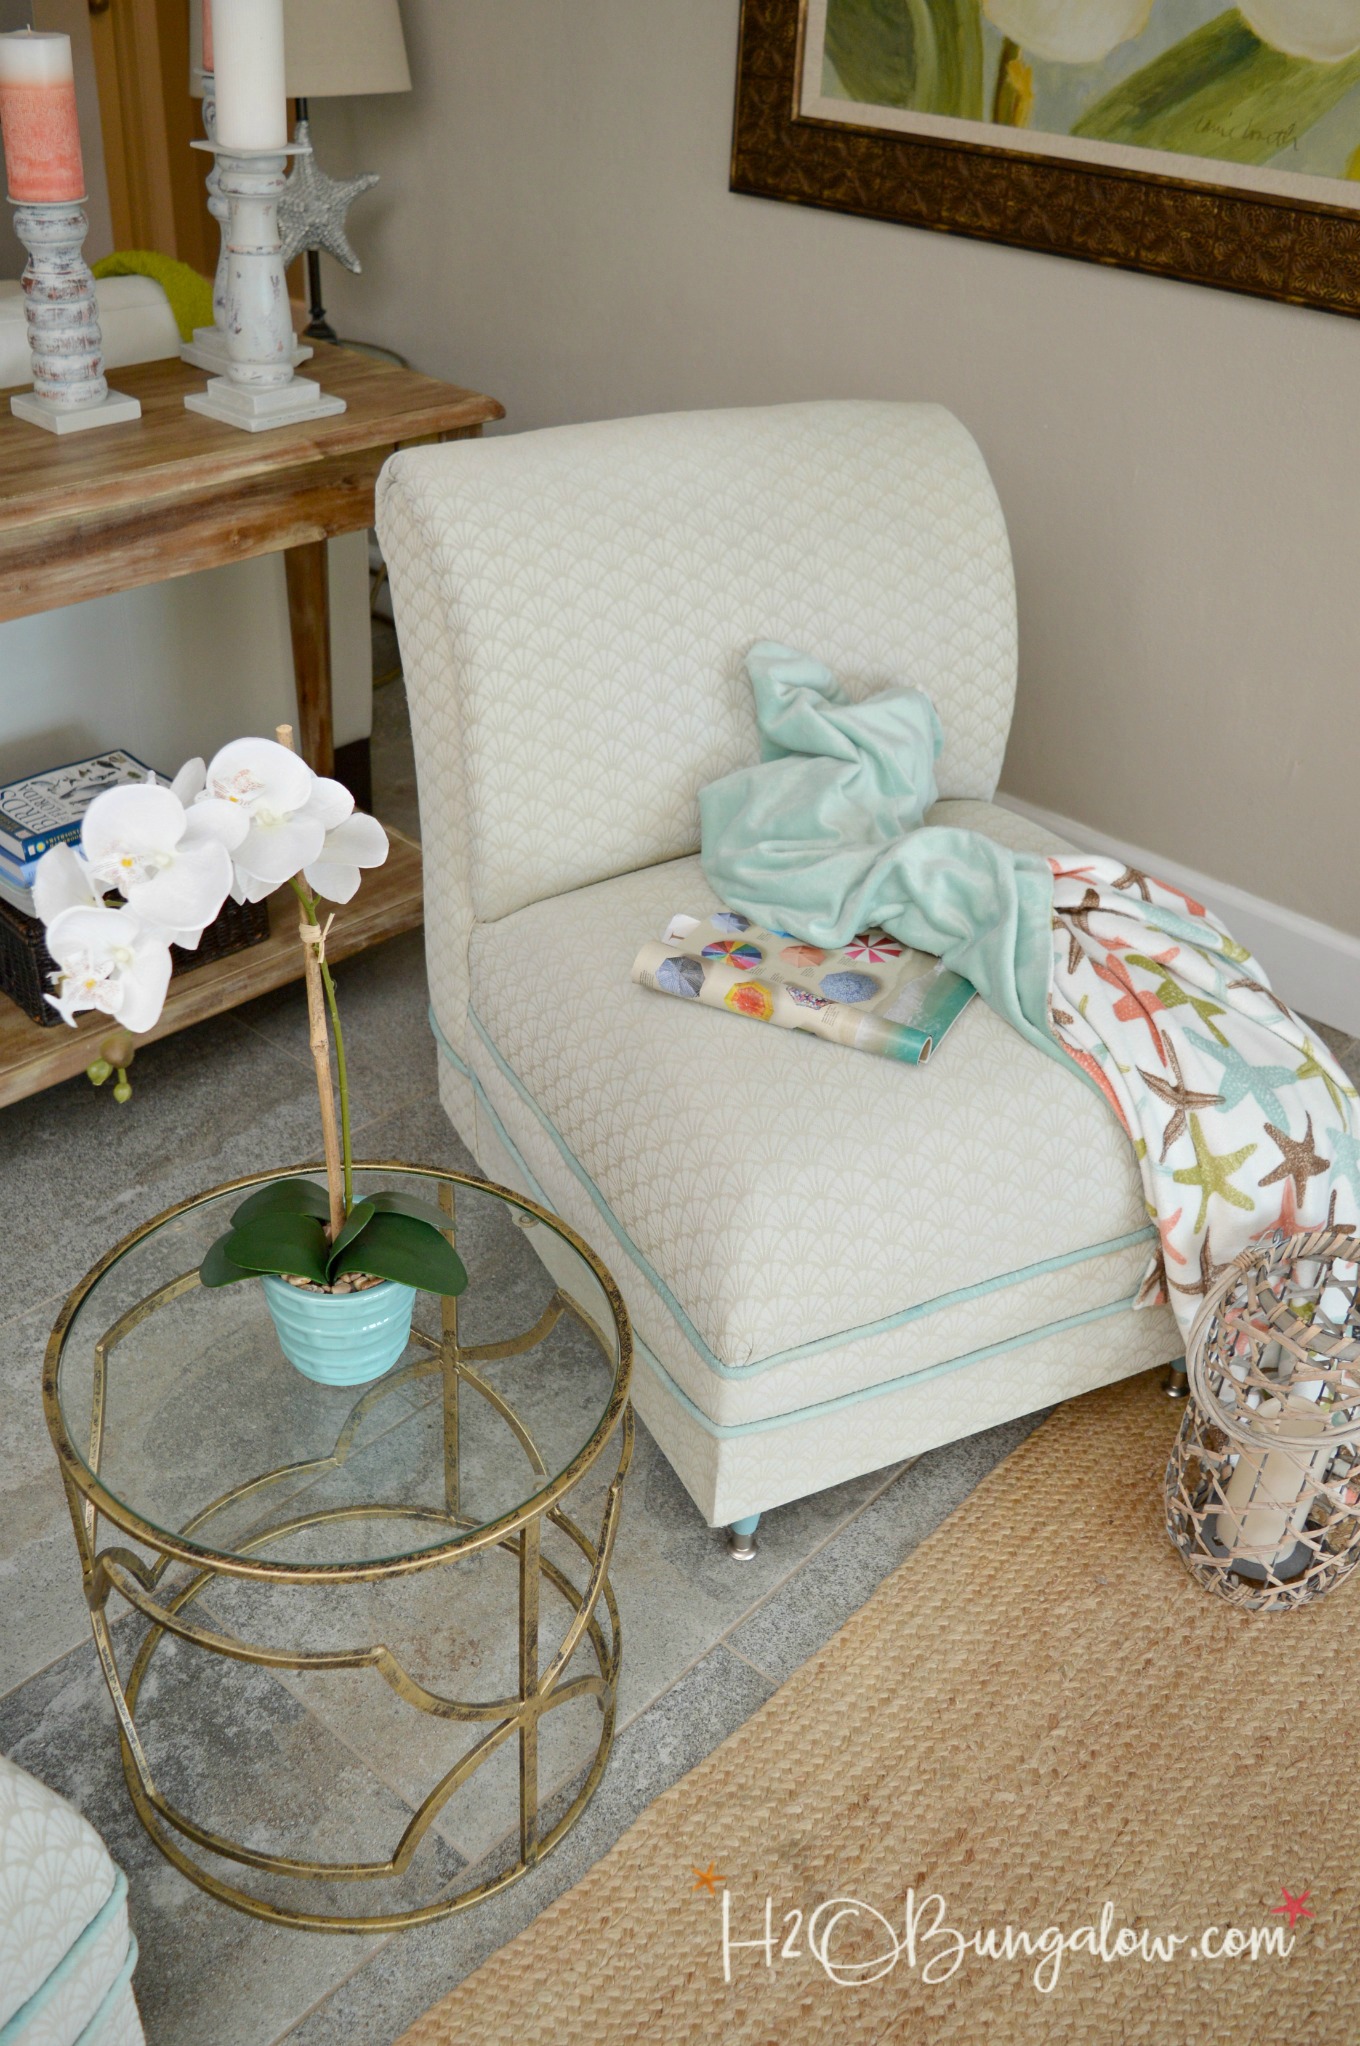
My old 90’s fabric chairs look great painted and fresh in my living area. They turned out better than I expected they would.
I was on the fence about painting the legs a coastal blue. But I kind of like the peek a boo look of the color. The other option is painting them with the same finish as the console table that’s behind them.
What do you think?
I do like the double row of painted fabric trim I added.
It took some courage to paint my fabric chairs. I wasn’t sure how I’d like them or if I’d like the feel of them afterwards. I’d read painted upholstery felt stiff. Does it? Well, it’s definitely stiffer. I’d say if this was a favorite cozy chair you sat in every day it wouldn’t be the most comfortable choice. But if it’s an accent chair that’s used some of the time it’s fine.

My sisters were in town last week. I didn’t say anything to see if they’d comment the chairs didn’t feel soft or comfortable when they sat in them. They didn’t say a word. Finally I asked them if they’d noticed it and both said not really. They got a kick out of being my test subjects for my painted upholstered chair makeover 🙂
Pin this project for later! It’s OK to share it on Facebook too!
I think painting a fabric chair is a good choice to get a little more life out of a favorite piece of furniture.
So here’s the big question, would you consider doing a painted upholstered chair makeover too? Share your thoughts in the comments section below!
You might like these other posts too!
How to Recover Wood Chair Seats

Trish says
Saw this on Here’s the Scoop party. Love this idea, and your chairs are beautiful! Pinned
Wendi says
Hi Trish and thank you so much! I loved the shape of these chairs and didn’t want to let them go. They’ve held up well and I’d do it again in a heart beat:) Thanks so much for your sweet note and visit!
Michelle James says
I wanted to let you know I am featuring this great project at #merrymonday this week. I hope you will check it out when you have a chance! Hope you will link up with us again! https://ourcraftymom.com/15-upcycled-cool-creative-home-decor-projects/
Wendi says
Hi Michele and thank you! I loved these chairs when I first bought them and now that I’ve remade them, I love them even more! I hope your readers do as well. Thanks for your visit and hosting!
JaneEllen Jones says
For the paint formula, says an 8 oz. bottle medium, 1 part paint and 1 part water. Is the water mixed with paint formula or is it the water you spray chair with. Sorry to bug you, wanted to be sure of what am doing.Will be trying this soon. going to paint chair darker gray, our walls are very light gray.
Thanks for your advice.
Wendi says
Hi JaneEllen…No bother at all! Yes, mix equal parts of water, paint and fabric medium. The water in the spray bottle is extra water 🙂 Have fun! The grey color sounds dreamy, you can add so many complimentary colors to grey!
JaneEllen says
Painting a rug? Well what the hay, why not if we can paint upholstered furniture. Am so encouraged to see how beautifully your chairs turned out. Gives me courage to tackle one chair, a club style chair guess would be called.
Bought it at Habitat few years ago for $75, is nice clean sturdy chair but hate the plaid upholstery, just doesn’t work so I cover it with tablecloths. Took the skirt off years ago, that helped it look somewhat better but is still plaid. Could paint the legs, couldn’t hurt. Thought about having it reupholstered but can’t afford that. Any tips about covering up plaid? Too good a chair to pitch so want to save it. It’s a light colored plaid, not very solid, more open.
I’d love to see that rug painted also, have 2 0or 3 out in shed.Happy Days
If you answer would you please send me an email?
Wendi says
Hi JaneEllen! I totally get your chair dilemma, that’s how I felt about my chairs. They were too good to toss and even when I shopped I din’t see anything I liked as much as mine. I do have some tips for covering the plaid. Go a few shades darker for one, and then read the link to Kim Sixs’ post I put in my post. She painted a chair and had more tips for painting fabric which is different than my upholstered chairs. Good luck on your project!
Nina says
I love this DIY project! I am currently painting a rug, which when the thought first occurred to me, I felt that it must be a crazy idea . . . and then I did the research and discovered that there are lots of ways to paint a rug! If it is still in good shape but not the right color or if it has discoloration or stains, go ahead and paint it. I figured it couldn’t look any worse that it was so I’m working on it right now. Thanks for sharing this project at the #HomeMattersParty. I’ll be watching to see what you come up with next time. Nina @ Vintage Mama’s Cottage
Wendi says
Hi Nina and thank you! Wow! A rug is a cool idea to paint too. Why not, right? I’d love to see it when you’re done. Thanks so much for your visit and sweet comment!
Shelly says
I’m itching to try this – thanks for the tips!
Wendi says
Hi Shelly! Glad you found my tutorial. It’s not hard to do and I think it’s a great way to extend the life of furniture! Thanks so much for your visit and I hope you get to try this DIY project soon!
Emily says
I am so impressed that you painted these and gave them new life instead of getting rid of them! Great makeover Wendi! I like the blue legs, too – it’s a fun pop of color. Thanks for sharing with Merry Monday this week.
Wendi says
Hi Emily and thank you! The blue legs are growing on me, it took some time to get past the “i should make them conservative” thought! LOL Thanks again for your sweet comment and visit!
gilda friedman says
Love this project. I really like the blue trim and added height with legs. However,I would paint the legs the same color as chair as the blue legs draw attention away from the gorgeous chairs.
Wendi says
Hi Gilda and thank you so much for your feedback on the legs. I like the added height too, it’s funny that with all the years I had these chairs I never noticed how low to the ground they were until this project. I love the trim too and think it was the perfect touch! Thanks so much for your visit and taking the time to leave me some feedback!
Gail @Purple Hues and Me says
Your chairs look fabulous, Wendi! And the video makes it seem so easy. I was curious about the feel, but if you’re happy with it, that’s all that matters. I am a bit concerned about using hot glue to attach your beautiful trim. I craft a lot and hot glue just doesn’t seem to be stable enough for a permanent hold. Sometimes it works and sometimes it doesn’t.
Wendi says
Hi Gail! Thank you so much and good feedback on the video too. I was hoping it would help people see how easy it was to tackle this type of project. Strangely enough, hot glue is what is used in upholstery. The trim I pulled off was attached with hot glue and had been there without issue since I bought the chairs. I think because it’s trim and not something substantial it works. I agree with you that hot glue would not have the strength to hold something that took daily abuse.I got lucky on this because the last thing I’d want to do is hand se the all that trim on! LOL Thanks for your feedback and visit!
Mary says
Wendi these look really great. I can;t believe it was so easy to do. And the trim gives them a bit of pretty color. Now you are tempting me to try my hand at painting upholstery too. Great video!
Wendi says
Hi Mary and thank you! This is so your style girlfriend! You can do this. I looked for new chairs but didn’t see any I liked so stayed with what I had. It was a good choice, they look great in our space. Glad you like the video too!
Kate Horrell says
Looks fantastic. I have 2 leather chairs that I love but also have seen better days, I often wondered about painting them.
Wendi says
Hi Kate and thank you so much! I painted a leather chair a few years back and loved it! Here’s the link to that project. https://h2obungalow.com/painted-modern-leather-chair/ It’s lasted well and the only area that has worn off was where the handle rubbed on my desk when I rolled my chair in. I should have readjusted my chair, but I’m short and needed to get close! LOL I love leather furniture, it looks pretty and lasts. Good Luck and let me know if you decide to tackle your chairs!
Julianne says
Great job. They don’t look uncomfortable at all. Keep the blue legs!
Wendi says
Hi Julianne and thank you! Isn’t it funny how something like the leg color can trip up a project? I’ve been going back and forth on it since I did them. Surprisingly, the natural wood wasn’t so pretty so I had to cover it up. Thanks for your note and visit. Glad you like my project:)
Kirstin Troyer says
Thank you so much for the feature.
Kirstin Troyer says
Thank you Lorelai for the feature. 🙂
Kirstin Troyer says
Thank you so much for the feature