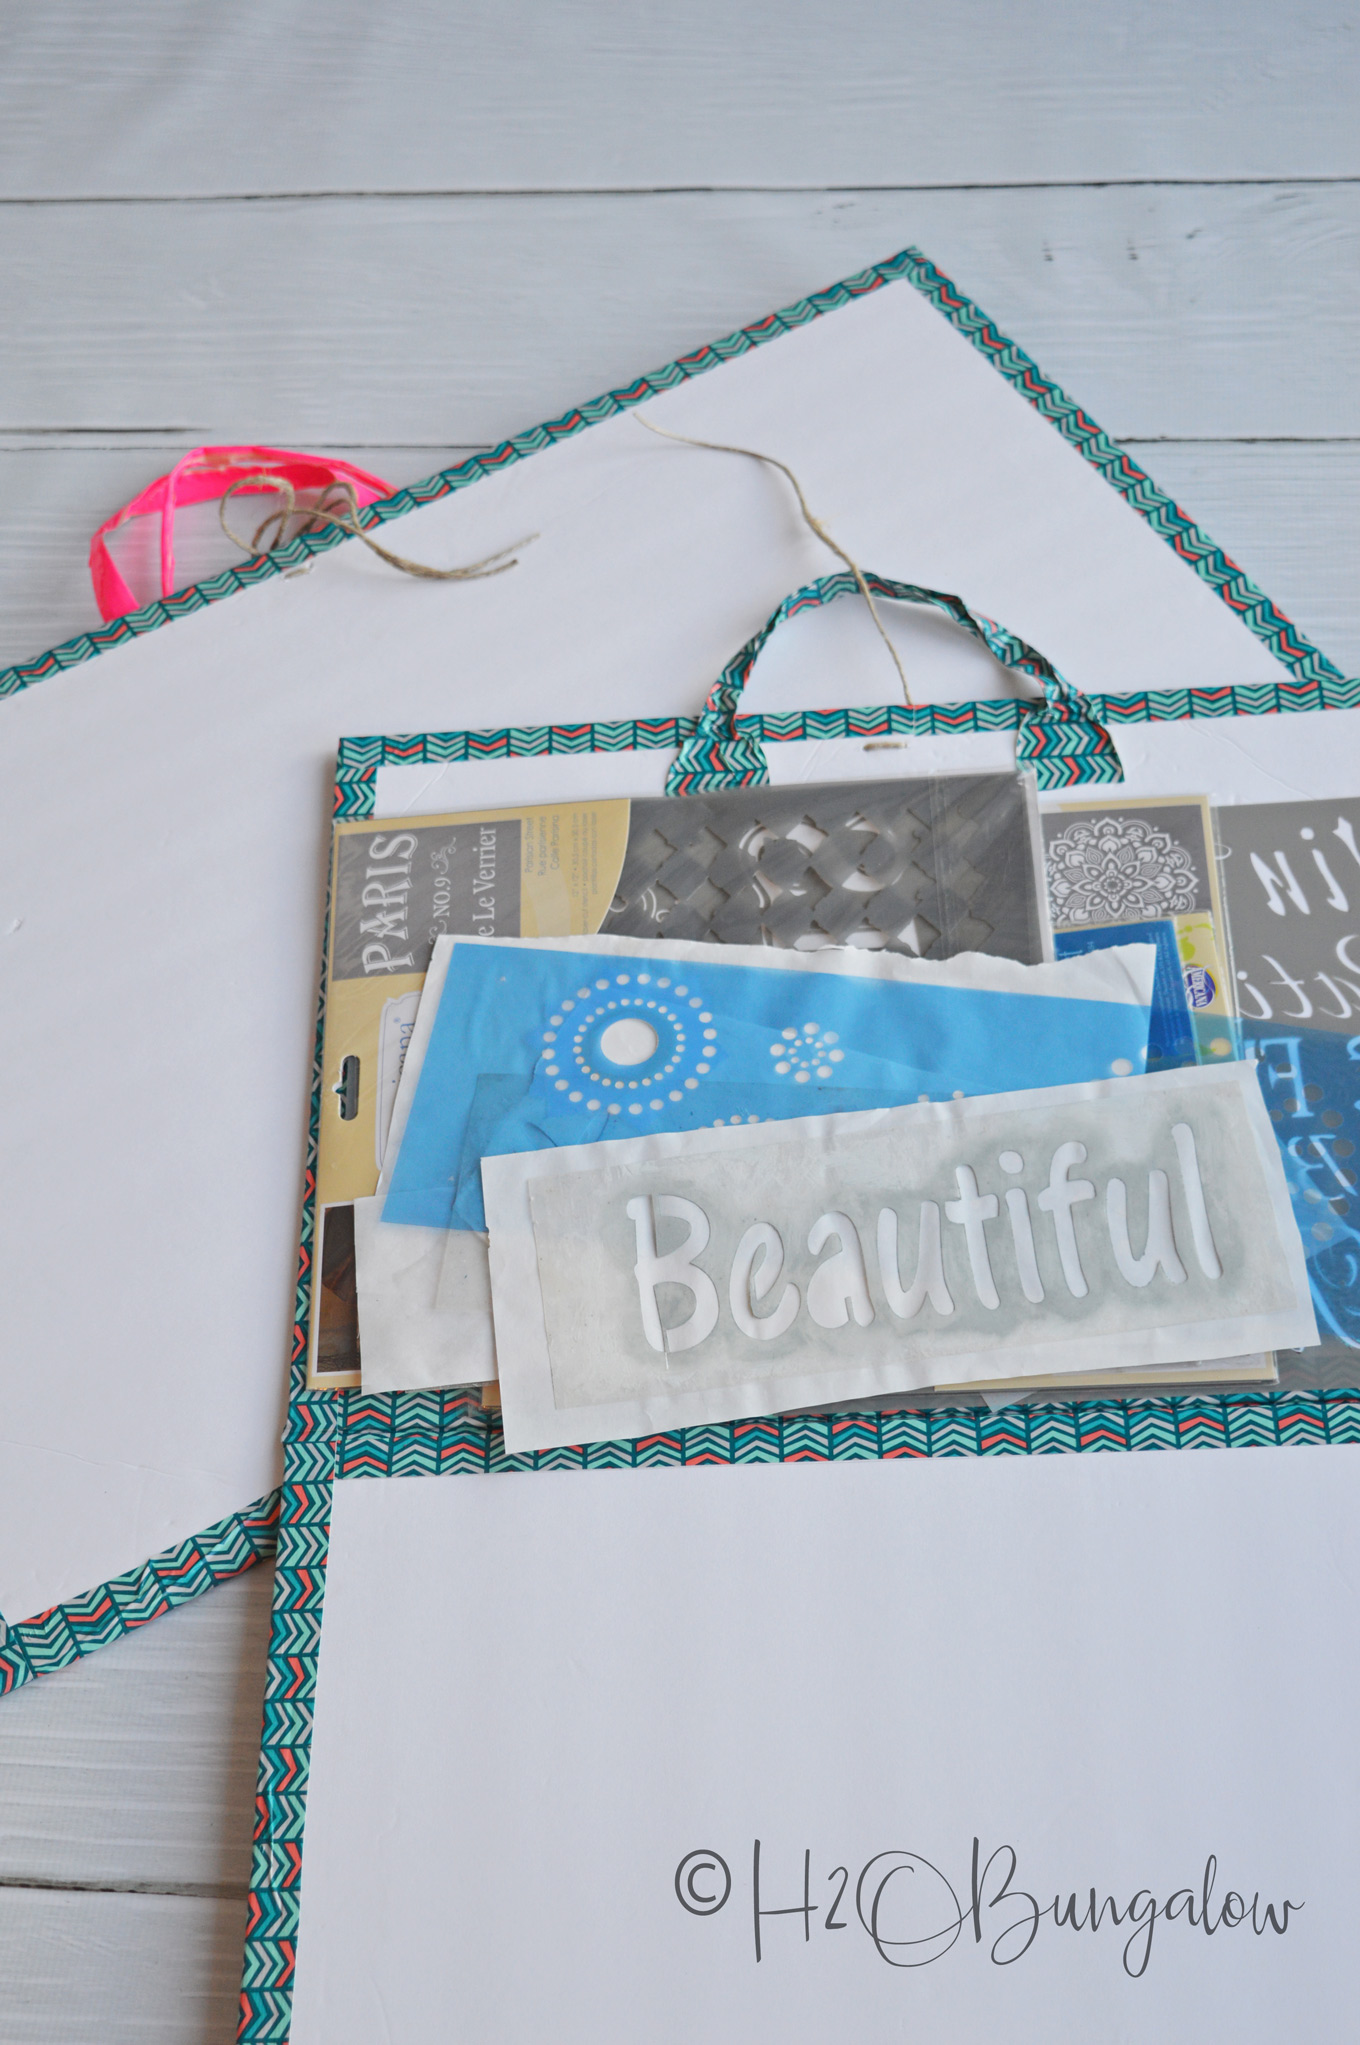
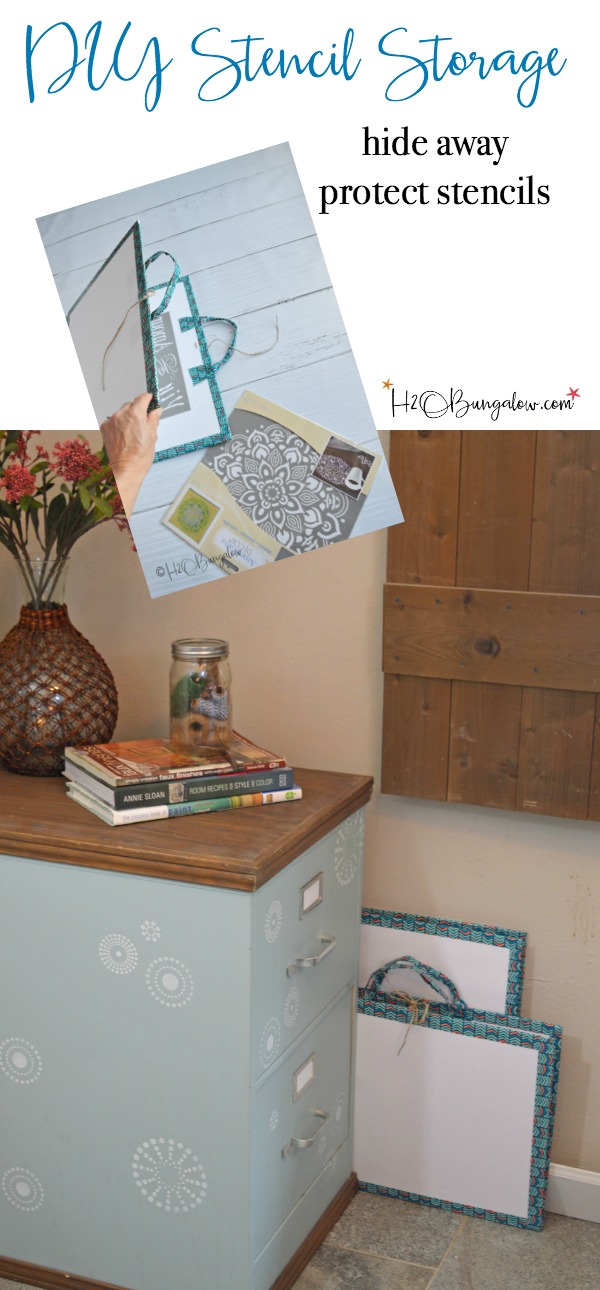
I have a good stencil storing idea for you today. I needed to figure out how to store and organize stencils without taking up a lot of room in my office. After thinking about it for a while I made these DIY stencil folders that keep my stencils from getting bent or crushed. This was one of my top posts for 2018.
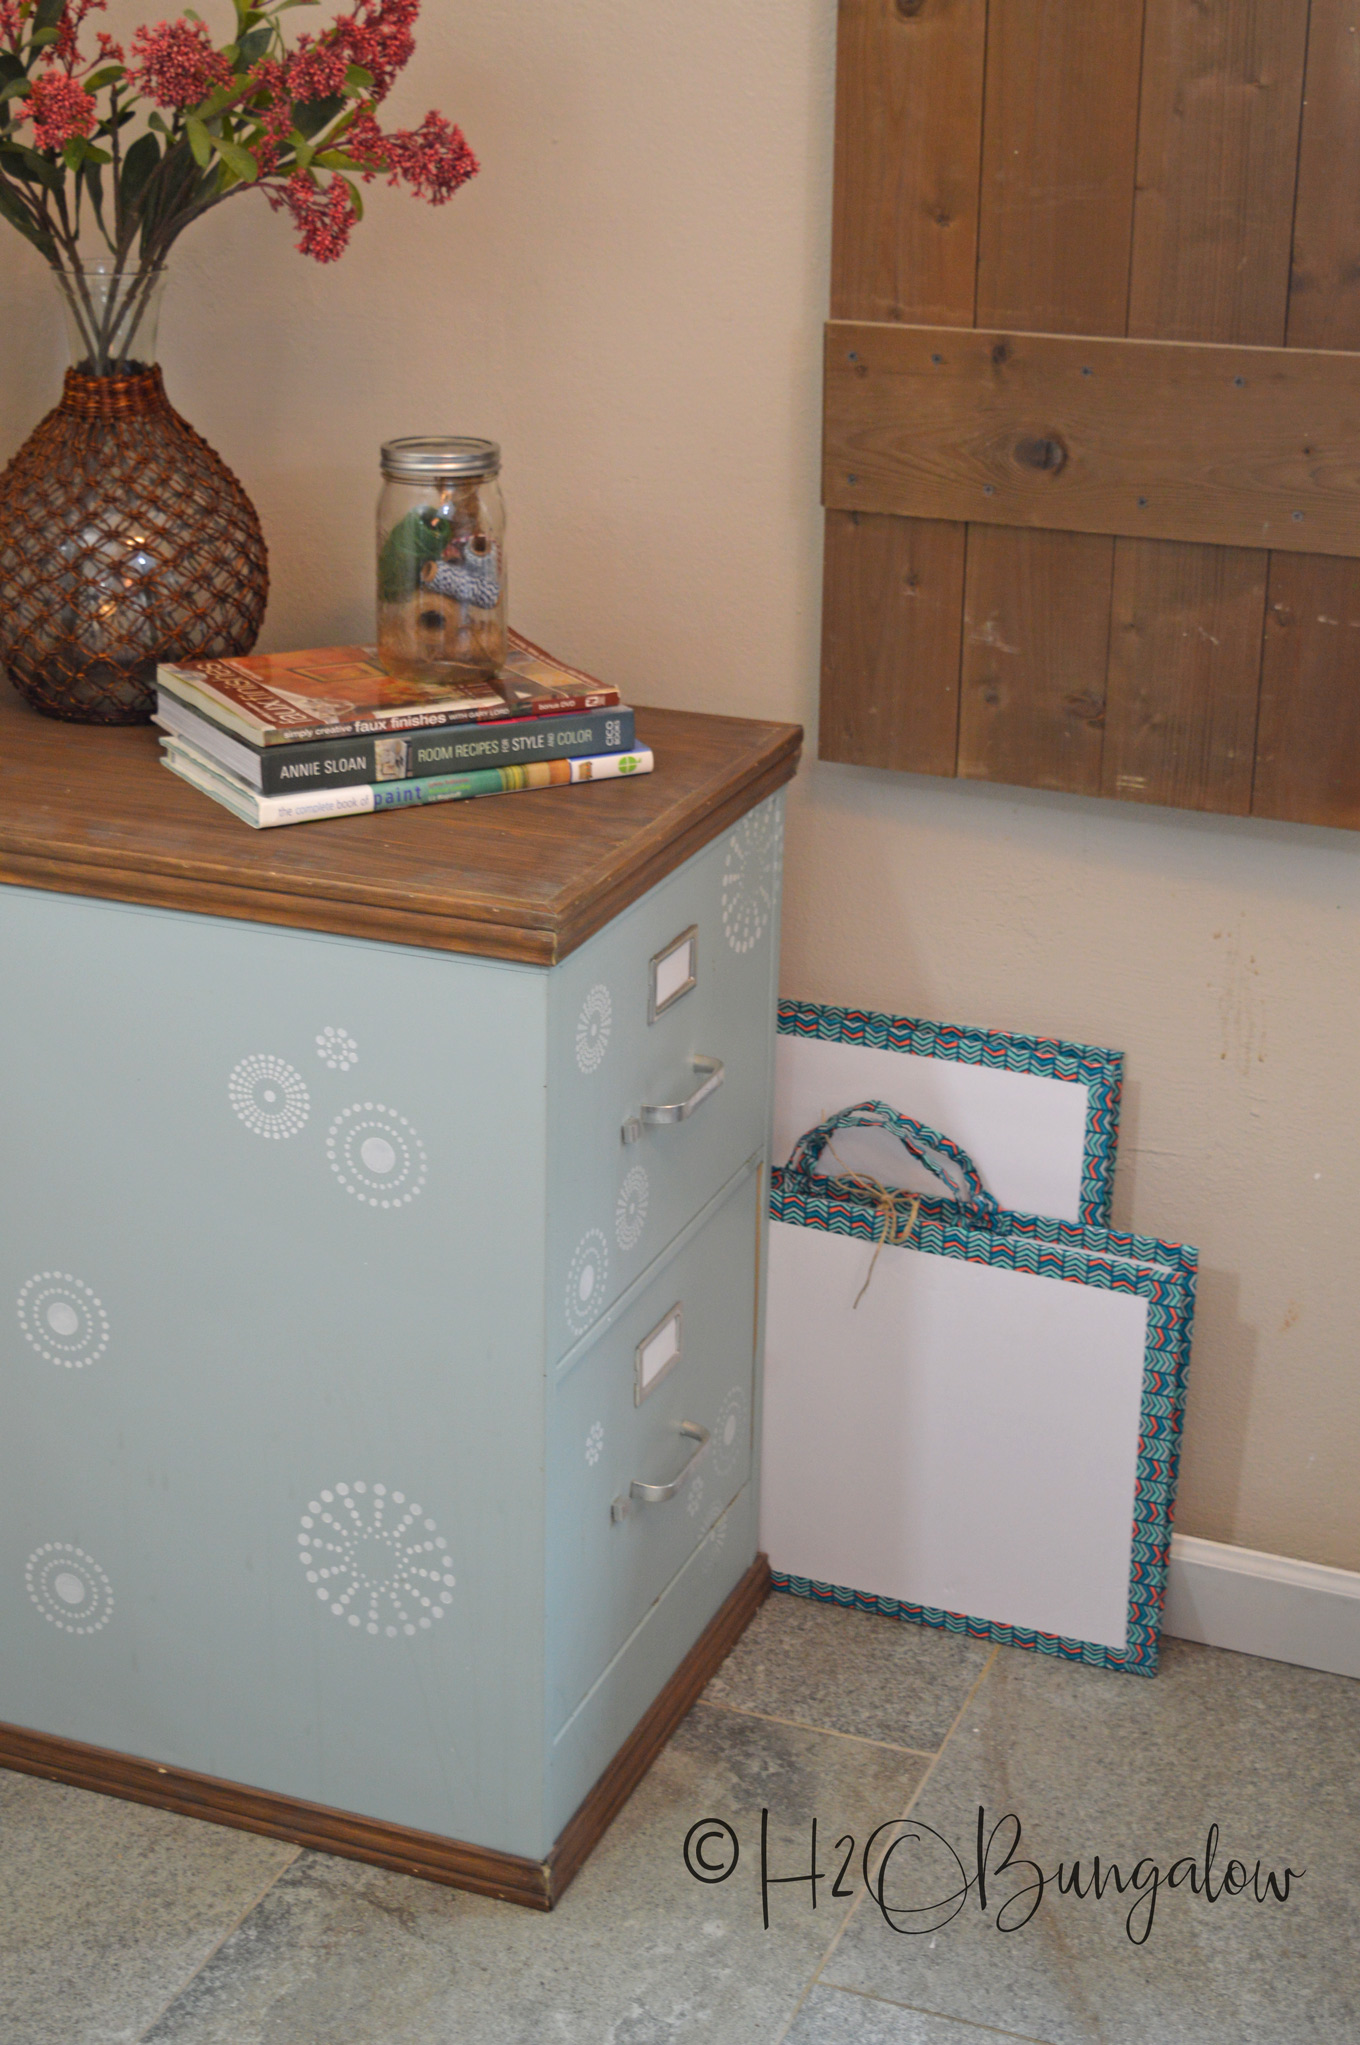
Best of all, they tuck away behind my file cabinet.
 It’s week #3 of my office organization and decluttering you guys!
So far, I’ve shared my power declutter and storage tips and a few of the office organizing tips that have worked well for me in the past. I cut my desk down to a smaller size and removed the old shelves off the wall. Last week I treated myself and made my office more comfortable and bright by adding my new hidden ceiling fan light. And to give myself a place to store all my supplies I added my DIY Built in bookcases.
Are you feeling motivated to organize your space too?
It’s not too late to join in on the fun, organize your creative space and win prizes friends! All you need to do is share a picture of your creative space before and after! Click the photo below for more info!
Now that I’m done with the heavy lifting so to speak, it’s time to start organizing and find a place for everything. I’m tackling the messiest stuff first. One big challenge I have is my growing stash of stencils.
Stencils are expensive you guys!
Like I mentioned earlier, I needed to figure out how to store and organize my stencils to protect them from being bent or damaged in way that didn’t take up space.
All my stencils have been kept in craft paper tucked behind my Wood Trimmed File Cabinet. It wasn’t working so well anymore. I have lots of them, they’re heavy and they started sliding down at the bottom and bending. 🙁
I researched how to store stencils and couldn’t believe that I didn’t come up with a ton of good ideas! The most popular stencil storing idea was to hang the stencils by clips from a bar, which is great if you have the room or a closet. I have neither….
So I had to come up with my own way.
How To Store and Organize Stencils
I use affiliate links to help you find the supplies I used. You can read my full disclosure policy here.
Supplies needed to make a stencil holder to hold big and small stencils. This is sooo easy and inexpensive guys!
- foam core board – I get mine at the Dollar Tree
- 1 roll 2″ x 10 yard Colorful Duck Tape
- jute or twine
Favorite tools of mine that made the job easier
- self centering measuring tape
- Kreg Measuring tool
- Exacto knife
- pencil
- scissors
The directions are the same for both the large and the small stencil holder. I used two pieces of foam core board for the large and one cut in half to make the small one. One roll of 10 yard Duck tape will make both stencil storage folders as long as you use another material for one set of handles. In other words, I was about 20 inches shy of having enough tape. That’s why I have bright pink handles on one set.
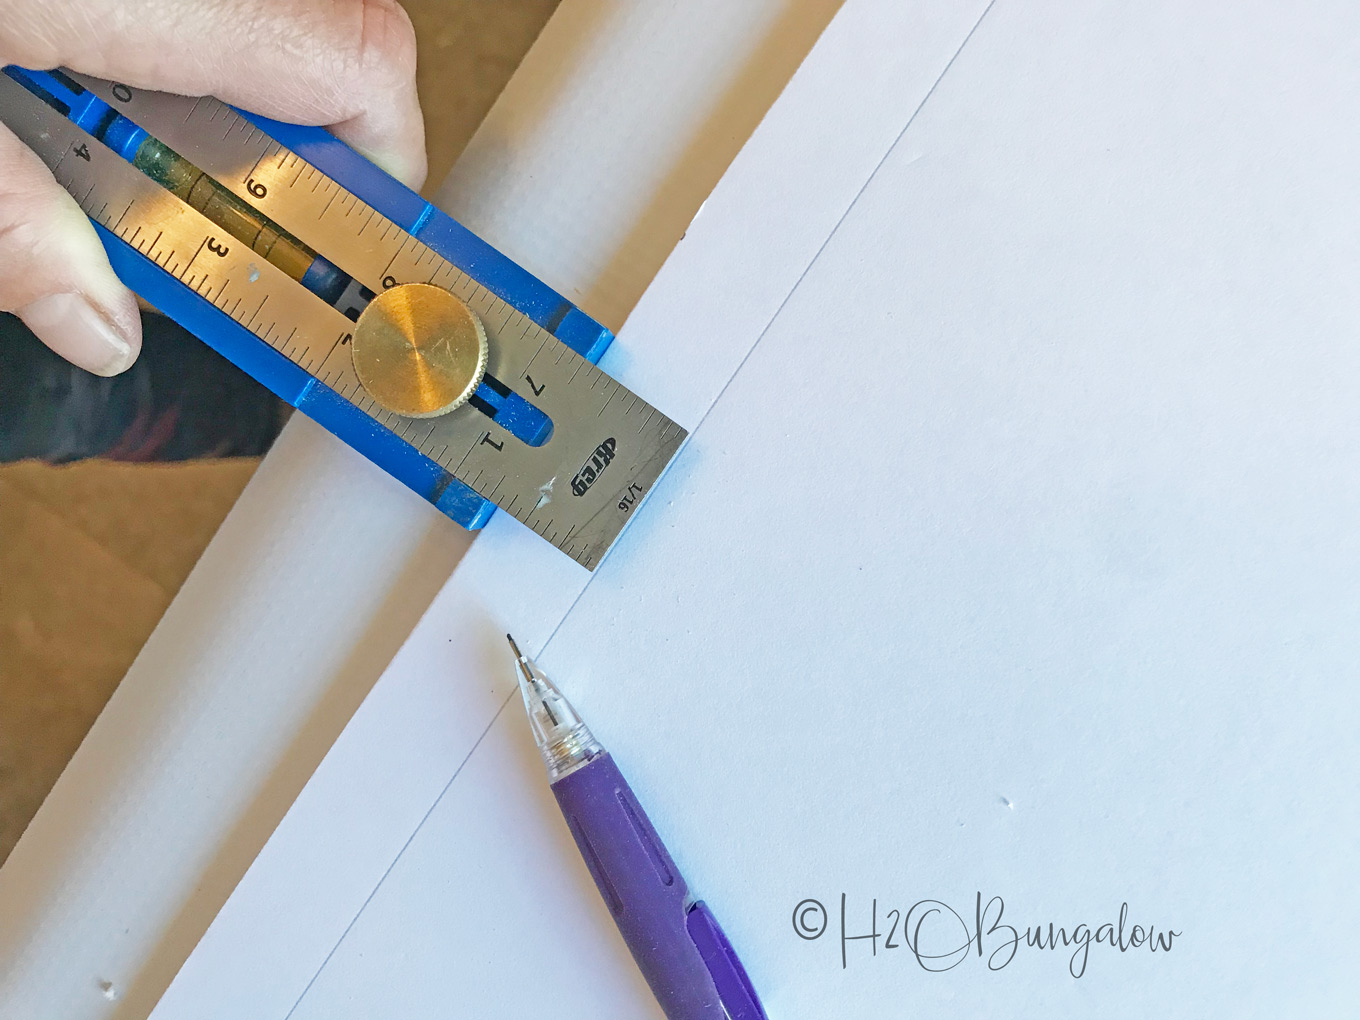
#1. Measure and mark around the edge of the foam core board. Mark one long side at 3/4″ and the other three sides at 1″ inch. Do this for both boards. Drag the measuring tool along the board edge with a pencil to mark the boards. See why I love my Kreg Measuring Tool in this photo? It’s so fast and easy to mark long lines accurately!
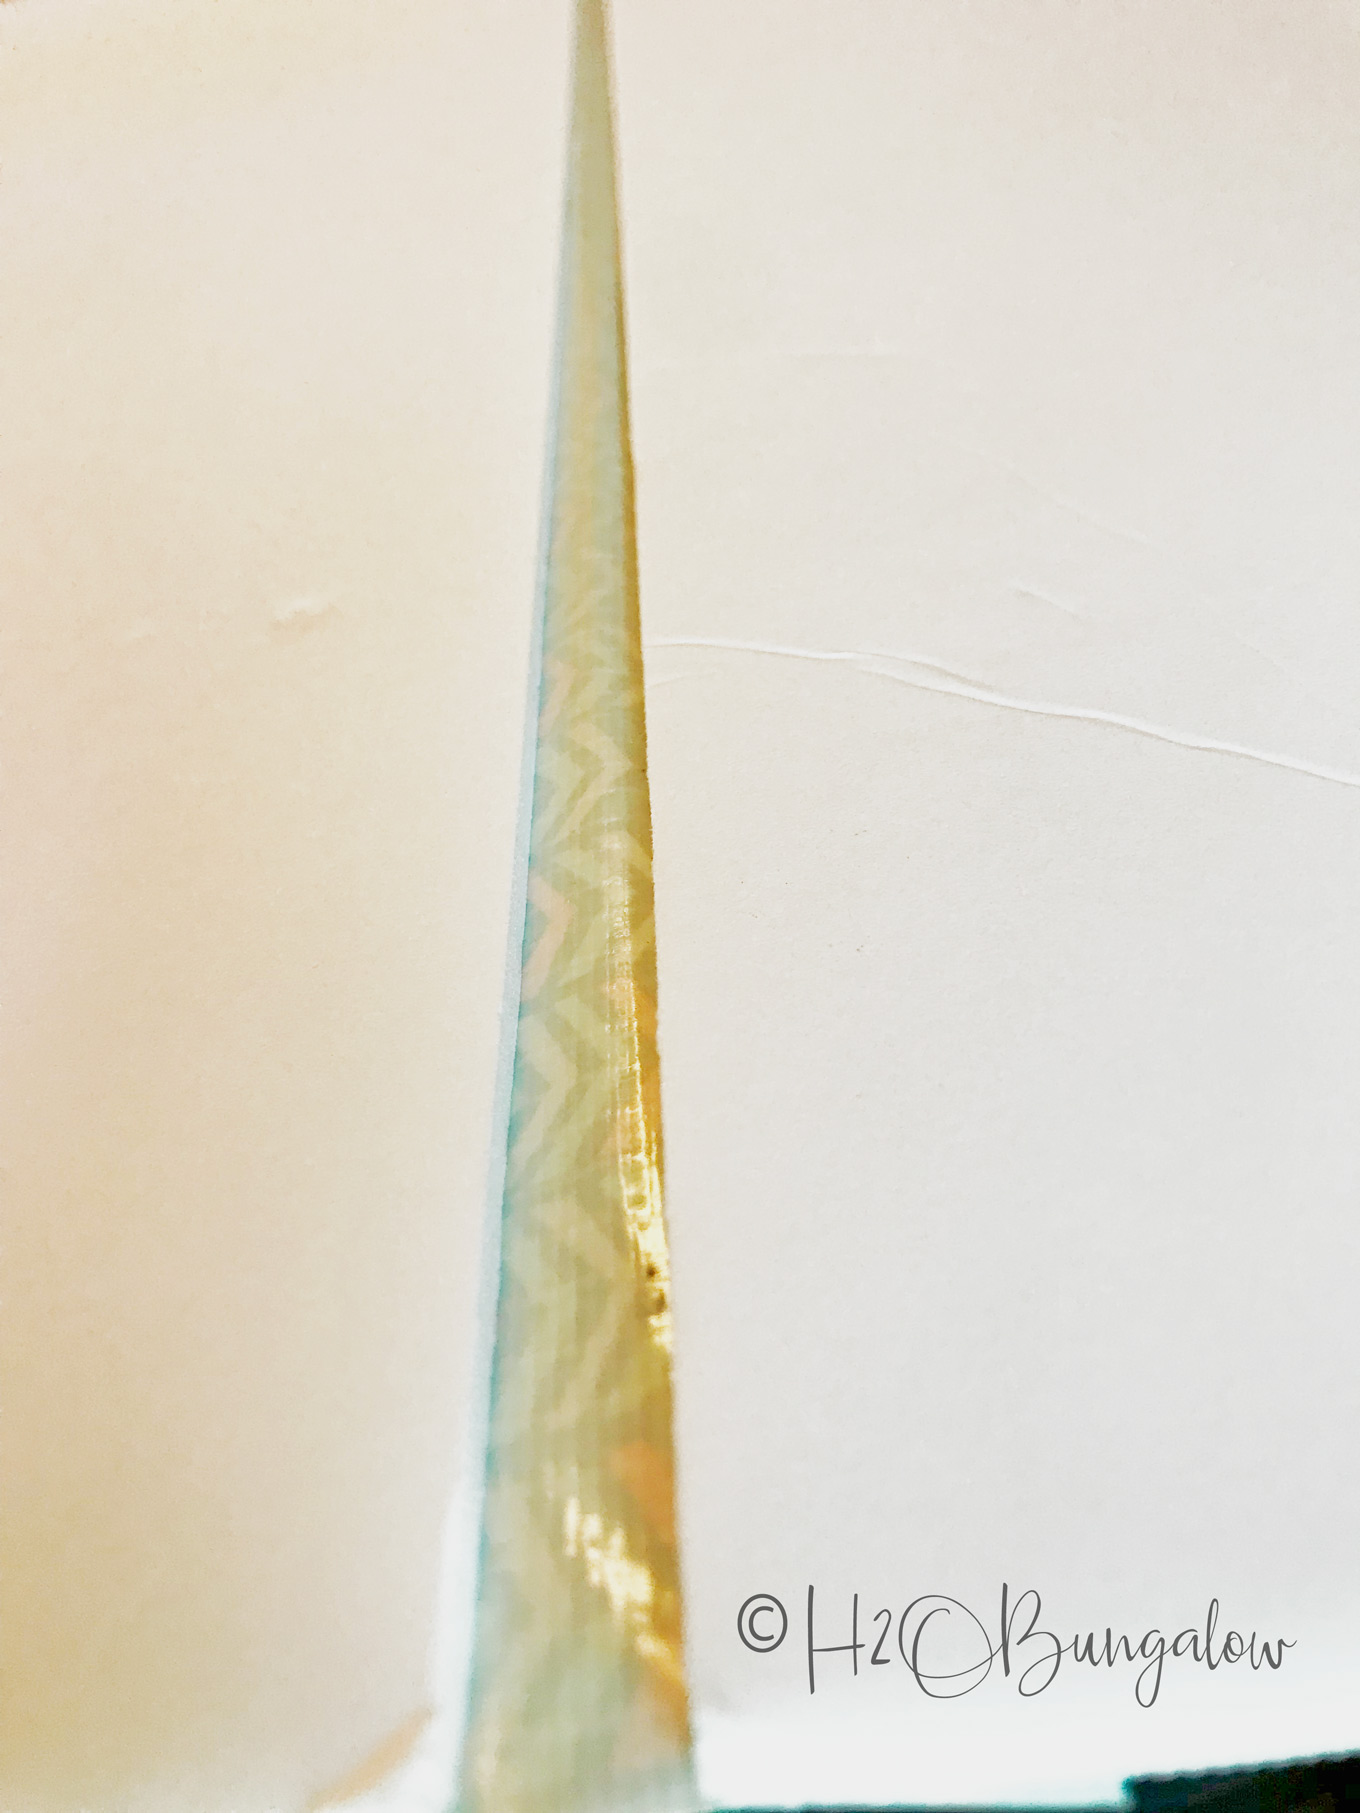
#2. Place Duck Tape along the spine of the folder. Starting on one side, place the tape along the edge of the side marked 3/4″. The tape will hang off the edge. Next, you’ll place the Duck Tape along the the other piece of foam core on the 3/4″ margin. Turn the stencil storage folder over and add another piece of tape along the inside of the spine. The gap in the center allows the stencil storing folder to have a little room to add several stencils.
#3. Add the Duck Tape along the two sides. Add the tape to the sides at the 1″ marks. Fold the tape over to the other side. It folds better if you start folding at the center and work your way out.
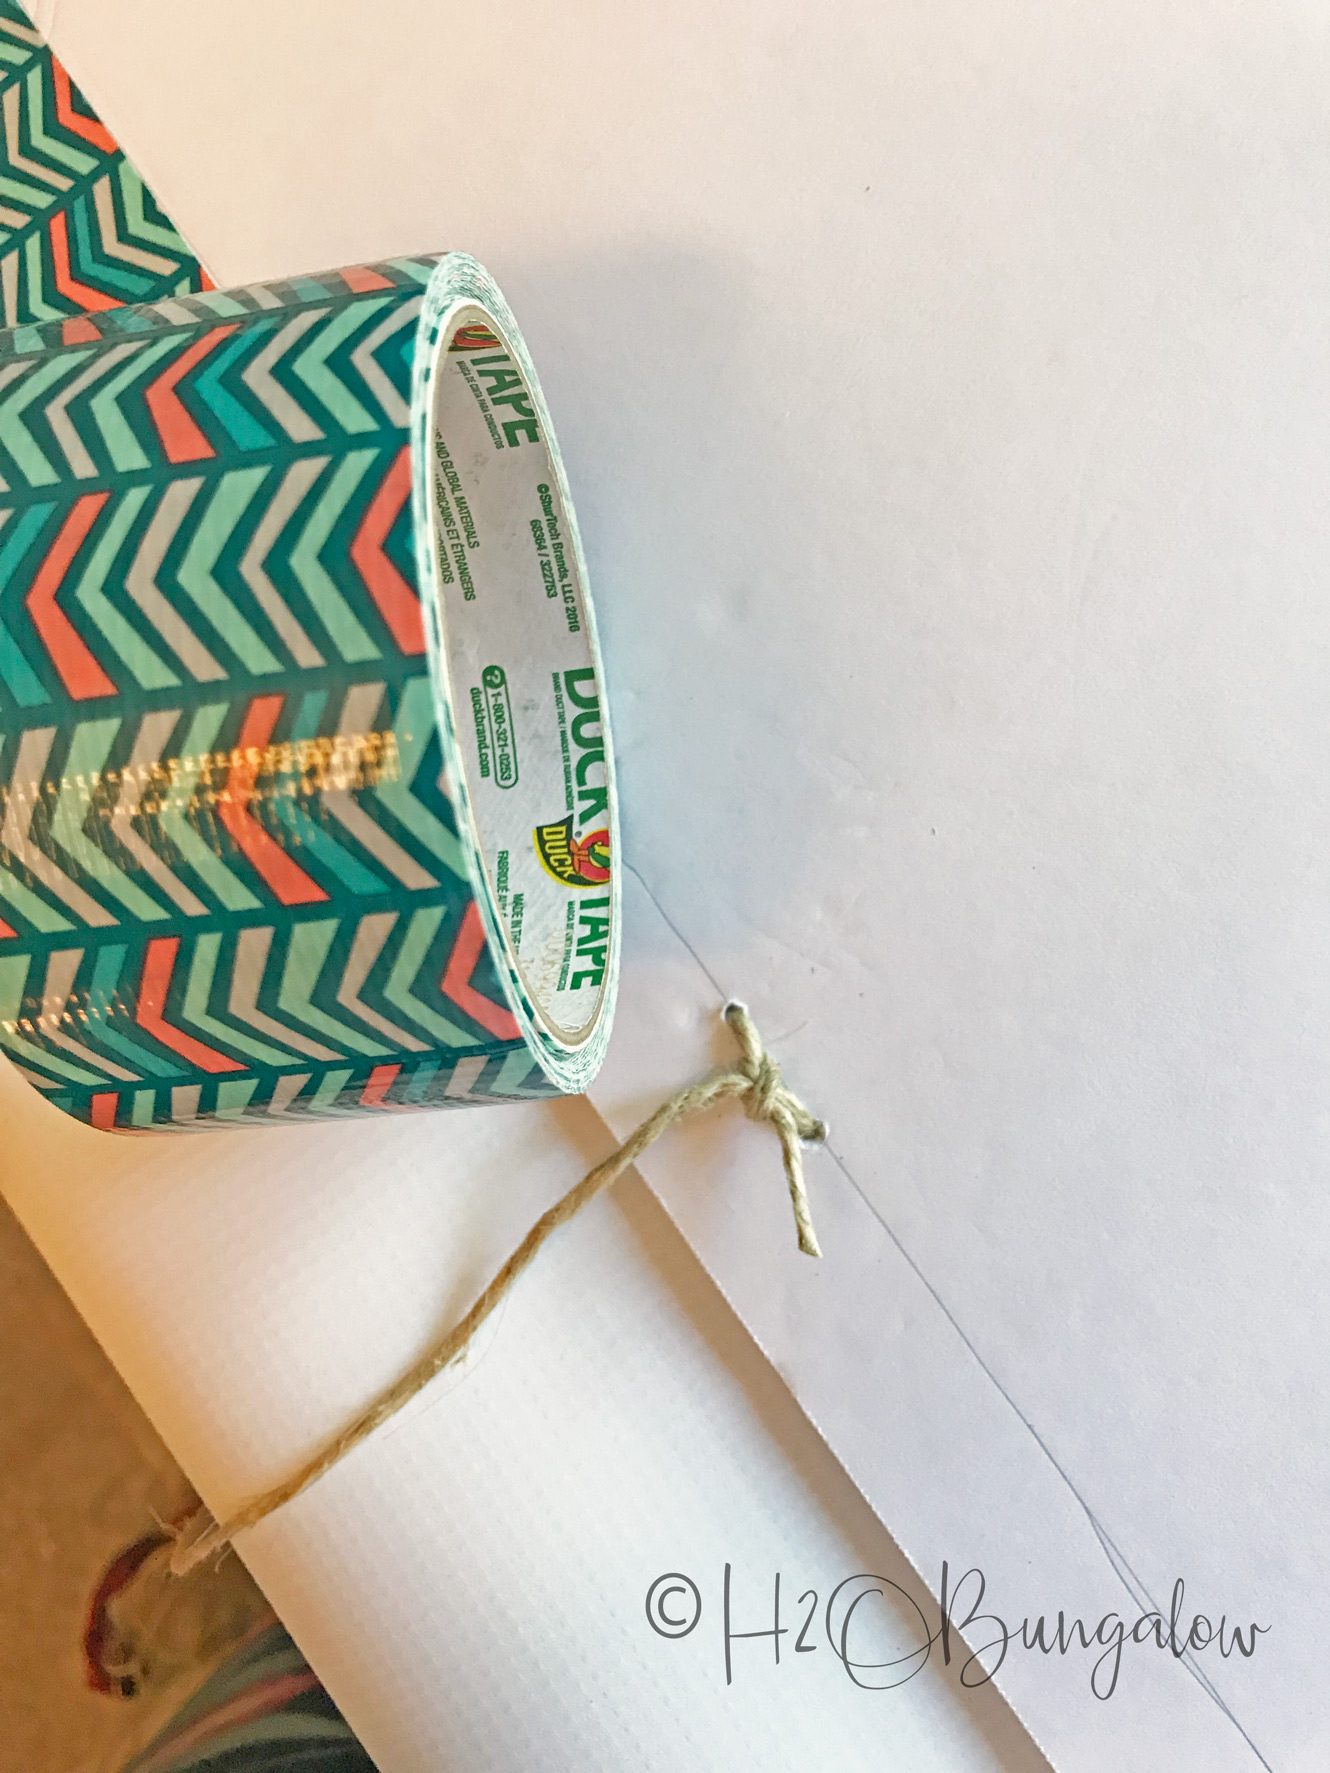
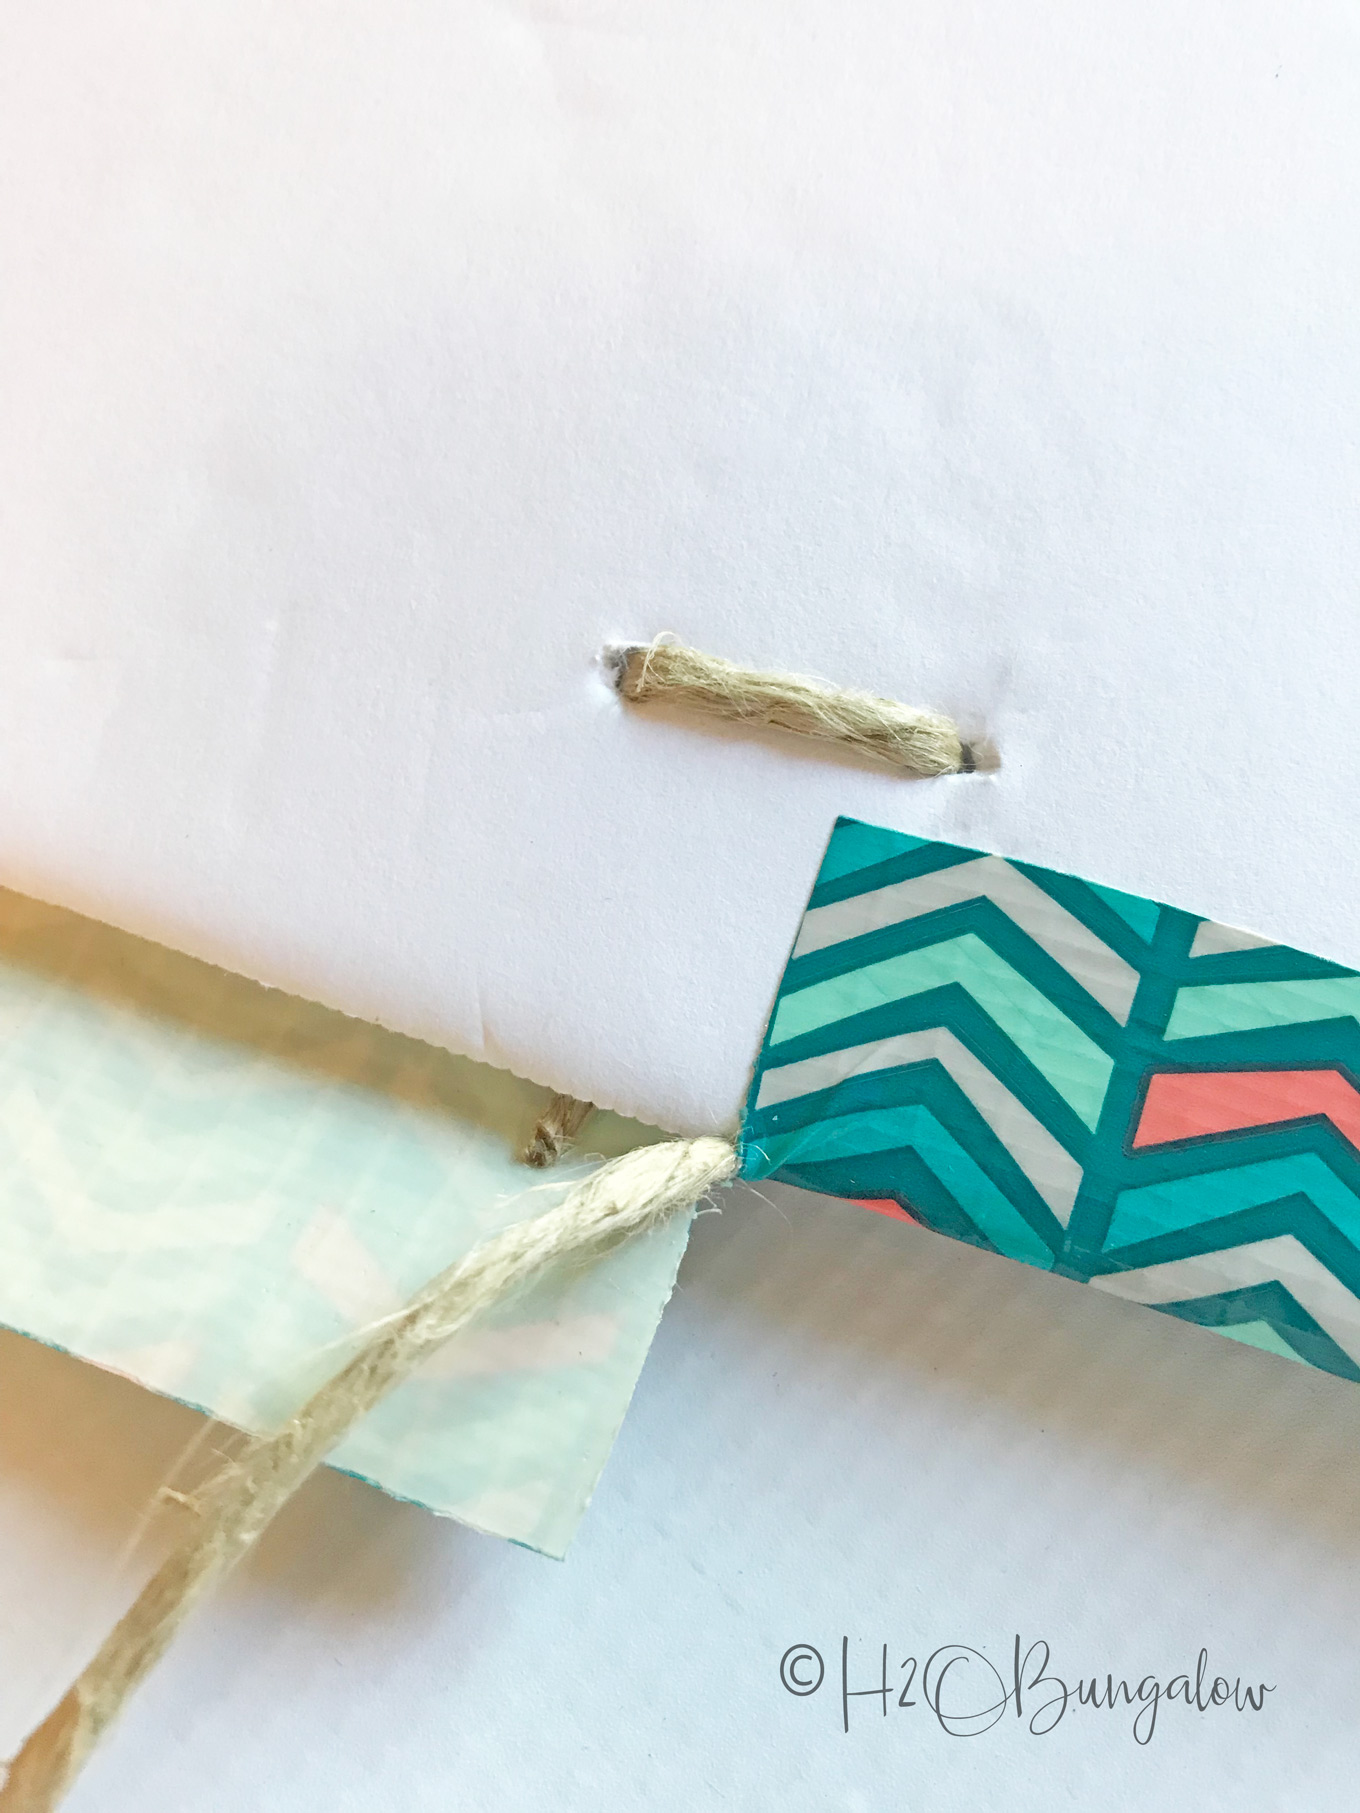
#4. Add ties to the top of the stencil storage. Mark and poke a small hole in the center 1/2″ apart. Thread a piece of jute through and tie it on the inside. Do this for both sides.
#5. Add tape along the top of the stencil storage folder. Place the tape on the outside of the stencil storage folder first, covering the jute strings. Cut a slit in the tape where the string is and fold each side of tape down toward the inside of the folder.
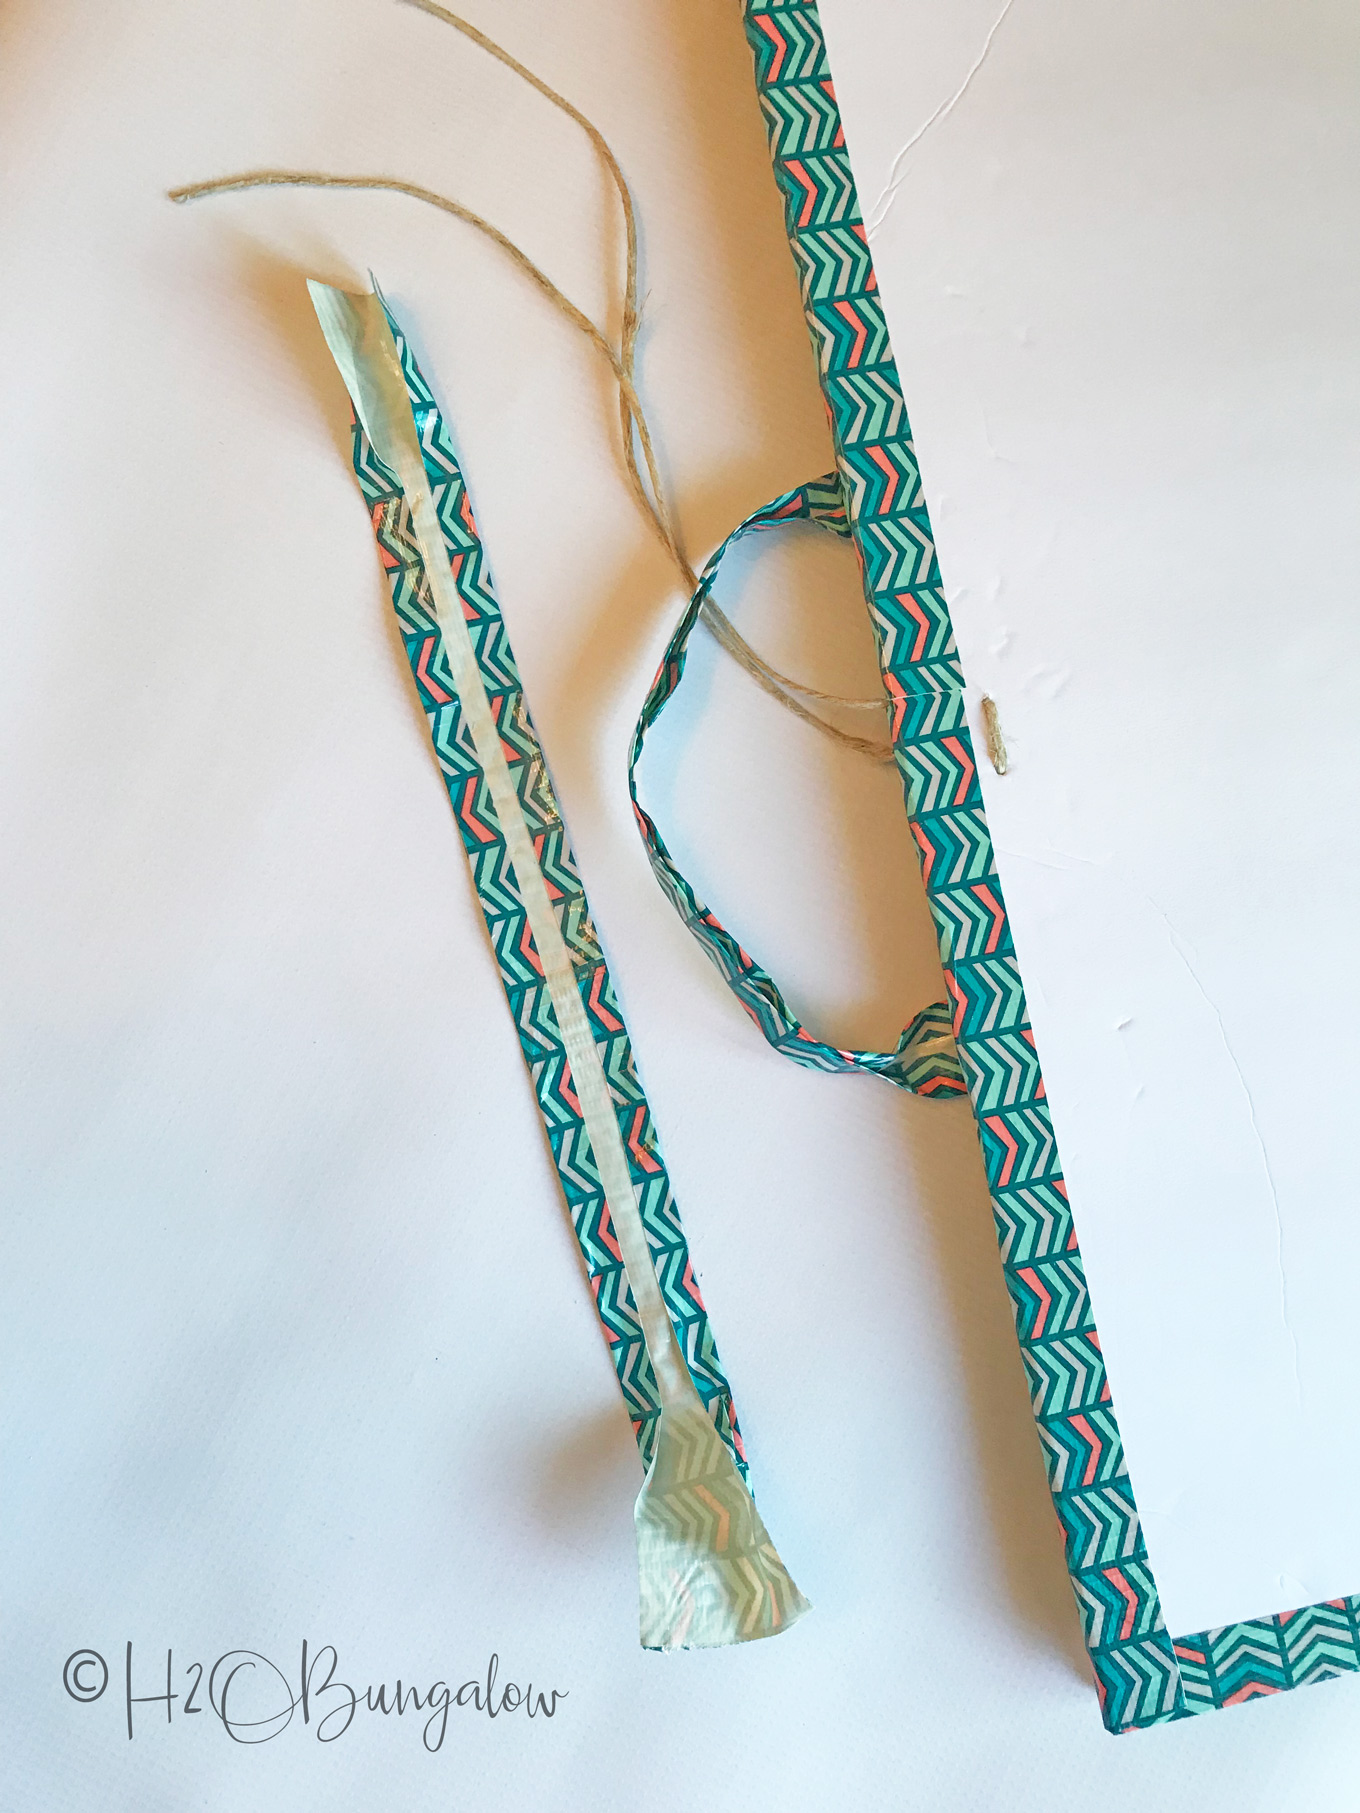
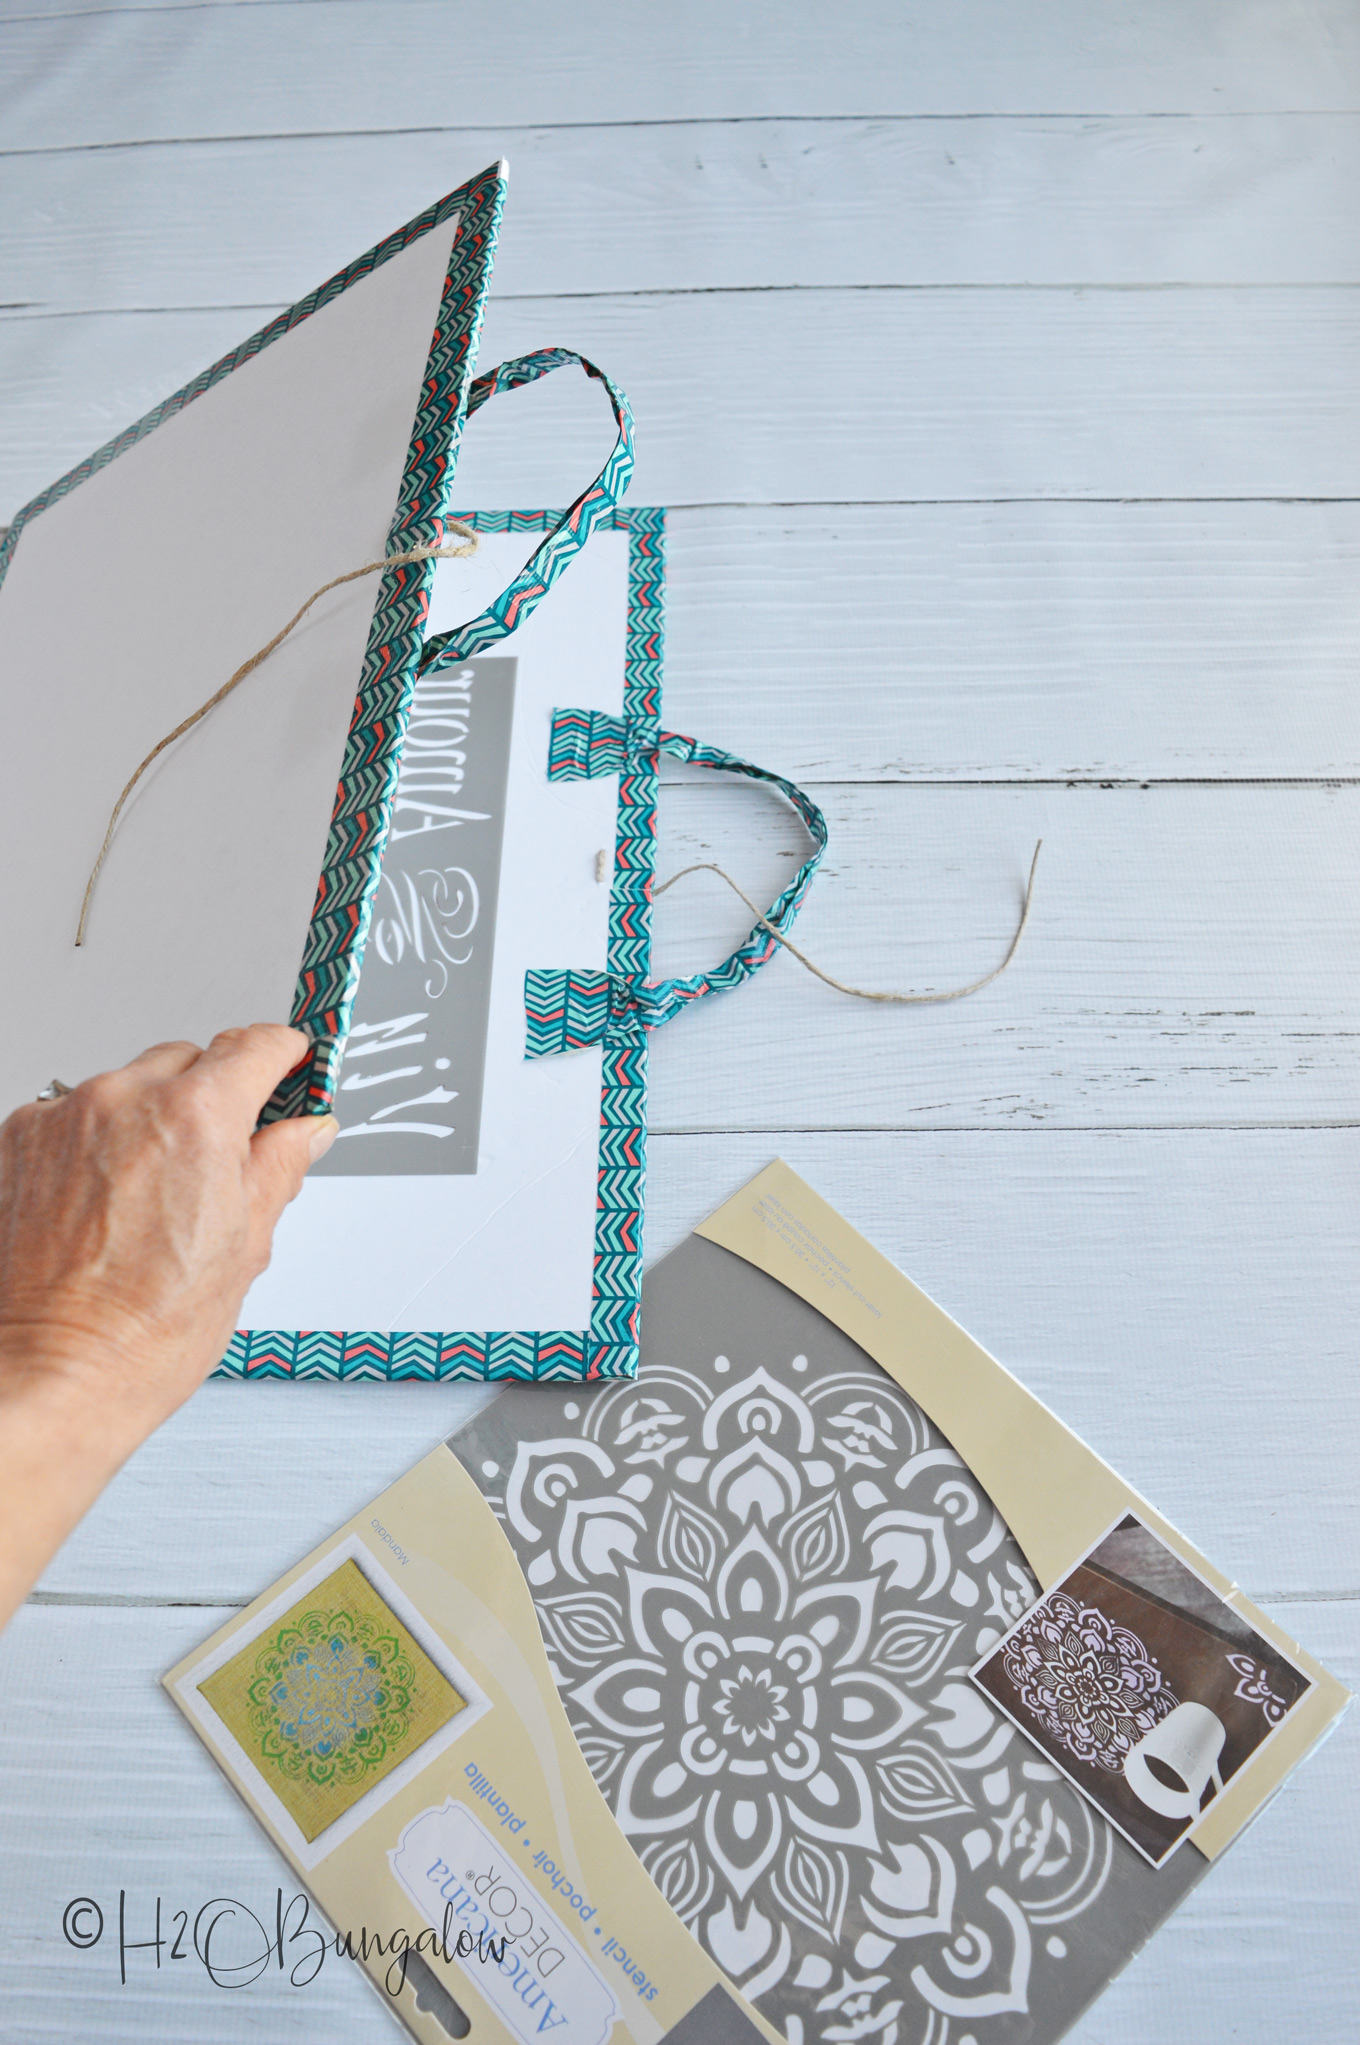
#6. Add handles to the stencil storage folder. Cut two pieces of Duck Tape 15″ long. Carefully fold the center in leaving a space like the picture below. Fold the other side in. Leave about 1 1/2 inches at each end unfolded. Attach the handles to the inside top of the stencil storage folder and fold the handle in half. It will stick together.
That’s it! You’ve made your own stencil storage.
It was like a trip down memory lane as I filled these folders. Holy cow, I’ve done a lot of stencil projects over the past 5 years! Click here to see a thumbnail of all my home decor stencil projects.
Please pin my how to store and organize stencils tutorial!
I think you could use my stencil storing idea for other things too. Like keeping kids artwork, or storing and organizing printables.
I like this method of storing and organizing stencils much better than keeping them in hanging files or my brown paper because the stencils don’t bend and most of my stencils are too big to fit in a hanging file anyway.
Do you have any good tips on how to store stencils? Share below in the comments!


Kandi Lauzara says
Omg, this is brilliant. .
Wendi says
Hi Kandi and thank you! Like lots of people I love my stencils, bit what a pain to store right? Making my own stencil storage was the perfect solution to keeping them out of the way and taking care of them too. Glad you liked my idea! Thanks so much for your note 🙂
Susan says
This is a great idea. I made something much uglier to store my stencils and the big monsters I cut out for my windows for halloween (just two big pieces of posterboard taped together at the bottom). I hide mine under the bed. But if I made a portfolio for them the way you did, I’d be proud to store them in plain sight.
Also, I’m going to have to agree with Sandi – because of the way that every photo has an ad below it, your photos and the ads get mixed up to the point where it isn’t clear that you are going to tell how to make the stencil holder. I know the reason for the ads, but maybe you could put a bold phrase “See how I made this below” or something so it was more obvious that you had more content coming? Just a suggestion.
Wendi says
Thanks so much for your note Susan and sharing your experience. First…so glad you like my stencil storing idea, I hope you find it as useful as I have. Second, I’m not sure why this one page seems to be so out of control with ads. I just changed the ad settings and took several spaces out of the post so fewer should show up. I appreciate you taking the time to tell me. You know it’s always a fine balance with ads.
Donna @ Modern on Monticello says
I definitely need to make one of these. I have been wondering what was the best way to store my stencils besides throwing them in a box. Thanks for sharing the idea. Visiting from #HomeMattersParty
Wendi says
Hi Donna and thank you! Stencils are awesome to use but such a pain to store. Plus, I hate when I ruin them because I’ve shoved them in a drawer. Thanks for your note and visit!
Deb says
Wendi this is a great idea! I currently have my stencils in a dresser drawer(craft dresser)..only 1 is too big for the drawer so I have it hanging in a cabinet..I thought about using painters tape to tape some of the stencils to the tops of pizza boxes because my stash has grown too..
Wendi says
Hi Deb and thank you! Good idea on the pizza boxes, although I’d turn that in to an excuse to eat more pizza! I knew I couldn’t be the only one with a growing and getting messier by the day stencil stash. I also have a large wall stencil that’s too big for the stencil storage folders. I just rest it behind my filing cabinet ..and move it when I have to take pictures 🙂 I love using stencils though! Thanks so much for your note & visit 🙂
Jayme Rudolph says
Awesome design. I really needed that one.
Wendi says
Hi Jayme and thank you! It’s a simple idea but works well. I’d been dealing with my messy stencil stash for so long and it was getting worse. I hope this works for you too. Thanks so much for your note & visit!
Debrashoppeno5 says
Fantastic idea to keep the stencils neat and organized.
Wendi says
Hi Debra and thank you! Seriously, I was floored that there weren’t other stencil storing ideas out there. I’m sure lots of people have out of control stencils overflowing in piles like I did…LOL Thanks so much for your visit and note 🙂
Ready Assembled Bookcase says
This is really a nice way to store and organize stencils. Thanks for sharing this post.
Wendi says
You’re welcome and thanks so much for your visit 🙂
Sandi Magle says
I was really confused, I thought for sure the pictures of freeze drying fruit, squeezing money from my social security benefits, downloading PDF docs, 9 ways to become a good writer, DIY Silkwoood wall stuff, big book of income, target food(2 of these) ad,Eyedesign eye makeup,Missing Teeth, Wafair sofas, and the continually flashing monstrosity at the bottom which changed, had something to do with your post???which was…at this point I don’t remember. oh yes, had to go to the top—stencil storage. Very disappointed as I was interested in that. Sandi
Wendi says
Hi Sandi, I’m so sorry you had a bad experience. I’ll check the settings on my ads to see why so many. On the flip side, please understand that ads are a large part of our revenue and pay for the overhead as well as the supplies of running a blog and offering free tutorials for others to enjoy. This is my full time job and I love it, but…I cannot operate without some type of income. I hope you’ll come back again. Thanks so much for sharing your thoughts!