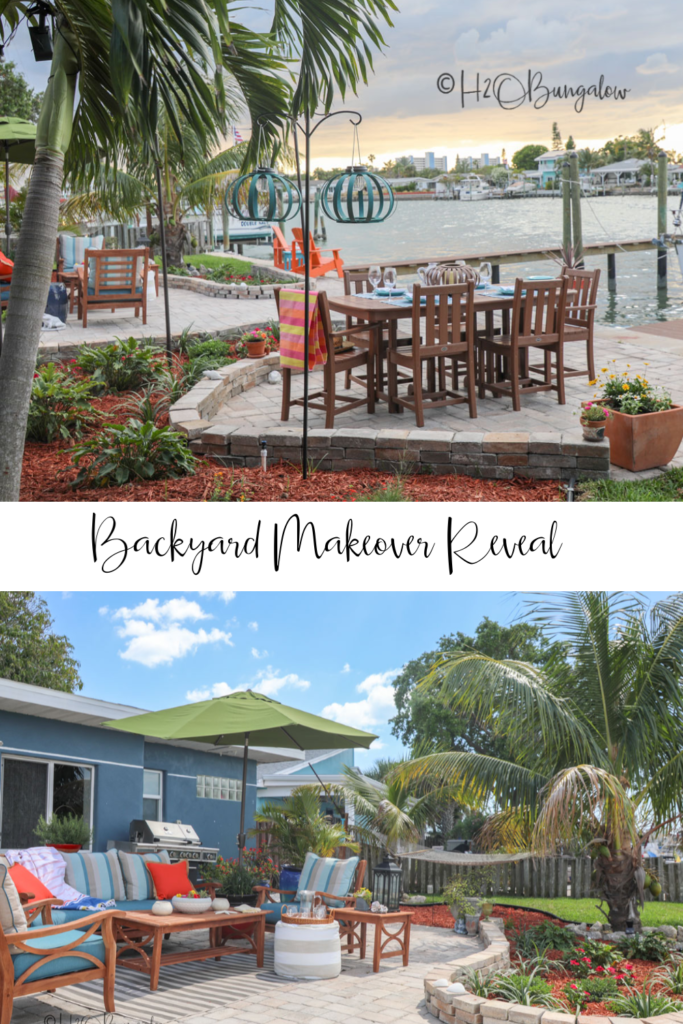
Hot. That’s what my backyard felt like before this patio makeover. Open, a sea of pavers in a giant bare patio and baking hot. No restful green for the eyes anywhere. But thats all changed! I’m finally ready to share my coastal backyard makeover reveal today! It’s been four long weeks of work transforming my backyard into a beautiful place I’m proud to have friends and family enjoy with us. When you’re done checking out the backyard, head indoor for an Updated Coastal Home Tour (the inside).
Sending out a big thank you to Ryobi for sponsoring this post and month long competition. I use affiliate links in my articles to shop. We receive (at no cost to you) a small commission if you make a purchase. Thank you!
Stay tuned for more information on when the voting starts for your favorite blogger Outdoor Overhaul!
Backyard Makeover Part 1
Before I share my big reveal I want to share the real before-before photo of my backyard! I want to guys to see what it looked like about four years ago and I want to remind everyone (and sometimes myself), that making a home beautiful is a journey. It takes time and patience and for most of us, a lot of sweat equity along the way.
Four years ago, I entered my backyard makeover in a contest Ryobi sponsored with Thrift Diving. I placed 3rd and was proud of it too! Take a peek at what my first DIY Makeover Projects Reveal turned out like. I think it’s pretty cool that I get to be one of the hosts for this years Outdoor Overhaul 2.0, don’t you?
This Year’s Backyard Makeover Plans
I shared my big plans last month for my backyard redesign when I announced the Outdoor Makeover Challenge and shared that I was a co-host for this year’s Ryobi Outdoor Overhaul 2.0 The Hangout Challenge.
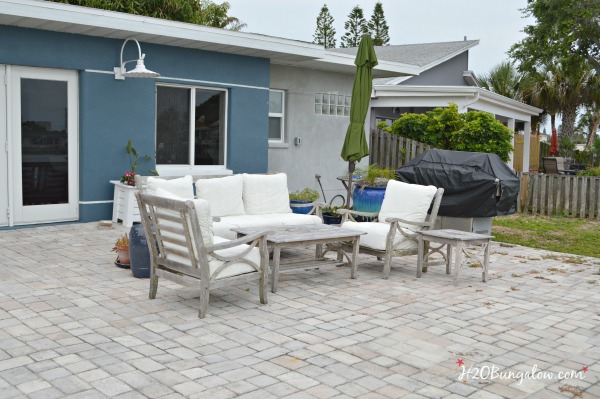
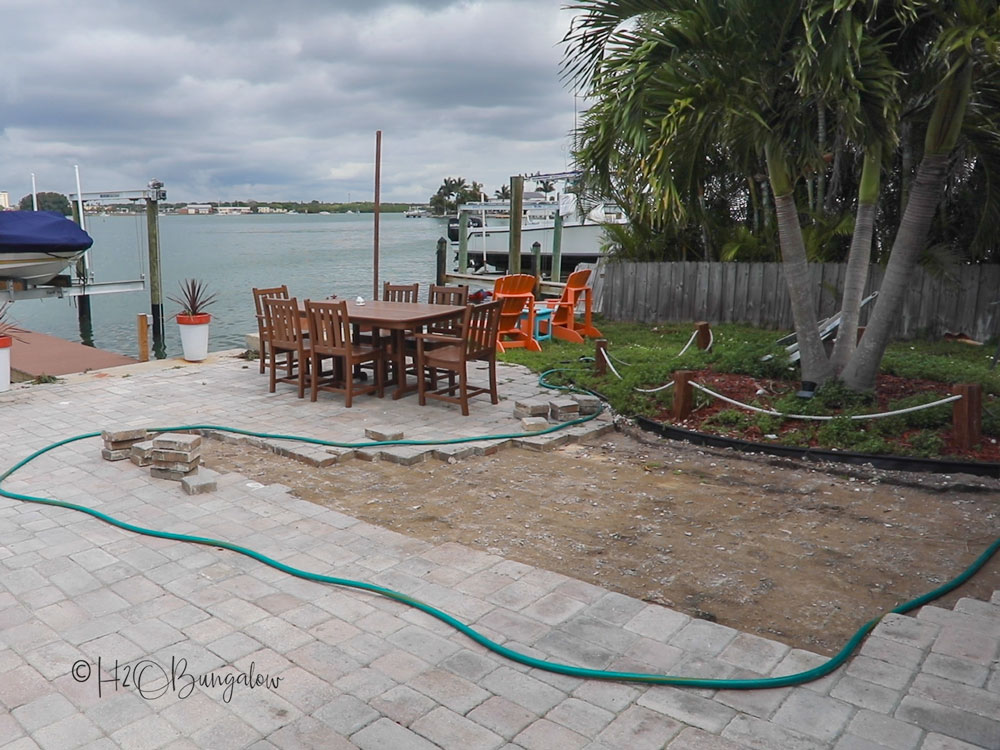
It’s been a while since I’ve given this yard any attention or energy. It was time for a refresh! This is what my backyard looked like four weeks ago. It was sun worn with weeds everywhere and lacked the cozy feeling I wanted in a backyard retreat.
It just didn’t feel inviting and relaxing to me.
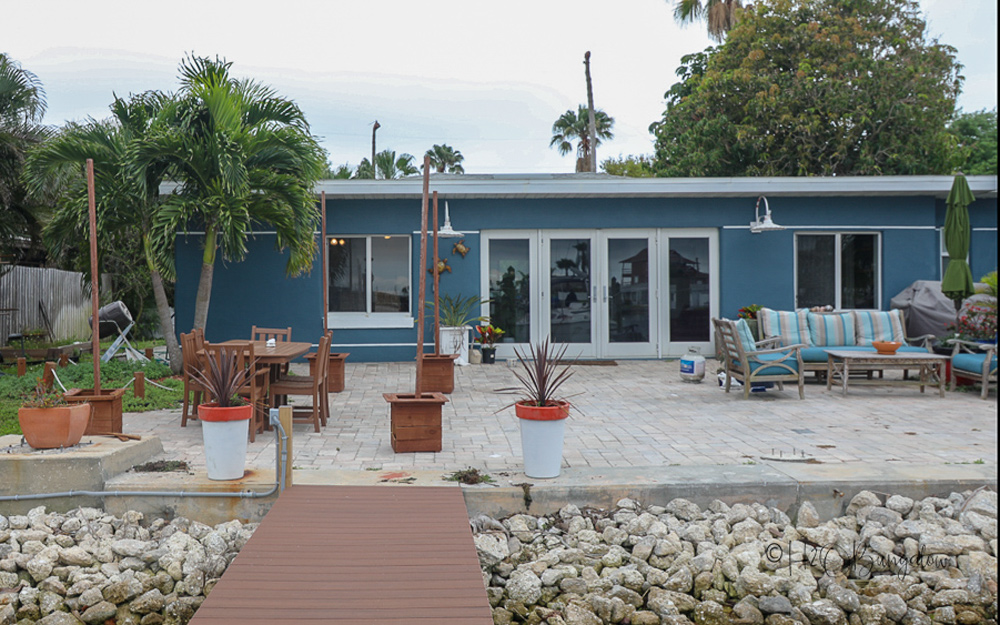
This area has always been a challenge for me. It’s too wide open and there’s a sea of pavers (pun intended) with nothing to break up the areas or even define them. We had no grass, just weeds on the edges, no irrigation in the back and my garden beds were grown over.
The wood boxes with poles are my DIY Outdoor String Lights I made a few years ago. I loved them, but when our big gusty winds come, they’d knock over breaking the glass bulbs.
Oh, did I mention we’re hosting a party this summer with a large group of our sailing and racing friends? Oh, heck no, not looking like this!
This space needed an overhaul and the Ryobi Hangout Challenge was just the thing to get me motivated!
Patio Landscaping
In week two of the challenge, I shared my Patio Landscaping Ideas and lots of landscaping tips to help plan a landscape layout.
Planting Landscape Beds
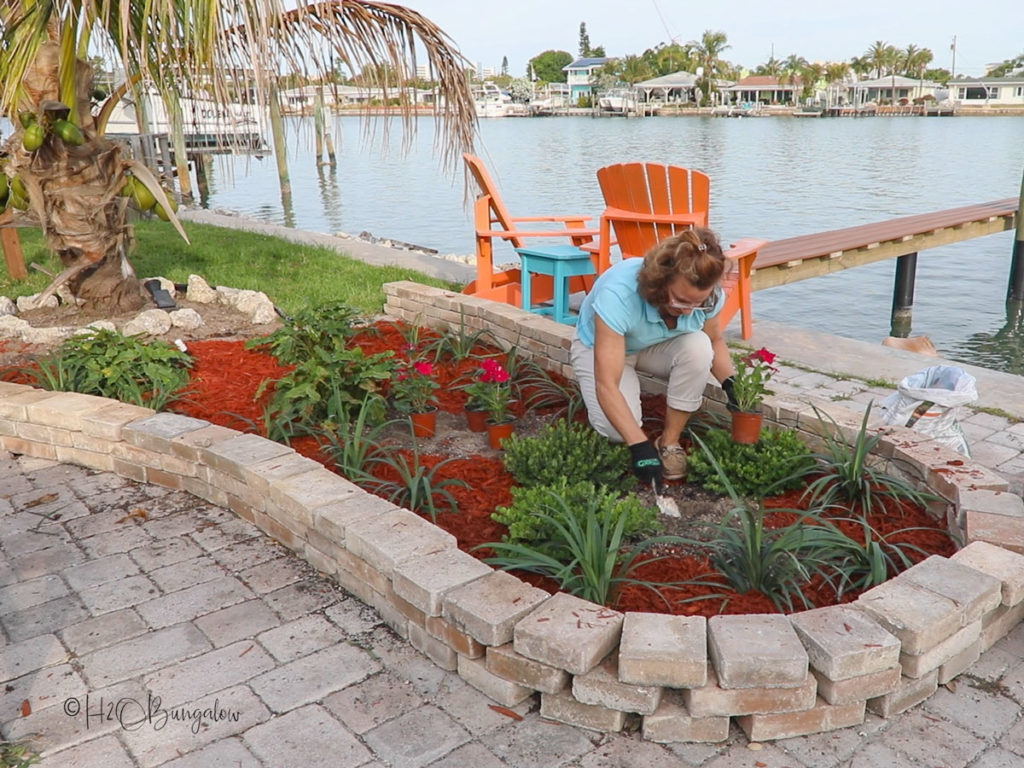
Last week was planting time, I covered lots of information in my Planting Landscaping Beds post.
Our new irrigation and sod for both sides of the yard was installed too. Unfortunately, the guys worked fast so I didn’t get any pictures of that part of the process. Nope, thankfully it wasn’t DIY. I treated myself and hired that part out!
Are you ready to see it all together?
Let me take you on a walking tour…
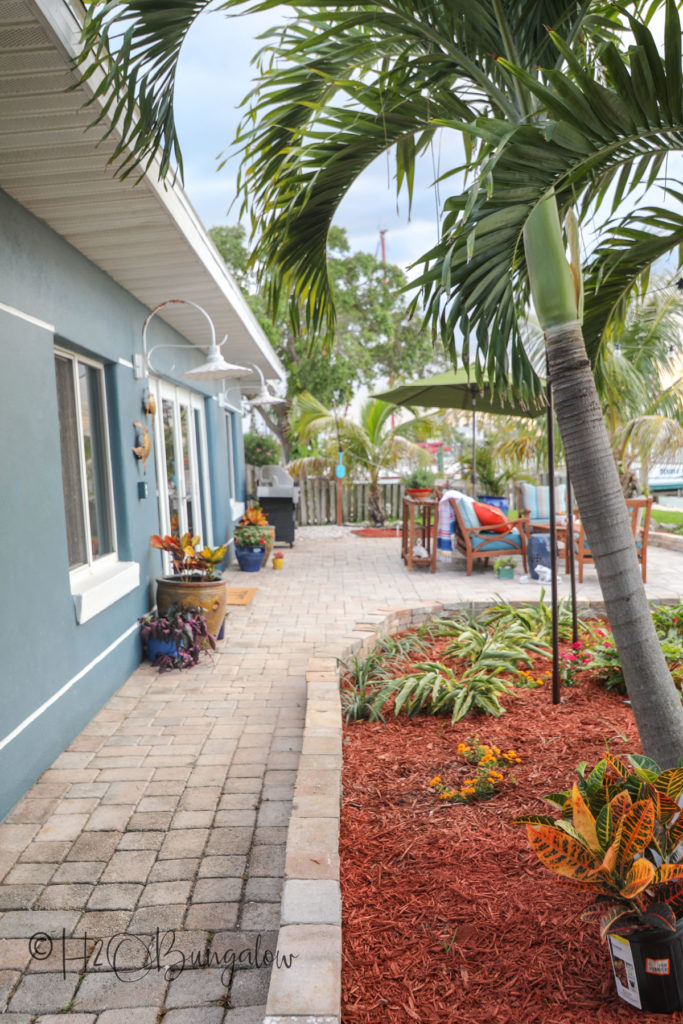
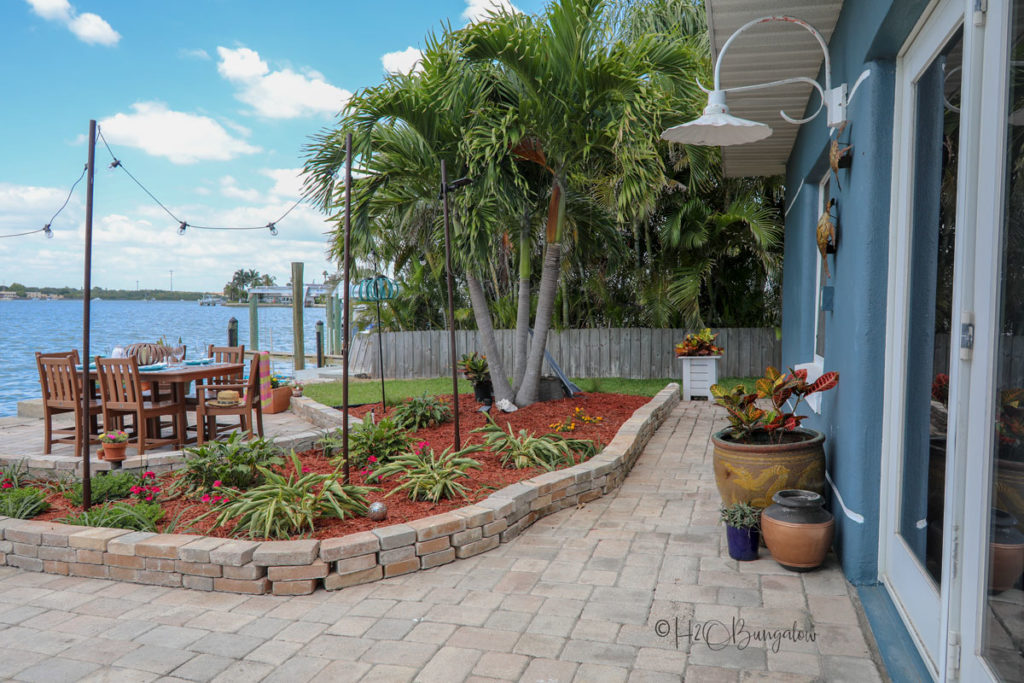
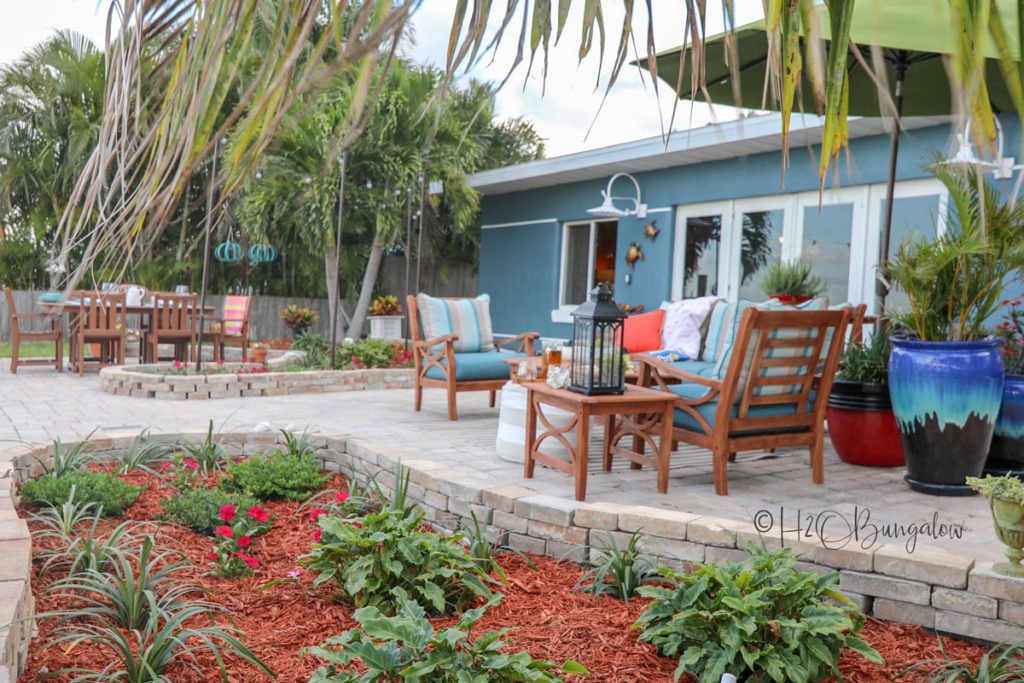
A lot of friends enter from the side of the house, which is why I wanted to clean it up. This is the first view as someone turns the corner.
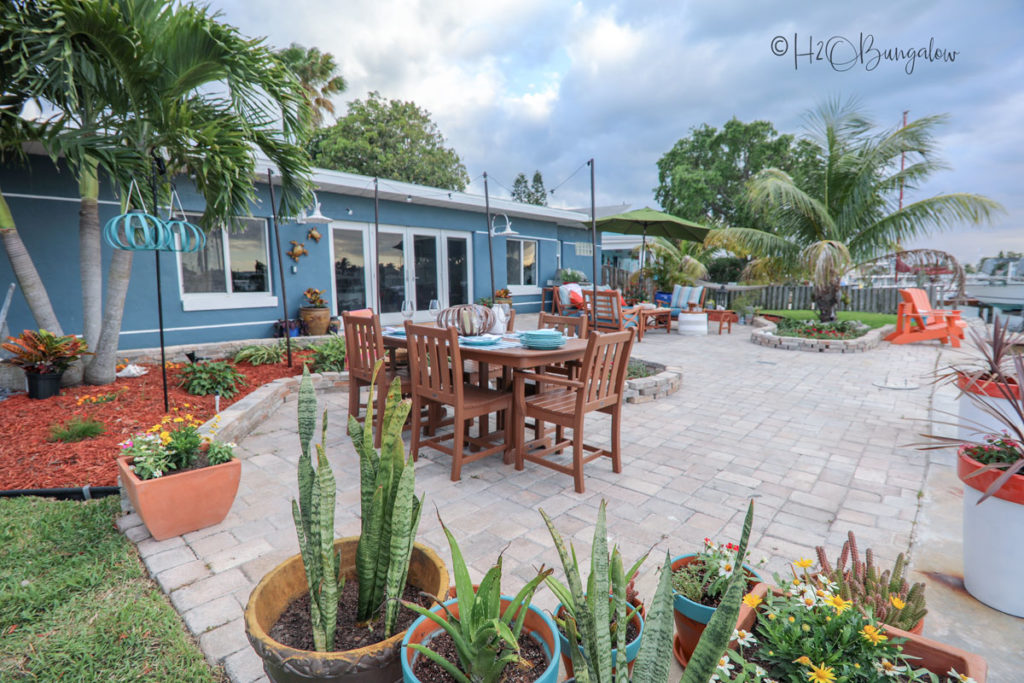
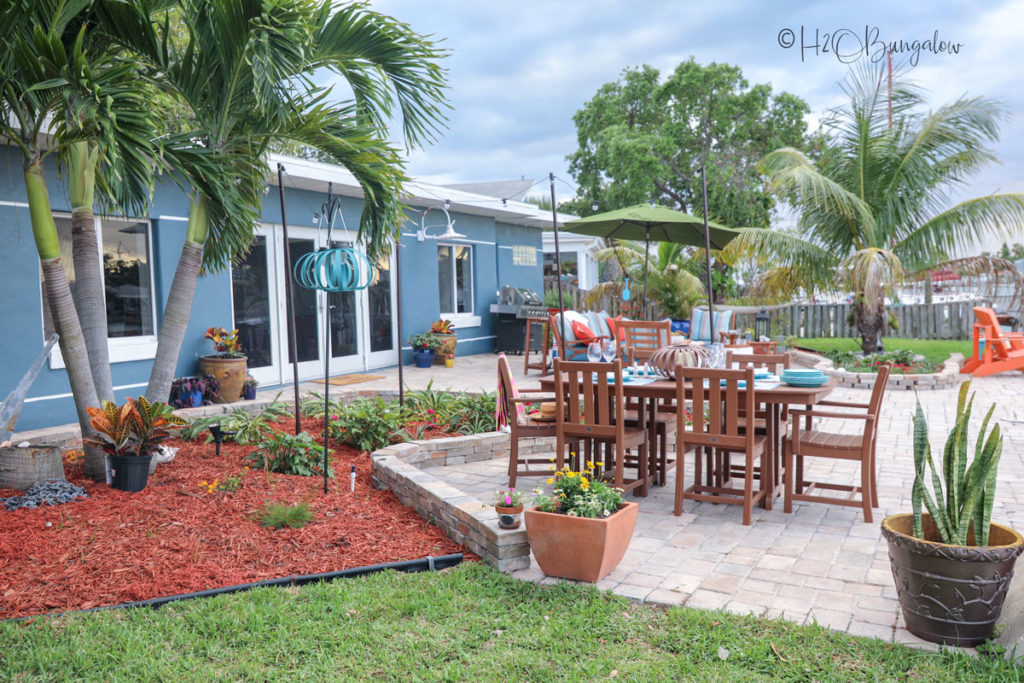
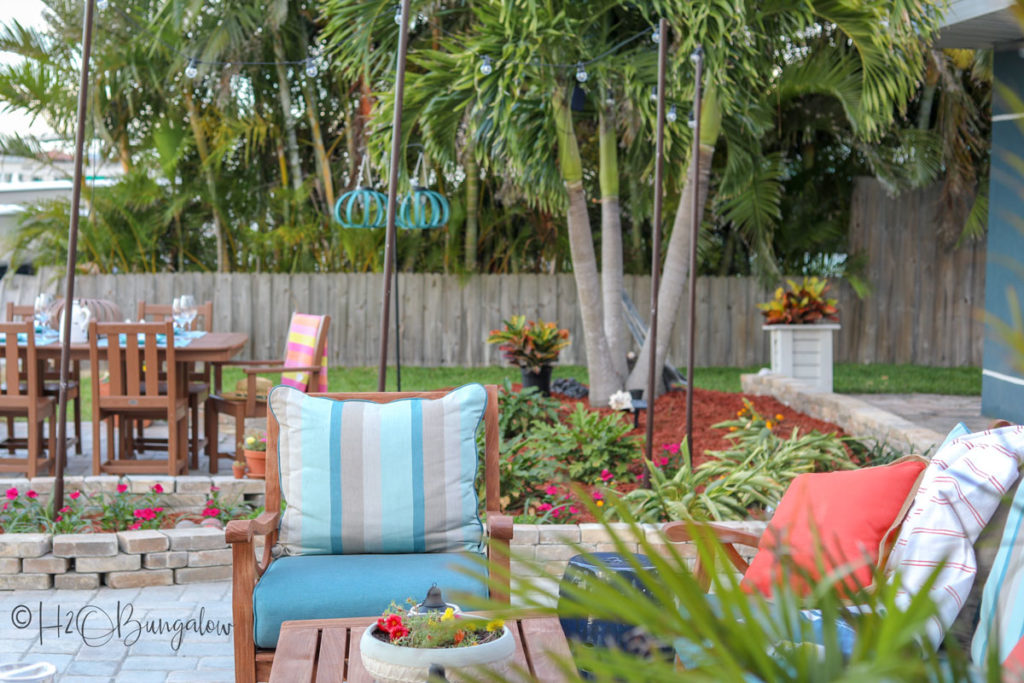
I used my landscape beds to break the wide open backyard into two distinctive useful places we could enjoy. I think repurposing the pavers into stacked paver landscape edging was a good idea. I like the way they look, a lot!
My husband and I grew up in New Orleans and I’ve always loved the feeling of courtyards. When the landscape plants grow larger they will be just under waist high. My vision is that they will surround the dining area and make it feel cozy with lush greenery.
I built a set of these Key West DIY Wood Planter Boxes a while ago. I moved one from the back door to the end of the walkway. The other one unfortunately started rotting so I had to toss it.
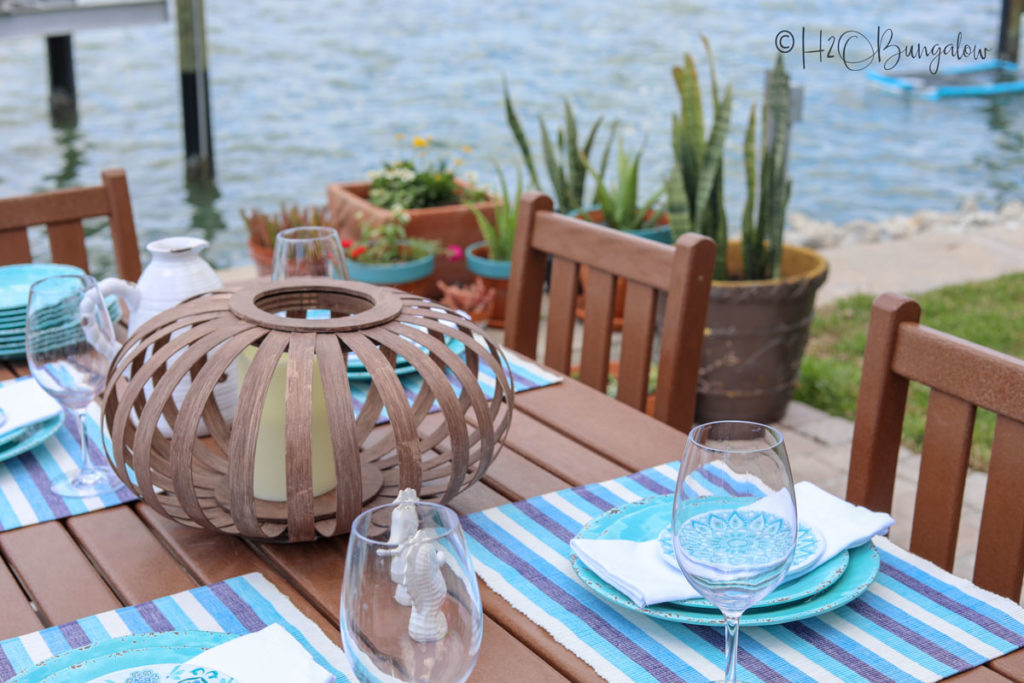
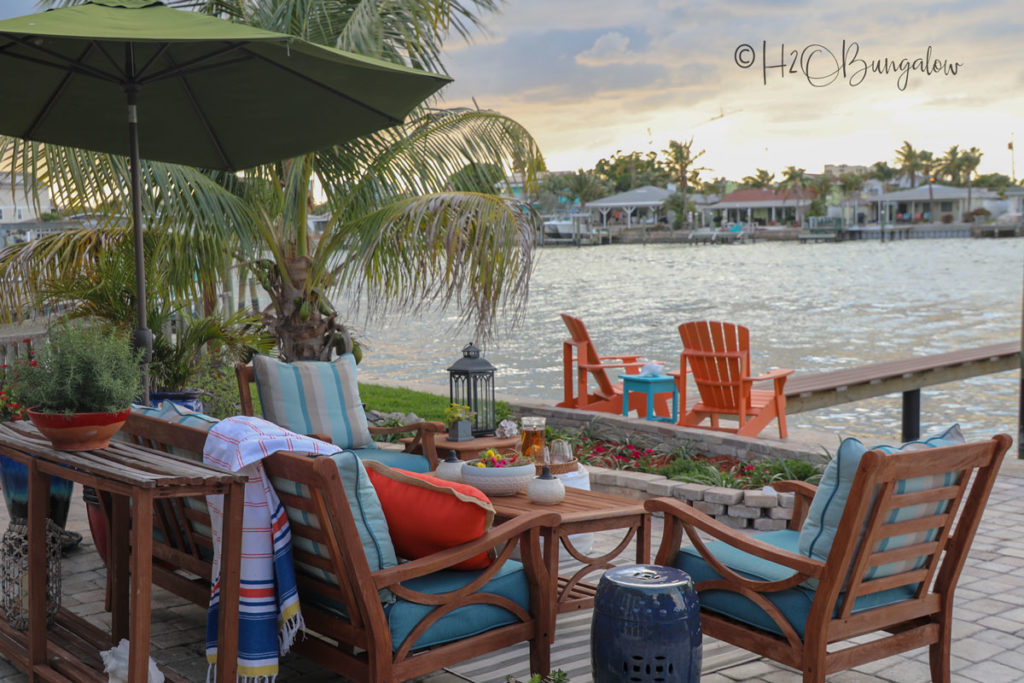
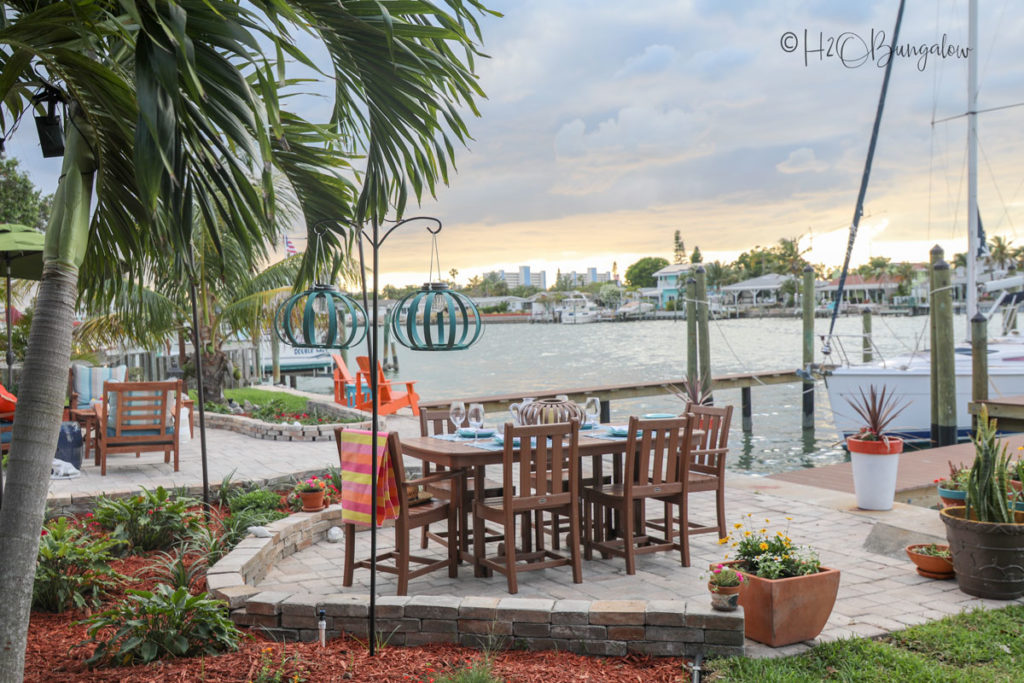
The other side of my outdoor dining area is open on the water.
To make it feel more cozy and define the space I used lots of different size potted plants in a mass grouping. It also helps to hide the big old concrete platform our boat davit sat on before we moved it to a lift.
I used lots of heat tolerant plants since this area is a scorcher in the summer. I still have to connect the drip irrigation for the landscape beds and the planters.
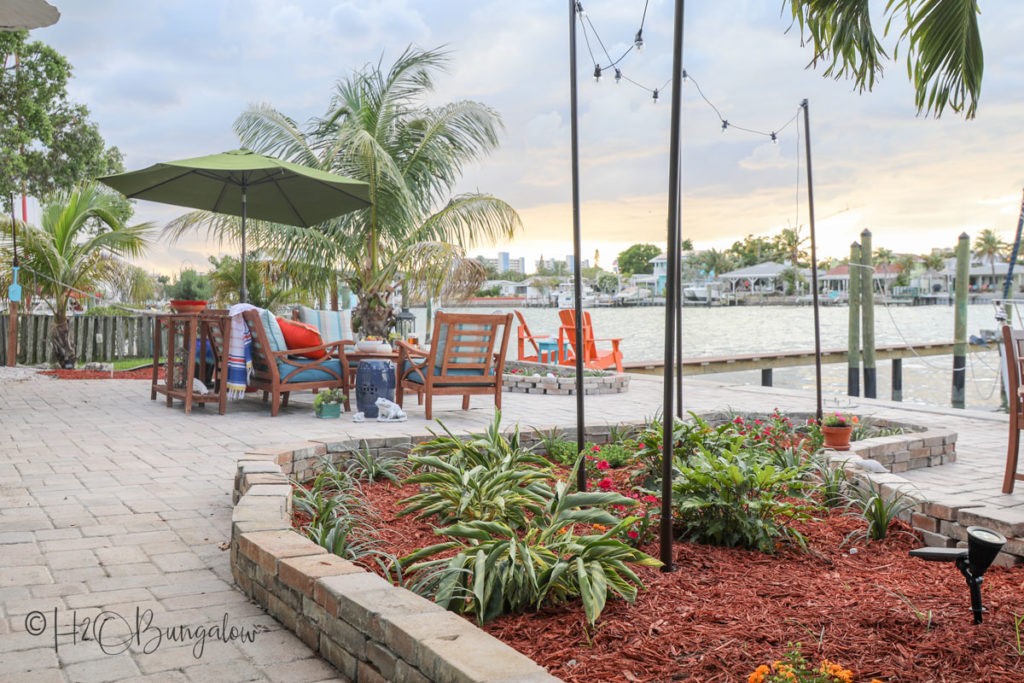
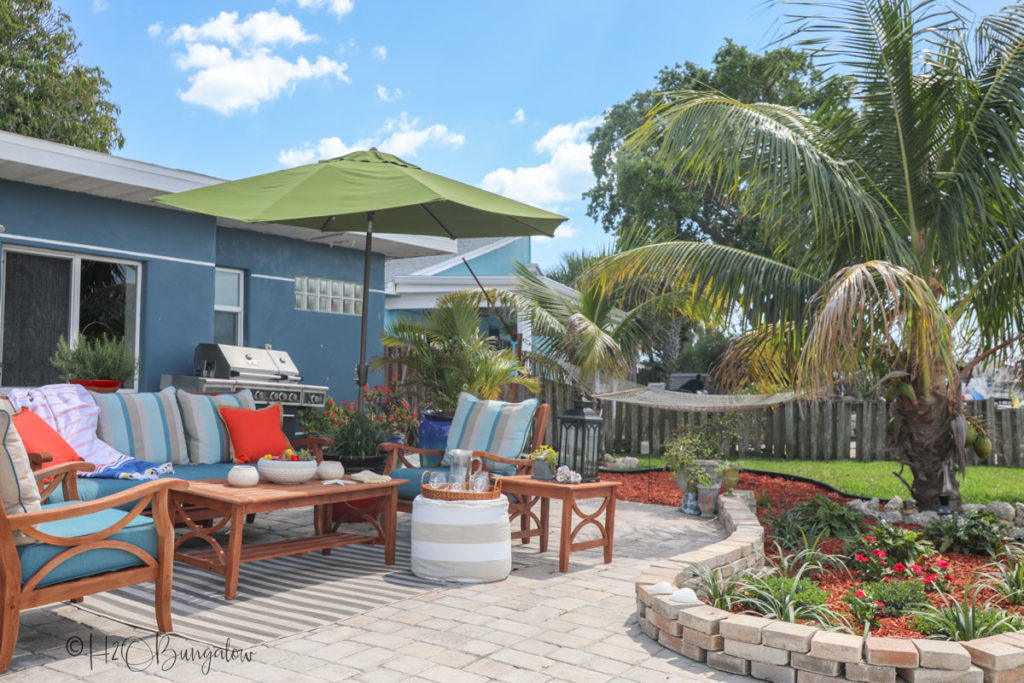
Our other hangout space I’d like us to use more is the seating area on the other side of the patio.
I built a complimentary landscape bed on this side of the yard to break up the big open patio space. Since these planting beds are huge, I used the same type of plants in each one but changed the layout so they wouldn’t look matchy-matchy. My goal was to make the big space look cohesive and well thought out.
The teak furniture got a much needed makeover also.
It was time for some new accessories for the sofa area. I added new outdoor rug, a few throw pillows and a big pouf which will double as extra seating.
Like my favorite courtyards in New Orleans, I use lots of planters in groupings to fill corners and open spaces. Some were here most are new. What will be new to me this year is adding drip irrigation to them all so they’ll survive the summer and be watered on a regular basis!
That DIY Umbrella Planter Stand still works great from my last makeover! It holds up well to our crazy wind too.
Sunsets are beautiful here when the evenings cool down. Now that the backyard is done, I plan on enjoying more of them!
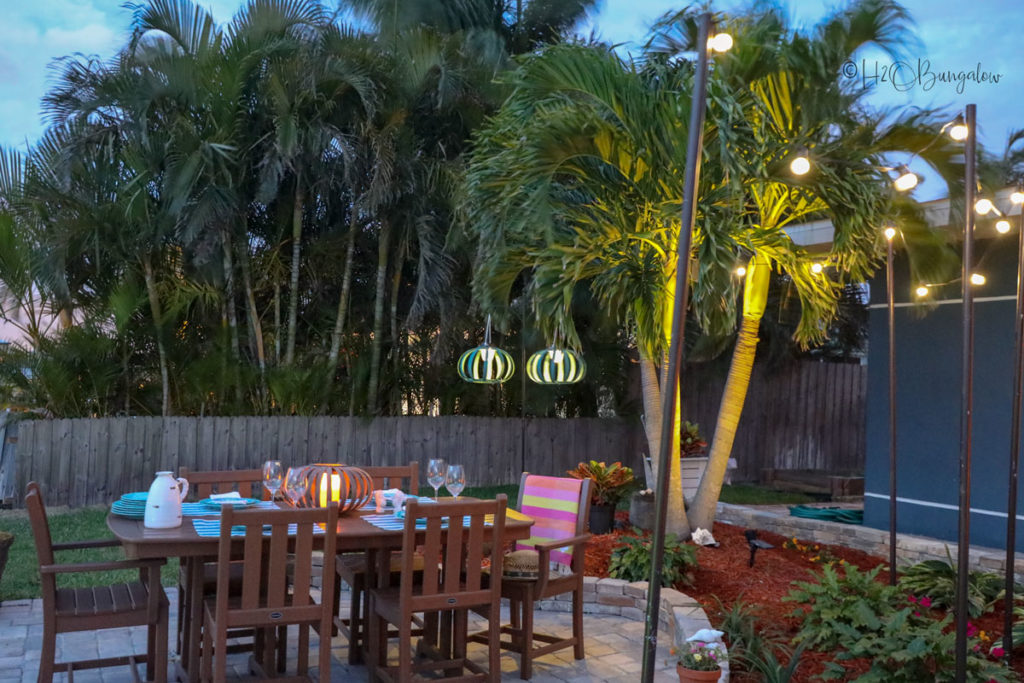
Our dining area is perfect for a sunset dinner on the water. I made this set of DIY Solar hanging Lanterns from inexpensive solar path lights. They’re so pretty at night! I also Refinished my Teak Furniture and it looks like new.
One of the things I love about my new backyard makeover is that when the sun goes down, we’ll still be able to enjoy my new space!
I added a new version of string lights to my garden beds. I’ll share the tutorial soon!
I’m really proud of my backyard makeover! Please pin and share it with your friends on facebook!

Backyard patio makeover reveal shows how to make a take a large open space and make it feel cozy and inviting with landscape beds, planters and patio furniture
Favorite tools for this backyard makeover
All month long I’ve shared my favorite new 40 Volt Ryobi tools that I loved using for this project. Yes, Ryobi has an 18 Volt line too, which is what powers most of my woodworking tools. What’s the difference? This is new 40 volt line is powerful!
Here are my favorites from this week’s work.
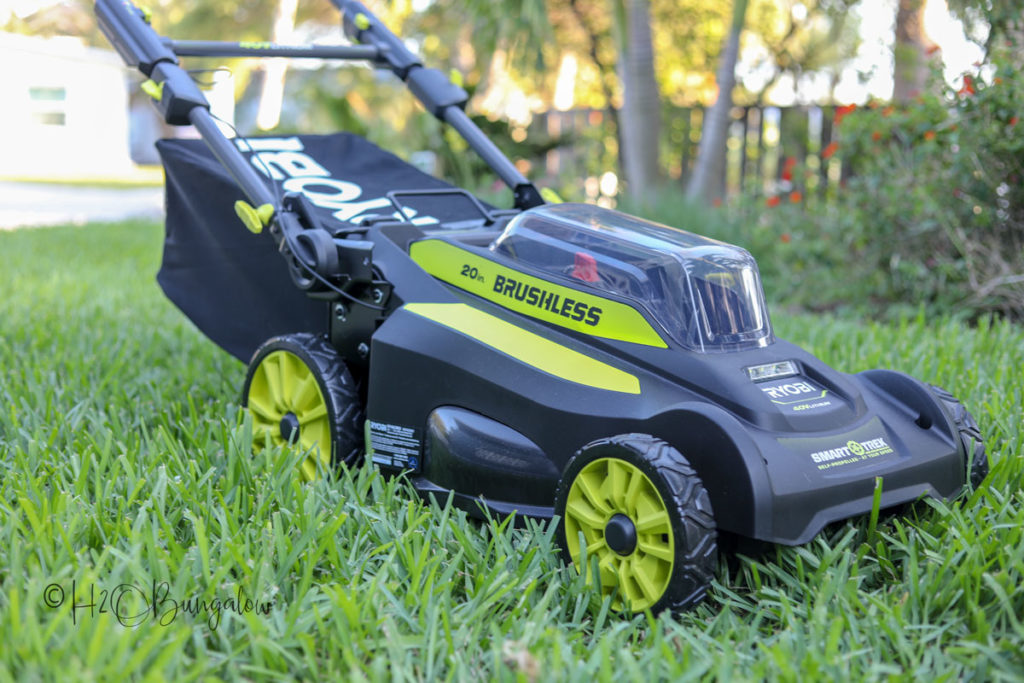
40 Volt Smart Trek Mower
Mowing the lawn is not one of my regular chores here (usually the hubby), but I was so impressed with how easy it was to start and use this Ryobi 40V mower! You’ll see me start this in my video. Plus, it’s self propelled and walks as fast or slow as you do. Last, it fold for easy storage which I love.
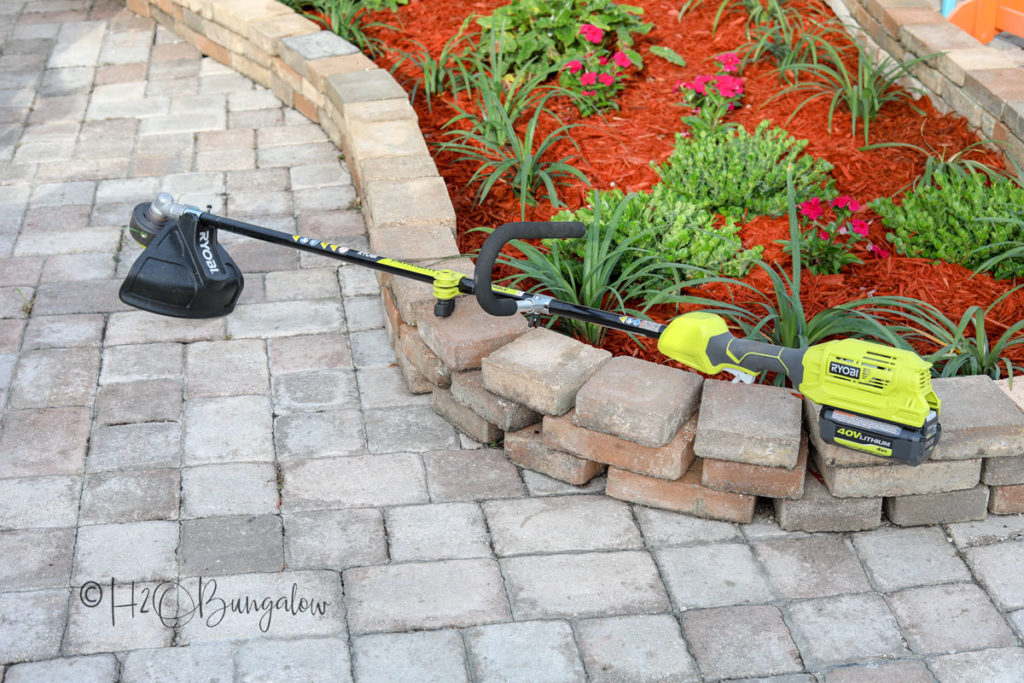
40 Volt String Trimmer Multi-Tool Attachment
I used my 40 volt Multi-Tool so many ways for this backyard makeover! It came with the String Trimmer Attachment and an Edger Attachment. You also saw me use the Cultivator Attachment when I broke up the soil and worked in new organic material in my planter beds.
There’s a whole line of attachments that can be used .
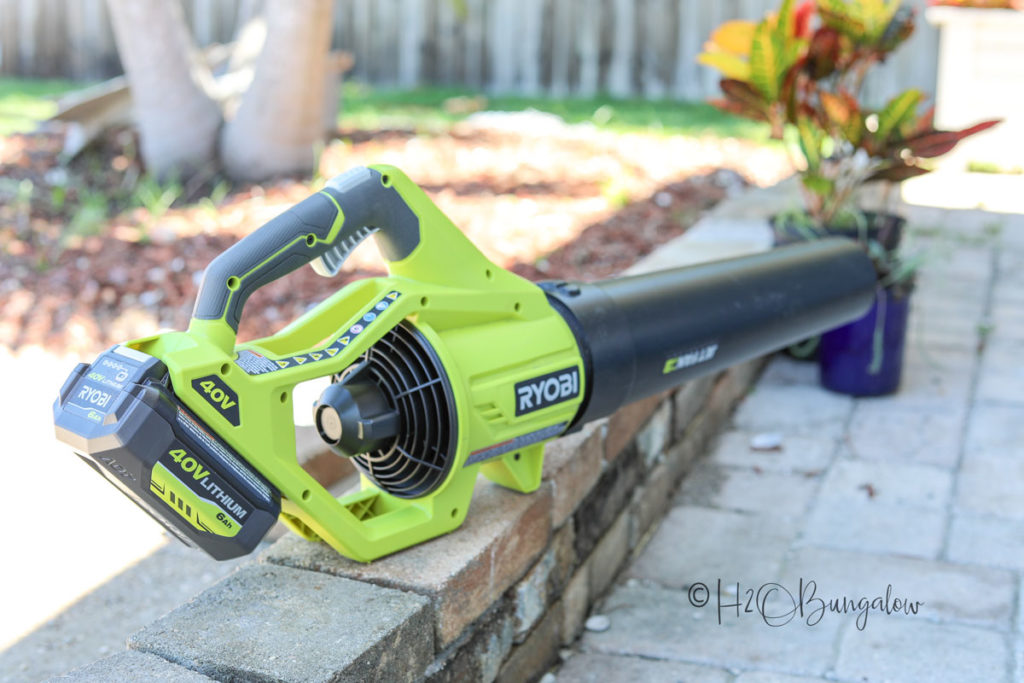
40 Volt Jet Fan Leaf Blower
Just about every day I’d use my 40V Jet Fan Leaf Blower to clean up after a day of working in the yard. It blows a whopping 125mph and move 500 CFM! Even heavy stuff moves. After a month of using it on my project, I still have 50% of my battery charge!
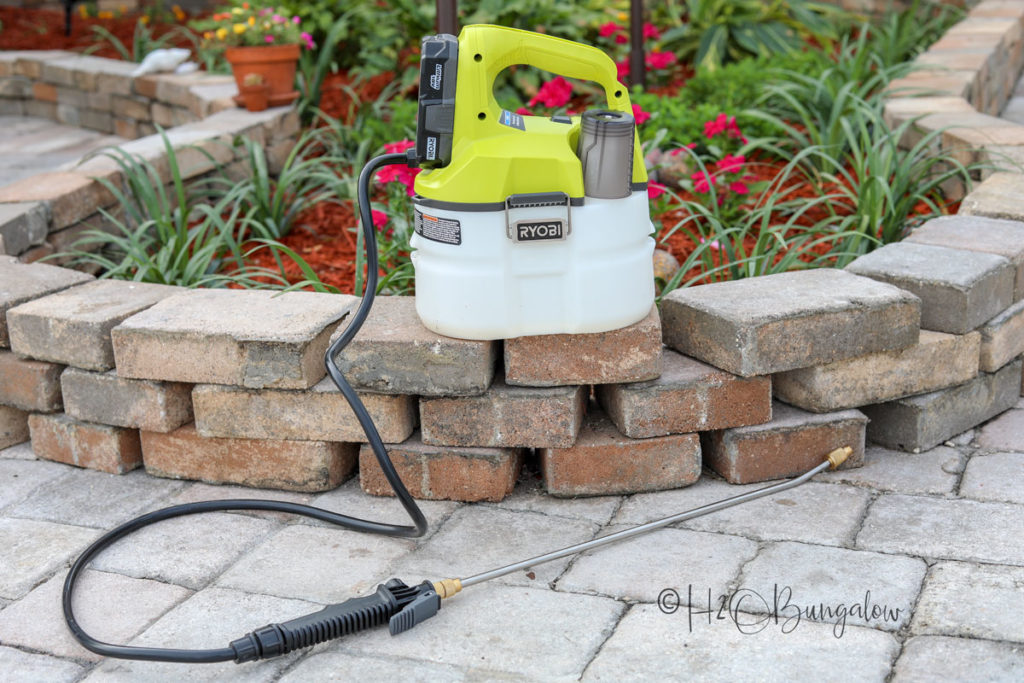
18 Volt Sprayer
Ever tried to use a hand pump sprayer to apply three or four gallons onto bushes or trees? Yeah, no, not doing it. I just had four gallons of fungicide to apply in the front yard on my bushes. I can’t tell you how thankful I was to have this 18V sprayer! Push the on button and it works. That’s it, easy peasy.
Just as an FYI, I use environmentally friendly weed killer made from essential oils to kill weeds in my pavers after I’ve tackled them with the string trimmer. – You’ll see this in the video too!
Outdoor Overhaul 2.0 The Hangout Challenge Team
So, are you ready to see what my friends did to their own backyard makeovers for the Ryobi Hangout Challenge?
My Repurposed Life – Backyard Camper Retreat
The Handymans Daughter – Backyard Makeover with beautiful garden areas
Thrift Diving- Backyard Fire Pit Makeover
Whew! This post was long but so were the past four weeks, Friends! I’m tired and achy. It may take several days to get the dirt out from under my fingernails but I’m so happy I took on this patio makeover!
I hope you’ve had a good time following along on all of our progress as we’ve updated our neglected outdoor spaces. If you joined in on the fun, I thank you for participating!
I’m so happy I tackled my backyard makeover early, before it gets too hot here in FL. I’m not sure I could pick a favorite spot. Which part of my makeover did you like the best? Share in the comments below!

Loli Perez says
Awesome job. I have a lot of limestone rock here and deers. I love how your project turned out. Can I ask the name of the paint color you used on your house. I have been looking for it but can’t match it up. Thank you in advance
Wendi says
Hi Loli!
Thank you so much for your nice compliment on my backyard. It’s looking even better now that the plants are maturing a little more. Our house paint color is BungleHouse Blue by Sherwin Williams. It’s great, not too blue with a tinge of gray. Thanks again for your visit!
Mary says
Wendi you certainly have been busy. And here I thought you were still up at the North House. Your idea of breaking up the space with the plantings is brilliant. It looks like a totally different backyard. Enjoy yourself over the summer.
Wendi says
Hi Mary!
I travel between the North House and home a lot. Sometimes I’ll work on a post way in advance if I won’t be back before it’s due. Yes, I’ve been busy! Always 🙂 …there’s never a shortage of things to do here or up in VT. Especially now with the new location that needs to be finished before fall…I hope it is anyway! Thanks so much for your visit!
gail says
Wendi,
Your backyard looks so cozy and inviting. You’re really lucky you will be able to enjoy it all year long. I’ll only get the cool months in the spring and fall. 🙁
Great job!
gail
Wendi says
Hi Gail!
Thank you so much! The backyard doesn’t look the same, that’s for sure! Funny, the time when we won’t be able to enjoy it is summer, it’s way too hot to be outside, like at your place. Late fall and spring are our best times here. I absolutely love how beautiful your backyard turned out! Thanks for your note!
Jody says
Wendi you Wonder Woman you. This is most inviting and I love the pavers. You worked hard and it shows it. You will have my vote.
Wendi says
Hi Jody!
Thank you so much! It’s amazing how different the backyard looks by adding planter beds! I think reusing the pavers was a good idea, they fit perfectly and were a budget friendly choice. Thanks yo for your note and I’ll let everyone know when the voting starts!
Wendi says
Hi Kate!
Thank you SO much for your note, it made my day! Yes, that last makeover was 4 years ago and it was time for a redo. We needed to break up the wide open space and I love having green and color just outside the doors now. It’s restful for the eyes and the patio doesn’t look so hot! Thanks again for your lovely note and following my work!
Kate Horrell says
Hey Wendy, I started following ur blog when u did ur first back yard makeover, 4 yrs ago?? I LOVED ur projects then, but I have to admit, I think u knocked it out of the park with this one, what a difference!!! I LOVE, LOVE, LOVE the planting islands. I bet now ur backyard is one of the prettiest on the canal. A GREAT Job
Tina says
Wow! I love the new look! And this is the first time I’ve read you talking about growing up in NOLA. I grew up in Houma, my family is from New Iberia + St Martinsville. Small world.
Wendi says
Hi Tina!
Thank you! We are enjoying the new backyard…a lot! How funny, yes it is a small world! We were in New Orleans about 15 years. It was a lot of fun. I miss the culture and the food!! Thanks so much for following along on this crazy DIY project and your very sweet note!
Christy James says
Wow!! What a spectacular space! Those planting beds made such a difference, and how smart to trust the pavers the way you did! Of course the view…gorgeous!! XO
Wendi says
Hi Christy!
Thank you so much! It’s amazing how different the backyard looks with the new garden beds. It was definitely the best idea for changing up the way this space looks! Thanks so much for your visit and taking the time to leave a comment!
Cristina says
Oh, this is impressive! I love how you designed the entire area around the planting beds, giving them movement and coziness. Beautiful job, beautiful space!
Wendi says
Thank you Cristina!
I think you see things like I do. The planter beds were like walls for each area to help them feel cozy and intimate. I’m looking forward to when the greenery matures. It should be just under waist high, lush and beautiful. I’m hoping it will cool the space down a bit too. Thanks so very much for your visit and very nice comment!
Kaycee says
Wow, what a gorgeous new look! The planting beds really soften the look of the space now and are a really nice organic shape. I love the courtyards in New Orleans as well, and when your plants mature, it will be so reminiscent of a beautiful courtyard just like you envisioned! I also love the colors you used with the plants, textiles, and the DIY lanterns!!
How are you feeling, you seriously moved a ton of materials? Hopefully you can put your feet up and rest up and enjoy your fabulous end result!
(I wished our weather would have cooperated for this challenge, but we had record rainfall in April, which left me out.)
Wendi says
Hi Kaycee!
Thank you so very much! Adding the planter beds was absolutely the best choice for this space. I think it will be even more beautiful when the plants mature. Plus, they will create some shade where I can tuck smaller plants underneath that cascade here and there over the edges. I think I’ll enjoy this new space and greenery a lot! I need some yoga classes now to stretch out! – I wish you could have joined in too! I have a fun idea for an easy to do group event coming up! I hope you join in!
Marie says
Wow, I remember the first backyard makeover and was impressed but this second makeover is AMAZING! Your hard work really paid off, Wendi! I’ll bring the Chardonnay 😉
Wendi says
Hi Marie!
Bring on the chardonnay! You have no idea how nice it is to walk outside and not think…I have to hurry and get something done. This was a lot to do in under a month! I enjoyed looking back over the last makeover as I was planning this one. The place has come so far since then! Hope all is well with you on your side of the continent! Thanks for stopping by and it was SO good to hear from you!
Larissa ~ Prodigal Pieces says
This is just amazing, Wendi. So beautiful and relaxing. On my way…
Wendi says
Hi Larissa!
Thank you so very much! I won’t mind using the backyard now that it feels as good as it looks. It’s always lacked green, trees and plants which is one of the things I love about being in Vermont. I wish you were close enough to stop by and visit! Thank you so much for taking the time to leave a comment, I really appreciate it!
Paula Pugh says
Wow, Wendi! I love it all. Love the colors, of course. The division of the two areas are beautifully done. Love the tutorial of the solar lamps, too. Thank you for sharing.
Wendi says
Hi Paula!
Thank you so much! this was a fun and long… 🙂 project but so worth it! We needed to break this space up into distinct areas. I don’t know why I didn’t see it before…probably because I was too focused an other projects! LOL! Again, thanks so much for your visit and taking the time to leave me a very sweet note! I hope you make the solar lamps, they are easy and fun!
Michele says
It’s beautiful! I love it! You did such a good job and you have inspired me and helped me realize I can do all of that myself too. Thank!
Wendi says
Hi Michele and thank you!
You can do all this! I think we all, myself included, shortchange ourselves when it comes to certain projects. It took a little imagination and I got help for the heavy work which was smart. Outside of that it was just do a step at a time! Thanks so much for your note and I hope you now feel like you can tackle something you’ve wanted to!
Judy says
Absolutely gorgeous. What a great job you did
Wendi says
Hi Judy,
Thank you so much! This was a big project to tackle but worth every bit of the hard work it took! hanks so much for following along and leaving me a note, it’s appreciated!
Kirstin says
It looks amazing. I want to come sit and relax there!
Wendi says
Hi Kirstin!
Thank you so much! I wish you lived closer so you could!
Paula says
It looks so good, Wendi! Your hard work really paid off.
Wendi says
Hi Paula!
Thank you so much! The last month was a grind ut yes, so worth it! I know we’ll start using our backyard more and enjoying it this season. Thanks so much for your note and visit!